Page 65 of 115

Removable roof
7-13
Comfort and convenience
TR0130
4
6
Installing the hard-topThe hard-top has been designed to provide a
seasonal alternative to the standard soft-top.
To ensure proper installation, Tesla
recommends that the hard-top be installed by
a Tesla service technician.
WARNING: The mounting bracket bolts
securing the hard-top to the vehicle
should be routinely ch ecked and tightened.
An incorrectly fitted or unsecured hard-top
could result in an accident.
�S
WARNING: Avoid getting hands or
fingers trapped when installing or
removing the hard-top.
�S
Use only the Torx
® tool supplied in the toolkit
to tighten or release the hard-top’s bolts.
When storing the hard-top, care should be
taken to avoid damaging its corners. If the
hard-top must be stood on its end, use a
suitable soft floor covering.
Note: Because of its size, the hard-top should
only be removed or installed when a second
person is available to assist.
1. If necessary, remove the soft-top. For instructions, see Removing the soft-top,
page 7-11.
2. Open both doors.
3. With the aid of an assistant, lift the hard-top into positi on on the vehicle
4. Tilt the front of the hard-top to engage the locating pins into the lower most slots on
the header rail. If necessary, loosen the
locating pin bolts to ensure that the pins
engage correctly on the header rail.
Roadster OHB.book Page 13 Thursday, October 2, 2008 8:59 AM
Page 66 of 115

Removable roof7-14
Comfort and convenience
5. Push the hard-top into position on the front header rail and then lower the
hard-top’s rear edge.
6. Engage the hook on the rear mounting brackets with the fixings on the rear
header rail.
7. Use the Torx
® tool supplied in the toolkit
to tighten the bolts just enough to keep
the rear brackets engaged. Do not fully
tighten.
8. Ensure the hard-top is correctly aligned on the vehicle.
9. Holding the rear mounting brackets to prevent them from twisting, tighten the
bolts to secure the hard-top in place. Do
not overtighten.
10. Check and tighten th e bolts securing the
front locating pins to the hard-top.
WARNING: Make sure that the
hard-top is securely fitted by trying
to lift each corner in turn. If any
movement is evident, check and tighten
the hard-top fixings. Driving with a loose
or incorrectly secured hard-top could
result in an accident which could lead to
serious injury and even death.
�S
11. Check that both doors shut correctly with the windows in the fully raised position.
12. Position the front header rail trim panel and align the bolts to the holes in the
hard-top, starting with the bolt in the
center. 13. Starting with the bolt in the center,
tighten the three bolts to secure the trim
panel. Do not overtighten.
WARNING: Do not drive the vehicle
with the trim panel removed. In a
collision, injury could result from contact with
the brackets.
�S
14. Return the Torx
tool to the tool kit.
Note: If, upon your request, Tesla Motors has
adjusted your windows to achieve maximum
seal for using the soft-top, you’ll need to have
Tesla Motors re-adjust your windows to avoid
water ingress using the hard-top.
Removing the hard-top1. Open both doors.
2. Using the Torx tool supplied in the toolkit, loosen the three bolts securing the
header rail trim panel to the hard-top.
3. Remove the trim panel.
4. Loosen the two bolts securing the rear of the hard-top to the vehicle.
5. Disengage the brackets from the rear header rail.
6. With the aid of an assistant, lift the rear edge of the hard-top and slide it towards
the rear of the vehicle to disengage the
front locating pins.
7. Store the hard-top in a safe place where it will not get damaged. If the hard-top
must be stood vertically, use a suitable
soft floor covering to protect its corners.
8. Return the Torx tool to the tool kit.
TR0158
Roadster OHB.book Page 14 Thursday, October 2, 2008 8:59 AM
Page 67 of 115

HomeLink®
7-15
Comfort and convenience
HomeLink
®
HomeLink
® Universal
Transceiver
Your vehicle is equipped with a HomeLink
®
Universal Transceiver that you can use to
operate most Radio Frequency (RF) devices
such as garage doors, gates, lights and
security systems. Your transceiver can be
programmed using the Touch Screen to
operate up to three individual devices.
Devices can be operated by touching a
button on the Touch Screen. You can also set
up the third button on the key fob to operate
a device. For details on how to program
HomeLink, refer to the Touch Screen Users
Manual, provided in your owners package.
For security purposes, when you sell your
vehicle, you should erase your HomeLink
settings.
WARNING: Do not use the HomeLink
Universal Transceiver with any garage
door opener that la cks safety stop and
reverse features as required by federal safety
standards. A garage door opener which
cannot detect an object in the path of a
closing garage door and then automatically
stop and reverse, does not meet current
federal safety standards. Using a garage door
opener without these features increases the
risk of injury or death.
�S
You’re vehicle should be turned off
while programming the HomeLink
Universal Transceiver.
�S
During programming, your garage
door or gate may open or close. Make
sure that people and objects are clear of the
garage door or gate that you are
programming.
�S
FCC ComplianceThis device complies with Part 15 of the FCC
Rules. Operation is subject to the following
two conditions:
1. This device may not cause harmful interference, and
2. This device must accept any interference received, including interference that may
cause undesired operation.
Any unauthorized modification to this device
could void the user’s authority to operate the
equipment.
Roadster OHB.book Page 15 Thursday, October 2, 2008 8:59 AM
Page 68 of 115
8-1
Audio and navigation systems
Your vehicle is equipped with an audio and
navigation system. For details on how to
operate these systems, refer to the OEM
documentation provided to you by Tesla
Motors.
Roadster OHB.book Page 1 Thursday, October 2, 2008 8:59 AM
Page 69 of 115
9-1
Maintenance and careMaintenanceGeneral information 8-2
Routine maintenance 8-2
Owner maintenance 8-2
Opening and closing the hood 8-3
Fluid reservoirs Fluid reservoir locations 8-4
Brake fluid 8-4
Windshield washer fluid 8-5
Battery coolant 8-5
Windshield wiper and washer Checking the wiper blade 8-6
Replacing the wiper blade 8-6
Windshield washer jets 8-6
Cleaning and vehicle care Environmental precautions 8-7
Cleaning the vehicle exterior 8-7
Polishing the body 8-8
Using a car cover 8-8
Paint damage and rectification 8-8
Cleaning the vehicle interior 8-8
Roadster OHB.book Page 1 Th ursday, October 2, 2008 8:59 AM
Page 70 of 115

Maintenance9-2
Maintenance and care
Maintenance and care
MaintenanceGeneral informationRegular maintenance is the key to ensuring
the continued reliability and efficiency of
your vehicle.
Maintenance is the owner's responsibility and
you must ensure that the appropriate
maintenance is carried out when required
and according to the recommendations
specified by Tesla Motors.Routine maintenanceTake your vehicle to Tesla Motors at the
regularly scheduled maintenance intervals of
every 12 months, or every 12,000 miles,
whichever comes first.
Maintenance and service must be performed
by Tesla-certified technicians. Damages or
failures caused by maintenance or repairs
performed by non-Tesla certified technicians
are not covered under the New Vehicle
Limited Warranty.
Service interval indicatorWhen the key is inserted and the starter
switch turned to the ACC position, the Touch
Screen momentarily displays the distance to
the next service interval.
In addition, this information can be displayed
by selecting the Info icon on the Touch
Screen when the vehicle is parked. For
details, refer to the Touch Screen Users
Manual provided in your owners package.
Owner maintenance
WARNING: Any significant or sudden
drop in fluid levels, or uneven tire wear
should be rectified immediately.
�S
In addition to the routine maintenance
performed by Tesla Motors, a few simple
checks must be carried out more frequently.
Advice is given on the pages that follow.Daily checks• Operation of lights, horn, turn indicators,
wipers, washers and warning indicators
• Operation of seat belts and brakes
• Check for fluid deposits underneath the
vehicle that might indicate a leakWe e k l y c h e c k s•Brake fluid level. Refer to Brake fluid,
page 10-4 .
• Windshield washer fluid level. Refer to
Windshield washer fluid, page 10-5 .
• Battery coolant. Refer to Battery coolant,
page 10-5.
• Condition and pressure of each tire. Refer
to Wheels and tires, page 11-4 .
• Operation of the air conditioning. Refer to
Interior temperature control, page 7-4.
Roadster OHB.book Page 2 Th ursday, October 2, 2008 8:59 AM
Page 71 of 115

Maintenance
9-3
Maintenance and care
TR0043
Opening and closing the hood
Never work on a vehicle that is plugged
in. Always remember to unplug the
vehicle before working under the hood or the
underside of the vehicle.
�S
WA R N I N G : M a ke s u re t h a t t h e h o o d i s i n
the fully open position before working in
the area under the hood. In windy conditions,
you may need to secure the hood stay to
prevent the hood from being closed by the
wind.�S
Opening1. Pull the hood release handle located to the left of the steering column.
2. Raise the hood.
3. Insert the hood stay into the slot.ClosingReturn the hood stay to its original position
and lower the hood to the closed position.
Press down firmly on ea ch side of the hood
(see illustration) to engage the locks. You can
hear the locks ‘click’ into place.
Caution: Before driving, check that the
locks on both sides of the hood are fully
engaged by attempting to lift the hood - there
should be no movement.
Roadster OHB.book Page 3 Th ursday, October 2, 2008 8:59 AM
Page 72 of 115

Fluid reservoirs9-4
Maintenance and care
Fluid reservoirsFluid reservoir locations1.Windshield washer fluid
2. Brake fluid
3. Battery coolant
Brake fluid
WARNING: Seek qualified assistance
immediately if brake pedal travel is
unusually long or if there is a significant loss
of brake fluid. Driving under such conditions
could result in extended stopping distances
or complete brake failure.
�S
Fluid level checkCheck the brake fluid level weekly with the
vehicle on level ground. The fluid level can be
checked visually through the side of the
reservoir without removing the filler cap.
The brake fluid level should be between the
MIN and the MAX marks.
Topping up the fluid
WARNING: Brake fluid is highly toxic.
Keep containers sealed and out of the
reach of children. In the event of accidental
consumption, seek medical attention
immediately.
�S
1. Clean the filler cap before removing to prevent dirt from entering the reservoir.
2. Unscrew the cap and remove.
3. Top-up the reservoir to the MAX mark using brake fluid meeting DOT4
specification.
4. Replace the reservoir cap.
Caution: Brake fluid will damage
painted surfaces. Immediately soak up
any spills with an absorbent cloth and wash
the area with a mixtur e of vehicle shampoo
and water.
Caution: Only use new fluid from an
air-tight container. Do not use fluid
from previously opened containers or fluid
that has been previously bled from the
system - this fluid has absorbed moisture and
will decrease braking performance.
TR00531
2
3
TR0052
MAXMIN
Roadster OHB.book Page 4 Th ursday, October 2, 2008 8:59 AM
 1
1 2
2 3
3 4
4 5
5 6
6 7
7 8
8 9
9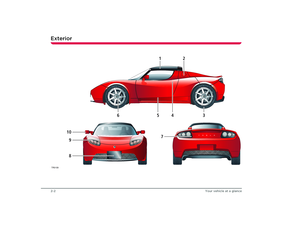 10
10 11
11 12
12 13
13 14
14 15
15 16
16 17
17 18
18 19
19 20
20 21
21 22
22 23
23 24
24 25
25 26
26 27
27 28
28 29
29 30
30 31
31 32
32 33
33 34
34 35
35 36
36 37
37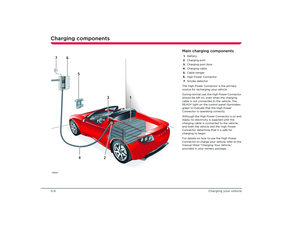 38
38 39
39 40
40 41
41 42
42 43
43 44
44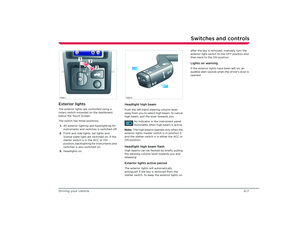 45
45 46
46 47
47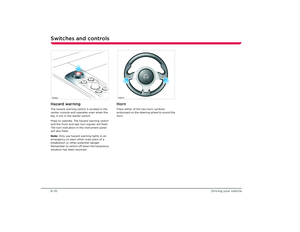 48
48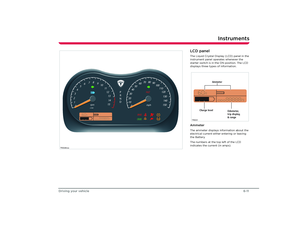 49
49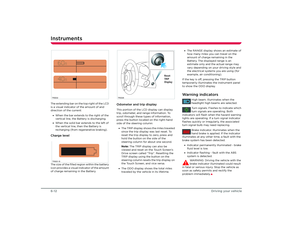 50
50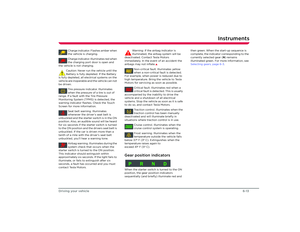 51
51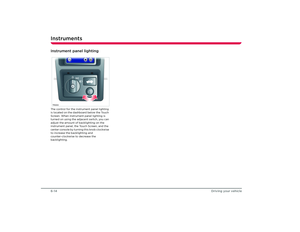 52
52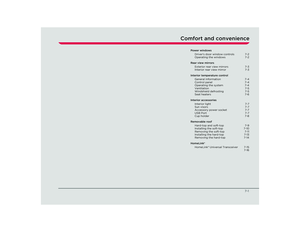 53
53 54
54 55
55 56
56 57
57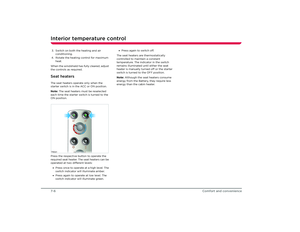 58
58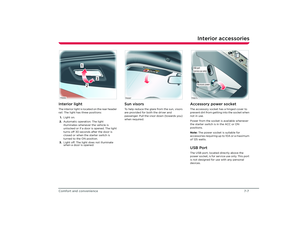 59
59 60
60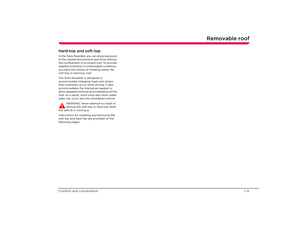 61
61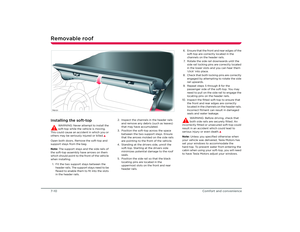 62
62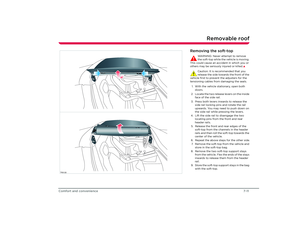 63
63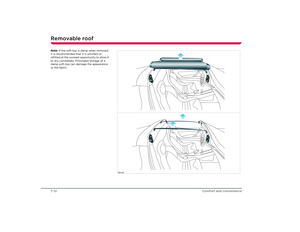 64
64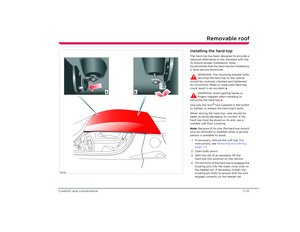 65
65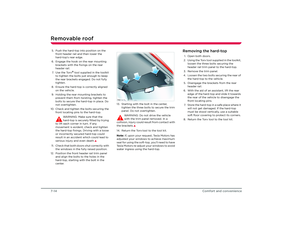 66
66 67
67 68
68 69
69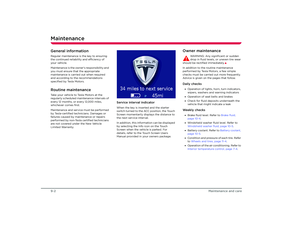 70
70 71
71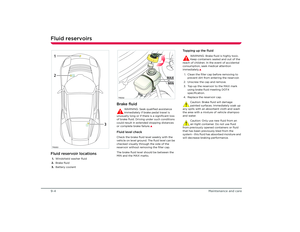 72
72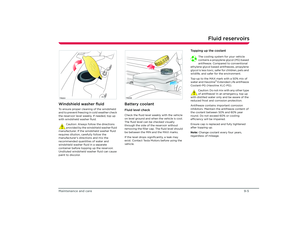 73
73 74
74 75
75 76
76 77
77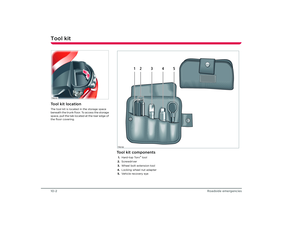 78
78 79
79 80
80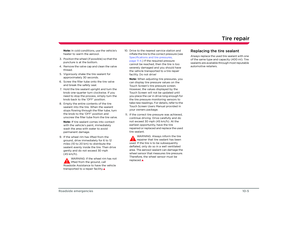 81
81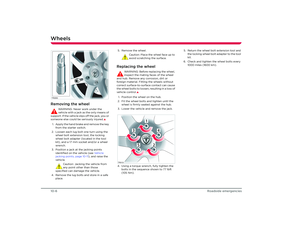 82
82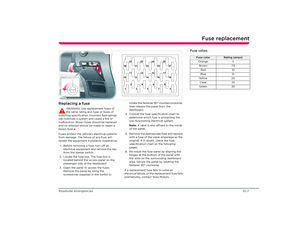 83
83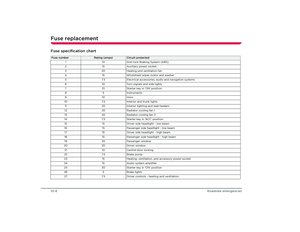 84
84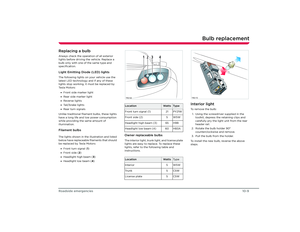 85
85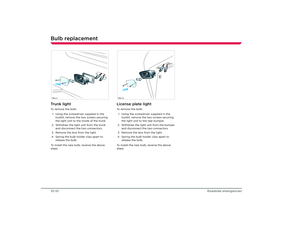 86
86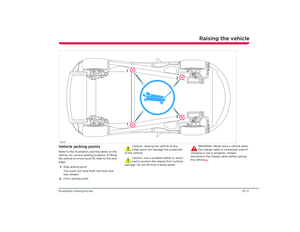 87
87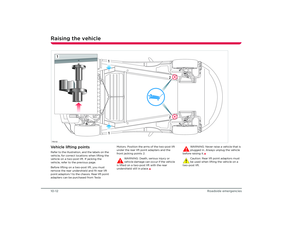 88
88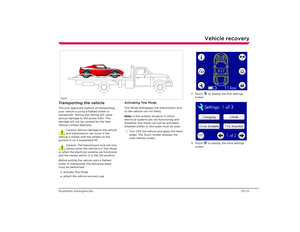 89
89 90
90 91
91 92
92 93
93 94
94 95
95 96
96 97
97 98
98 99
99 100
100 101
101 102
102 103
103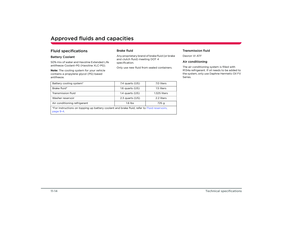 104
104 105
105 106
106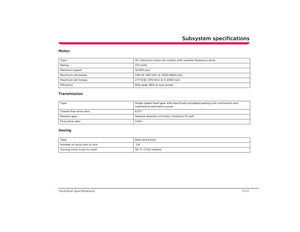 107
107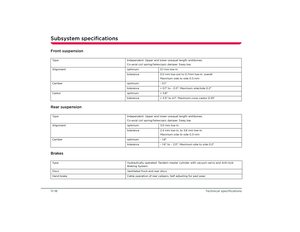 108
108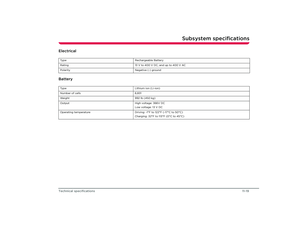 109
109 110
110 111
111 112
112 113
113 114
114
