Page 57 of 115

Interior temperature control
7-5
Comfort and convenience
Rotate the temperature control to achieve
the desired air temperature.
Note: In high ambient temperatures, cooling
may be temporarily diverted away from the
passenger compartment to cool the Battery.HeatingEnsure that the fan 6 is on, then press button
5 to operate the heating system. The
indicator in the switch will illuminate amber
when the system is operating. Press again to
switch off.
Rotate the temperature control to achieve
the desired air temperature.Air recirculationPress button 7 to operate air recirculation.
The indicator in the switch will illuminate
green. Press again to switch off.
When air recirculation is operating, and the
soft-top or hard-top is installed, 90% of the
air from within the passenger compartment is
recirculated, instead of being drawn from
outside the vehicle. This is useful for
preventing fumes from entering the vehicle
or to effectively maintain a constant
temperature.
Note: It is recommended that recirculation is
switched off for a short period each hour to
refresh the air inside the vehicle, and to help
prevent the windshield from fogging.Air distributionRotate the air distribution control 8 to
change the points at which air enters the
passenger compartment. Windshield vents
Footwell vents
Face vents
Air flow from the vents can be mixed by
positioning the control between the
distribution settings.
Ve n t i l a t i o nAir is drawn into the ventilation system
through the grill at the front of the vehicle.
Keep the grill clear of obstructions (leaves,
snow, etc.).
Press the thumb depression to open the
vents and rotate to direct the air. The vents
on each side of the dashboard can be
adjusted to direct air onto the side windows.
Note: With the face level vents open, airflow
to the foot and windshield outlets is reduced. TR0026
Windshield defrostingFor maximum efficiency when removing frost
or mist from your windshield, set the controls
as follows:
1. Rotate the air distribution control to windshield.
2. Rotate the fan control fully clockwise.TR0027
Roadster OHB.book Page 5 Th ursday, October 2, 2008 8:59 AM
Page 58 of 115

Interior temperature control7-6
Comfort and convenience
3. Switch on both the heating and air conditioning.
4. Rotate the heating control for maximum heat.
When the windshield has fully cleared, adjust
the controls as required.Seat heatersThe seat heaters operate only when the
starter switch is in the ACC or ON position.
Note: The seat heaters must be reselected
each time the starter switch is turned to the
ON position.
Press the respective button to operate the
required seat heater. The seat heaters can be
operated at two different levels:
• Press once to operate at a high level. The
switch indicator will illuminate amber.
• Press again to operate at low level. The
switch indicator will illuminate green. •
Press again to switch off.
The seat heaters are thermostatically
controlled to maintain a constant
temperature. The indicator in the switch
remains illuminated until either the seat
heater is manually turned off or the starter
switch is turned to the OFF position.
Note: Although the seat heaters consume
energy from the Battery, they require less
energy than the cabin heater.TR0021 Roadster OHB.book Page 6 Th ursday, October 2, 2008 8:59 AM
Page 59 of 115

Interior accessories
7-7
Comfort and convenience
Interior accessoriesInterior lightThe interior light is located on the rear header
rail. The light has three positions:
1. Light on.
2. Automatic operation. The light
illuminates whenever the vehicle is
unlocked or if a door is opened. The light
turns off 30 seconds after the door is
closed or when the starter switch is
turned to the ON position.
3. Light off. The light does not illuminate
when a door is opened.
Sun visorsTo help reduce the glare from the sun, visors
are provided for both the driver and
passenger. Pull the visor down (towards you)
when required.
TR0095
2
1
3
TR0097
Accessory power socketThe accessory socket has a hinged cover to
prevent dirt from getting into the socket when
not in use.
Power from the socket is available whenever
the starter switch is in the ACC or ON
positions.
Note: The power socket is suitable for
accessories requiring up to 10A or a maximum
of 125 watts.USB PortThe USB port, located directly above the
power socket, is for service use only. This port
is not designed for use with any personal
devices.
Accessory power
TR0075USB port
(service use only)
Roadster OHB.book Page 7 Th ursday, October 2, 2008 8:59 AM
Page 60 of 115
Interior accessories7-8
Comfort and convenience
Cup holder
WARNING: Do not carry open drink
containers. A spilled hot drink could
cause personal injury as well as damaging
upholstery, carpeting and electrical
systems.�S
Pull the cup holder from the side of the center
console to use. The fingers of the cup holder
are spring-loaded to hold the cup securely.
Open the fingers and insert the cup. The base
of the cup should rest on the floor.
Caution: After use, return the cup
holder to the center console to prevent
it being broken when occupants are entering
or leaving the passenger side of the vehicle.
Roadster OHB.book Page 8 Th ursday, October 2, 2008 8:59 AM
Page 61 of 115
Removable roof
7-9
Comfort and convenience
Removable roofHard-top and soft-topIn the Tesla Roadster, you can enjoy exposure
to the natural environment and drive without
the confinement of a cockpit roof. To provide
weather protection in unfavorable conditions,
you have the choice of installing either the
soft-top or hard-top roof.
The Tesla Roadster is designed to
accommodate changing loads and strains
that constantly occur while driving. It also
accommodates the tolerances needed to
allow repeated removal and installation of the
roof. As a result, wind noise and minor water
leaks can occur and are considered normal.
WARNING: Never attempt to install or
remove the soft-top or hard-top while
the vehicle is moving.
�S
Instructions for installing and removing the
soft-top and hard-top are provided on the
following pages.
Roadster OHB.book Page 9 Th ursday, October 2, 2008 8:59 AM
Page 62 of 115

Removable roof7-10Comfort and convenienceInstalling the soft-top
WARNING: Never attempt to install the
soft-top while the vehicle is moving.
This could cause an accident in which you or
others may be seriously injured or killed.
�S
Open both doors. Remove the soft-top and
support stays from the bag.
Note: The support stays and the side rails of
the soft-top assembly have arrows on them
which should point to the front of the vehicle
when installing.
1. Fit the two support stays between the header rails. The support stays need to be
flexed to enable them to fit into the slots
in the header rails. 2. Inspect the channels in the header rails
and remove any debris (such as leaves)
that may have accumulated.
3. Position the soft-top across the space between the two support stays. Ensure
that the arrows molded on the side rails
are pointing to the front of the vehicle.
4. Standing at the drivers side, unroll the soft-top. Starting at the drivers side
minimizes potential damage to the roof
seals.
5. Position the side rail so that the black locating pins are located in the
uppermost slots on the front and rear
header rails.TR0131
6. Ensure that the front and rear edges of the soft-top are correctly located in the
channels on the header rails.
7. Rotate the side rail downwards until the side rail locking pins are correctly located
in the lower slots and you can hear them
‘click’ into place.
8. Check that both locking pins are correctly engaged by attempting to rotate the side
rail upwards.
9. Repeat steps 5 through 8 for the passenger side of the soft-top. You may
need to pull on the side rail to engage the
locating pins on the header rails.
10. Inspect the fitted soft-top to ensure that the front and rear edges are correctly
located in the channels on the header rails.
Incorrect fitment can result in damaged
seals and water leakage.
WARNING: Before driving, check that
both side rails are securely fitted. An
incorrectly fitted or unsecured soft-top could
result in an accident which could lead to
serious injury or even death.
�S
Note: Unless you specified otherwise when
your vehicle was delivered, Tesla Motors has
set your windows to accommodate the
hard-top. To prevent water from entering the
cabin when using your soft-top, you will need
to have Tesla Motors adjust your windows.
Roadster OHB.book Page 10 Thursday, October 2, 2008 8:59 AM
Page 63 of 115

Removable roof
7-11
Comfort and convenience
TR0128
Removing the soft-top
WA R N I N G : N e v e r a t t e m p t t o r e m o v e
the soft-top while the vehicle is moving.
This could cause an accident in which you or
others may be seriously injured or killed.
�S
Caution: It is recommended that you
release the side towards the front of the
vehicle first to prevent the adjusters for the
tensioning cables from damaging the seals.
1. With the vehicle stationary, open both doors.
2. Locate the two release levers on the inside face of the side rail.
3. Press both levers inwards to release the side rail locking pins and rotate the rail
upwards. You may need to push down on
the side rail while pressing the levers.
4. Lift the side rail to disengage the two locating pins from the front and rear
header rails.
5. Release the front and rear edges of the soft-top from the channels in the header
rails and then roll the soft-top towards the
center of the vehicle.
6. Repeat the above steps for the other side. 7. Remove the soft-top from the vehicle and store in the soft-top bag.
8. Remove the two soft-top support stays from the vehicle. Flex the ends of the stays
inwards to release them from the header
rail.
9. Store the soft-top support stays in the bag with the soft-top.
Roadster OHB.book Page 11 Thursday, October 2, 2008 8:59 AM
Page 64 of 115
Removable roof7-12
Comfort and convenience
Note: If the soft-top is damp when removed,
it is recommended that it is unrolled or
refitted at the soonest opportunity to allow it
to dry completely. Prolonged storage of a
damp soft-top can damage the appearance
or the fabric.
TR0129
Roadster OHB.book Page 12 Thursday, October 2, 2008 8:59 AM
 1
1 2
2 3
3 4
4 5
5 6
6 7
7 8
8 9
9 10
10 11
11 12
12 13
13 14
14 15
15 16
16 17
17 18
18 19
19 20
20 21
21 22
22 23
23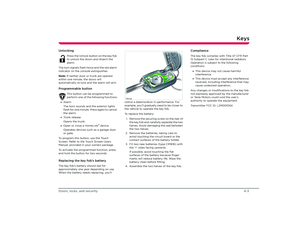 24
24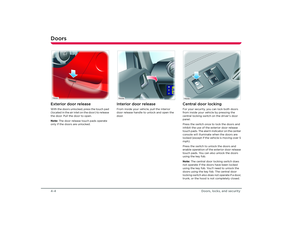 25
25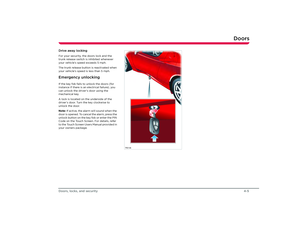 26
26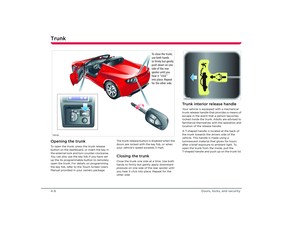 27
27 28
28 29
29 30
30 31
31 32
32 33
33 34
34 35
35 36
36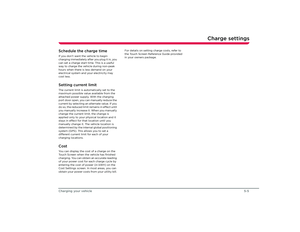 37
37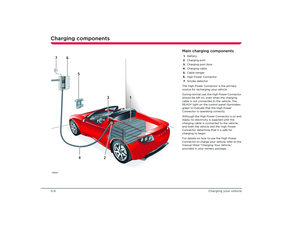 38
38 39
39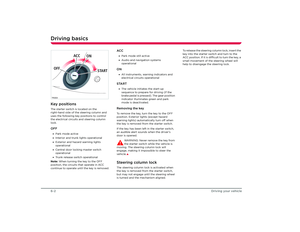 40
40 41
41 42
42 43
43 44
44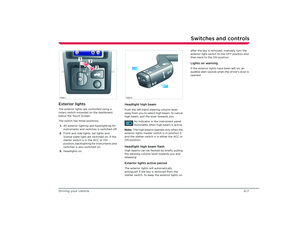 45
45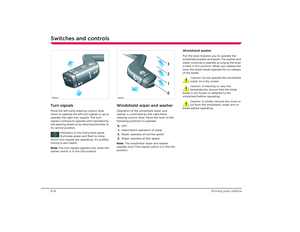 46
46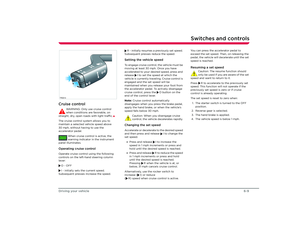 47
47 48
48 49
49 50
50 51
51 52
52 53
53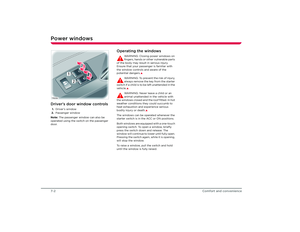 54
54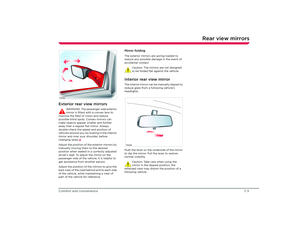 55
55 56
56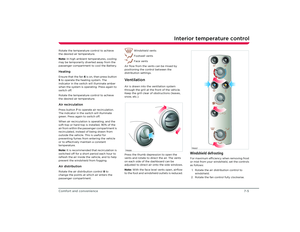 57
57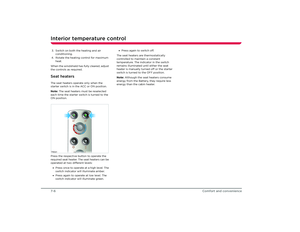 58
58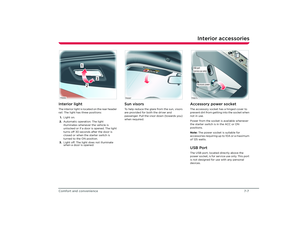 59
59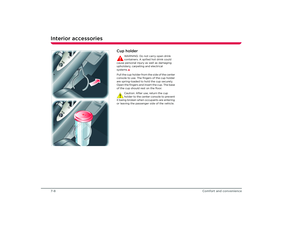 60
60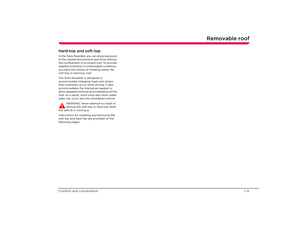 61
61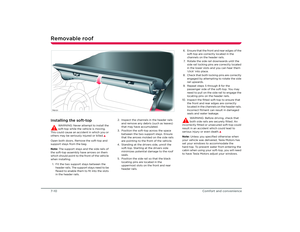 62
62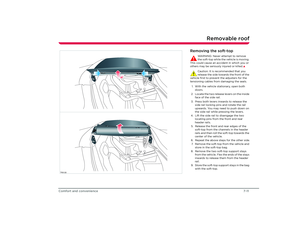 63
63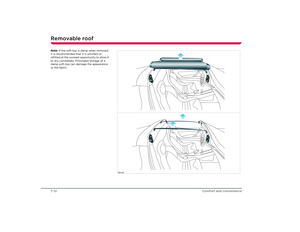 64
64 65
65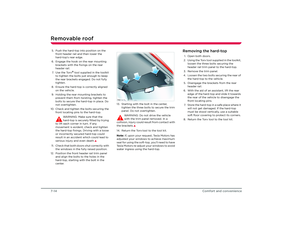 66
66 67
67 68
68 69
69 70
70 71
71 72
72 73
73 74
74 75
75 76
76 77
77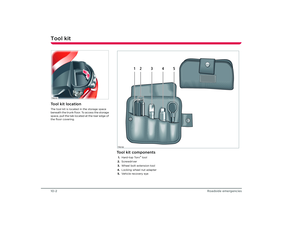 78
78 79
79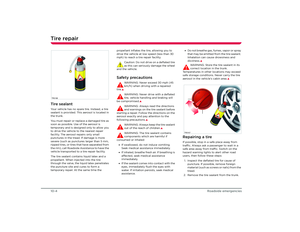 80
80 81
81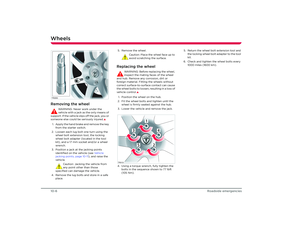 82
82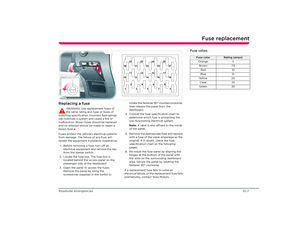 83
83 84
84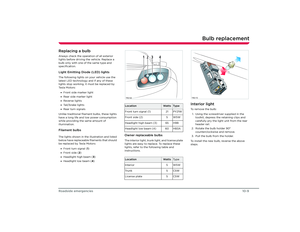 85
85 86
86 87
87 88
88 89
89 90
90 91
91 92
92 93
93 94
94 95
95 96
96 97
97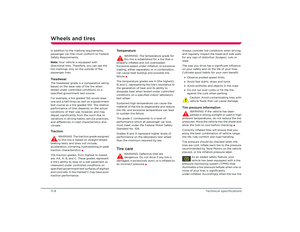 98
98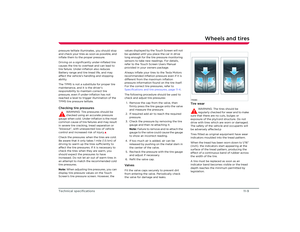 99
99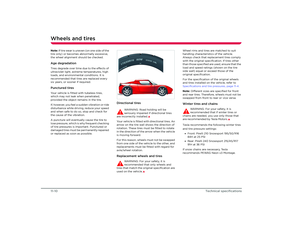 100
100 101
101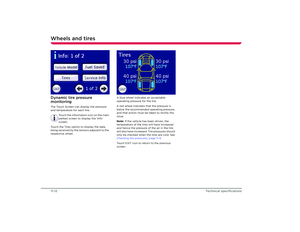 102
102 103
103 104
104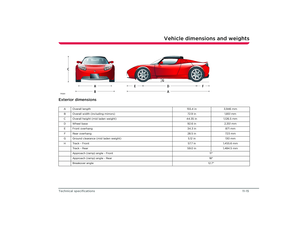 105
105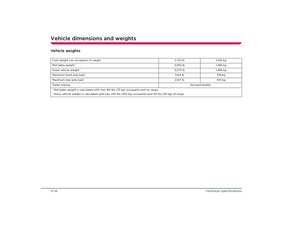 106
106 107
107 108
108 109
109 110
110 111
111 112
112 113
113 114
114

