Page 9 of 115
2-1
Your vehicle at a glance
ExteriorExterior overview 2-3
Interior Dashboard overview 2-5
Roadster OHB.book Page 1 Thursday, October 2, 2008 8:59 AM
Page 10 of 115
Exterior2-2
Your vehicle at a glance
Your vehicle at a glance
TR0109
1
2
3
4
5
6
109
7
8
Roadster OHB.book Page 2 Thursday, October 2, 2008 8:59 AM
Page 11 of 115
Exterior
2-3
Your vehicle at a glance
Exterior overview1. Roof. See Removable roof, page 7-9 .
2. Charging port door. For details on vehicle charging, see the manual titled “Charging Your Vehicle” provided in your owners pack age.
3. Wheels and tires. See Wheels and tires, page 11-4.
4. Exterior door release. See Exterior door release, page 4-4.
5. Emergency door unlock. See Emergency unlocking, page 4-5.
6. Wheel bolts. See Removing the wheel, page 10-6.
7. Trunk lock. See Opening the trunk, page 4-6.
8. Vehicle recovery eye. See Attaching the vehicle recovery eye, page 10-14.
9. Headlights. See Exterior lights, page 6-7.
10. Exterior mirrors. See Exterior rear view mirrors, page 7-3.
Roadster OHB.book Page 3 Th ursday, October 2, 2008 8:59 AM
Page 12 of 115
Interior2-4
Your vehicle at a glance
InteriorTR0050
i1
2
3
4
567
8
12
14
15
1617 10
11
13
9
Roadster OHB.book Page 4 Thursday, October 2, 2008 8:59 AM
Page 13 of 115

Interior
2-5
Your vehicle at a glance
Dashboard overview1. Touch Screen. See Touch Scr een Users Manual provided in your owners package .
2. Turn signals, headlight high beam and cruise control. See Exterior lights, page 6-7 and Cruise control, page 6-9.
3. Instruments. See Instruments, page 6-11.
4. Windshield wiper and washer. See Windshield wiper and washer, page 6-8.
5. Hazard warning light switch. See Hazard warning, page 6-10.
6. Heating and air conditioning. See Interior temperature control, page 7-4.
7. Gear selector. See Selecting gears, page 6-3.
8. Traction control switch. See Traction control, page 6-6.
9. Accessory power socket. See Accessory power socket, page 7-7.
10. Horn. See Horn, page 6-10 .
11. Starter switch. See Starting the vehicle, page 6-3.
12. Hood release. See Opening and closing the hood, page 9-3.
13. Trunk release. See Opening the trunk, page 4-6.
14. Instrument panel illumination control. See Instrument panel lighting, page 6-14.
15. Exterior lights master switch. See Exterior lights, page 6-7.
16. Power windows. See Operating the windows, page 7-2.
17. Central door locking. See Central door locking, page 4-4.
Roadster OHB.book Page 5 Th ursday, October 2, 2008 8:59 AM
Page 14 of 115
3-1
Seating and safety restraints
SeatsSeat adjustment 3-2
Seat belts General information 3-3
Seat belt safety instructions 3-3
Using the seat belts 3-3
Seat belt reminder 3-4
Wearing seat belts during pregnancy 3-4
Seat belt tensioners 3-4
Caring for seat belts 3-4
Child seats and restraints 3-5
Airbag system General information 3-6
How the system works 3-6
Deployment effects 3-6
Obstruction of airbags 3-7
Airbag warning indicator 3-7
Airbag warning labels 3-7
Using child seats 3-7
Passenger airbag deactivation 3-7
Airbag service information 3-8
Roadster OHB.book Page 1 Thursday, October 2, 2008 8:59 AM
Page 15 of 115

Seats3-2Seating and safety restra
ints
Seating and Safety Restraints
Seat adjustment
WARNING: Never adjust the driver’s
seat while your vehicle is moving.
U n ex p e c t e d o r s u d d e n s e at m ove m e n t co u l d
result in an accident.
�S
Driver’s seat positionTo adjust the forward/rearward position of
the driver’s seat, raise the bar beneath the
front of the seat and slide the seat to the
required position. Release the bar to lock the
TR0001
12
seat into position. Ensure that the seat is
locked in position before driving, by trying to
slide the seat forward.
To reduce the risk of injury in the event of an
accident, Tesla recommends the following
when adjusting seat position:
• Adjust the seat so that you can press the
foot pedals fully to the floor with your
knees slightly bent.
• Make sure that you can comfortably reach
the top of the steering wheel.
• Ensure a distance of at least 10 inches (25
cm) between the steering wheel and your
breastbone. The airbag will not provide
adequate protection if you sit closer.
• Fasten your seat belt correctly.Lumbar supportAdjust lumbar support using the inflator bulb
located on the outside front edge of the
driver’s seat 1 or on the inside front edge of
the passenger seat 2 .
To increase lumbar support, squeeze the bulb
repeatedly until sufficie nt support is obtained.
To reduce the amount of support, press the
button located on the clamp between the
hose and the inflator bulb.Head restraintsEach seat is provided with a head restraint.
The head restraints are integral with the seats
and therefore can not be adjusted or
removed.
Roadster OHB.book Page 2 Th ursday, October 2, 2008 8:59 AM
Page 16 of 115

Seat belts
3-3
Seating and s afety restraints
Seat beltsGeneral information
WARNING: Seat belts should be worn
by all occupants, for every journey no
matter how short. Failure to do so greatly
increases the risk of death or serious injury in
the event of an accident.
�S
It is an established fact that seat belts provide
good protection in accidents. Therefore
wearing a seat belt is required by law in most
states.
Both the driver and passenger seating
positions are equipped with three-point
inertia reel seat belts. Inertia reel belts are
tensioned automatically and allow freedom
of movement during normal driving
conditions.
The belt reel automatically locks, preventing
movement of occupants, whenever your
vehicle experiences the force associated with
hard acceleration, braking, cornering or on
impact in a collision. The reel may also lock
when driving on steep hills or slopes.Seat belt safety instructions
WARNING: Ensure that all seat belts are
worn correctly. An improperly worn
seat belt increases the risk of death or serious
injury in the event of a collision.
�S
WARNING: Seat belts are designed to
bear upon the bony structure of the
body, and should be worn low across the
pelvis, over the shoulder and across the
chest. Avoid wearing the lap section of the
belt across the abdominal area.
�S
WARNING: Always adjust the belt to
remove slack. Seat belts worn too loose
can result in injuries because they allow
excessive forward movement in an
accident.
�S
WARNING: Do not wear seat belts over
hard, fragile or sharp items in clothing,
such as pens, keys, eyeglasses, etc. In an
impact, the pressure from the seat belt on
such items can cause them to break, which in
turn may cause serious injury.
�S
WARNING: Seat belts should not be
worn with any part of the strap
twisted.�SWA R N I N G : E a c h b e l t a s s e m b l y m u s t b e
used by only one occupant. It is
dangerous to put the belt around a child
being carried on an occupant’s lap.
�S
WARNING: It is essential that seat belts
that have been worn in an accident are
replaced, even if damage to the assembly is
not obvious. The belt anchors must also be
checked.
�S
WA R N I N G : C a r e m u s t b e t a k e n t o a v o i d
contaminating the seat belt webbing,
and seat belt mechanisms with any
chemicals, liquids, grit, dirt or cleaning
products. If a seat belt fails to retract or latch
into the buckle, it must be replaced
immediately.
�S
WARNING: No modifications or
additions should be made that prevent
the seat belt mechanism from taking up slack, or that prevent the seat belt being
adjusted to remove slack. A slack belt greatly
reduces the level of occupant protection.
�S
Using the seat beltsFastening the belt1. Ensure that the seat is correctly
positioned.
2. Take hold of the latch plate and pull it slowly across your chest and lap.
3. Insert the latch plate into the buckle and press down until you hear a “click” that
indicates it is securely locked into place.
4. Pull the belt to check that it is securely fastened.
5. Position the belt so that it is worn low across the front of the pelvis, and across
the chest and shoulder.TR0139
Roadster OHB.book Page 3 Th ursday, October 2, 2008 8:59 AM
 1
1 2
2 3
3 4
4 5
5 6
6 7
7 8
8 9
9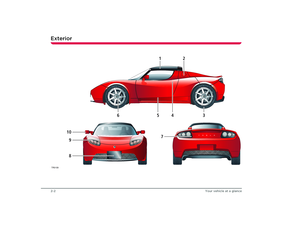 10
10 11
11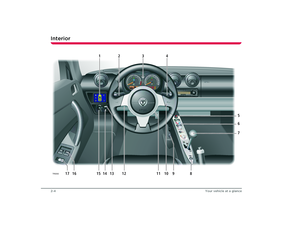 12
12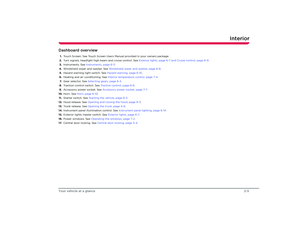 13
13 14
14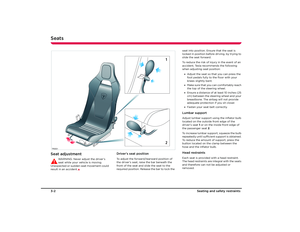 15
15 16
16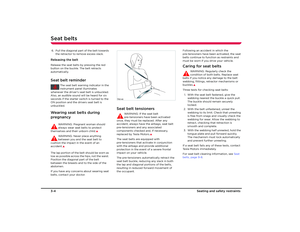 17
17 18
18 19
19 20
20 21
21 22
22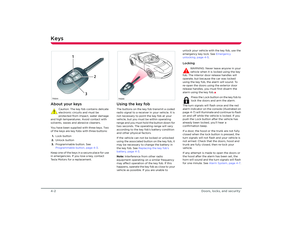 23
23 24
24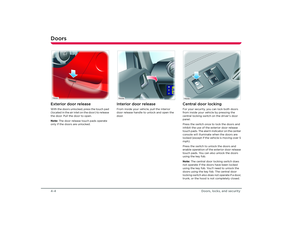 25
25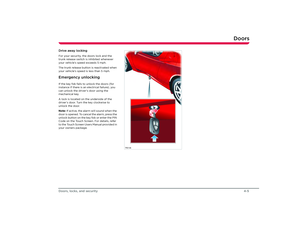 26
26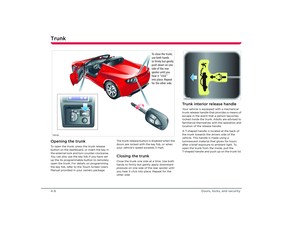 27
27 28
28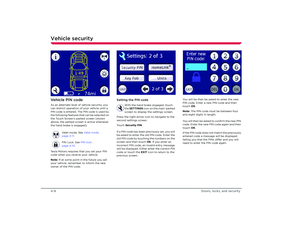 29
29 30
30 31
31 32
32 33
33 34
34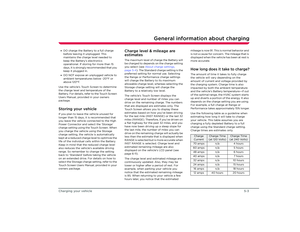 35
35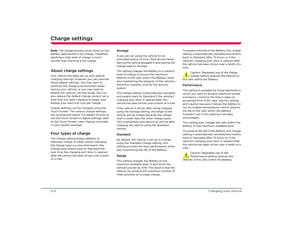 36
36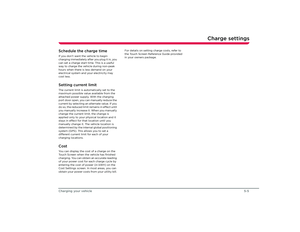 37
37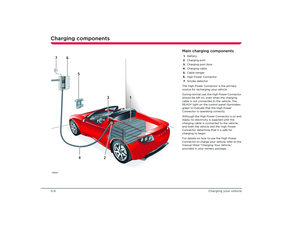 38
38 39
39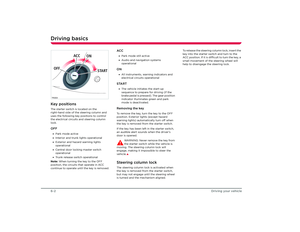 40
40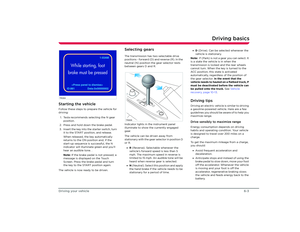 41
41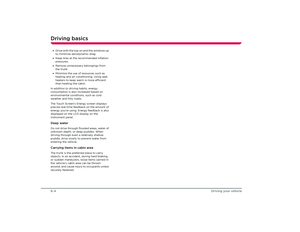 42
42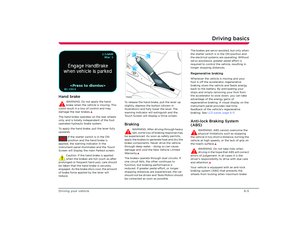 43
43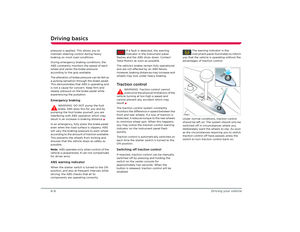 44
44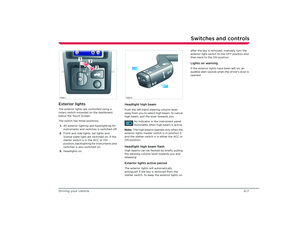 45
45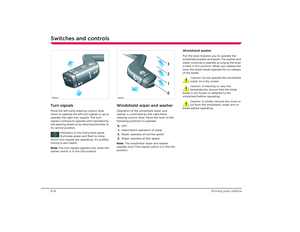 46
46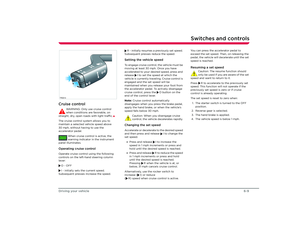 47
47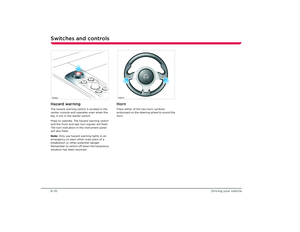 48
48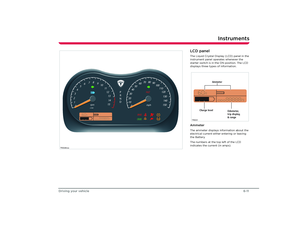 49
49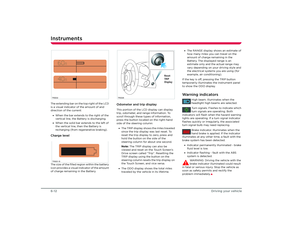 50
50 51
51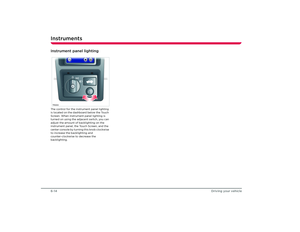 52
52 53
53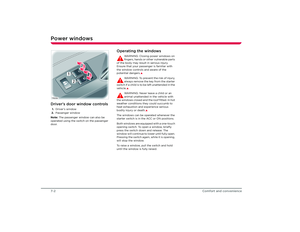 54
54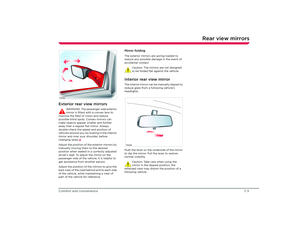 55
55 56
56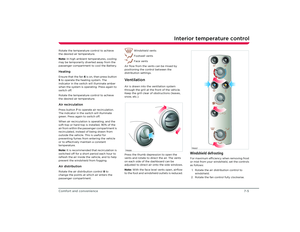 57
57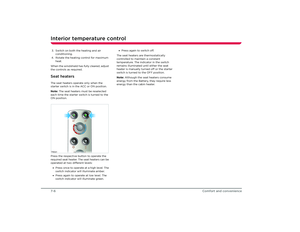 58
58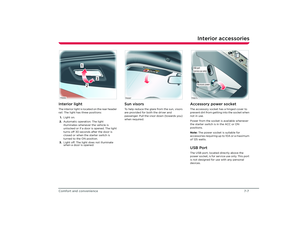 59
59 60
60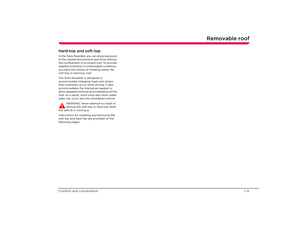 61
61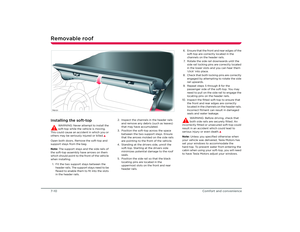 62
62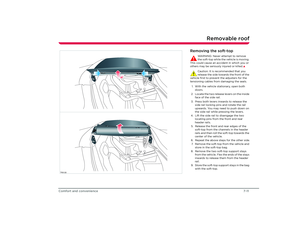 63
63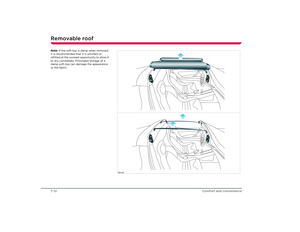 64
64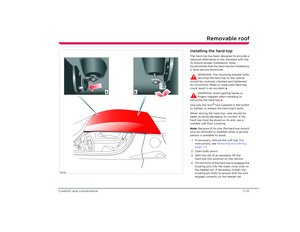 65
65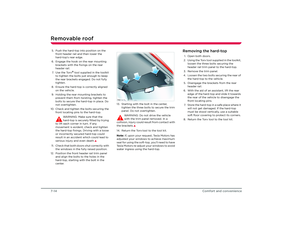 66
66 67
67 68
68 69
69 70
70 71
71 72
72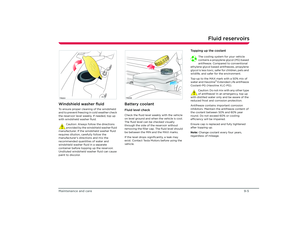 73
73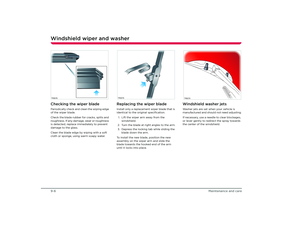 74
74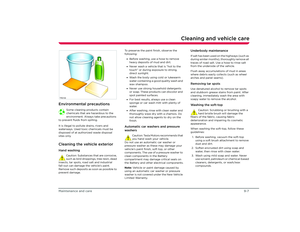 75
75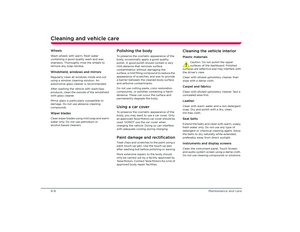 76
76 77
77 78
78 79
79 80
80 81
81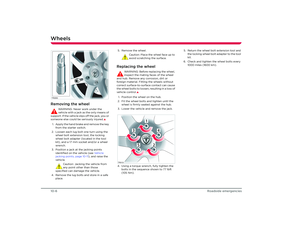 82
82 83
83 84
84 85
85 86
86 87
87 88
88 89
89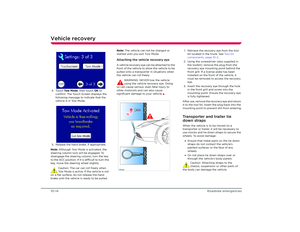 90
90 91
91 92
92 93
93 94
94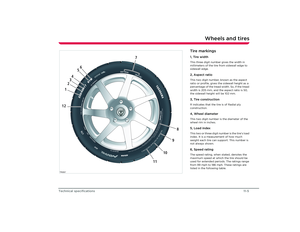 95
95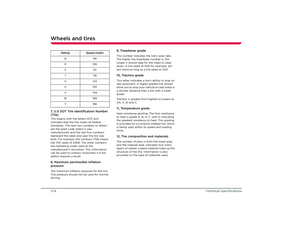 96
96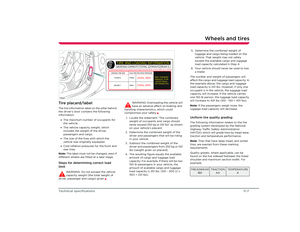 97
97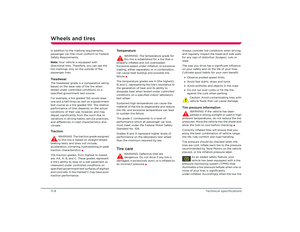 98
98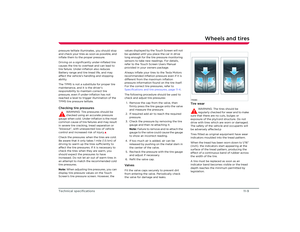 99
99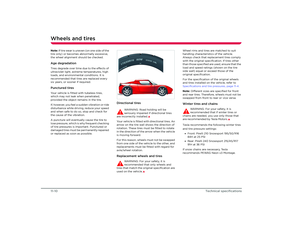 100
100 101
101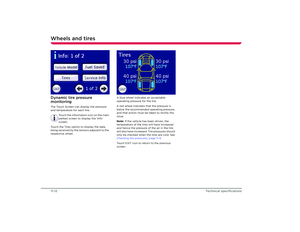 102
102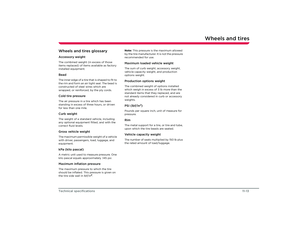 103
103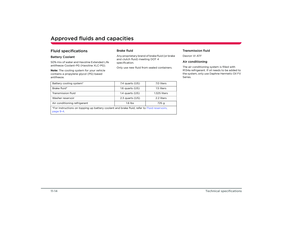 104
104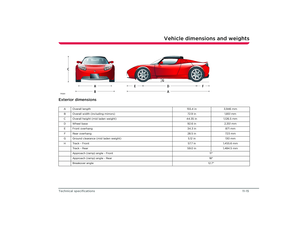 105
105 106
106 107
107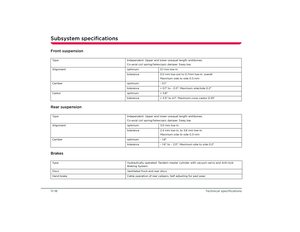 108
108 109
109 110
110 111
111 112
112 113
113 114
114


