Page 49 of 115
Instruments
6-11
Driving your vehicle
Instruments
BRAKE FAU LT
CRUISE
TC
P
R
N
D
mph
rpm
x1000
150
140
130
120
110
100
50
40
30
20 10 90
60 80
70
0
0
1
2
3
4
5
6
7
8
9
10
11
12
13
1415
BRAKE
FAU LT
CRUISE
TC
PRND
mph
rpmx1000
150140130120110100
5040302010
90
60
80
70
0
012345
6
7
8
910
1112131415
TR0028noc
LCD panelThe Liquid Crystal Display (LCD) panel in the
instrument panel operates whenever the
starter switch is in the ON position. The LCD
displays three types of information.AmmeterThe ammeter displays information about the
electrical current either entering or leaving
the Battery.
The numbers at the top left of the LCD
indicates the current (in amps).
Ammeter
Odometer,
trip display,
& range
Charge level
TR0031
Roadster OHB.book Page 11 Thursday, October 2, 2008 8:59 AM
Page 50 of 115

Instruments6-12Driving your vehicleThe extending bar on the top right of the LCD
is a visual indicator of the amount of and
direction of the current:
• When the bar extends to the right of the
vertical line, the Battery is discharging.
• When the solid bar extends to the left of
the vertical line, then the Battery is
recharging (from regenerative braking).Charge levelThe size of the filled region within the battery
icon provides a visual indicator of the amount
of charge remaining in the Battery.
Odometer and trip displayThis portion of the LCD display can display
trip, odometer, and range information. To
scroll through these types of information,
press the button located on the right-hand
side of the steering column:
• The TRIP display shows the miles traveled
since the trip display was last reset. To
reset the trip display to zero, press and
hold the button on the side of the
steering column for about one second.
Note: The TRIP display can also be
viewed and reset on the Touch Screen’s
Drive screen called “Trip”. Resetting the
TRIP display using the button on the
steering column resets the trip display on
the Touch Screen, and vice versa.
• The ODO display shows the total miles
traveled by the vehicle in its lifetime.
TR0032TR0031-B
TR0029
Reset
TRIP
Display
•The RANGE display shows an estimate of
how many miles you can travel on the
amount of charge remaining in the
Battery. The displayed range is an
estimate only and the actual range may
vary depending on your driving style and
the electrical systems you are using (for
example, air conditioning).
If the key is off, pressing the TRIP button
temporarily illuminates the instrument panel
to show the ODO display.Warning indicators
High beam. Illuminates when the
headlight high beams are selected.
Turn signals. Flashes to indicate which
turn signals are operating. Both
indicators will flash when the hazard warning
lights are operating. If a turn signal indicator
flashes quickly or irregularly, the associated
turn signal bulb may need replacing.
Brake indicator. Illuminates when the
hand brake is applied. If the indicator
illuminates at any other time, a fault with the
brake system has been detected.
• Indicator permanently illuminated - brake
fluid level is low.
• Indicator flashing - fault with the ABS
system is detected.
WARNING: Driving the vehicle with the
brake indicator illuminated could result
in fatal or serious injury. Stop the vehicle as
soon as safety permits and rectify the
problem immediately.
�S
BRAKE
Roadster OHB.book Page 12 Thursday, October 2, 2008 8:59 AM
Page 51 of 115

Instruments
6-13
Driving your vehicle
Charge indicator. Flashes amber when
the vehicle is charging.
Charge indicator. Illuminates red when
the charging port door is open and
the vehicle is not charging.
Caution: Never run the vehicle until the
Battery is fully depleted. If the Battery
is fully depleted, all electrical systems on the
vehicle are inoperable and the vehicle can not
be driven.
Tire pressure indicator. Illuminates
when the pressure of a tire is out of
range. If a fault with the Tire Pressure
Monitoring System (TPMS) is detected, the
warning indicator flas hes. Check the Touch
Screen for more information.
Seat belt warning. Illuminates
whenever the driver’s seat belt is
unbuckled and the starter switch is in the ON
position. Also, an audible sound will be heard
for six seconds if the starter switch is turned
to the ON position and the drivers seat belt is
unbuckled. If the car is driven more than a
tenth of a mile with the driver’s seat belt
unbuckled, you’ll hear a warning tone.
Airbag warning. Illu minates during the
system check that occurs when the
starter switch is turned to the ON position.
This indicator should extinguish within
approximately six seconds. If the light fails to
illuminate, or fails to extinguish after six
seconds, a fault has occurred and you must
contact Tesla Motors. Warning: If the airbag indicator is
illuminated, the airbag system will be
deactivated. Contact Tesla Motors
immediately. In the event of an accident the
airbags may not inflate.
�S
Non-critical fault. Illuminates yellow
when a non-critical fault is detected.
For example, when power is reduced due to
high temperature. Bring the vehicle to Tesla
Motors for servicing as soon as possible.
Critical fault. Illuminates red when a
critical fault is detected. This is usually
accompanied by the inability to drive the
vehicle and a shutdown of all electrical
systems. Stop the vehicle as soon as it is safe
to do so, and contact Tesla Motors.
Traction control. Illuminates when the
traction control has been manually
deactivated and will il luminate briefly in
situations where traction control is in use.
Cruise control. Illuminates when the
cruise control system is operating.
Frost warning. Illuminates when the
temperature outside the vehicle falls
below 37º F (3º C). Extinguishes when the
temperature raises again to
exceed 41º F (5º C).
Gear position indicatorsWhen the starter switch is turned to the ON
position, the gear po sition indicators
sequentially (and briefly) illuminate red and then green. When the start-up sequence is
complete, the indicator corresponding to the
currently selected gear (
N) remains
illuminated green. For more information, see
Selecting gears, page 6-3 .FAULTFAULTTCCRUISEPRND
Roadster OHB.book Page 13 Thursday, October 2, 2008 8:59 AM
Page 52 of 115
Instruments6-14
Driving your vehicle
Instrument panel lightingThe control for the instrument panel lighting
is located on the dashboard below the Touch
Screen. When instrument panel lighting is
turned on using the adjacent switch, you can
adjust the amount of backlighting on the
instrument panel, the Touch Screen, and the
center console by turning this knob clockwise
to increase the backlighting and
counter-clockwise to decrease the
backlighting.TR0033Roadster OHB.book Page 14 Thursday, October 2, 2008 8:59 AM
Page 53 of 115
7-1
Comfort and convenience
Power windowsDriver’s door window controls 7-2
Operating the windows 7-2
Rear view mirrors Exterior rear view mirrors 7-3
Interior rear view mirror 7-3
Interior temperature control General information 7-4
Control panel 7-4
Operating the system 7-4
Ventilation 7-5
Windshield defrosting 7-5
Seat heaters 7-6
Interior accessories Interior light 7-7
Sun visors 7-7
Accessory power socket 7-7
USB Port 7-7
Cup holder 7-8
Removable roof Hard-top and soft-top 7-9
Installing the soft-top 7-10
Removing the soft-top 7-11
Installing the hard-top 7-13
Removing the hard-top 7-14
HomeLink® HomeLink® Universal Transceiver 7-15 7-16
Roadster OHB.book Page 1 Thursday, October 2, 2008 8:59 AM
Page 54 of 115

Power windows7-2
Comfort and convenience
Comfort and convenience
Power windowsDriver’s door window controls1.Driver’s window
2. Passenger window
Note: The passenger window can also be
operated using the switch on the passenger
door.
Operating the windows
WARNING: Closing power windows on
fingers, hands or other vulnerable parts
of the body may result in serious injury.
Ensure that your passenger is familiar with
the window controls and aware of the
potential dangers.
�S
WARNING: To prevent the risk of injury,
always remove the key from the starter
switch if a child is to be left unattended in the
vehicle.�SWARNING: Never leave a child or an
animal unattended in the vehicle with
the windows closed and the roof fitted. In hot
weather conditions they could succumb to
heat exhaustion and experience serious
bodily injury or death.
�S
The windows can be operated whenever the
starter switch is in the ACC or ON positions.
Both windows are equipped with a one-touch
opening switch. To open a window, briefly
press the switch down and release. The
window will continue to lower until fully open.
Pressing the switch again, while it is opening,
will stop the window.
To raise a window, pull the switch and hold
until the window is fully raised.
TR0058
1
2
Roadster OHB.book Page 2 Th ursday, October 2, 2008 8:59 AM
Page 55 of 115

Rear view mirrors
7-3
Comfort and convenience
Rear view mirrorsExterior rear view mirrors
WARNING: The passenger side exterior
mirror is fitted with a convex lens to
improve the field of vision and reduce
possible blind spots. Convex mirrors can
make objects appear smaller and further
away than a regular flat mirror. Always
double-check the speed and position of
v e h i c l e s a r o u n d y o u , b y l o o k i n g i n t h e i n t e r i o r
mirror and over your shoulder, before
changing lanes.
�S
Adjust the position of the exterior mirrors by
manually moving them to the desired
position when seated in a correctly adjusted
driver’s seat. To adjust the mirror on the
passenger side of the vehicle, it is helpful to
get assistance from another person.
Adjust the position of the mirrors to give the
best view of the road behind and to each side
of the vehicle, while maintaining a view of
part of the vehicle for reference.
Mirror foldingThe exterior mirrors are spring-loaded to
reduce any possible damage in the event of
accidental contact.
Caution: The mirrors are not designed
to be folded flat against the vehicle.Interior rear view mirrorThe interior mirror can be manually dipped to
reduce glare from a following vehicle’s
headlights.
Push the lever on the underside of the mirror
to dip the mirror. Pull the lever to restore
normal visibility.Caution: Take care when using the
mirror in the dipped position, the
reflected view may distort the position of a
following vehicle.
TR0060
TR0094
Roadster OHB.book Page 3 Th ursday, October 2, 2008 8:59 AM
Page 56 of 115

Interior temperature control7-4
Comfort and convenience
Interior temperature controlGeneral informationThe temperature of the air inside the vehicle
is controlled using the controls on the center
console.
Heating is provided by a high voltage electric
heater located under the hood. Cooling is
provided by an all-electric air conditioning
system located under the hood. In addition to
cooling the cabin, the system also cools the
Battery.
Note: In high ambient temperatures, the
system may not be able to achieve the
desired cabin temperature. This is normal,
with priority being given to cooling the
Battery to ensure that cell temperatures stay
within a range that supports long life and
efficient performance.Control panel1. Driver’s seat heater
2. Passenger’s seat heater
3. Temperature control
4. Air conditioning system
5. Heating system
6. Fan speed control
7. Air recirculation
8. Air distribution
The heating and air conditioning in your Tesla
Roadster operate differently from those in
conventional vehicles in two key ways. First,
the temperature control 3 doesn’t do
anything unless either the air conditioning 4
or the heating system 5 button is pressed.
Second, because the vehicle is designed to
conserve the Battery’s energy, the air conditioning system and the heating system
must be manually turned on each time you
start the vehicle—even if they were turned on
when you shut the vehicle off.
Also note that if both the air conditioning and
heating is turned on at the same time, you get
a nominal amount of cooling. If operating
when the ambient temperature is below 2°, it
is recommended you press the air
recirculation
7 button.
Operating the systemNote: The fan, heating and air conditioning
system are powered by the Battery.
Prolonged use decreases the range of the
vehicle.
Heating and air conditioning must be
reselected each time the starter switch is
turned to the ON position or whenever the
fan is turned off.Fan speedRotate the fan control 6 clockwise to increase
fan speed.
With the fan switched off, the amount of air
entering the vehicle depends on your driving
speed. To operate the air conditioning or
heating systems, the fan must be turned on.Te m p e r a t u r eRotate the temperature control 3 clockwise
or counterclockwise to adjust the
temperature of the heated or cooled air.
Unlike the temperature control system of a
conventional vehicle, the temperature of the
air entering the vehicle will change only if the
heating or air conditioning system is
operating.Air conditioningEnsure that the fan 6 is on, then press button
4 to operate the air conditioning system. The
indicator in the switch illuminates blue when
the system is operating. Press again to switch
off.
TR0020
1
2
47
5368
Roadster OHB.book Page 4 Th ursday, October 2, 2008 8:59 AM
 1
1 2
2 3
3 4
4 5
5 6
6 7
7 8
8 9
9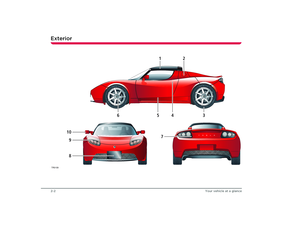 10
10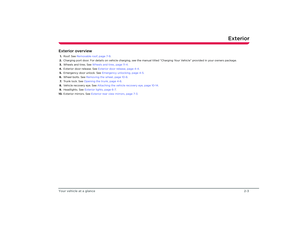 11
11 12
12 13
13 14
14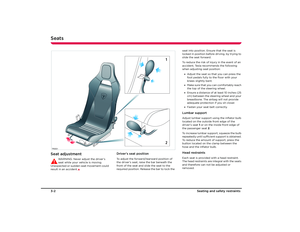 15
15 16
16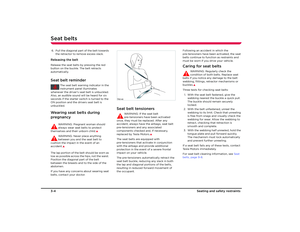 17
17 18
18 19
19 20
20 21
21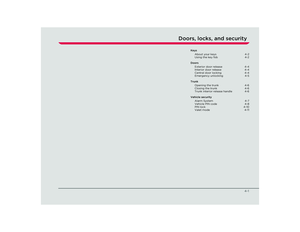 22
22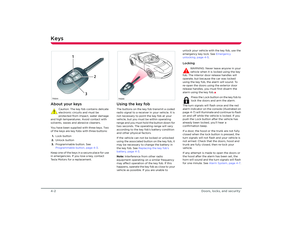 23
23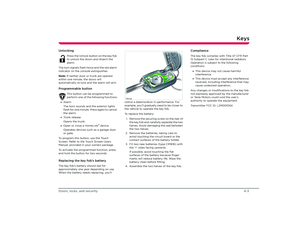 24
24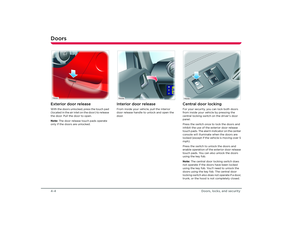 25
25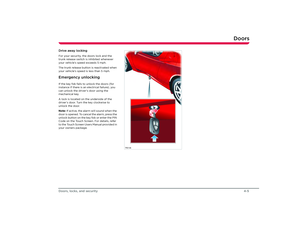 26
26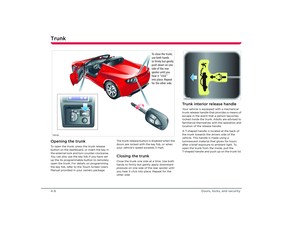 27
27 28
28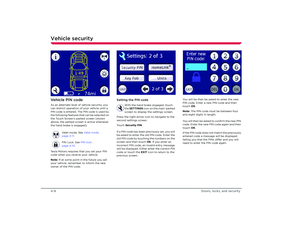 29
29 30
30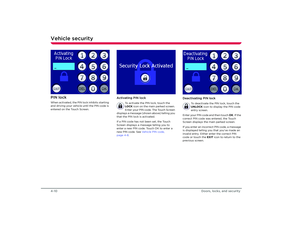 31
31 32
32 33
33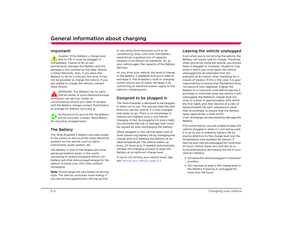 34
34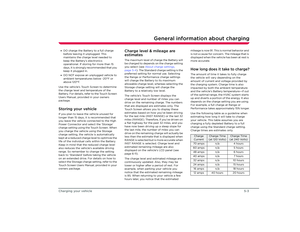 35
35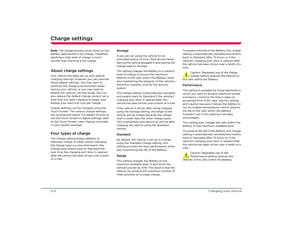 36
36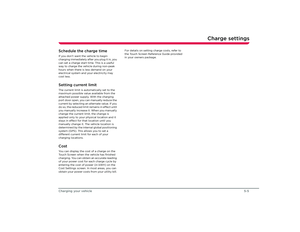 37
37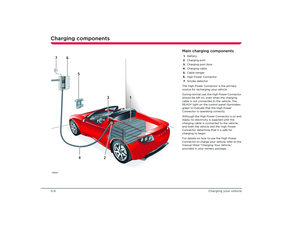 38
38 39
39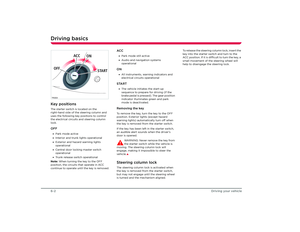 40
40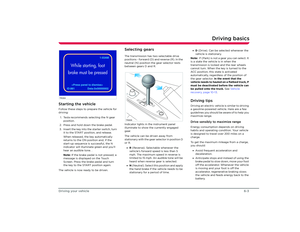 41
41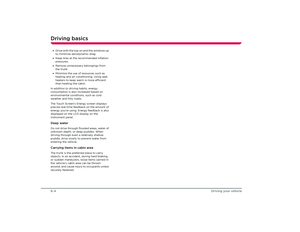 42
42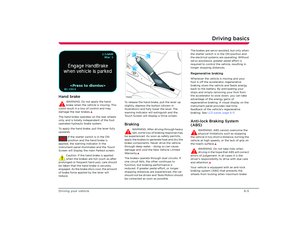 43
43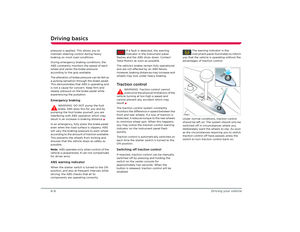 44
44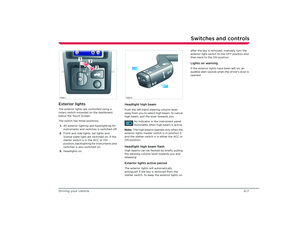 45
45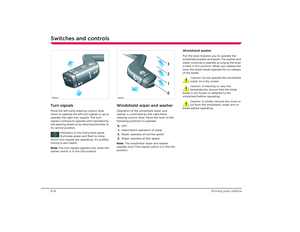 46
46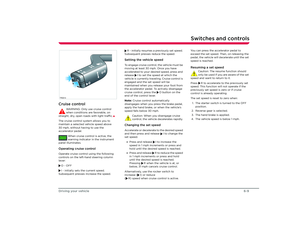 47
47 48
48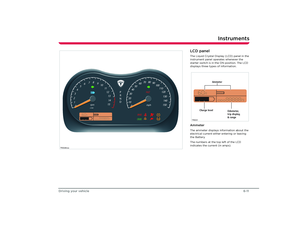 49
49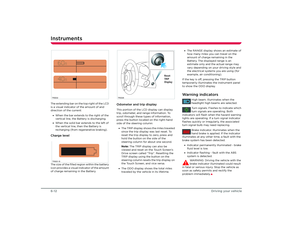 50
50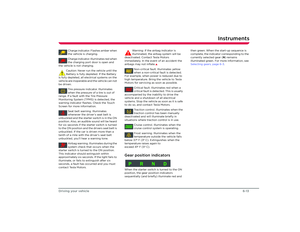 51
51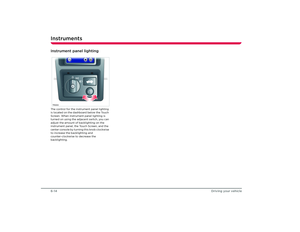 52
52 53
53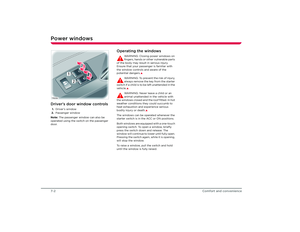 54
54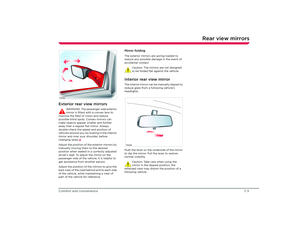 55
55 56
56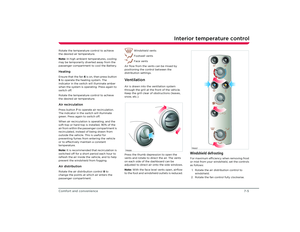 57
57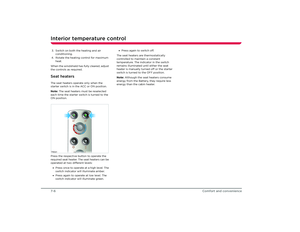 58
58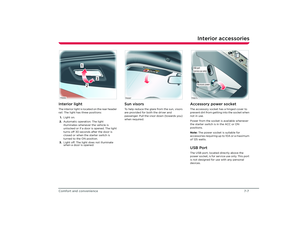 59
59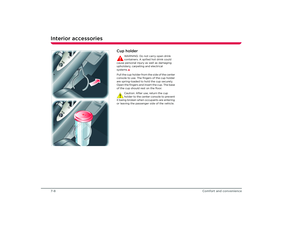 60
60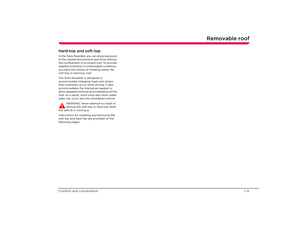 61
61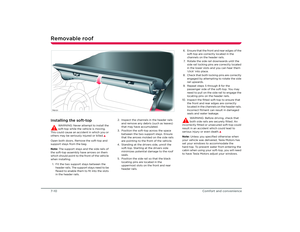 62
62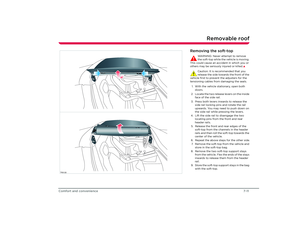 63
63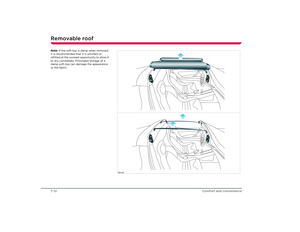 64
64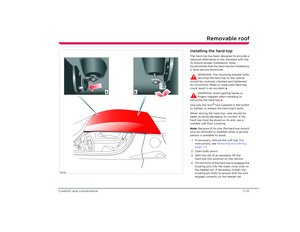 65
65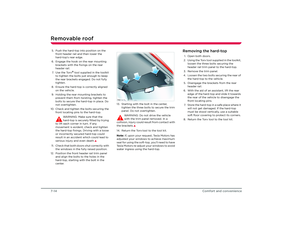 66
66 67
67 68
68 69
69 70
70 71
71 72
72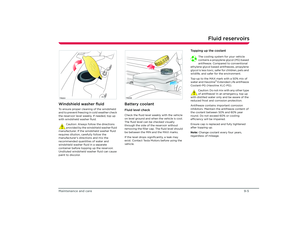 73
73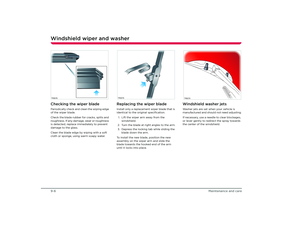 74
74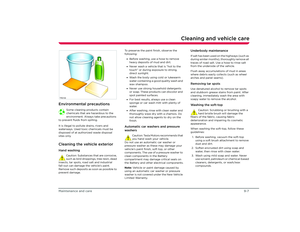 75
75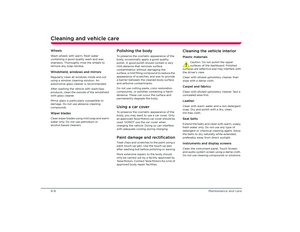 76
76 77
77 78
78 79
79 80
80 81
81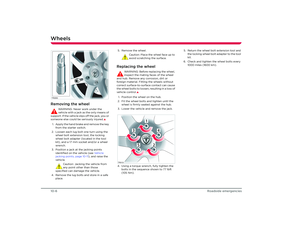 82
82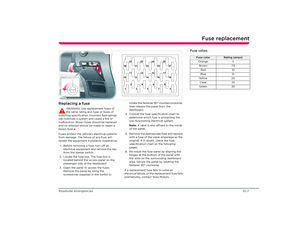 83
83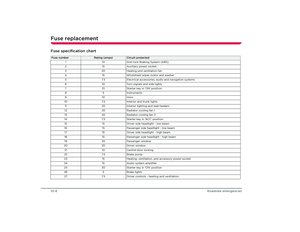 84
84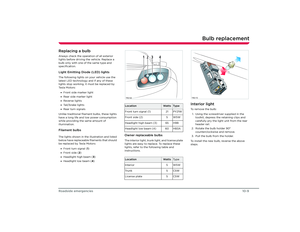 85
85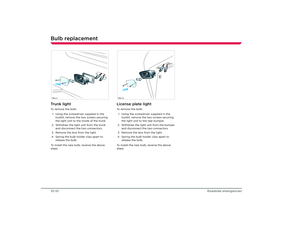 86
86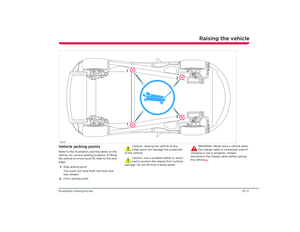 87
87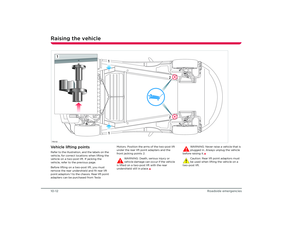 88
88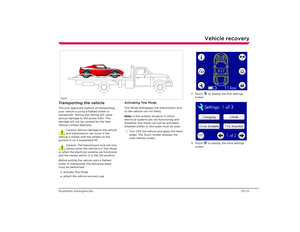 89
89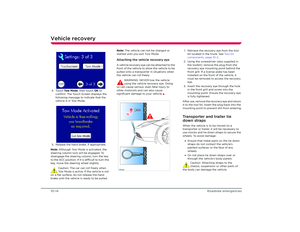 90
90 91
91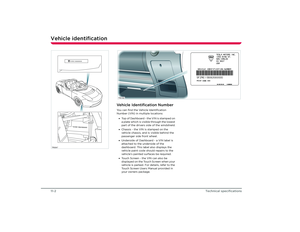 92
92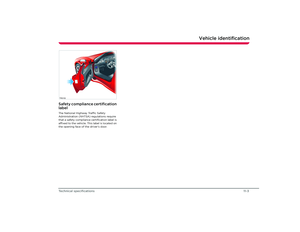 93
93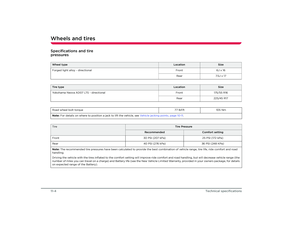 94
94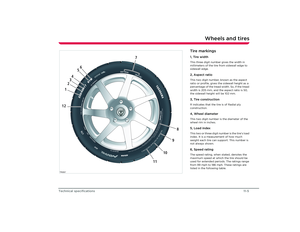 95
95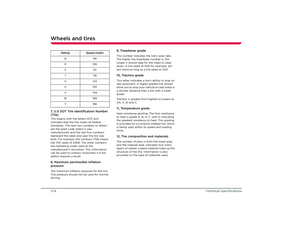 96
96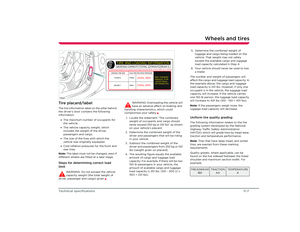 97
97 98
98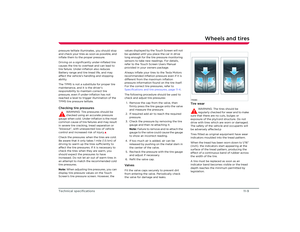 99
99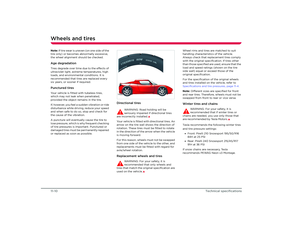 100
100 101
101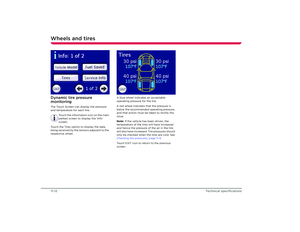 102
102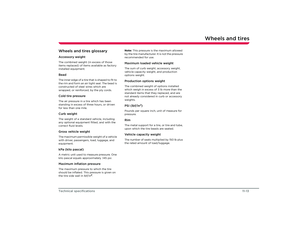 103
103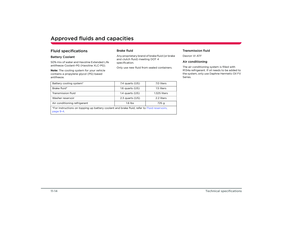 104
104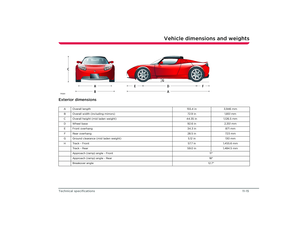 105
105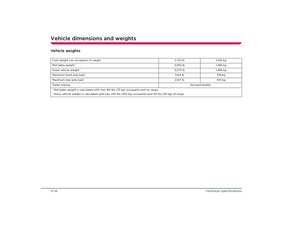 106
106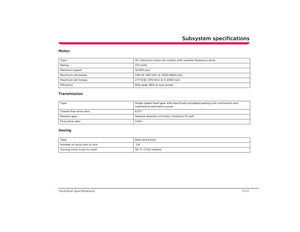 107
107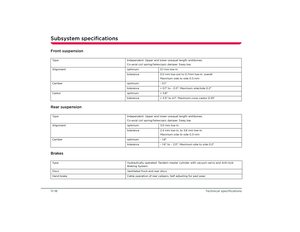 108
108 109
109 110
110 111
111 112
112 113
113 114
114

