2008 SUBARU TRIBECA change time
[x] Cancel search: change timePage 266 of 409
7-32
Starting and operating
&To change the cruising speed! To increase the speed (by control
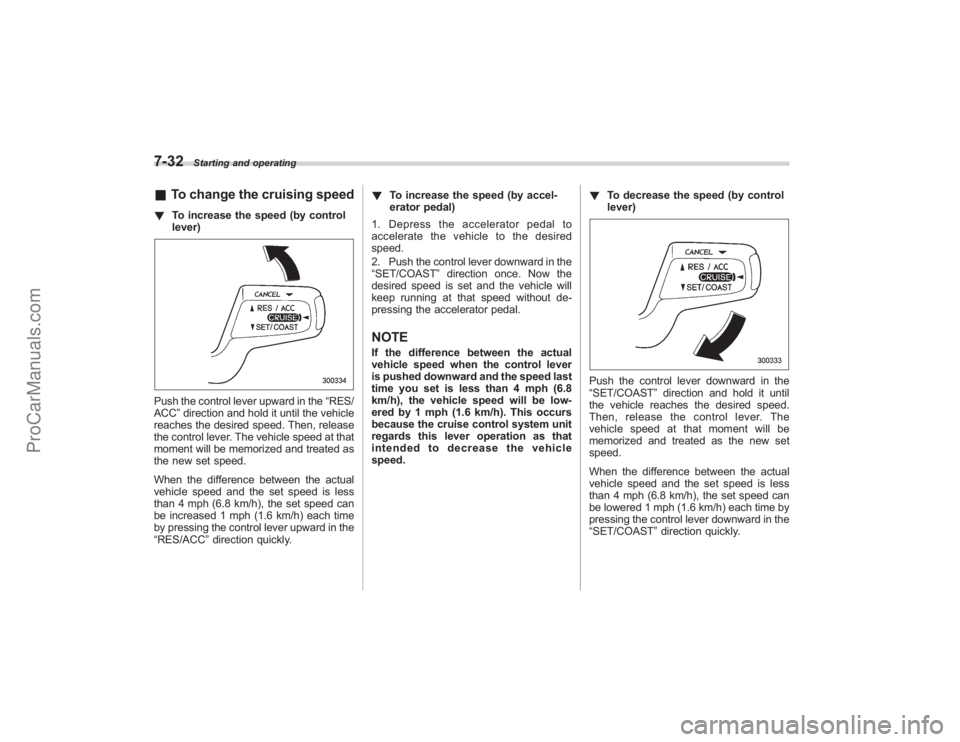
lever)Push the control lever upward in the “RES/
ACC ”direction and hold it until the vehicle
reaches the desired speed. Then, release
the control lever. The vehicle speed at that
moment will be memorized and treated as
the new set speed.
When the difference between the actual
vehicle speed and the set speed is less
than 4 mph (6.8 km/h), the set speed can
be increased 1 mph (1.6 km/h) each time
by pressing the control lever upward in the
“RES/ACC ”direction quickly. !
To increase the speed (by accel-
erator pedal)
1. Depress the accelerator pedal to
accelerate the vehicle to the desired
speed.
2. Push the control lever downward in the
“SET/COAST ”direction once. Now the
desired speed is set and the vehicle will
keep running at that speed without de-
pressing the accelerator pedal.
NOTEIf the difference between the actual
vehicle speed when the control lever
is pushed downward and the speed last
time you set is less than 4 mph (6.8
km/h), the vehicle speed will be low-
ered by 1 mph (1.6 km/h). This occurs
because the cruise control system unit
regards this lever operation as that
intended to decrease the vehicle
speed. !
To decrease the speed (by control
lever)
Push the control lever downward in the
“SET/COAST ”direction and hold it until
the vehicle reaches the desired speed.
Then, release the control lever. The
vehicle speed at that moment will be
memorized and treated as the new set
speed.
When the difference between the actual
vehicle speed and the set speed is less
than 4 mph (6.8 km/h), the set speed can
be lowered 1 mph (1.6 km/h) each time by
pressing the control lever downward in the
“SET/COAST ”direction quickly.
ProCarManuals.com
Page 290 of 409
8-22
Driving tips
!Gross Vehicle Weight (GVW) and
Gross Vehicle Weight Rating
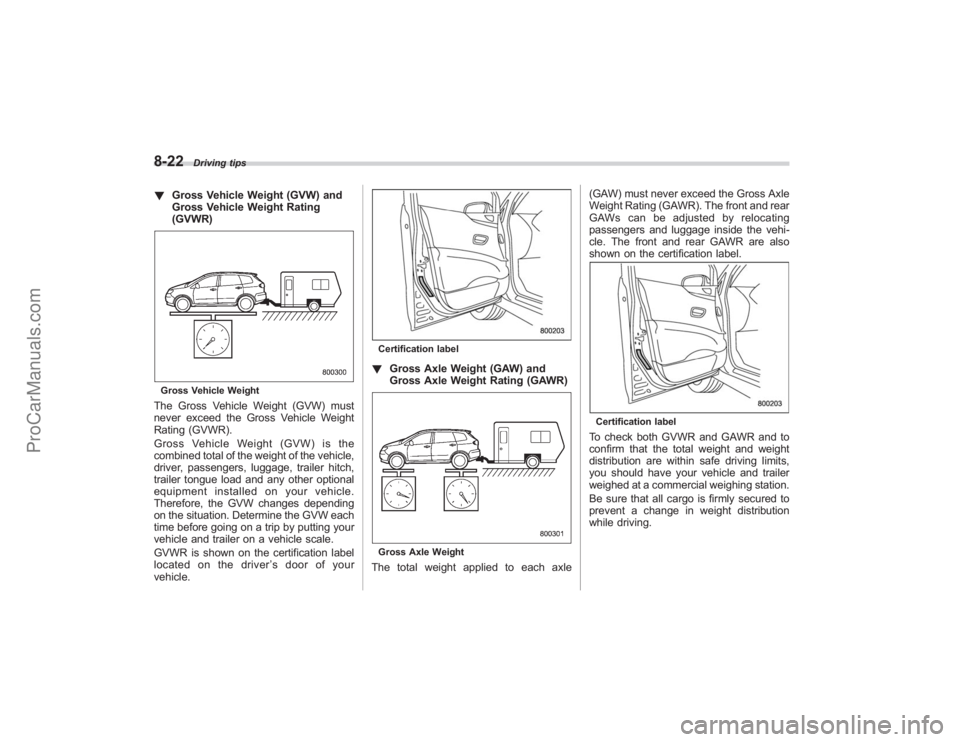
(GVWR)Gross Vehicle WeightThe Gross Vehicle Weight (GVW) must
never exceed the Gross Vehicle Weight
Rating (GVWR).
Gross Vehicle Weight (GVW) is the
combined total of the weight of the vehicle,
driver, passengers, luggage, trailer hitch,
trailer tongue load and any other optional
equipment installed on your vehicle.
Therefore, the GVW changes depending
on the situation. Determine the GVW each
time before going on a trip by putting your
vehicle and trailer on a vehicle scale.
GVWR is shown on the certification label
located on the driver ’s door of your
vehicle.
Certification label! Gross Axle Weight (GAW) and
Gross Axle Weight Rating (GAWR)Gross Axle WeightThe total weight applied to each axle (GAW) must never exceed the Gross Axle
Weight Rating (GAWR). The front and rear
GAWs can be adjusted by relocating
passengers and luggage inside the vehi-
cle. The front and rear GAWR are also
shown on the certification label.
Certification labelTo check both GVWR and GAWR and to
confirm that the total weight and weight
distribution are within safe driving limits,
you should have your vehicle and trailer
weighed at a commercial weighing station.
Be sure that all cargo is firmly secured to
prevent a change in weight distribution
while driving.
ProCarManuals.com
Page 293 of 409
create a traffic safety hazard.
For safety, always connect the towing
vehicle and trailer with trailer safety
chains. Pass the chains crossing each
other under the trailer tongue to prevent
the trailer from dropping onto the ground
in case the trailer tongue should discon-
nect from the hitch ball. Allow sufficient
slack in the chains taking tight-turn situa-
tions into account; however, be careful not
to let them drag on the ground.
For more information about the safety
chain connection, refer to the instructions
for your hitch and trailer.
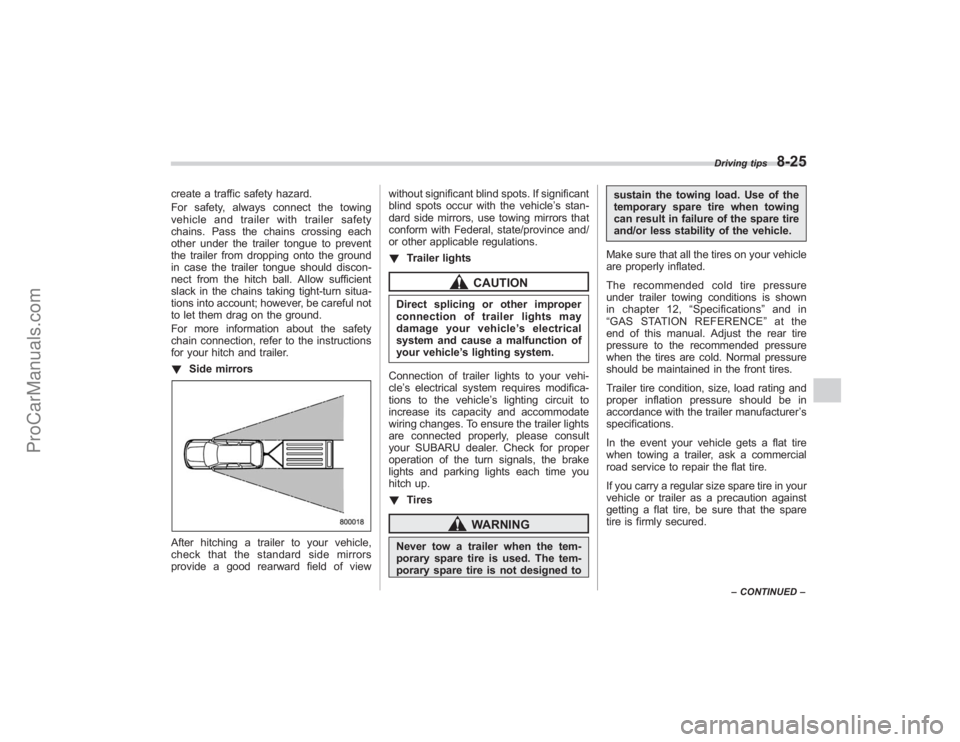
!Side mirrorsAfter hitching a trailer to your vehicle,
check that the standard side mirrors
provide a good rearward field of view without significant blind spots. If significant
blind spots occur with the vehicle’
s stan-
dard side mirrors, use towing mirrors that
conform with Federal, state/province and/
or other applicable regulations.
! Trailer lights
CAUTION
Direct splicing or other improper
connection of trailer lights may
damage your vehicle’ s electrical
system and cause a malfunction of
your vehicle ’s lighting system.
Connection of trailer lights to your vehi-
cle ’s electrical system requires modifica-
tions to the vehicle ’s lighting circuit to
increase its capacity and accommodate
wiring changes. To ensure the trailer lights
are connected properly, please consult
your SUBARU dealer. Check for proper
operation of the turn signals, the brake
lights and parking lights each time you
hitch up.
! Tires
WARNING
Never tow a trailer when the tem-
porary spare tire is used. The tem-
porary spare tire is not designed to sustain the towing load. Use of the
temporary spare tire when towing
can result in failure of the spare tire
and/or less stability of the vehicle.
Make sure that all the tires on your vehicle
are properly inflated.
The recommended cold tire pressure
under trailer towing conditions is shown
in chapter 12, “Specifications ”and in
“ GAS STATION REFERENCE ”at the
end of this manual. Adjust the rear tire
pressure to the recommended pressure
when the tires are cold. Normal pressure
should be maintained in the front tires.
Trailer tire condition, size, load rating and
proper inflation pressure should be in
accordance with the trailer manufacturer ’s
specifications.
In the event your vehicle gets a flat tire
when towing a trailer, ask a commercial
road service to repair the flat tire.
If you carry a regular size spare tire in your
vehicle or trailer as a precaution against
getting a flat tire, be sure that the spare
tire is firmly secured.
Driving tips
8-25
– CONTINUED –
ProCarManuals.com
Page 294 of 409
8-26
Driving tips
&Trailer towing tips
CAUTION
. Never exceed 45 mph (72 km/h)
when towing a trailer in hilly
country on hot days.
. When towing a trailer, steering,
stability, stopping distance and
braking performance will be dif-
ferent from normal operation. For
safety’ s sake, you should employ
extra caution when towing a
trailer and you should never
speed. You should also keep the
following tips in mind:
! Before starting out on a trip
. Check that the vehicle and vehicle-to-
hitch mounting are in good condition. If
any problems are apparent, do not tow the
trailer.
. Check that the vehicle sits horizontally
with the trailer attached. If the vehicle is
tipped sharply up at the front and down at
the rear, check the total trailer weight,
GVW, GAWs and tongue load again, then
confirm that the load and its distribution
are acceptable.
. Check that the tire pressures are
correct. .
Check that the vehicle and trailer are
connected properly. Confirm that
–the trailer tongue is connected
properly to the hitch ball.
– the trailer lights connector is con-
nected properly and trailer ’sbrake
lights illuminate when the vehicle ’s
brake pedal is pressed, and that the
trailer ’s turn signal lights flash when
the vehicle’ s turn signal lever is oper-
ated.
– the safety chains are connected
properly.
– all cargo in the trailer is secured
safely in position.
– the side mirrors provide a good
rearward field of view without a sig-
nificant blind spot.
. Sufficient time should be taken to learn
the “feel ”of the vehicle/trailer combination
before starting out on a trip. In an area free
of traffic, practice turning, stopping and
backing up.
! Driving with a trailer
. You should allow for considerably more
stopping distance when towing a trailer.
Avoid sudden braking because it may
result in skidding or jackknifing and loss of
control.
. Avoid uneven steering, sharp turns and
rapid lane changes. .
Slow down before turning. Make a
longer than normal turning radius because
the trailer wheels will be closer than the
vehicle wheels to the inside of the turn. In
a tight turn, the trailer could hit your
vehicle.
. Crosswinds will adversely affect the
handling of your vehicle and trailer, caus-
ing sway. Crosswinds can be due to
weather conditions or the passing of large
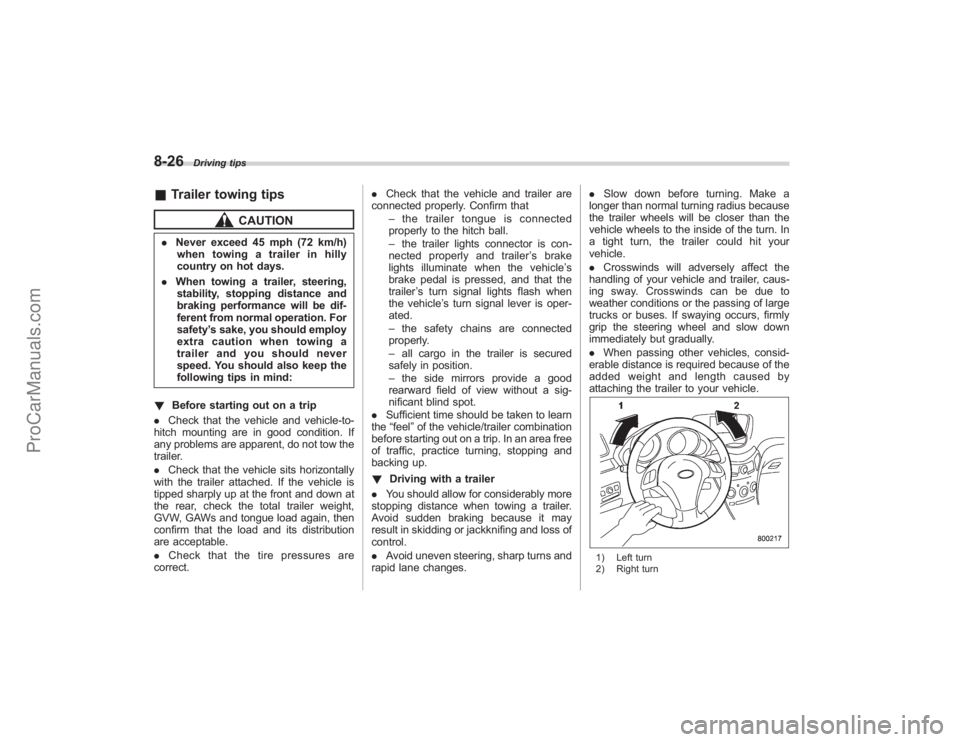
trucks or buses. If swaying occurs, firmly
grip the steering wheel and slow down
immediately but gradually.
. When passing other vehicles, consid-
erable distance is required because of the
added weight and length caused by
attaching the trailer to your vehicle.
1) Left turn
2) Right turn
ProCarManuals.com
Page 329 of 409
Engine oilNOTE.The engine oil consumption rate is
not stabilized, and therefore cannot be
determined until the vehicle has tra-
veled at least several thousand miles
(kilometers). Even after break-in, when
the vehicle is used under severe driv-
ing conditions such as those men-
tioned in the “Warranty and Mainte-
nance Booklet ”, engine oil is con-
sumed or deteriorated more quickly
than under normal driving conditions.
If you drive your vehicle under these
severe conditions, you should check
the oil level at least at every second
fuel fill-up time, and change the oil
more frequently. Please refer to the
“ Warranty and Maintenance Booklet ”
for more details.
. If the oil consumption rate seems
abnormally high after the break-in
period, for example more than 1 quart
per 1,200 miles or 1 liter per 2,000
kilometers, we recommend that you
contact your SUBARU dealer.
& Checking the oil levelCheck the engine oil level at each fuel
stop.
1. Park the vehicle on a level surface and
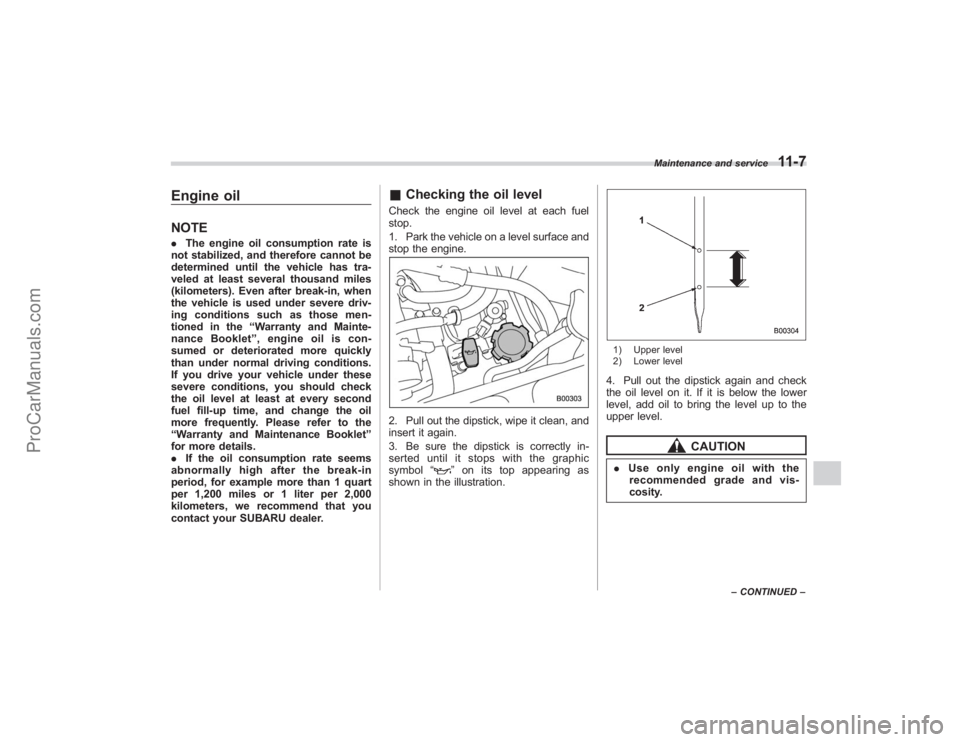
stop the engine.2. Pull out the dipstick, wipe it clean, and
insert it again.
3. Be sure the dipstick is correctly in-
serted until it stops with the graphic
symbol “
”on its top appearing as
shown in the illustration.
1) Upper level
2) Lower level4. Pull out the dipstick again and check
the oil level on it. If it is below the lower
level, add oil to bring the level up to the
upper level.
CAUTION
. Use only engine oil with the
recommended grade and vis-
cosity.
Maintenance and service
11-7
– CONTINUED –
ProCarManuals.com
Page 343 of 409
Use only brake fluid from a sealed
container.&Recommended brake fluidFMVSS No. 116, fresh DOT 3 or 4 brake
fluid
Brake boosterIf the brake booster does not operate as
described in the following, have it checked
by your SUBARU dealer.
1. With the engine off, depress the brake
pedal several times, applying the same
pedal force each time. The distance the
pedal travels should not vary.
2. With the brake pedal depressed, start
the engine. The pedal should move
slightly down to the floor.
3. With the brake pedal depressed, stop
the engine and keep the pedal depressed
for 30 seconds. The pedal height should
not change.
4. Start the engine again and run for
approximately one minute then turn it off.
Depress the brake pedal several times to
check the brake booster. The brake
booster operates properly if the pedal
stroke decreases with each depression.
Brake pedalCheck the brake pedal free play and
reserve distance according to the main-
tenance schedule in the “Warranty and
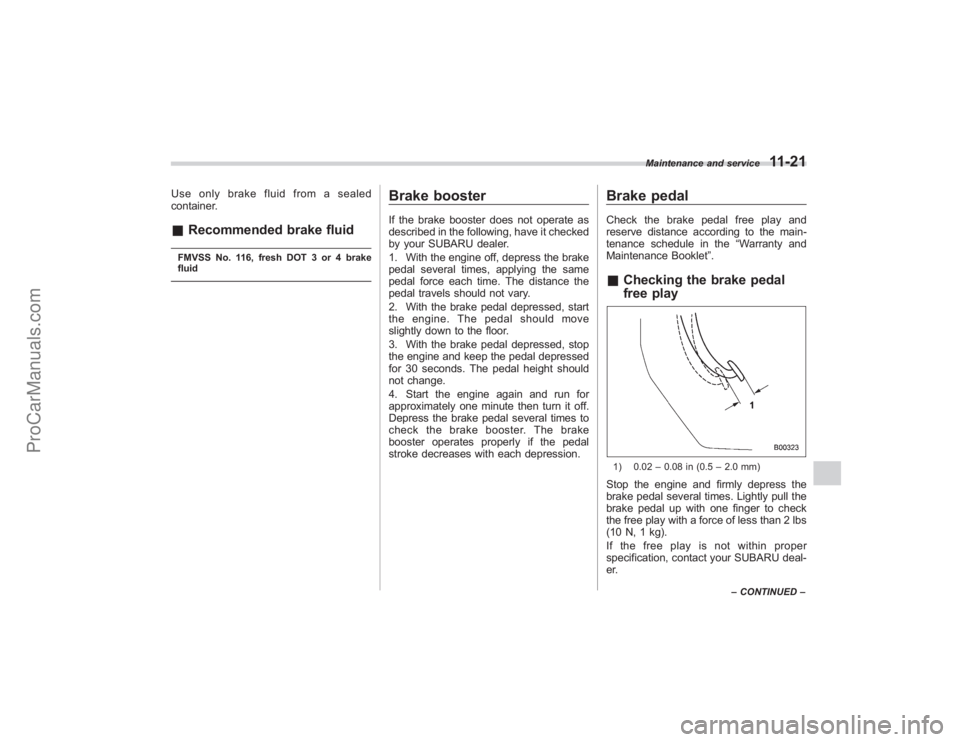
Maintenance Booklet ”.&Checking the brake pedal
free play1) 0.02 –0.08 in (0.5 –2.0 mm)Stop the engine and firmly depress the
brake pedal several times. Lightly pull the
brake pedal up with one finger to check
the free play with a force of less than 2 lbs
(10 N, 1 kg).
If the free play is not within proper
specification, contact your SUBARU deal-
er.
Maintenance and service
11-21
–CONTINUED –
ProCarManuals.com
Page 351 of 409
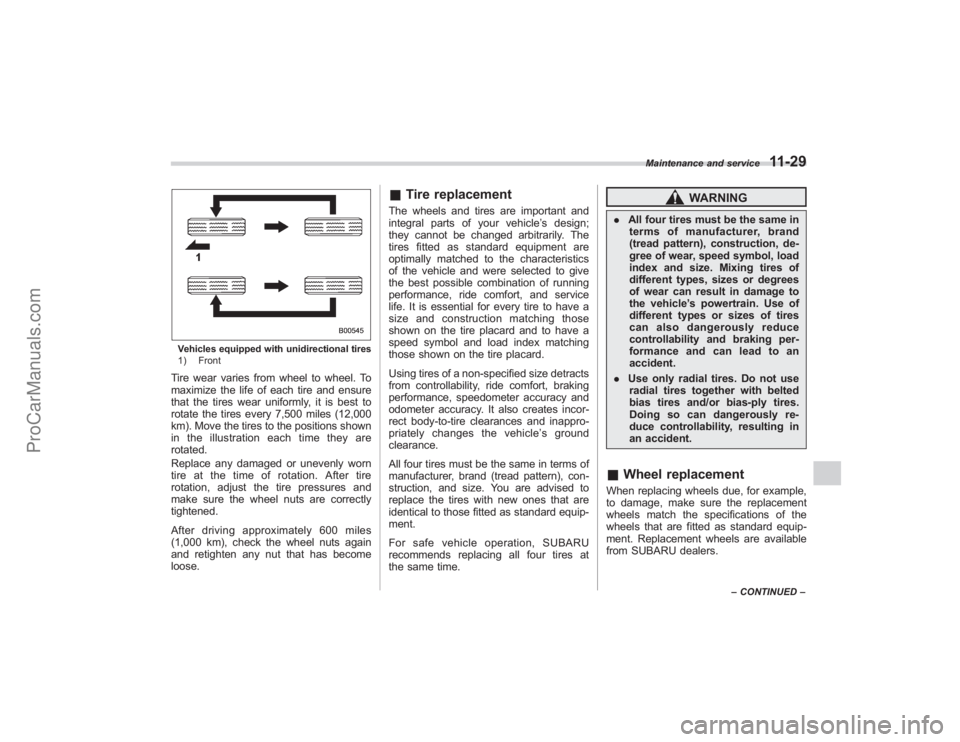
Vehicles equipped with unidirectional tires
1) FrontTire wear varies from wheel to wheel. To
maximize the life of each tire and ensure
that the tires wear uniformly, it is best to
rotate the tires every 7,500 miles (12,000
km). Move the tires to the positions shown
in the illustration each time they are
rotated.
Replace any damaged or unevenly worn
tire at the time of rotation. After tire
rotation, adjust the tire pressures and
make sure the wheel nuts are correctly
tightened.
After driving approximately 600 miles
(1,000 km), check the wheel nuts again
and retighten any nut that has become
loose.
&Tire replacementThe wheels and tires are important and
integral parts of your vehicle ’s design;
they cannot be changed arbitrarily. The
tires fitted as standard equipment are
optimally matched to the characteristics
of the vehicle and were selected to give
the best possible combination of running
performance, ride comfort, and service
life. It is essential for every tire to have a
size and construction matching those
shown on the tire placard and to have a
speed symbol and load index matching
those shown on the tire placard.
Using tires of a non-specified size detracts
from controllability, ride comfort, braking
performance, speedometer accuracy and
odometer accuracy. It also creates incor-
rect body-to-tire clearances and inappro-
priately changes the vehicle ’s ground
clearance.
All four tires must be the same in terms of
manufacturer, brand (tread pattern), con-
struction, and size. You are advised to
replace the tires with new ones that are
identical to those fitted as standard equip-
ment.
For safe vehicle operation, SUBARU
recommends replacing all four tires at
the same time.
WARNING
. All four tires must be the same in
terms of manufacturer, brand
(tread pattern), construction, de-
gree of wear, speed symbol, load
index and size. Mixing tires of
different types, sizes or degrees
of wear can result in damage to
the vehicle ’s powertrain. Use of
different types or sizes of tires
can also dangerously reduce
controllability and braking per-
formance and can lead to an
accident.
. Use only radial tires. Do not use
radial tires together with belted
bias tires and/or bias-ply tires.
Doing so can dangerously re-
duce controllability, resulting in
an accident.& Wheel replacementWhen replacing wheels due, for example,
to damage, make sure the replacement
wheels match the specifications of the
wheels that are fitted as standard equip-
ment. Replacement wheels are available
from SUBARU dealers.
Maintenance and service
11-29
–CONTINUED –
ProCarManuals.com