2008 SUBARU TRIBECA change time
[x] Cancel search: change timePage 194 of 409
5-18
Audio
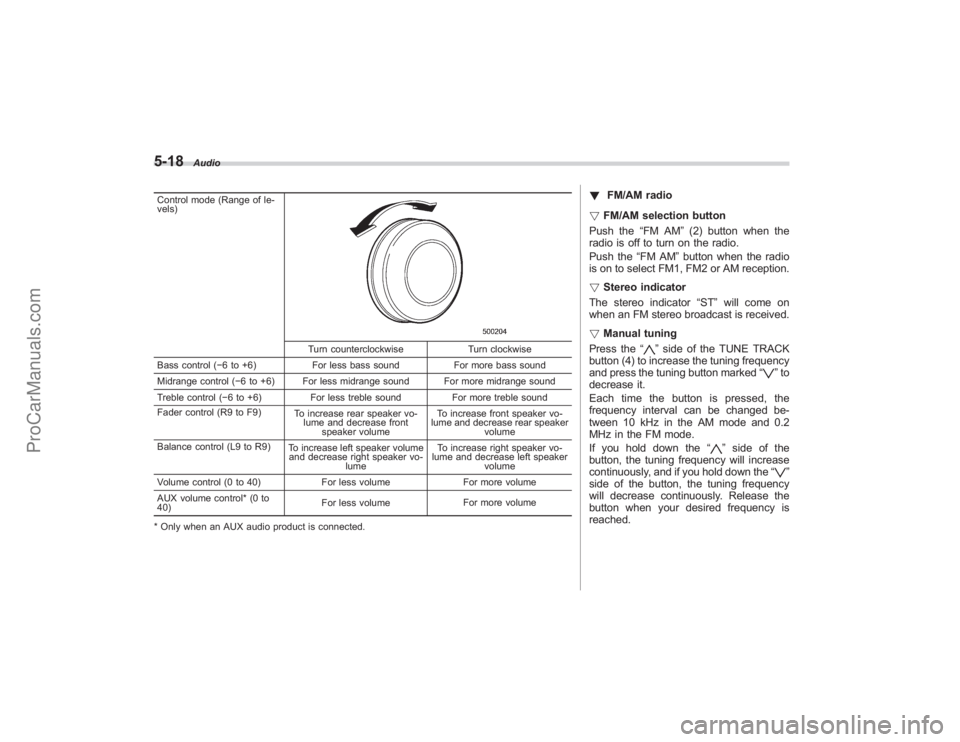
Control mode (Range of le-
vels)
Turn counterclockwiseTurn clockwise
Bass control ( −6 to +6) For less bass sound For more bass sound
Midrange control ( −6 to +6) For less midrange sound For more midrange sound
Treble control ( −6 to +6) For less treble sound For more treble sound
Fader control (R9 to F9) To increase rear speaker vo-
lume and decrease front speaker volume To increase front speaker vo-
lume and decrease rear speaker volume
Balance control (L9 to R9) To increase left speaker volume
and decrease right speaker vo-
lume To increase right speaker vo-
lume and decrease left speaker
volume
Volume control (0 to 40) For less volumeFor more volume
AUX volume control* (0 to
40) For less volume
For more volume
* Only when an AUX audio product is connected.
! FM/AM radio
! FM/AM selection button
Push the “FM AM”(2) button when the
radio is off to turn on the radio.
Push the “FM AM”button when the radio
is on to select FM1, FM2 or AM reception.
! Stereo indicator
The stereo indicator “ST”will come on
when an FM stereo broadcast is received.
! Manual tuning
Press the “
”side of the TUNE TRACK
button (4) to increase the tuning frequency
and press the tuning button marked “
”to
decrease it.
Each time the button is pressed, the
frequency interval can be changed be-
tween 10 kHz in the AM mode and 0.2
MHz in the FM mode.
If you hold down the “
”side of the
button, the tuning frequency will increase
continuously, and if you hold down the “
”
side of the button, the tuning frequency
will decrease continuously. Release the
button when your desired frequency is
reached.
ProCarManuals.com
Page 198 of 409
5-22
Audio
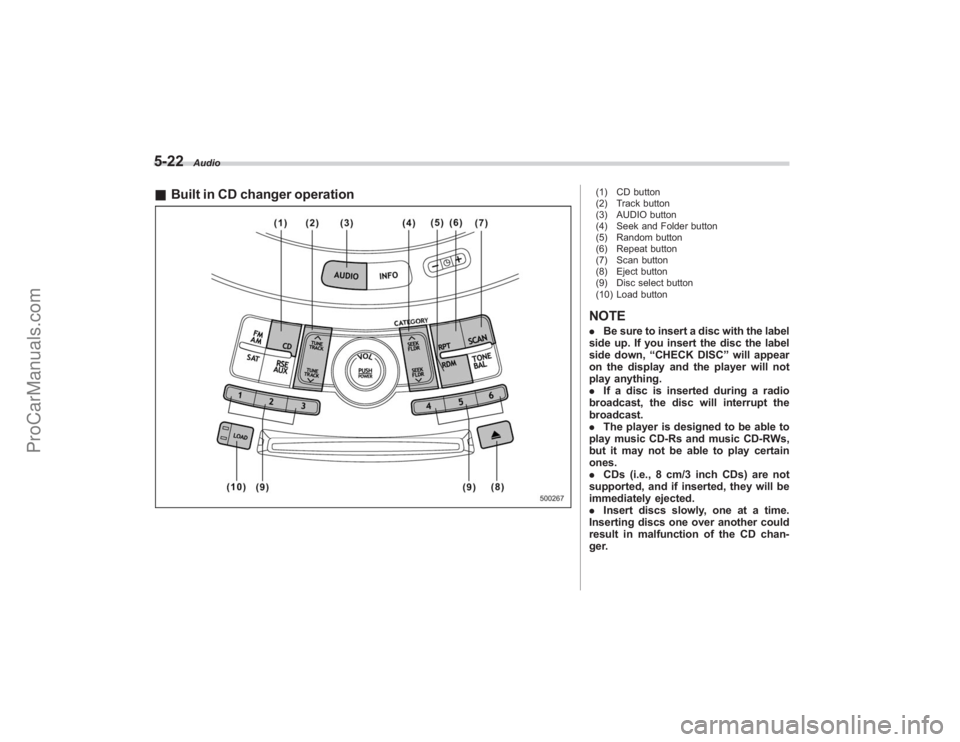
&Built in CD changer operation
(1) CD button
(2) Track button
(3) AUDIO button
(4) Seek and Folder button
(5) Random button
(6) Repeat button
(7) Scan button
(8) Eject button
(9) Disc select button
(10) Load buttonNOTE. Be sure to insert a disc with the label
side up. If you insert the disc the label
side down, “CHECK DISC ”will appear
on the display and the player will not
play anything.
. If a disc is inserted during a radio
broadcast, the disc will interrupt the
broadcast.
. The player is designed to be able to
play music CD-Rs and music CD-RWs,
but it may not be able to play certain
ones.
. CDs (i.e., 8 cm/3 inch CDs) are not
supported, and if inserted, they will be
immediately ejected.
. Insert discs slowly, one at a time.
Inserting discs one over another could
result in malfunction of the CD chan-
ger.
ProCarManuals.com
Page 200 of 409
5-24
Audio
!When there are CDs loaded:
Press a desired one of the disc select
buttons (9) the disc number indicator of
which steadily lights up. The player will
then start playback of the selected CD,
beginning with the first track.
If a disc that the player cannot read has
been loaded, “CHECK DISC ”will appear
on the display and the player will not play
anything.
! To select a song from its beginning
! Forward direction
Briefly press the “
”side of the TUNE
TRACK button (2) to skip to the beginning
of the next track/file (track). Each time the
button is pressed, the indicated track/file
(track) number will increase.
NOTEIn an MP3 folder, skipping past the last
track/file (track) will take you back to
the first track/file (track) in the folder.
! Backward direction
Briefly press the “
”side of the TUNE
TRACK button (2) to skip to the beginning
of the current track/file (track). Each time
the button is pressed, the indicated track/
file (track) number will decrease.
NOTEIn an MP3 folder, skipping past the first
track/file (track) will take you to the last
track/file (track) in the folder.
! Fast-forwarding and fast-reversing
! Fast-forwarding
Press the “
”side of the TUNE TRACK
button (2) continuously to fast-forward the
track/file.
Release the button to stop fast-forwarding.
NOTEIf you fast-forward to the end of the last
track/file (track), fast-forwarding will
stop and the player will start playback
beginning with the first track/file
(track).
! Fast-reversing
Press the “
”side of the TUNE TRACK
button (2) continuously to fast-reverse the
track/file.
Release the button to stop fast-reversing.
NOTEIf you fast-reverse to the beginning of
the first track/file (track), fast-reversing
will stop and the player will start play-
back. !
Repeating
! To repeat the currently playing track/
file (track)
To repeat a track/file (track), briefly press
the “RPT ”button (6) while the track/file
(track) is playing. The display will show
“RPT ”, and the track/file (track) will be
repeated.
To cancel the track/file (track) repeat-play
mode, briefly press the “RPT ”button
twice. The “RPT”indication will go off,
and the normal playback mode will be
resumed.
NOTE. Each time you briefly press the
button, the mode will change to the
next one in the following sequence.If you accidentally press the button and
cancel the track/file (track) repeat-play
mode, press it again to reselect the
repeat-play mode.
. The repeat-play mode will be can-
celled if you perform any of the follow-
ing steps:
.Press the “RDM ”button
. Press the “SCAN” button
. Press the “
”button
ProCarManuals.com
Page 201 of 409
.Press the disc select button
. Select the radio mode
. Press the “RSE AUX ”button
. Press the “
”or “
”side of the
SEEK FLDR button (MP3 disc)
. Turn off the power of the audio
equipment.
. Turn the ignition switch to the
“ LOCK ”position.
! To repeat the currently playing disc/
folder
To repeat the currently playing disc/folder,
press the “RPT”button (6) twice while a
track/file (track) is playing. The display will
show “D-RPT ”, and the disc/folder will be
played repeatedly.
To cancel the disc/folder repeat-play
mode, press the “RPT”button once more.
The “D-RPT ”indication will go off, and the
normal playback mode will be resumed.
NOTE. Each time you briefly press the
button, the mode will change to the
next one in the following sequence.If you accidentally press the button and
cancel the disc/folder repeat-play
mode, press it again to reselect the disc/folder repeat-play mode.
.
The disc/folder repeat-play mode
will be cancelled if you perform any of
the following steps:
.Press the “RDM ”button
. Press the “SCAN ”button
. Press the “
”button
. Press the disc select button
. Select the radio mode
. Press the “RSE AUX ”button
. Press the “”or “
”side of the
SEEK FLDR button (MP3 disc)
. Turn off the power of the audio
equipment.
. Turn the ignition switch to the
“ LOCK ”position.
! Random playback
! Non-MP3 disc
Press the “RDM”button (5) briefly during
disc playback to play all of the tracks on
the disc in a random order. The display will
show “RDM”, and all of the tracks on the
disc will be played in a random order.
To cancel random mode, press the button
again. The “RDM”indication will go off,
and the normal playback mode will be
resumed.
NOTERandom playback will be cancelled if
you perform any of the following steps:
. Press the “RDM ”button
. Press the “SCAN” button
. Press the “
”button
. Select the radio mode
. Press the “RSE AUX ”button
. Press the “”or “
”side of the
SEEK FLDR button
. Turn off the power of the audio
equipment.
. Turntheignitionswitchtothe
“ LOCK ”position.
! MP3 disc
Press the “RDM”button (5) during disc
playback to play all of the tracks in the
folder currently being played in random
order. Press the “RDM ”button again to
play all of the tracks on the disc in random
order. The display will show “RDM”during
the random mode.
To cancel the random mode, press the
“ RDM ”button during “in-disc ”random
playback. The “RDM”indication will go
off, and the normal playback mode will be
resumed.
NOTE. Each time you briefly press the
button, the mode will change to the
Audio
5-25
– CONTINUED –
ProCarManuals.com
Page 202 of 409
5-26
Audio
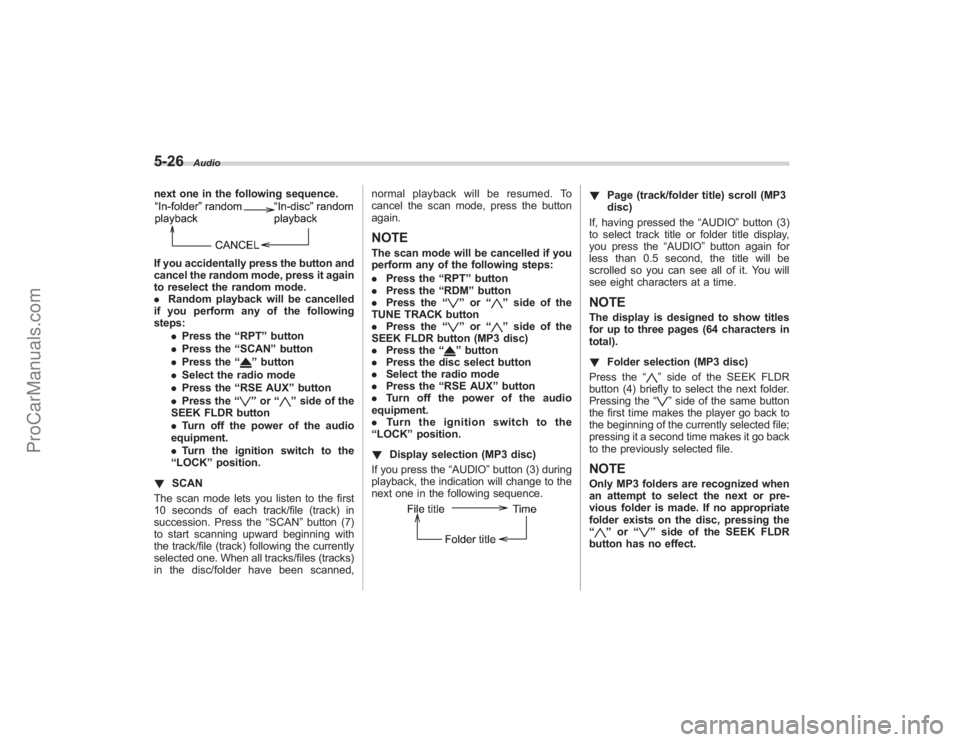
next one in the following sequence.If you accidentally press the button and
cancel the random mode, press it again
to reselect the random mode.
.Random playback will be cancelled
if you perform any of the following
steps:
.Press the “RPT ”button
. Press the “SCAN” button
. Press the “
”button
. Select the radio mode
. Press the “RSE AUX ”button
. Press the “”or “
”side of the
SEEK FLDR button
. Turn off the power of the audio
equipment.
. Turn the ignition switch to the
“ LOCK ”position.
! SCAN
The scan mode lets you listen to the first
10 seconds of each track/file (track) in
succession. Press the “SCAN”button (7)
to start scanning upward beginning with
the track/file (track) following the currently
selected one. When all tracks/files (tracks)
in the disc/folder have been scanned, normal playback will be resumed. To
cancel the scan mode, press the button
again.
NOTEThe scan mode will be cancelled if you
perform any of the following steps:
.
Press the “RPT ”button
. Press the “RDM ”button
. Press the “
”or “
”side of the
TUNE TRACK button
. Press the “
”or “
”side of the
SEEK FLDR button (MP3 disc)
. Press the “
”button
. Press the disc select button
. Select the radio mode
. Press the “RSE AUX ”button
. Turn off the power of the audio
equipment.
. Turn the ignition switch to the
“ LOCK ”position.
! Display selection (MP3 disc)
If you press the “AUDIO”button (3) during
playback, the indication will change to the
next one in the following sequence.
! Page (track/folder title) scroll (MP3
disc)
If, having pressed the “AUDIO”button (3)
to select track title or folder title display,
you press the “AUDIO”button again for
less than 0.5 second, the title will be
scrolled so you can see all of it. You will
see eight characters at a time.NOTEThe display is designed to show titles
for up to three pages (64 characters in
total).
! Folder selection (MP3 disc)
Press the “
”side of the SEEK FLDR
button (4) briefly to select the next folder.
Pressing the “”side of the same button
the first time makes the player go back to
the beginning of the currently selected file;
pressing it a second time makes it go back
to the previously selected file.
NOTEOnly MP3 folders are recognized when
an attempt to select the next or pre-
vious folder is made. If no appropriate
folder exists on the disc, pressing the
“
” or “
”side of the SEEK FLDR
button has no effect.
ProCarManuals.com
Page 203 of 409
!How to unload CDs from the player
! Ejecting a CD from the player
Of the discs loaded, you can select and
remove only one disc.
1. Use the disc select button (9) to select
the disc to be ejected.
2. Briefly press the “
”button (8). The
selected disc will be ejected. The disc
number indicator will flash at this time.
When you remove the ejected disc, the
disc number indicator will go off.
To remove more discs in succession,
repeat Steps 1 and 2.
! Ejecting all discs from the player (All
disc ejection mode)
1. If you continue to press the “
”button
(8), the player will produce beep sound
and will enter the all disc ejection mode.
2. Remove the disc that has been
ejected. The other discs loaded will then
be ejected one after another. If you do not
remove the disc that has been ejected, the
“All disc ejection mode ”will be canceled.
NOTE. Avoid driving the vehicle with a CD
sticking out, because vibration might
make it fall out.
. If you press the “
”button while the player is in all disc ejection mode,
the mode will be cancelled following
ejection of the disc that is currently
being ejected.
.
If you press the “CD ”button while
the player is in all disc ejection mode,
the player will draw in the discs that
have been ejected and play them.
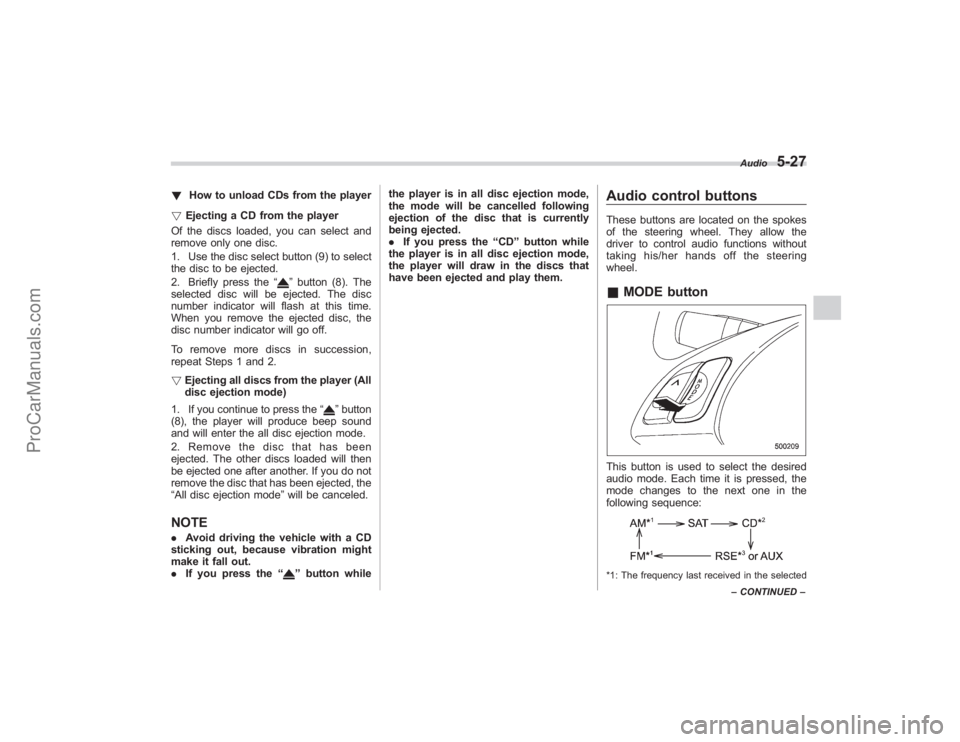
Audio control buttonsThese buttons are located on the spokes
of the steering wheel. They allow the
driver to control audio functions without
taking his/her hands off the steering
wheel.& MODE buttonThis button is used to select the desired
audio mode. Each time it is pressed, the
mode changes to the next one in the
following sequence:*1: The frequency last received in the selected Audio
5-27
–
CONTINUED –
ProCarManuals.com
Page 245 of 409
feature ON or OFF each time.
7. To exit the remote transmitter and
feature programming mode, turn the igni-
tion switch to the“LOCK”position, remove
the key from the ignition switch and test
operation of the remote transmitter(s) and
horn confirmation feature.& System maintenance! Changing the remote control bat-
teries
The two 3-volt lithium batteries (model
CR-1220) supplied in your remote control
should last approximately three years,
depending on usage. When the batteries
begin to weaken, you will notice a
decrease in range (distance from the
vehicle that your remote control operates).
Follow the instructions below to change
the remote control batteries.
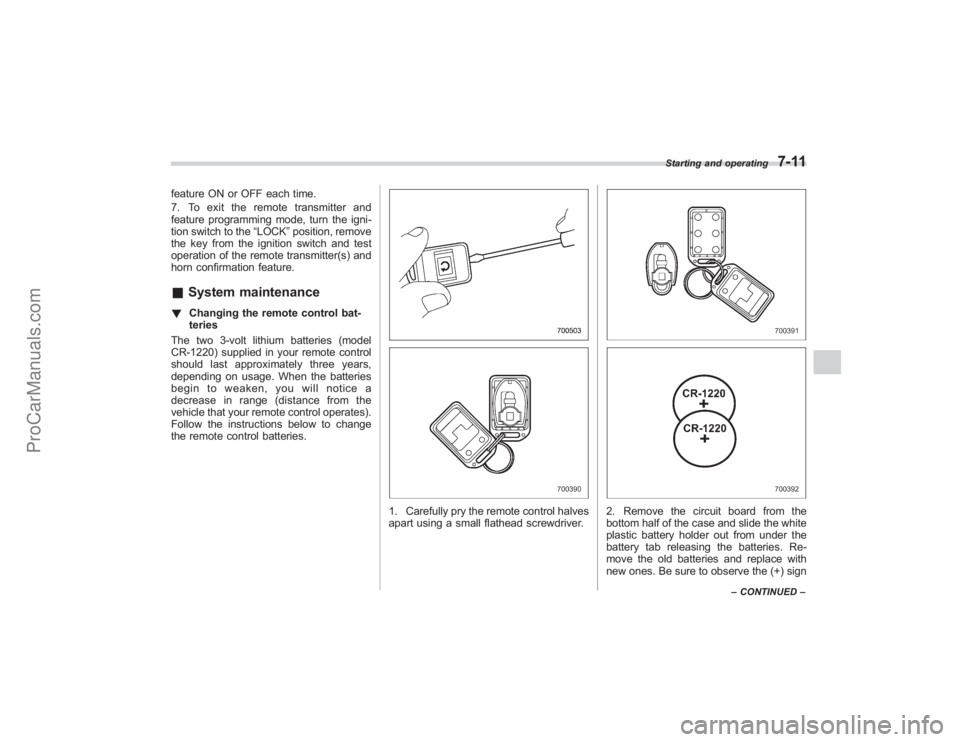
1. Carefully pry the remote control halves
apart using a small flathead screwdriver.
2. Remove the circuit board from the
bottom half of the case and slide the white
plastic battery holder out from under the
battery tab releasing the batteries. Re-
move the old batteries and replace with
new ones. Be sure to observe the (+) sign
Starting and operating
7-11
– CONTINUED –
ProCarManuals.com
Page 246 of 409

7-12
Starting and operating
on the old batteries before removing them
to ensure that the new batteries are
inserted properly (battery“+”should be
pointed away from the transmitter circuit
board on both batteries).
3. Carefully snap the case halves back
together, then test the remote control.NOTEThis device complies with Part 15 of
the FCC Rules and with RSS-210 of
Industry Canada. Operation is subject
to the following two conditions: (1) This
device may not cause harmful inter-
ference, and (2) this device must
accept any interference received, in-
cluding interference that may cause
undesired operation.
Changes or modifications not ex-
pressly approved by the party respon-
sible for compliance could void the
user ’s authority to operate the equip-
ment.
Automatic transmissionThe automatic transmission is electroni-
cally controlled and provides 5 forward
speeds and 1 reverse speed. Also, it has a
manual mode and a SPORT mode.
WARNING
Do not shift from the “P ” or “N ”
position into the “D ” or “R ” position
while depressing the accelerator
pedal. This may cause the vehicle
to jump forward or backward.
CAUTION
. Shift into the “P ” or “R ” position
only after the vehicle is comple-
tely stopped. Shifting while the
vehicle is moving may cause
damage to the transmission.
. Do not race the engine for more
than 5 seconds in any position
except the “N ” or “P ” position
when the brake is set or when
chocks are used in the wheels.
This may cause the automatic
transmission fluid to overheat.
. Avoid shifting from one of the
forward driving positions into the “
R ” position or vice versa until
the vehicle has completely
stopped. Such shifting may
cause damage to the transmis-
sion.
. When parking the vehicle, first
securely apply the parking brake
and then place the selector lever
in the “P ” position. Avoid parking
for a long time with the selector
lever in any other position as
doing so could result in a dead
battery.
NOTE. When the engine coolant tempera-
ture is still low, your vehicle ’s auto-
matic transmission will up-shift at high-
er engine speeds than when the cool-
ant temperature is sufficiently high in
order to shorten the warm-up time and
improve driveability. The gearshift tim-
ing will automatically shift to the nor-
mal timing after the engine has warmed
up.
. Immediately after ATF (automatic
transmission fluid) is replaced, you
may feel that the automatic transmis-
sion operation is somewhat unusual.
This results from invalidation of data
which the on-board computer has
ProCarManuals.com