2008 SUBARU TRIBECA light
[x] Cancel search: lightPage 169 of 409
!
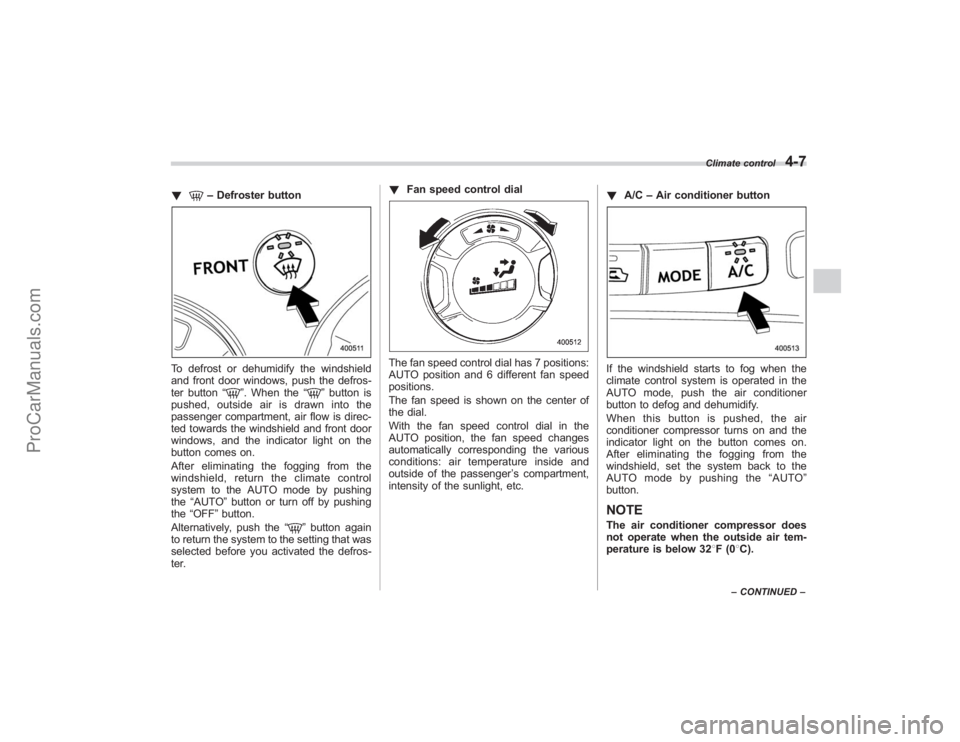
–Defroster button
To defrost or dehumidify the windshield
and front door windows, push the defros-
ter button “
”. When the “
”button is
pushed, outside air is drawn into the
passenger compartment, air flow is direc-
ted towards the windshield and front door
windows, and the indicator light on the
button comes on.
After eliminating the fogging from the
windshield, return the climate control
system to the AUTO mode by pushing
the “AUTO ”button or turn off by pushing
the “OFF ”button.
Alternatively, push the “
”button again
to return the system to the setting that was
selected before you activated the defros-
ter. !
Fan speed control dial
The fan speed control dial has 7 positions:
AUTO position and 6 different fan speed
positions.
The fan speed is shown on the center of
the dial.
With the fan speed control dial in the
AUTO position, the fan speed changes
automatically corresponding the various
conditions: air temperature inside and
outside of the passenger ’s compartment,
intensity of the sunlight, etc. !
A/C –Air conditioner button
If the windshield starts to fog when the
climate control system is operated in the
AUTO mode, push the air conditioner
button to defog and dehumidify.
When this button is pushed, the air
conditioner compressor turns on and the
indicator light on the button comes on.
After eliminating the fogging from the
windshield, set the system back to the
AUTO mode by pushing the “AUTO ”
button.NOTEThe air conditioner compressor does
not operate when the outside air tem-
perature is below 32 8F(0 8C).
Climate control
4-7
– CONTINUED –
ProCarManuals.com
Page 170 of 409
4-8
Climate control
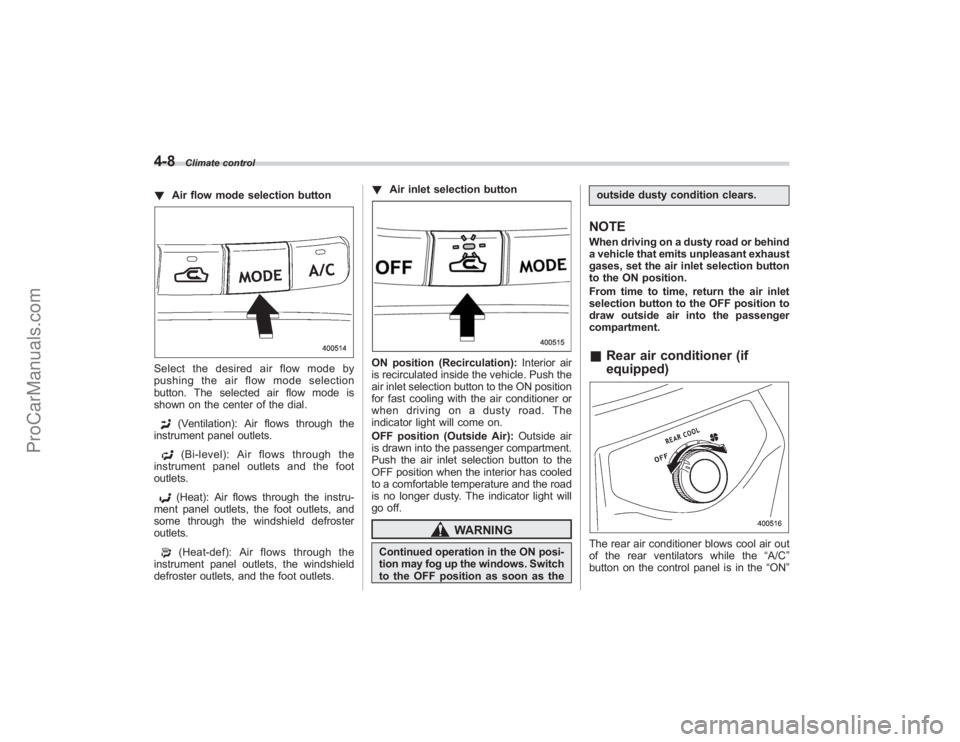
!Air flow mode selection buttonSelect the desired air flow mode by
pushing the air flow mode selection
button. The selected air flow mode is
shown on the center of the dial.
(Ventilation): Air flows through the
instrument panel outlets.(Bi-level): Air flows through the
instrument panel outlets and the foot
outlets.(Heat): Air flows through the instru-
ment panel outlets, the foot outlets, and
some through the windshield defroster
outlets.(Heat-def): Air flows through the
instrument panel outlets, the windshield
defroster outlets, and the foot outlets. !
Air inlet selection button
ON position (Recirculation): Interior air
is recirculated inside the vehicle. Push the
air inlet selection button to the ON position
for fast cooling with the air conditioner or
when driving on a dusty road. The
indicator light will come on.
OFF position (Outside Air): Outside air
is drawn into the passenger compartment.
Push the air inlet selection button to the
OFF position when the interior has cooled
to a comfortable temperature and the road
is no longer dusty. The indicator light will
go off.
WARNING
Continued operation in the ON posi-
tion may fog up the windows. Switch
to the OFF position as soon as the outside dusty condition clears.
NOTEWhen driving on a dusty road or behind
a vehicle that emits unpleasant exhaust
gases, set the air inlet selection button
to the ON position.
From time to time, return the air inlet
selection button to the OFF position to
draw outside air into the passenger
compartment.&
Rear air conditioner (if
equipped)The rear air conditioner blows cool air out
of the rear ventilators while the “A/C”
button on the control panel is in the “ON”
ProCarManuals.com
Page 172 of 409
4-10
Climate control
Operating tips for heater and
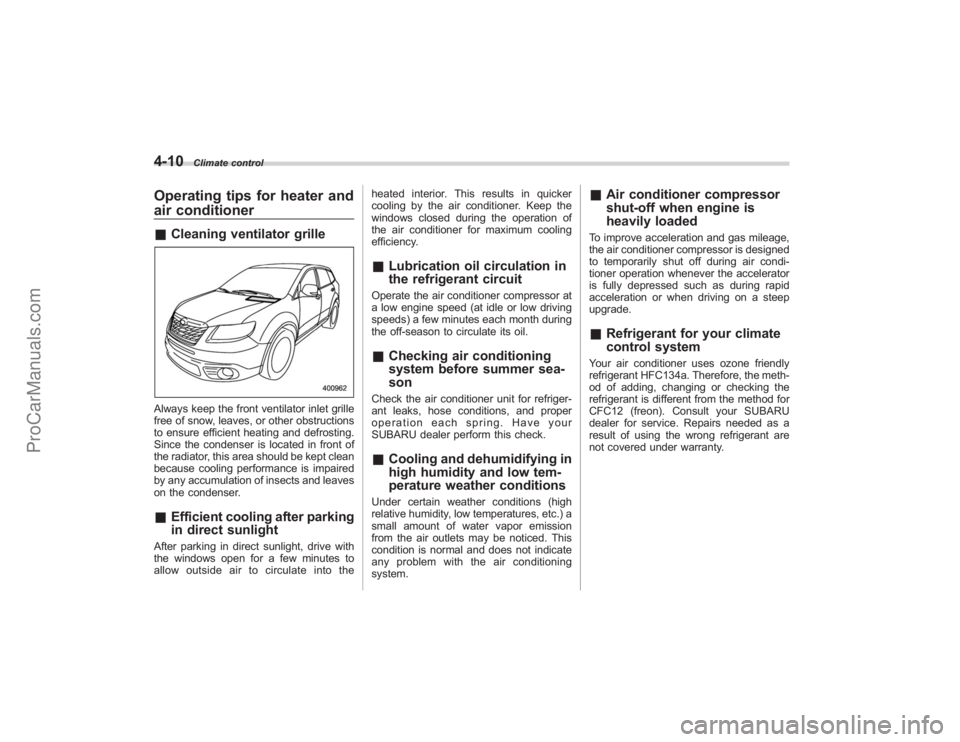
air conditioner&Cleaning ventilator grilleAlways keep the front ventilator inlet grille
free of snow, leaves, or other obstructions
to ensure efficient heating and defrosting.
Since the condenser is located in front of
the radiator, this area should be kept clean
because cooling performance is impaired
by any accumulation of insects and leaves
on the condenser.&Efficient cooling after parking
in direct sunlightAfter parking in direct sunlight, drive with
the windows open for a few minutes to
allow outside air to circulate into the heated interior. This results in quicker
cooling by the air conditioner. Keep the
windows closed during the operation of
the air conditioner for maximum cooling
efficiency.
&
Lubrication oil circulation in
the refrigerant circuitOperate the air conditioner compressor at
a low engine speed (at idle or low driving
speeds) a few minutes each month during
the off-season to circulate its oil.&Checking air conditioning
system before summer sea-
sonCheck the air conditioner unit for refriger-
ant leaks, hose conditions, and proper
operation each spring. Have your
SUBARU dealer perform this check.&Cooling and dehumidifying in
high humidity and low tem-
perature weather conditionsUnder certain weather conditions (high
relative humidity, low temperatures, etc.) a
small amount of water vapor emission
from the air outlets may be noticed. This
condition is normal and does not indicate
any problem with the air conditioning
system.
&Air conditioner compressor
shut-off when engine is
heavily loadedTo improve acceleration and gas mileage,
the air conditioner compressor is designed
to temporarily shut off during air condi-
tioner operation whenever the accelerator
is fully depressed such as during rapid
acceleration or when driving on a steep
upgrade.&Refrigerant for your climate
control systemYour air conditioner uses ozone friendly
refrigerant HFC134a. Therefore, the meth-
od of adding, changing or checking the
refrigerant is different from the method for
CFC12 (freon). Consult your SUBARU
dealer for service. Repairs needed as a
result of using the wrong refrigerant are
not covered under warranty.
ProCarManuals.com
Page 199 of 409
!How to insert a CD(s)
! Inserting a CD
1. Briefly press the “LOAD”button (10). If
the magazine in the player has an idle
position where you can insert a disc, the
disc number indicator associated with the
idle position will blink.
If no indicator blinks, it means that there is
no idle position in the magazine.
2. After the disc number indicator has
started to flash, insert the disc when
“LOAD” flashes on the display. The disc
will then be automatically drawn in, and
the player will begin to play back the first
track of the disc.
. To insert more discs in succession,
repeat Steps 1 and 2. The magazine will
be loaded with discs in the ascending
order of position number.
If you do not insert any disc in 15 seconds
after you have pressed the “LOAD”button,
the player will begin to play back the first
track of the last disc you have inserted.
. The disc indicator steadily lights up if a
disc is already inserted in the correspond-
ing position of the magazine.
. While the player is in the loading mode,
if you press “FM AM”button, the player will
enter the standby mode. Press the “CD”
button (1) to start playback. !
Inserting a disc in a desired position
1. Briefly press the “LOAD”button (10). If
the magazine in the player has an idle
position where you can insert a disc, the
disc number indicator associated with the
idle position will blink.
The positions in the magazine the indica-
tor of which steadily lights up are already
loaded with discs.
2. Press the disc select button (9) at the
position where you want to insert a disc.
3. Insert the disc when “LOAD”flashes
on the display. The disc will then be
automatically drawn in, and the player will
begin to play the first track on the disc.
. If you wish to insert another disc,
repeat the procedure beginning with step
1.
If you do not insert any disc in 15 seconds
after you have pressed the “LOAD” button,
the player will begin to play back the first
track of the last disc you have inserted.
. While the player is in the loading mode,
if you press “FM AM”button, the player will
enter standby mode. Press the “CD ”
button (1) to start playback.
! Loading all the magazine (Full disc
loading mode)
1. If you continue to press the “LOAD
”button
(10) for more than 1.5 seconds, the
player will produce beep sound and will
enter the full disc loading mode.
2. A “disc number ”indicator will blink,
and “ALL LOAD ”will be on display for a
period of 15 seconds. If a disc is success-
fully loaded during this period, the disc
number indicator will stop blinking and will
steadily light.
3. When the loading of a disc is com-
plete, the next disc number indicator will
blink. Then repeat Step 2.
4. When the magazine is filled with discs
by repeating Steps 2 and 3, the player will
start playback of the discs, beginning with
the one inserted first.
If you fail to insert any disc during each 15
seconds interval, the full disc loading
mode will be canceled, and the player will
start playback of the disc inserted first.
! How to play back a CD or make a
pause
! When there is no CD inserted:
Insert a CD by referring to “How to insert a
CD(s) ”.
When a CD is loaded, the player will start
playback of the CD, beginning with the
first track.
Audio
5-23
– CONTINUED –
ProCarManuals.com
Page 200 of 409
5-24
Audio
!When there are CDs loaded:
Press a desired one of the disc select
buttons (9) the disc number indicator of
which steadily lights up. The player will
then start playback of the selected CD,
beginning with the first track.
If a disc that the player cannot read has
been loaded, “CHECK DISC ”will appear
on the display and the player will not play
anything.
! To select a song from its beginning
! Forward direction
Briefly press the “
”side of the TUNE
TRACK button (2) to skip to the beginning
of the next track/file (track). Each time the
button is pressed, the indicated track/file
(track) number will increase.
NOTEIn an MP3 folder, skipping past the last
track/file (track) will take you back to
the first track/file (track) in the folder.
! Backward direction
Briefly press the “
”side of the TUNE
TRACK button (2) to skip to the beginning
of the current track/file (track). Each time
the button is pressed, the indicated track/
file (track) number will decrease.
NOTEIn an MP3 folder, skipping past the first
track/file (track) will take you to the last
track/file (track) in the folder.
! Fast-forwarding and fast-reversing
! Fast-forwarding
Press the “
”side of the TUNE TRACK
button (2) continuously to fast-forward the
track/file.
Release the button to stop fast-forwarding.
NOTEIf you fast-forward to the end of the last
track/file (track), fast-forwarding will
stop and the player will start playback
beginning with the first track/file
(track).
! Fast-reversing
Press the “
”side of the TUNE TRACK
button (2) continuously to fast-reverse the
track/file.
Release the button to stop fast-reversing.
NOTEIf you fast-reverse to the beginning of
the first track/file (track), fast-reversing
will stop and the player will start play-
back. !
Repeating
! To repeat the currently playing track/
file (track)
To repeat a track/file (track), briefly press
the “RPT ”button (6) while the track/file
(track) is playing. The display will show
“RPT ”, and the track/file (track) will be
repeated.
To cancel the track/file (track) repeat-play
mode, briefly press the “RPT ”button
twice. The “RPT”indication will go off,
and the normal playback mode will be
resumed.
NOTE. Each time you briefly press the
button, the mode will change to the
next one in the following sequence.If you accidentally press the button and
cancel the track/file (track) repeat-play
mode, press it again to reselect the
repeat-play mode.
. The repeat-play mode will be can-
celled if you perform any of the follow-
ing steps:
.Press the “RDM ”button
. Press the “SCAN” button
. Press the “
”button
ProCarManuals.com
Page 207 of 409
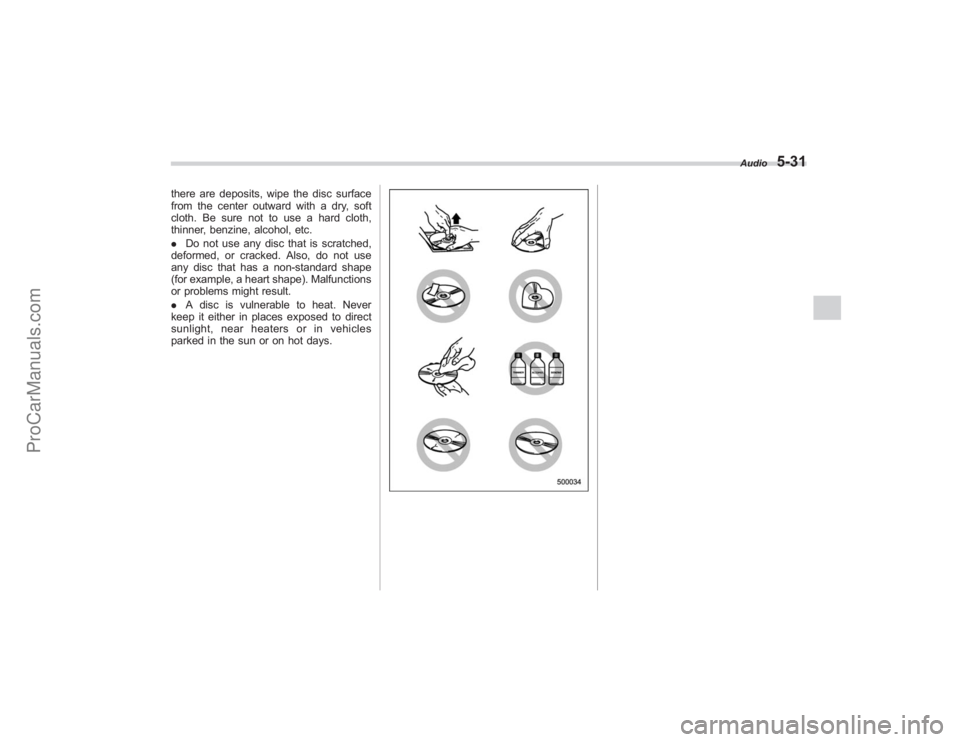
there are deposits, wipe the disc surface
from the center outward with a dry, soft
cloth. Be sure not to use a hard cloth,
thinner, benzine, alcohol, etc.
.Do not use any disc that is scratched,
deformed, or cracked. Also, do not use
any disc that has a non-standard shape
(for example, a heart shape). Malfunctions
or problems might result.
. A disc is vulnerable to heat. Never
keep it either in places exposed to direct
sunlight, near heaters or in vehicles
parked in the sun or on hot days.
Audio
5-31
ProCarManuals.com
Page 209 of 409
Interior light...................................................... 6-2
Dome light....................................................... 6-2
Cargo area light ............................................... 6-2
Rear gate light ................................................. 6-3
Automatic ambient light for center console area (if equipped) .................................................. 6-3
Map light........................................................... 6-3
Sun visors ........................................................ 6-4
Sun visor extension plate ................................. 6-4
Vanity mirror with light ..................................... 6-4
Storage compartment...................................... 6-5
Glove box........................................................ 6-5
Center console box .......................................... 6-6
Rear console .................................................... 6-7
Overhead console ............................................ 6-7
Cup holder........................................................ 6-7
Front passenger ’s cup holder ........................... 6-8
Rear seat (5-seater models)/Second-row seat (7-seater models) passenger ’s cup holder ....... 6-8
Third-row seat cup holders (7-seater models) ........................................... 6-9
Accessory power outlets ................................. 6-9
Coat hook ....................................................... 6-11
Rear (5-seater models)/Second-row
(7-seater models) passenger area .................. 6-11
Shopping bag hook........................................ 6-12
Floor mat ........................................................ 6-12 Cargo area cover (if equipped)
..................... 6-13
Using the cover.............................................. 6-13
To remove the cover ....................................... 6-14
To install the cover housing ............................ 6-14
Convenient tie-down hooks.......................... 6-15
Under-floor storage compartment ................ 6-15
5-seater models.............................................. 6-15
7-seater models .............................................. 6-16
HomeLink®Wireless Control System
(if equipped) ................................................ 6-16
Garage door opener programming in the
U.S.A. ........................................................... 6-17
Programming rolling-code-protected garage door openers in the U.S.A. .................................... 6-18
Programming for entrance gates and garage door openers in Canada ........................................ 6-19
Programming other devices ............................ 6-20
Operating the HomeLink ®Wireless Control
System ......................................................... 6-20
Reprogramming a single HomeLink ®
button .......................................................... 6-20
Erasing HomeLink ®button memory ................ 6-20
In case a problem occurs ................................ 6-20
Rear view camera (if equipped) .................... 6-21
Position of rear view camera........................... 6-22
How to use the rear view camera .................... 6-22
Viewing range on the screen ........................... 6-22
Distance marker (help line) ............................. 6-24
Interior equipment
6
ProCarManuals.com
Page 210 of 409
6-2
Interior equipment
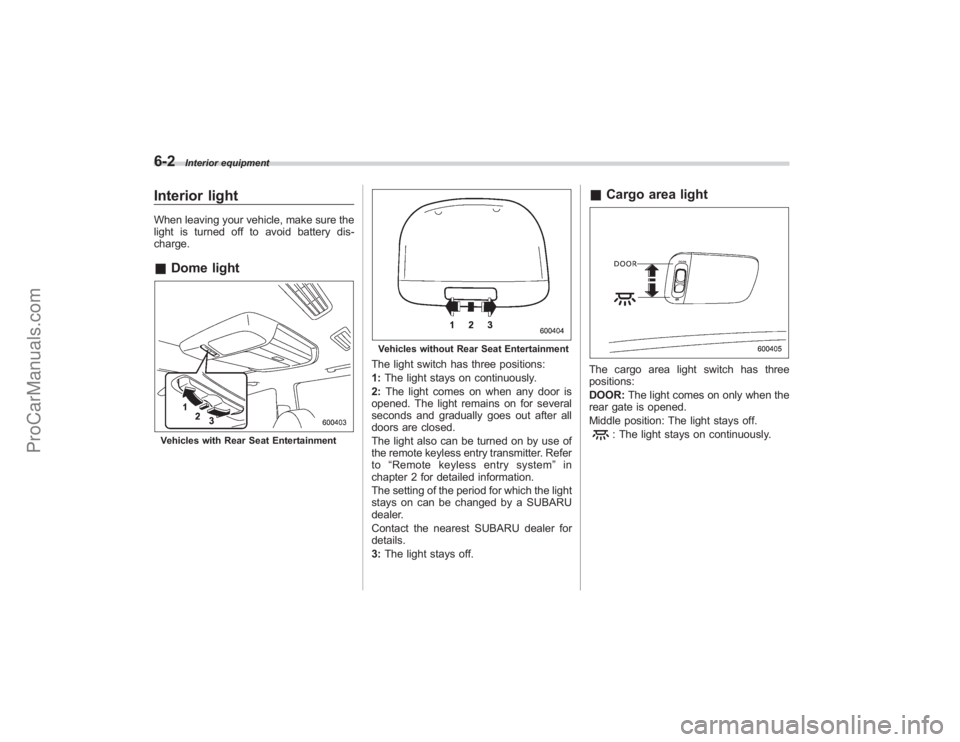
Interior lightWhen leaving your vehicle, make sure the
light is turned off to avoid battery dis-
charge.&Dome lightVehicles with Rear Seat Entertainment
Vehicles without Rear Seat EntertainmentThe light switch has three positions:
1:The light stays on continuously.
2: The light comes on when any door is
opened. The light remains on for several
seconds and gradually goes out after all
doors are closed.
The light also can be turned on by use of
the remote keyless entry transmitter. Refer
to “Remote keyless entry system ”in
chapter 2 for detailed information.
The setting of the period for which the light
stays on can be changed by a SUBARU
dealer.
Contact the nearest SUBARU dealer for
details.
3: The light stays off.
& Cargo area lightThe cargo area light switch has three
positions:
DOOR: The light comes on only when the
rear gate is opened.
Middle position: The light stays off.
: The light stays on continuously.
ProCarManuals.com