2008 SUBARU TRIBECA lights
[x] Cancel search: lightsPage 3 of 409
Warranties&Warranties for U.S.A.All SUBARU vehicles distributed by
Subaru of America, Inc. and sold at retail
by an authorized SUBARU dealer in the
United States come with the following
warranties:
. SUBARU Limited Warranty
. Emission Control Systems Warranty
. Emissions Performance Warranty
All warranty information, including details
of coverage and exclusions, is in the
“ Warranty and Maintenance Booklet ”.
Please read these warranties carefully.& Warranties for CanadaAll SUBARU vehicles distributed by
Subaru Canada, Inc. and sold at retail by
an authorized SUBARU dealer in Canada
come with the following warranties:
. SUBARU Limited Warranty
. Anti-Corrosion Warranty
. Emission Control Warranty
All warranty information, including details
of coverage and exclusions, is in the
“Warranty and Service Booklet ”. Please
read these warranties carefully.
CAUTION
. If your vehicle is equipped with a
navigation system and/or Rear
Seat Entertainment System, the
displays contain mercury. There-
fore, the displays of the naviga-
tion system and/or Rear Seat
Entertainment System must be
removed before vehicle disposal.
Once the displays have been
removed, please reuse, recycle
or dispose of them as hazardous
waste.
. If your vehicle is equipped with
High Intensity Discharge (HID)
headlights, the HID headlights
contain mercury. Therefore, it is
necessary to remove HID head-
lights before vehicle disposal.
Once removed, please reuse, re-
cycle or dispose of the HID head-
lights as hazardous waste.
How to use this Owner ’s
Manual& Using your Owner ’s ManualBefore you operate your vehicle, carefully
read this manual. To protect yourself and
extend the service life of your vehicle,
follow the instructions in this manual.
Failure to observe these instructions may
result in serious injury and damage to your
vehicle.
This manual is composed of fourteen
chapters. Each chapter begins with a brief
table of contents, so you can usually tell at
a glance if that chapter contains the
information you want.
Chapter 1: Seat, seatbelt and SRS
airbags
This chapter informs you how to use the
seat and seatbelt and contains precau-
tions for the SRS airbags.
Chapter 2: Keys and doors
This chapter informs you how to operate
the keys, locks and windows.
Chapter 3: Instruments and controls
This chapter informs you about the opera-
tion of instrument panel indicators and
how to use the instruments and other
switches.
1
– CONTINUED –
ProCarManuals.com
Page 5 of 409
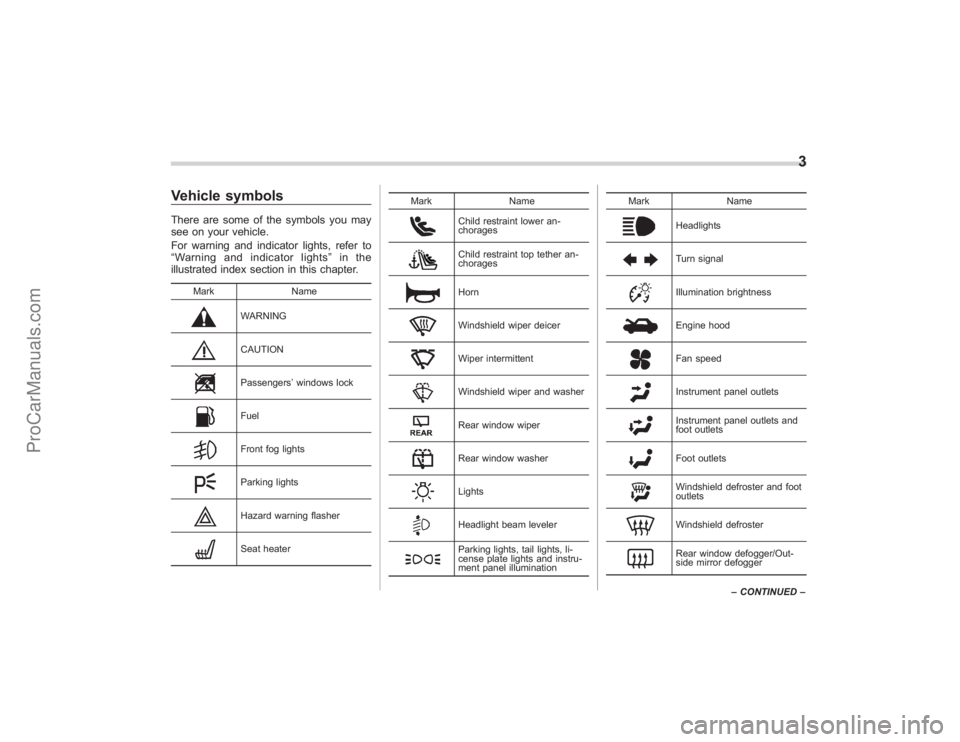
Vehicle symbolsThere are some of the symbols you may
see on your vehicle.
For warning and indicator lights, refer to
“Warning and indicator lights ”in the
illustrated index section in this chapter.
Mark Name
WARNINGCAUTIONPassengers’windows lockFuelFront fog lightsParking lightsHazard warning flasherSeat heater Mark Name
Child restraint lower an-
choragesChild restraint top tether an-
choragesHornWindshield wiper deicerWiper intermittentWindshield wiper and washerRear window wiperRear window washerLightsHeadlight beam levelerParking lights, tail lights, li-
cense plate lights and instru-
ment panel illuminationMark
Name
HeadlightsTurn signalIllumination brightnessEngine hoodFan speedInstrument panel outletsInstrument panel outlets and
foot outletsFoot outletsWindshield defroster and foot
outletsWindshield defrosterRear window defogger/Out-
side mirror defogger
3
–CONTINUED –
ProCarManuals.com
Page 15 of 409
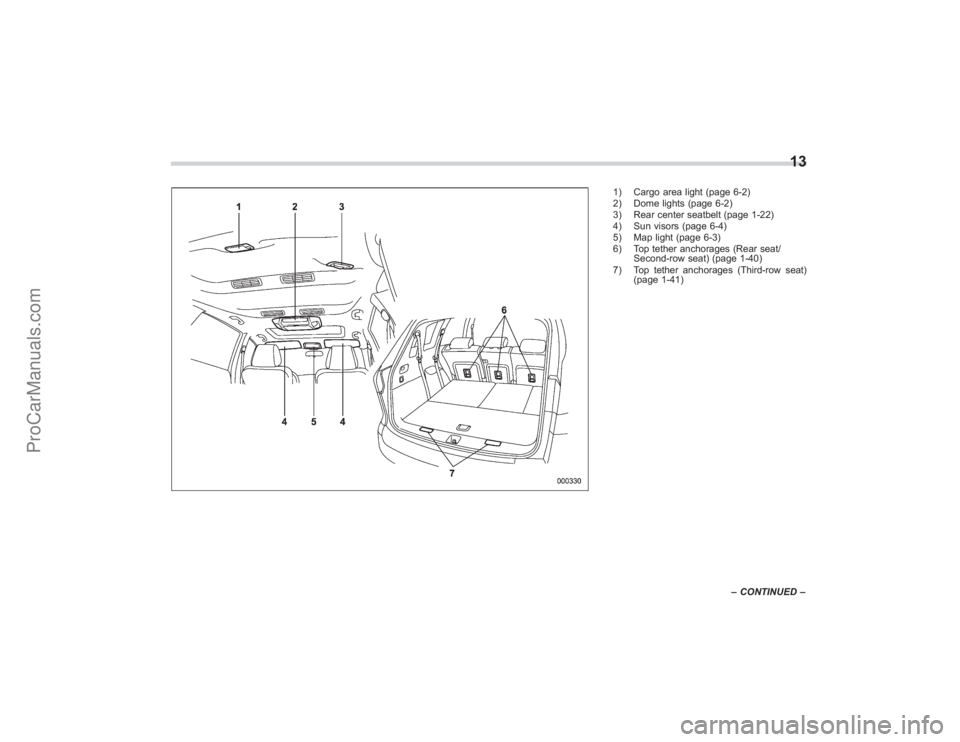
1) Cargo area light (page 6-2)
2) Dome lights (page 6-2)
3) Rear center seatbelt (page 1-22)
4) Sun visors (page 6-4)
5) Map light (page 6-3)
6) Top tether anchorages (Rear seat/Second-row seat) (page 1-40)
7) Top tether anchorages (Third-row seat) (page 1-41)
13
–CONTINUED –
ProCarManuals.com
Page 21 of 409
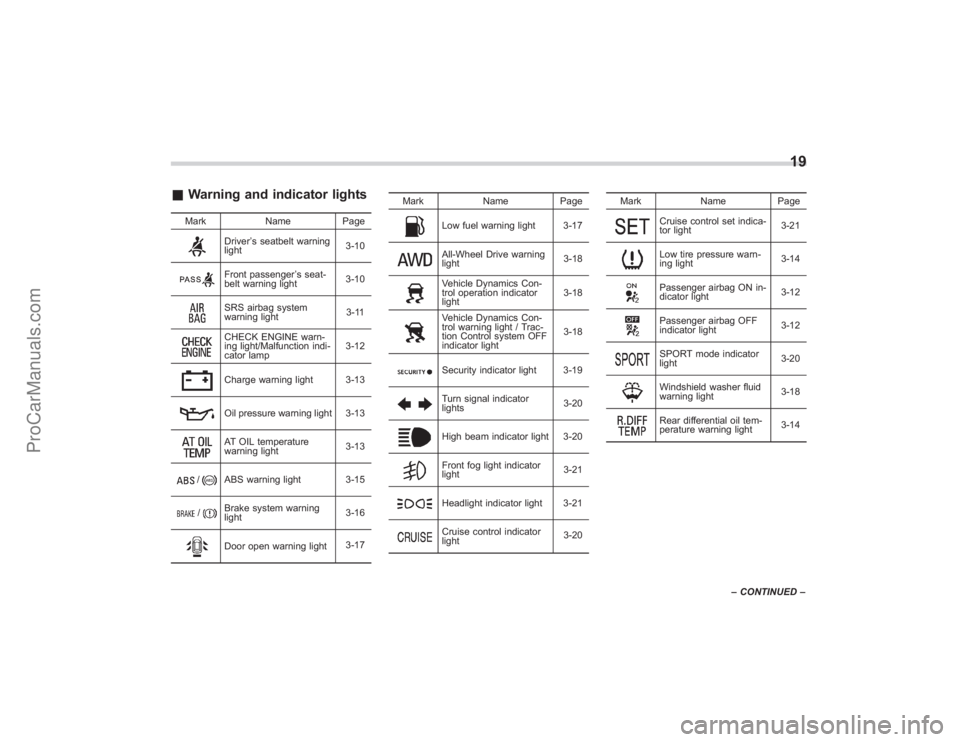
&Warning and indicator lights
Mark NamePage
Driver’s seatbelt warning
light 3-10Front passenger
’s seat-
belt warning light 3-10SRS airbag system
warning light 3-11CHECK ENGINE warn-
ing light/Malfunction indi-
cator lamp3-12Charge warning light 3-13Oil pressure warning light 3-13AT OIL temperature
warning light
3-13
/
ABS warning light 3-15
/
Brake system warning
light3-16Door open warning light
3-17Mark Name Page
Low fuel warning light 3-17All-Wheel Drive warning
light
3-18Vehicle Dynamics Con-
trol operation indicator
light3-18Vehicle Dynamics Con-
trol warning light / Trac-
tion Control system OFF
indicator light3-18Security indicator light 3-19Turn signal indicator
lights
3-20High beam indicator light 3-20Front fog light indicator
light3-21Headlight indicator light 3-21Cruise control indicator
light3-20Mark Name Page
Cruise control set indica-
tor light
3-21Low tire pressure warn-
ing light3-14Passenger airbag ON in-
dicator light
3-12Passenger airbag OFF
indicator light3-12SPORT mode indicator
light
3-20Windshield washer fluid
warning light3-18Rear differential oil tem-
perature warning light3-14
19
–
CONTINUED –
ProCarManuals.com
Page 41 of 409
&Emergency Locking Retrac-
tor (ELR)The driver ’s seatbelt has an Emergency
Locking Retractor (ELR).
The emergency locking retractor allows
normal body movement but the retractor
locks automatically during a sudden stop,
impact or if you pull the belt very quickly
out of the retractor.& Automatic/Emergency Lock-
ing Retractor (A/ELR)Each passenger ’s seatbelt has an Auto-
matic/Emergency Locking Retractor (A/
ELR). The Automatic/Emergency Locking
Retractor normally functions as an Emer-
gency Locking Retractor (ELR). The A/
ELR has an additional locking mode
“ Automatic Locking Retractor (ALR)
mode ”intended to secure a child restraint
system. When the seatbelt is once drawn
out completely and is then retracted even
slightly, the retractor locks the seatbelt in
that position and the seatbelt cannot be
extended. As the belt is rewinding, clicks
will be heard which indicate the retractor
functions as ALR. When the seatbelt is
retracted fully, ALR mode is released.
When securing a child restraint system on
the passengers’ seats, the seatbelt must
be changed over to the Automatic Locking Retractor (ALR) mode.
When the child restraint system is re-
moved, make sure that the retractor is
restored to the Emergency Locking Re-
tractor (ELR) function by allowing the
seatbelt to retract fully.
For instructions on how to convert the
retractor to the ALR mode and restore it to
the ELR mode, refer to the
“Installing child
restraint systems with A/ELR seatbelt ”
section in this chapter.
&
Seatbelt warning light
and chime
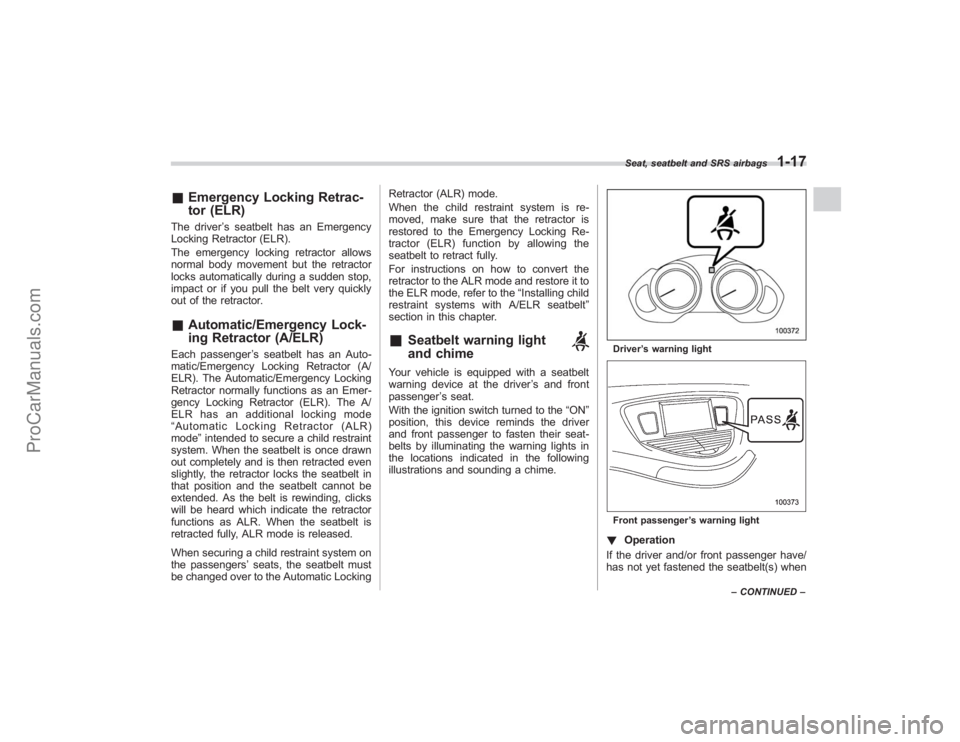
Your vehicle is equipped with a seatbelt
warning device at the driver ’s and front
passenger ’s seat.
With the ignition switch turned to the “ON”
position, this device reminds the driver
and front passenger to fasten their seat-
belts by illuminating the warning lights in
the locations indicated in the following
illustrations and sounding a chime.
Driver ’s warning lightFront passenger ’s warning light! Operation
If the driver and/or front passenger have/
has not yet fastened the seatbelt(s) when
Seat, seatbelt and SRS airbags
1-17
– CONTINUED –
ProCarManuals.com
Page 100 of 409
2-6
Keys and doors
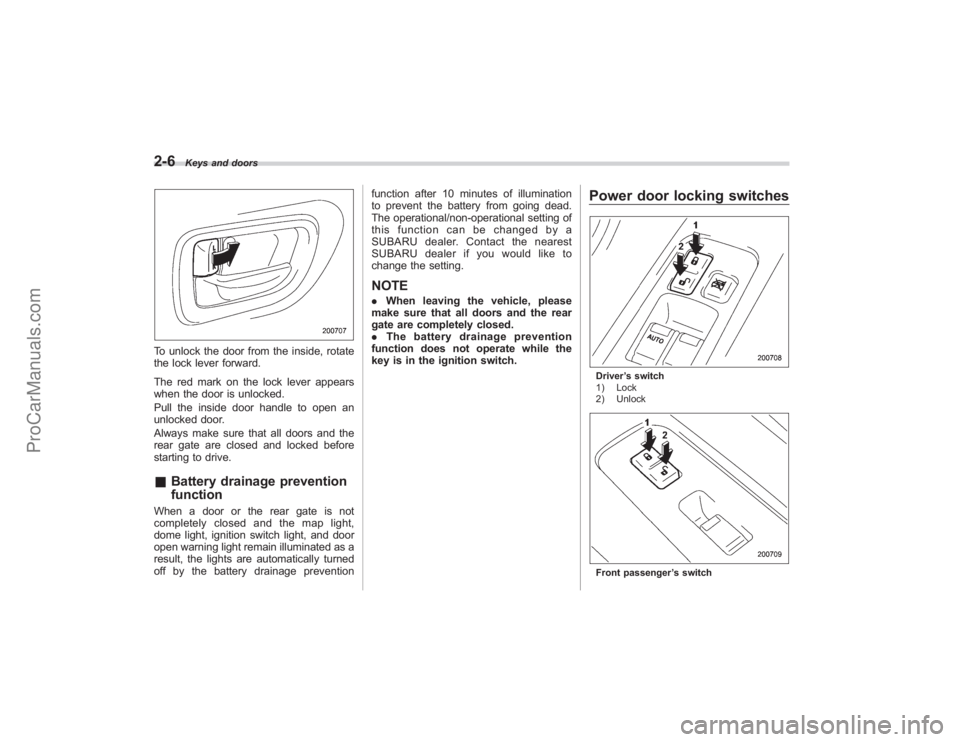
To unlock the door from the inside, rotate
the lock lever forward.
The red mark on the lock lever appears
when the door is unlocked.
Pull the inside door handle to open an
unlocked door.
Always make sure that all doors and the
rear gate are closed and locked before
starting to drive.&Battery drainage prevention
functionWhen a door or the rear gate is not
completely closed and the map light,
dome light, ignition switch light, and door
open warning light remain illuminated as a
result, the lights are automatically turned
off by the battery drainage prevention function after 10 minutes of illumination
to prevent the battery from going dead.
The operational/non-operational setting of
this function can be changed by a
SUBARU dealer. Contact the nearest
SUBARU dealer if you would like to
change the setting.
NOTE.
When leaving the vehicle, please
make sure that all doors and the rear
gate are completely closed.
. The battery drainage prevention
function does not operate while the
key is in the ignition switch.
Power door locking switchesDriver ’s switch
1) Lock
2) UnlockFront passenger ’s switch
ProCarManuals.com
Page 102 of 409
2-8
Keys and doors
entry system is located inside the key
head.
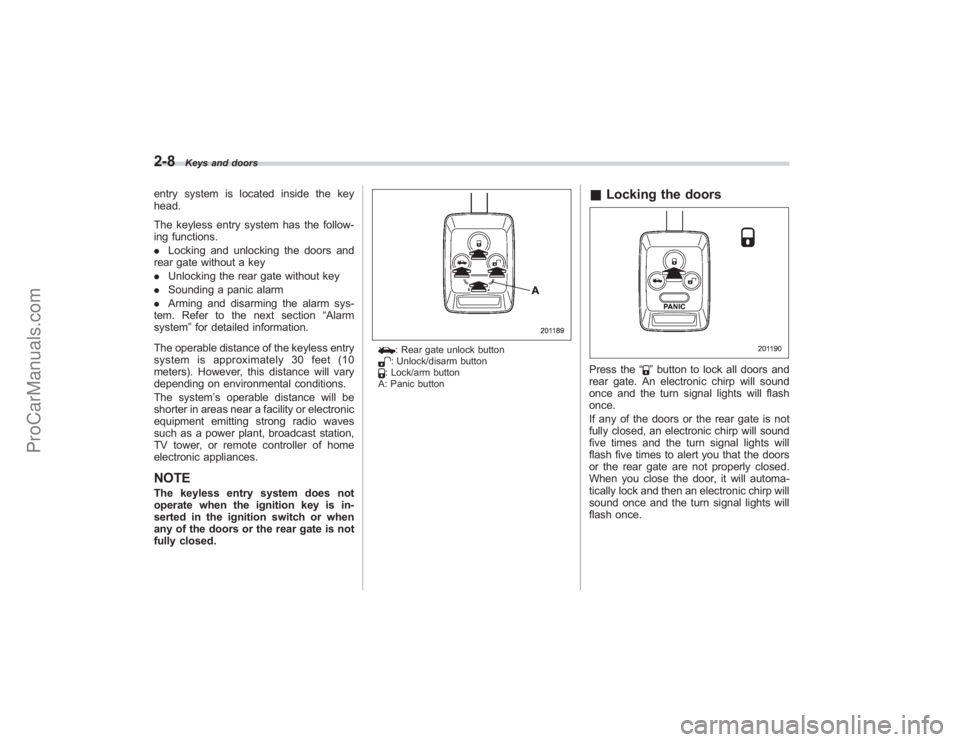
The keyless entry system has the follow-
ing functions.
.Locking and unlocking the doors and
rear gate without a key
. Unlocking the rear gate without key
. Sounding a panic alarm
. Arming and disarming the alarm sys-
tem. Refer to the next section “Alarm
system ”for detailed information.
The operable distance of the keyless entry
system is approximately 30 feet (10
meters). However, this distance will vary
depending on environmental conditions.
The system ’s operable distance will be
shorter in areas near a facility or electronic
equipment emitting strong radio waves
such as a power plant, broadcast station,
TV tower, or remote controller of home
electronic appliances.NOTEThe keyless entry system does not
operate when the ignition key is in-
serted in the ignition switch or when
any of the doors or the rear gate is not
fully closed.
: Rear gate unlock button: Unlock/disarm button: Lock/arm button
A: Panic button
& Locking the doorsPress the “
”button to lock all doors and
rear gate. An electronic chirp will sound
once and the turn signal lights will flash
once.
If any of the doors or the rear gate is not
fully closed, an electronic chirp will sound
five times and the turn signal lights will
flash five times to alert you that the doors
or the rear gate are not properly closed.
When you close the door, it will automa-
tically lock and then an electronic chirp will
sound once and the turn signal lights will
flash once.
ProCarManuals.com
Page 103 of 409
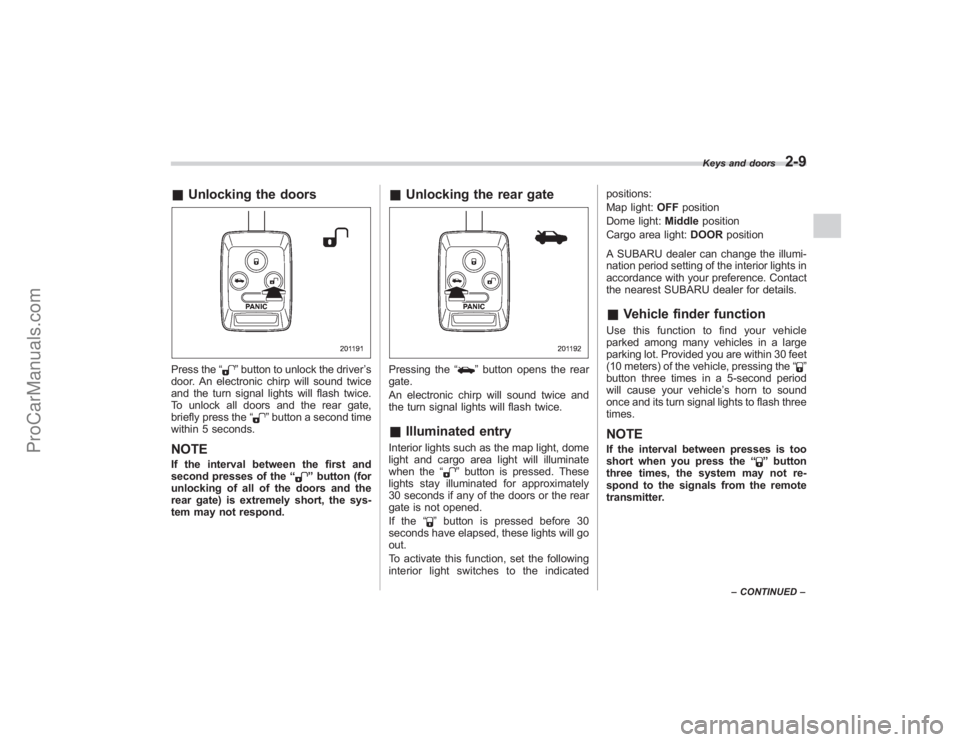
&Unlocking the doorsPress the “
”button to unlock the driver ’s
door. An electronic chirp will sound twice
and the turn signal lights will flash twice.
To unlock all doors and the rear gate,
briefly press the “
”button a second time
within 5 seconds.
NOTEIf the interval between the first and
second presses of the “
”button (for
unlocking of all of the doors and the
rear gate) is extremely short, the sys-
tem may not respond.
& Unlocking the rear gatePressing the “
”button opens the rear
gate.
An electronic chirp will sound twice and
the turn signal lights will flash twice.
& Illuminated entryInterior lights such as the map light, dome
light and cargo area light will illuminate
when the “
”button is pressed. These
lights stay illuminated for approximately
30 seconds if any of the doors or the rear
gate is not opened.
If the “
”button is pressed before 30
seconds have elapsed, these lights will go
out.
To activate this function, set the following
interior light switches to the indicated positions:
Map light:
OFFposition
Dome light: Middleposition
Cargo area light: DOORposition
A SUBARU dealer can change the illumi-
nation period setting of the interior lights in
accordance with your preference. Contact
the nearest SUBARU dealer for details.
& Vehicle finder functionUse this function to find your vehicle
parked among many vehicles in a large
parking lot. Provided you are within 30 feet
(10 meters) of the vehicle, pressing the “
”
button three times in a 5-second period
will cause your vehicle ’s horn to sound
once and its turn signal lights to flash three
times.
NOTEIf the interval between presses is too
short when you press the “
”button
three times, the system may not re-
spond to the signals from the remote
transmitter.
Keys and doors
2-9
– CONTINUED –
ProCarManuals.com