2008 SUBARU TRIBECA transmission
[x] Cancel search: transmissionPage 28 of 409
1-4
Seat, seatbelt and SRS airbags
switch.
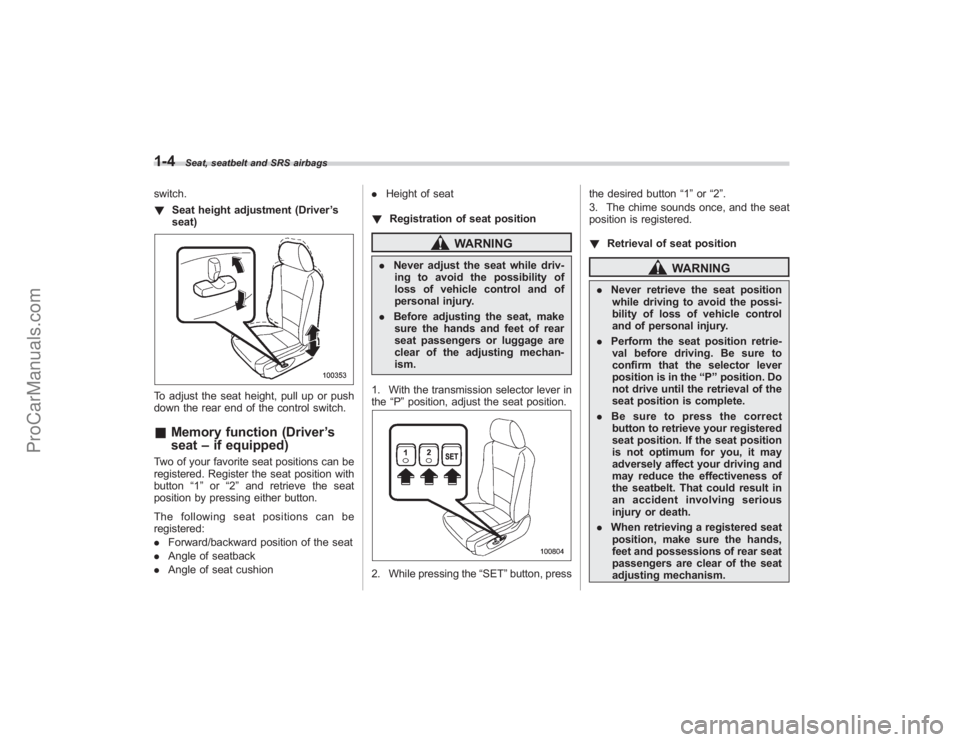
!Seat height adjustment (Driver ’s
seat)To adjust the seat height, pull up or push
down the rear end of the control switch.& Memory function (Driver ’s
seat –if equipped)Two of your favorite seat positions can be
registered. Register the seat position with
button “1” or “2” and retrieve the seat
position by pressing either button.
The following seat positions can be
registered:
. Forward/backward position of the seat
. Angle of seatback
. Angle of seat cushion .
Height of seat
! Registration of seat position
WARNING
.Never adjust the seat while driv-
ing to avoid the possibility of
loss of vehicle control and of
personal injury.
. Before adjusting the seat, make
sure the hands and feet of rear
seat passengers or luggage are
clear of the adjusting mechan-
ism.
1. With the transmission selector lever in
the “P”position, adjust the seat position.2. While pressing the “SET”button, press the desired button
“1”or “2”.
3. The chime sounds once, and the seat
position is registered.
! Retrieval of seat position
WARNING
.Never retrieve the seat position
while driving to avoid the possi-
bility of loss of vehicle control
and of personal injury.
. Perform the seat position retrie-
val before driving. Be sure to
confirm that the selector lever
position is in the “P ” position. Do
not drive until the retrieval of the
seat position is complete.
. Be sure to press the correct
button to retrieve your registered
seat position. If the seat position
is not optimum for you, it may
adversely affect your driving and
may reduce the effectiveness of
the seatbelt. That could result in
an accident involving serious
injury or death.
. When retrieving a registered seat
position, make sure the hands,
feet and possessions of rear seat
passengers are clear of the seat
adjusting mechanism.
ProCarManuals.com
Page 29 of 409
.When any trouble or a malfunc-
tion occurs during the retrieval of
the seat position, stop the retrie-
val of the seat position using any
of the control switches for man-
ual adjustment, seat memory set
button, seat memory registered
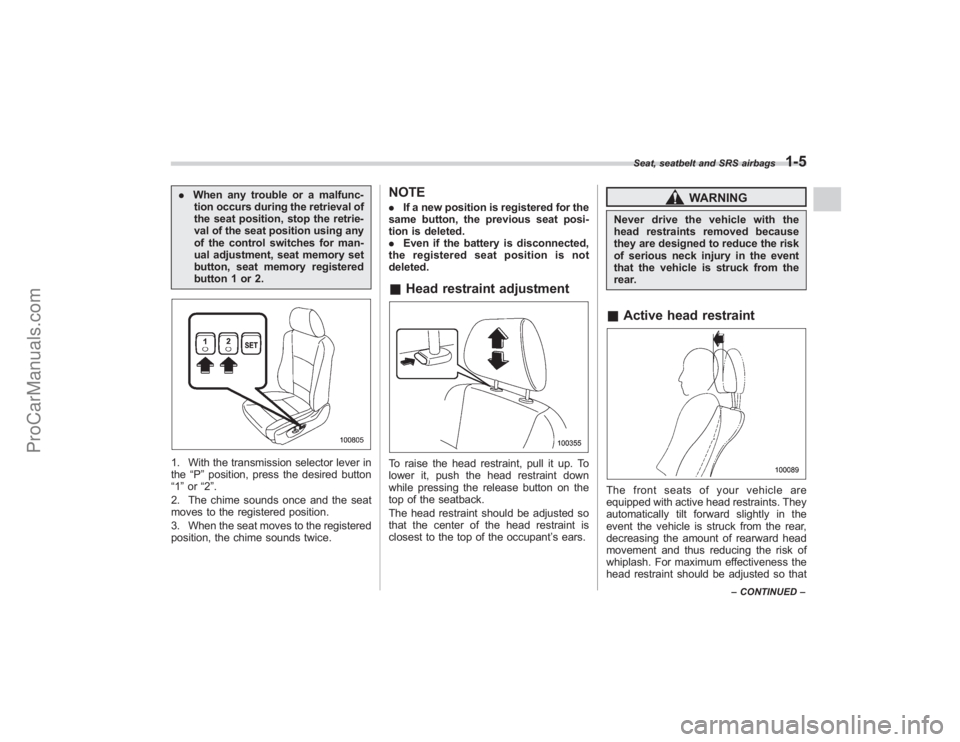
button 1 or 2.1. With the transmission selector lever in
the “P”position, press the desired button
“1 ”or “2”.
2. The chime sounds once and the seat
moves to the registered position.
3. When the seat moves to the registered
position, the chime sounds twice.
NOTE. If a new position is registered for the
same button, the previous seat posi-
tion is deleted.
. Even if the battery is disconnected,
the registered seat position is not
deleted.& Head restraint adjustmentTo raise the head restraint, pull it up. To
lower it, push the head restraint down
while pressing the release button on the
top of the seatback.
The head restraint should be adjusted so
that the center of the head restraint is
closest to the top of the occupant ’s ears.
WARNING
Never drive the vehicle with the
head restraints removed because
they are designed to reduce the risk
of serious neck injury in the event
that the vehicle is struck from the
rear.& Active head restraintThe front seats of your vehicle are
equipped with active head restraints. They
automatically tilt forward slightly in the
event the vehicle is struck from the rear,
decreasing the amount of rearward head
movement and thus reducing the risk of
whiplash. For maximum effectiveness the
head restraint should be adjusted so that
Seat, seatbelt and SRS airbags
1-5
–CONTINUED –
ProCarManuals.com
Page 133 of 409
NOTEThis light also comes on when the fuel
filler cap is not tightened until it clicks.
If you have recently refueled your vehicle,
the cause of the CHECK ENGINE warning
light/malfunction indicator lamp coming on
could be a loose or missing fuel filler cap.
Remove the cap and retighten it until it
clicks. Make sure nothing is interfering
with the sealing of the cap. Tightening the
cap will not make the CHECK ENGINE
warning light turn off immediately. It may
take several driving trips. If the light does
not go out, take your vehicle to your
authorized SUBARU dealer immediately.
!If the light is blinking:
If the light is blinking while driving, an
engine misfire condition has been de-
tected which may damage the emission
control system.
To prevent serious damage to the emis-
sion control system, you should do the
following.
. Reduce vehicle speed.
. Avoid hard acceleration.
. Avoid steep uphill grades.
. Reduce the amount of cargo, if possi-
ble.
. Stop towing a trailer as soon as
possible. The CHECK ENGINE warning light may
stop blinking and come on steadily after
several driving trips. You should have your
vehicle checked by an authorized
SUBARU dealer immediately.
&
Charge warning light
If this light comes on when the engine is
running, it may indicate that the charging
system is not working properly.
If the light comes on while driving or does
not go out after the engine starts, stop the
engine at the first safe opportunity and
check the alternator belt. If the belt is
loose, broken or if the belt is in good
condition but the light remains on, contact
your nearest SUBARU dealer immedi-
ately.&
Oil pressure warning
light
CAUTION
Do not operate the engine with the
oil pressure warning light on. This
may cause serious engine damage.
If this light comes on when the engine is
running, it may indicate that the engine oil
pressure is low and the lubricating system
is not working properly. If the light comes on while driving or does
not go out after the engine starts, stop the
engine at the first safe opportunity and
check the engine oil level. If the oil level is
low, add oil immediately. If the engine oil is
at the proper level but the light remains on,
contact your nearest SUBARU dealer
immediately.
&
AT OIL TEMPerature
warning light
The AT oil temperature warning light
comes on when the ignition switch is
turned to the
“ON”position and goes out
after approximately 2 seconds.
If this light comes on when the engine is
running, it may indicate that the automatic
transmission fluid temperature is too hot.
If the light comes on while driving,
immediately stop the vehicle in a safe
place and let the engine idle until the
warning light goes off.
! Automatic transmission control
system warning
If the light flashes after the engine starts, it
may indicate that the automatic transmis-
sion control system is not working prop-
erly. Contact your nearest SUBARU deal-
er for service immediately.
Instruments and controls
3-13
– CONTINUED –
ProCarManuals.com
Page 140 of 409
3-20
Instruments and controls
section in chapter 2.)
If the indicator light does not flash, it may
indicate that immobilizer system may be
faulty. Contact your nearest SUBARU
dealer immediately.
In the event that an unauthorized key (for
example, an unauthorized duplicate) is
used, the security indicator light comes
on.&
SPORT mode indicator
light
This light comes on when the ignition
switch is turned to the“ON”position and
goes out after the engine has started.
When the selector lever is moved to the
manual gate, the SPORT mode is se-
lected and the indicator light comes on.
(Refer to the “Automatic transmission ”
section in chapter 7.)
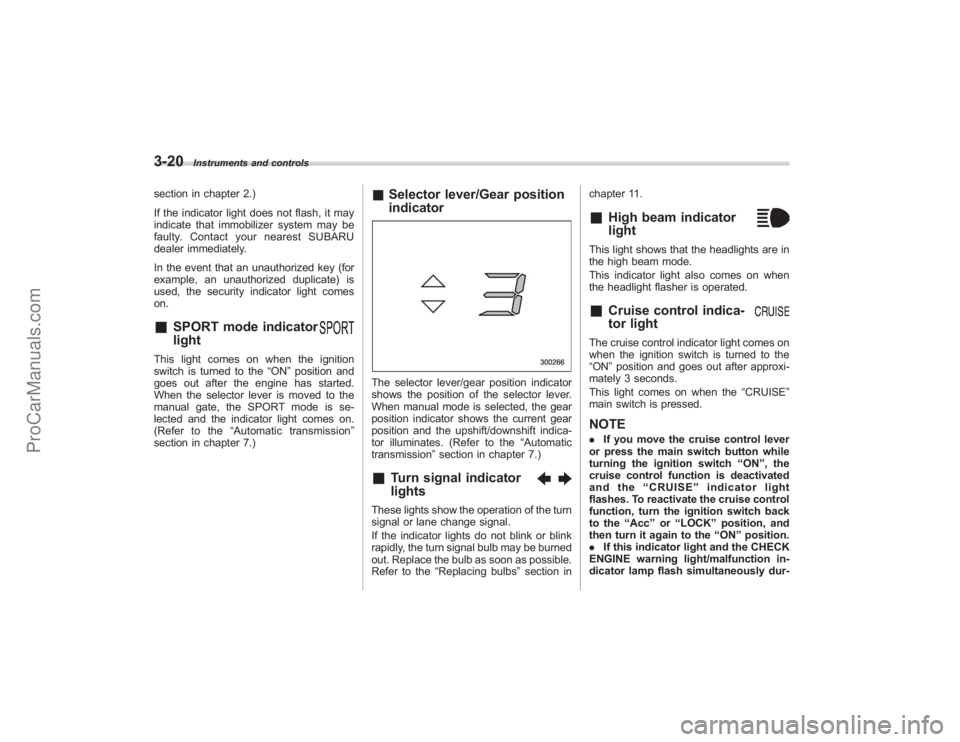
& Selector lever/Gear position
indicatorThe selector lever/gear position indicator
shows the position of the selector lever.
When manual mode is selected, the gear
position indicator shows the current gear
position and the upshift/downshift indica-
tor illuminates. (Refer to the “Automatic
transmission” section in chapter 7.)&
Turn signal indicator
lights
These lights show the operation of the turn
signal or lane change signal.
If the indicator lights do not blink or blink
rapidly, the turn signal bulb may be burned
out. Replace the bulb as soon as possible.
Refer to the“Replacing bulbs ”section in chapter 11.
&
High beam indicator
light
This light shows that the headlights are in
the high beam mode.
This indicator light also comes on when
the headlight flasher is operated.&
Cruise control indica-
tor light
The cruise control indicator light comes on
when the ignition switch is turned to the
“ON
”position and goes out after approxi-
mately 3 seconds.
This light comes on when the “CRUISE”
main switch is pressed.NOTE. If you move the cruise control lever
or press the main switch button while
turning the ignition switch “ON ”, the
cruise control function is deactivated
and the “CRUISE ”indicator light
flashes. To reactivate the cruise control
function, turn the ignition switch back
to the “Acc ”or “LOCK ”position, and
then turn it again to the “ON ”position.
. If this indicator light and the CHECK
ENGINE warning light/malfunction in-
dicator lamp flash simultaneously dur-
ProCarManuals.com
Page 156 of 409
3-36
Instruments and controls
speed is low; shorter when the vehicle
speed is high).
When you subsequently move the selec-
tor lever of the automatic transmission to
the“R ”position, the rear wiper will switch
to continuous operation. When you move
the selector lever from the “R”position to
some other position, the rear wiper will
return to intermittent operation.
! Washer
To wash the rear window while the rear
wiper is operating, turn the knob on the
end of the wiper control lever upward to
the “
”position. The washer fluid sprays
until you release the knob.
To wash the rear window when the rear
wiper is not in use, turn the knob on the
end of the wiper control lever downward to
the “”position. The washer fluid sprays
and the wiper operates until you release
the knob.
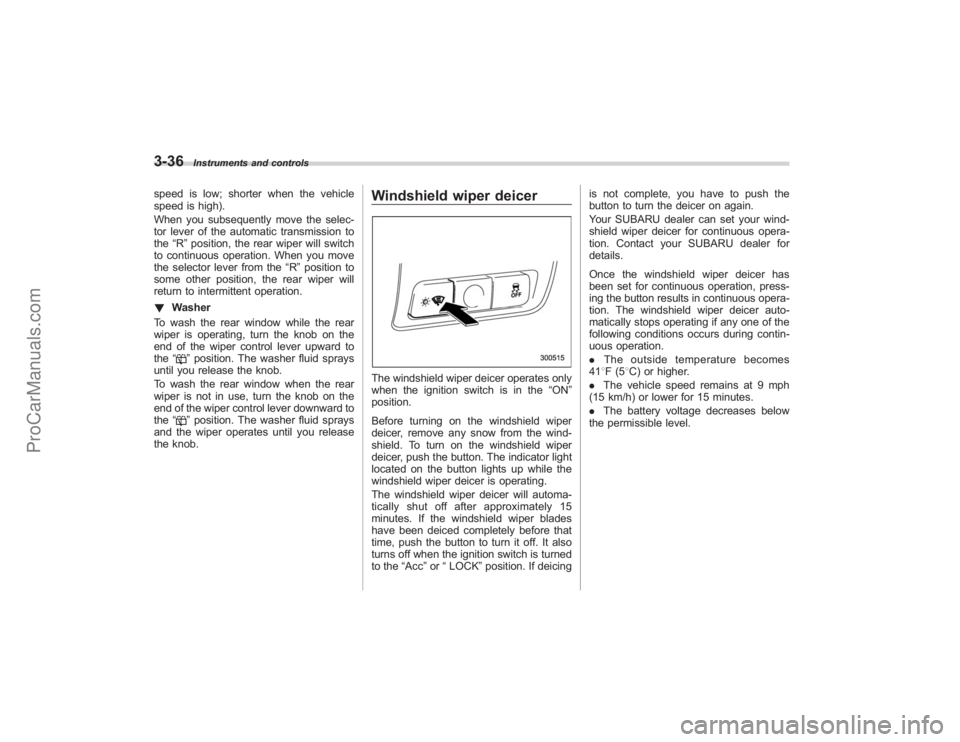
Windshield wiper deicerThe windshield wiper deicer operates only
when the ignition switch is in the “ON”
position.
Before turning on the windshield wiper
deicer, remove any snow from the wind-
shield. To turn on the windshield wiper
deicer, push the button. The indicator light
located on the button lights up while the
windshield wiper deicer is operating.
The windshield wiper deicer will automa-
tically shut off after approximately 15
minutes. If the windshield wiper blades
have been deiced completely before that
time, push the button to turn it off. It also
turns off when the ignition switch is turned
to the “Acc”or “LOCK” position. If deicing is not complete, you have to push the
button to turn the deicer on again.
Your SUBARU dealer can set your wind-
shield wiper deicer for continuous opera-
tion. Contact your SUBARU dealer for
details.
Once the windshield wiper deicer has
been set for continuous operation, press-
ing the button results in continuous opera-
tion. The windshield wiper deicer auto-
matically stops operating if any one of the
following conditions occurs during contin-
uous operation.
.
The outside temperature becomes
41 8F(5 8C) or higher.
. The vehicle speed remains at 9 mph
(15 km/h) or lower for 15 minutes.
. The battery voltage decreases below
the permissible level.
ProCarManuals.com
Page 158 of 409
3-38
Instruments and controls
MirrorsAlways check that the inside and outside
mirrors are properly adjusted before you
start driving.&Inside mirrorThe inside mirror has a day and night
position. Pull the tab at the bottom of the
mirror toward you for the night position.
Push it away for the day position. The
night position reduces glare from head-
lights.
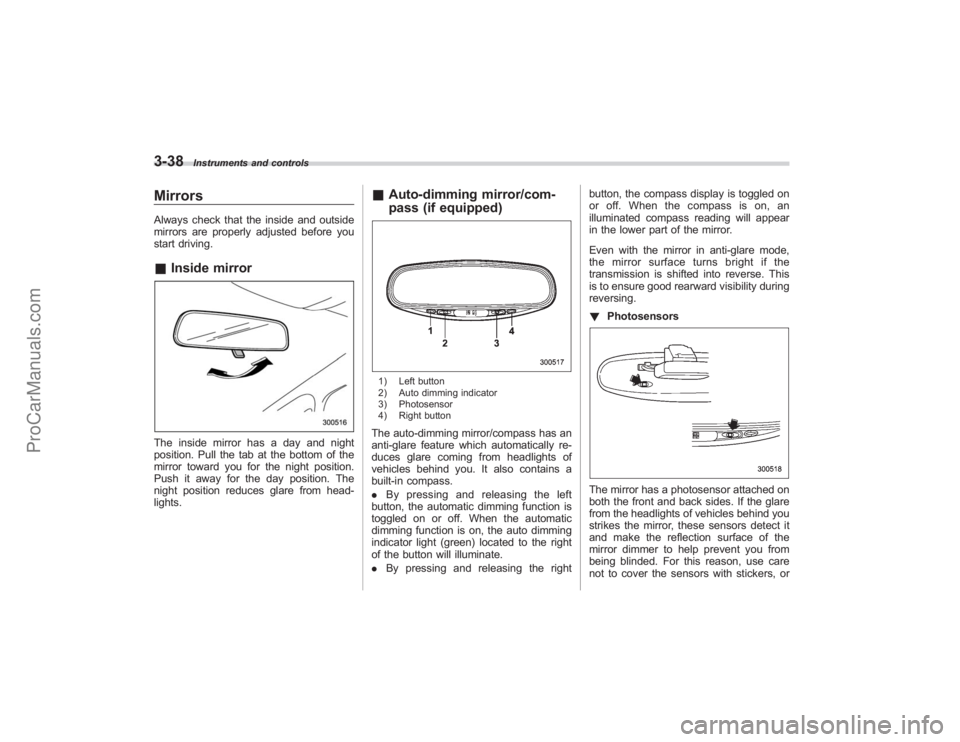
&Auto-dimming mirror/com-
pass (if equipped)1) Left button
2) Auto dimming indicator
3) Photosensor
4) Right buttonThe auto-dimming mirror/compass has an
anti-glare feature which automatically re-
duces glare coming from headlights of
vehicles behind you. It also contains a
built-in compass.
. By pressing and releasing the left
button, the automatic dimming function is
toggled on or off. When the automatic
dimming function is on, the auto dimming
indicator light (green) located to the right
of the button will illuminate.
. By pressing and releasing the right button, the compass display is toggled on
or off. When the compass is on, an
illuminated compass reading will appear
in the lower part of the mirror.
Even with the mirror in anti-glare mode,
the mirror surface turns bright if the
transmission is shifted into reverse. This
is to ensure good rearward visibility during
reversing.
!
Photosensors
The mirror has a photosensor attached on
both the front and back sides. If the glare
from the headlights of vehicles behind you
strikes the mirror, these sensors detect it
and make the reflection surface of the
mirror dimmer to help prevent you from
being blinded. For this reason, use care
not to cover the sensors with stickers, or
ProCarManuals.com
Page 235 of 409
Fuel................................................................... 7-2
Fuel requirements ............................................ 7-2
Fuel filler lid and cap ........................................ 7-3
State emission testing (U.S. only) ................... 7-5
Preparing to drive ............................................ 7-7
Starting the engine ........................................... 7-7
Stopping the engine ......................................... 7-8
Remote engine start system (dealer option) ............................................... 7-8
Starting your vehicle ........................................ 7-9
Remote start safety features ............................. 7-9
Entering the vehicle while it is running via remote start ............................................................... 7-9
Entering the vehicle following remote engine start shutdown ....................................................... 7-9
Pre-heating or pre-cooling the interior of the vehicle ......................................................... 7-10
Service mode ................................................. 7-10
Remote transmitter programming and programmable feature option ........................ 7-10
System maintenance ....................................... 7-11
Automatic transmission ................................. 7-12
Selector lever................................................. 7-13
Selector lever reverse inhibiting function . ....... 7-14
Selection of manual mode .............................. 7-15
Maximum speeds ........................................... 7-16
Driving tips .................................................... 7-16
SPORT mode ................................................. 7-17 Shift lock release
............................................ 7-17
Power steering............................................... 7-18
Braking ........................................................... 7-18
Braking tips .................................................... 7-18
Brake system ................................................. 7-19
Disc brake pad wear warning indicators .......... 7-19
ABS (Anti-lock Brake System)...................... 7-20
ABS system self-check................................... 7-20
ABS warning light ........................................... 7-21
Electronic Brake Force Distribution (EBD)
system ......................................................... 7-22
Steps to take if EBD system fails .................... 7-22
Vehicle Dynamics Control system ................ 7-23
Vehicle Dynamics Control system monitor....... 7-25
Traction Control system OFF switch ................ 7-26
Tire pressure monitoring system
(TPMS) ......................................................... 7-27
Parking your vehicle ..................................... 7-29
Parking brake................................................. 7-29
Parking tips .................................................... 7-29
Cruise control ................................................ 7-30
To set cruise control ....................................... 7-30
To temporarily cancel the cruise control .......... 7-31
To turn off the cruise control ........................... 7-31
To change the cruising speed .. ....................... 7-32
Cruise control indicator light ........................... 7-33
Cruise control set indicator light ..................... 7-33
Starting and operating
7
ProCarManuals.com
Page 246 of 409

7-12
Starting and operating
on the old batteries before removing them
to ensure that the new batteries are
inserted properly (battery“+”should be
pointed away from the transmitter circuit
board on both batteries).
3. Carefully snap the case halves back
together, then test the remote control.NOTEThis device complies with Part 15 of
the FCC Rules and with RSS-210 of
Industry Canada. Operation is subject
to the following two conditions: (1) This
device may not cause harmful inter-
ference, and (2) this device must
accept any interference received, in-
cluding interference that may cause
undesired operation.
Changes or modifications not ex-
pressly approved by the party respon-
sible for compliance could void the
user ’s authority to operate the equip-
ment.
Automatic transmissionThe automatic transmission is electroni-
cally controlled and provides 5 forward
speeds and 1 reverse speed. Also, it has a
manual mode and a SPORT mode.
WARNING
Do not shift from the “P ” or “N ”
position into the “D ” or “R ” position
while depressing the accelerator
pedal. This may cause the vehicle
to jump forward or backward.
CAUTION
. Shift into the “P ” or “R ” position
only after the vehicle is comple-
tely stopped. Shifting while the
vehicle is moving may cause
damage to the transmission.
. Do not race the engine for more
than 5 seconds in any position
except the “N ” or “P ” position
when the brake is set or when
chocks are used in the wheels.
This may cause the automatic
transmission fluid to overheat.
. Avoid shifting from one of the
forward driving positions into the “
R ” position or vice versa until
the vehicle has completely
stopped. Such shifting may
cause damage to the transmis-
sion.
. When parking the vehicle, first
securely apply the parking brake
and then place the selector lever
in the “P ” position. Avoid parking
for a long time with the selector
lever in any other position as
doing so could result in a dead
battery.
NOTE. When the engine coolant tempera-
ture is still low, your vehicle ’s auto-
matic transmission will up-shift at high-
er engine speeds than when the cool-
ant temperature is sufficiently high in
order to shorten the warm-up time and
improve driveability. The gearshift tim-
ing will automatically shift to the nor-
mal timing after the engine has warmed
up.
. Immediately after ATF (automatic
transmission fluid) is replaced, you
may feel that the automatic transmis-
sion operation is somewhat unusual.
This results from invalidation of data
which the on-board computer has
ProCarManuals.com