2008 SUBARU TRIBECA audio
[x] Cancel search: audioPage 4 of 409
2Chapter 4: Climate control
This chapter informs you how to operate
the climate control.
Chapter 5: Audio
This chapter informs you how to operate
your audio system.
Chapter 6: Interior equipment
This chapter informs you how to operate
interior equipment.
Chapter 7: Starting and operating
This chapter informs you how to start and
operate your SUBARU.
Chapter 8: Driving tips
This chapter informs you how to drive your
SUBARU in various conditions and ex-
plains some safety tips on driving.
Chapter 9: In case of emergency
This chapter informs you what to do if you
have a problem while driving, such as a
flat tire or engine overheating.
Chapter 10: Appearance care
This chapter informs you how to keep your
SUBARU looking good.
Chapter 11: Maintenance and service
This chapter informs you when you need
to take your SUBARU to the dealer for
scheduled maintenance and informs you
how to keep your SUBARU running
properly.Chapter 12: Specifications
This chapter informs you about dimension
and capacities of your SUBARU.
Chapter 13: Consumer information and
Reporting safety defects
This chapter informs you about Tire
information, Uniform tire quality grading
standards and Reporting safety defects.
Chapter 14: Index
This is an alphabetical listing of all that’
sin
this manual. You can use it to quickly find
something you want to read.
& Safety warningsYou will find a number of WARNINGs,
CAUTIONs and NOTEs in this manual.
These safety warnings alert you to poten-
tial hazards that could result in injury to
you or others.
Please read these safety warnings as well
as all other portions of this manual care-
fully in order to gain a better understand-
ing of how to use your SUBARU vehicle
safely.
WARNING
A WARNING indicates a situation in
which serious injury or death could
result if the warning is ignored.
CAUTION
A CAUTION indicates a situation in
which injury or damage to your
vehicle, or both, could result if the
caution is ignored.NOTEA NOTE gives information or sugges-
tions how to make better use of your
vehicle.&Safety symbolYou will find a circle with a slash through it
in this manual. This symbol means “Do
not ”,“Do not do this ”,or“Do not let this
happen ”, depending upon the context.
ProCarManuals.com
Page 11 of 409
Table of contentsSeat, seatbelt and SRS airbags
1
Keys and doors
2
Instruments and controlsClimate control
4
Audio
5
Interior equipment
6
Starting and operating
7
Driving tips
8
In case of emergency
9
Appearance care
10
Maintenance and service
11
Specifications
12
Consumer information and Reporting safety defects
13
Index
143
ProCarManuals.com
Page 16 of 409
14
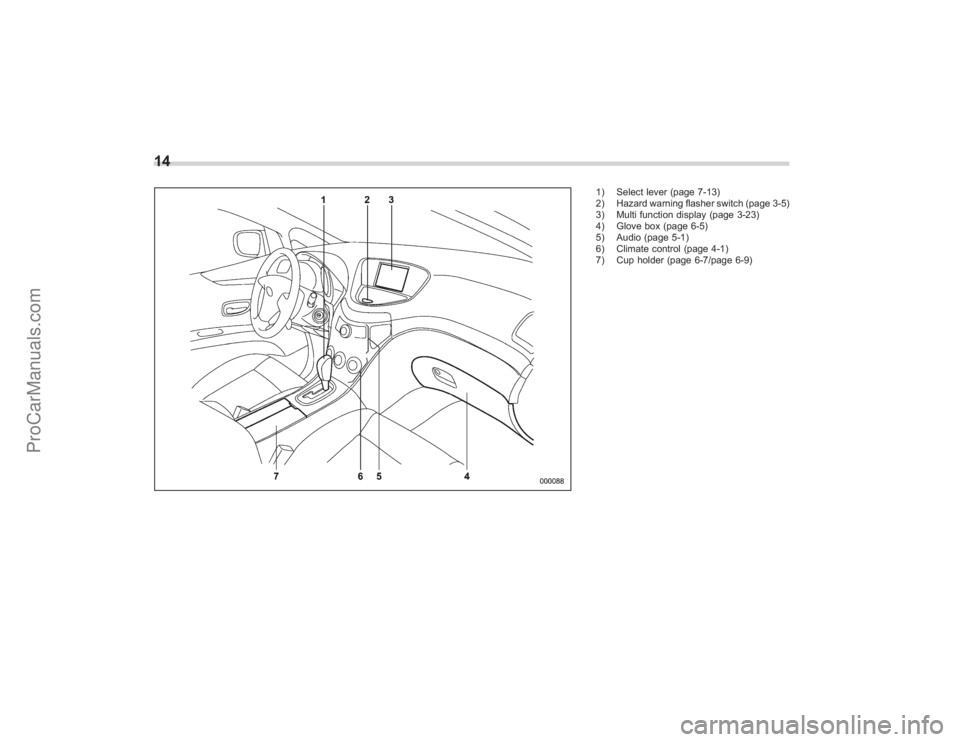
1) Select lever (page 7-13)
2) Hazard warning flasher switch (page 3-5)
3) Multi function display (page 3-23)
4) Glove box (page 6-5)
5) Audio (page 5-1)
6) Climate control (page 4-1)
7) Cup holder (page 6-7/page 6-9)
ProCarManuals.com
Page 75 of 409
front passenger’s seat such as by kicking.
. Do not spill liquid on the front passen-
ger ’s seat. If liquid is spilled, wipe it off
immediately.
. Do not remove or disassemble the front
passenger ’s seat.
. Do not install any accessory (such as
an audio amplifier) other than a genuine
SUBARU accessory under the front pas-
senger ’s seat.
. Do not place anything (shoes, umbrel-
la, etc.) under the front passenger ’s seat.
. The front passenger ’s seat must not be
used with the head restraint removed.
. Do not leave any article including a
child restraint system on the front passen-
ger ’s seat or the seatbelt tongue and
buckle engaged when you leave your
vehicle.
. Do not place a magnet near the
seatbelt buckle and the seatbelt retractor.
If the seatbelt buckle switch and/or front
passenger ’s occupant detection system
have failed, the SRS airbag system
warning light will illuminate. Have the
system inspected by your SUBARU deal-
er immediately if the SRS airbag system
warning light comes on.
If your vehicle has sustained impact, this
may affect the proper function of the
Subaru advanced frontal airbag system. Have your vehicle inspected at your
SUBARU dealer.
NOTEThe front passenger
’s SRS side airbag,
SRS curtain airbag and seatbelt pre-
tensioner are not controlled by the
Subaru advanced frontal airbag sys-
tem.
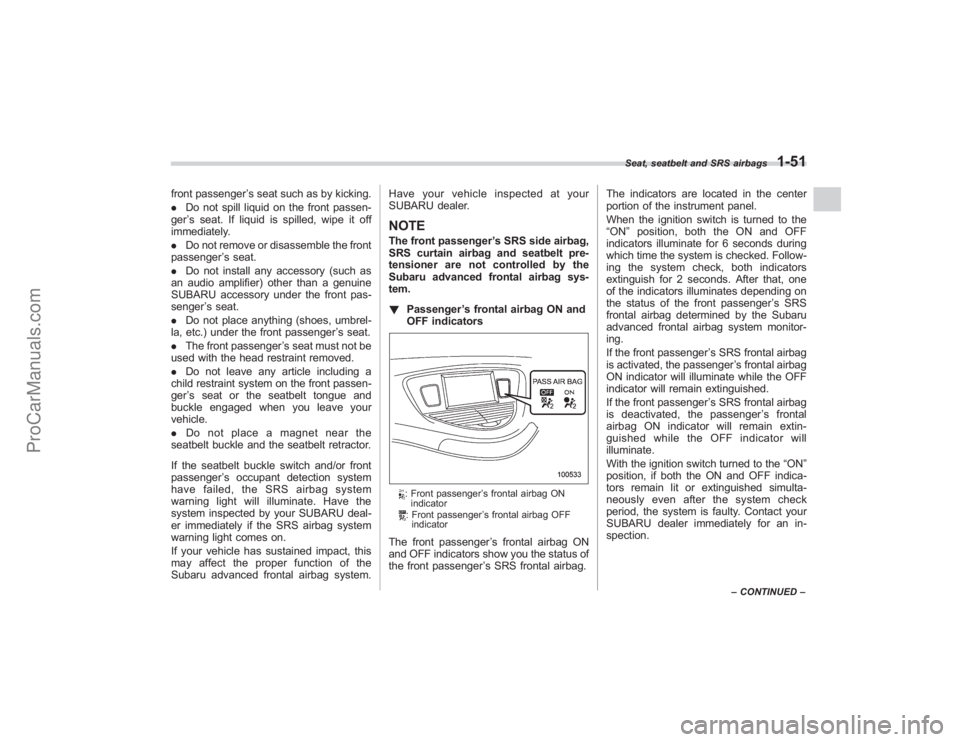
! Passenger ’s frontal airbag ON and
OFF indicators
: Front passenger ’s frontal airbag ON
indicator: Front passenger ’s frontal airbag OFF
indicator
The front passenger ’s frontal airbag ON
and OFF indicators show you the status of
the front passenger ’s SRS frontal airbag. The indicators are located in the center
portion of the instrument panel.
When the ignition switch is turned to the
“
ON ”position, both the ON and OFF
indicators illuminate for 6 seconds during
which time the system is checked. Follow-
ing the system check, both indicators
extinguish for 2 seconds. After that, one
of the indicators illuminates depending on
the status of the front passenger ’s SRS
frontal airbag determined by the Subaru
advanced frontal airbag system monitor-
ing.
If the front passenger ’s SRS frontal airbag
is activated, the passenger ’s frontal airbag
ON indicator will illuminate while the OFF
indicator will remain extinguished.
If the front passenger ’s SRS frontal airbag
is deactivated, the passenger ’s frontal
airbag ON indicator will remain extin-
guished while the OFF indicator will
illuminate.
With the ignition switch turned to the “ON”
position, if both the ON and OFF indica-
tors remain lit or extinguished simulta-
neously even after the system check
period, the system is faulty. Contact your
SUBARU dealer immediately for an in-
spection.
Seat, seatbelt and SRS airbags
1-51
– CONTINUED –
ProCarManuals.com
Page 143 of 409
378F(3 8C) or lower, the temperature
indication flashes to show that the road
surface may be frozen.
If the outside temperature drops to 37 8F
(3 8C) or lower while the display is giving
an indication other than the outside
temperature, the display switches to the
outside temperature indication and flashes
for 5 seconds before returning to its
original indication.
If the display is already indicating an
outside temperature of 37 8F(3 8C) or lower
when the ignition switch is turned to the
“ ON ”position, the indication does not
flash.NOTEThe outside temperature indication
may differ from the actual outside
temperature. The road surface freeze
warning indication should be treated
only as a guide. Be sure to check the
condition of the road surface before
driving.
Multi function display (Vehi-
cle without Navigation Sys-
tem)NOTE. If your vehicle is equipped with a
navigation system, refer to the sepa-
rate “Operating Instructions for Moni-
tor System ”.
. A liquid-crystal display is used in
the multi function display. You will find
its indications hard to see if you wear
polarized glasses.
Withtheignitionswitchinthe“ ON”
position, each successive push of the
“INFO ”button toggles the display in the
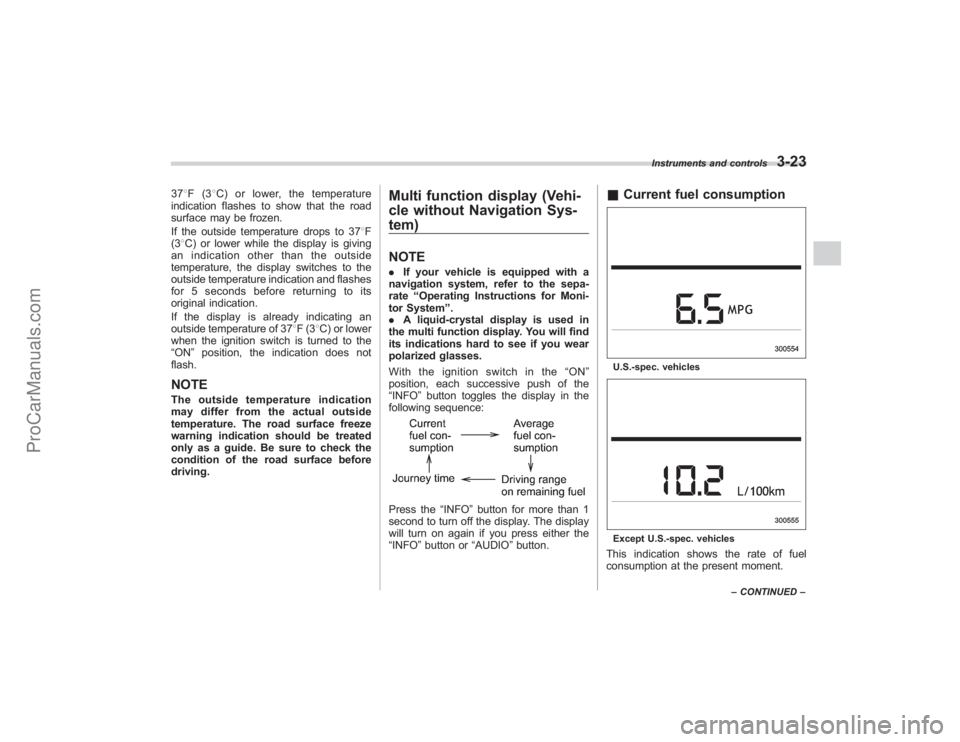
following sequence:Press the “INFO”button for more than 1
second to turn off the display. The display
will turn on again if you press either the
“INFO ”button or “AUDIO”button.
& Current fuel consumptionU.S.-spec. vehiclesExcept U.S.-spec. vehiclesThis indication shows the rate of fuel
consumption at the present moment.
Instruments and controls
3-23
–CONTINUED –
ProCarManuals.com
Page 148 of 409
3-28
Instruments and controls
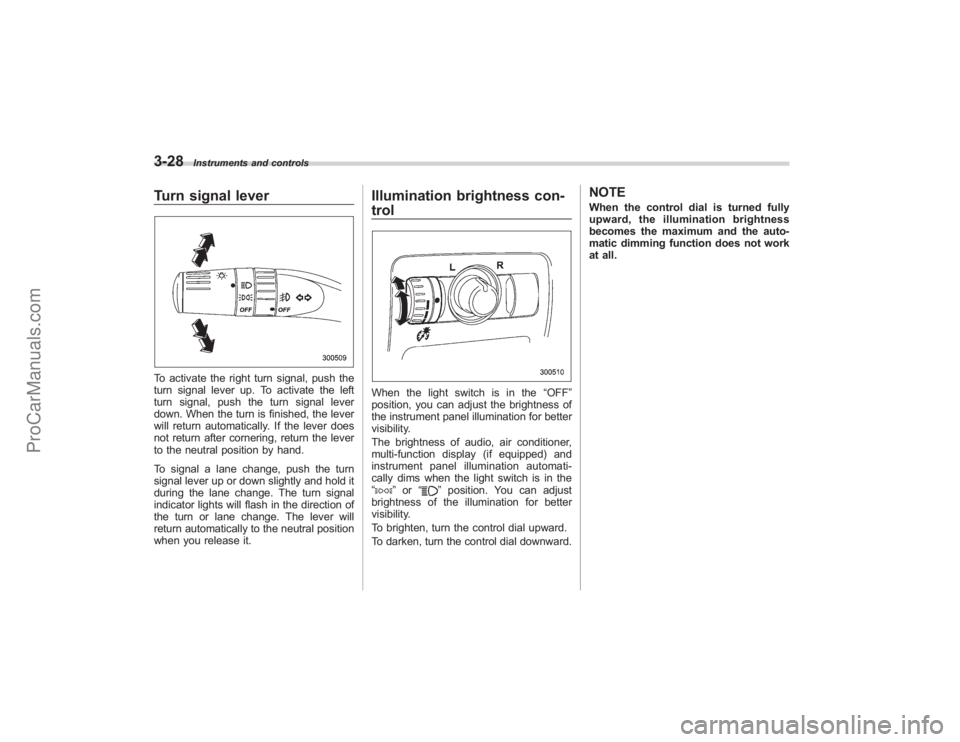
Turn signal leverTo activate the right turn signal, push the
turn signal lever up. To activate the left
turn signal, push the turn signal lever
down. When the turn is finished, the lever
will return automatically. If the lever does
not return after cornering, return the lever
to the neutral position by hand.
To signal a lane change, push the turn
signal lever up or down slightly and hold it
during the lane change. The turn signal
indicator lights will flash in the direction of
the turn or lane change. The lever will
return automatically to the neutral position
when you release it.
Illumination brightness con-
trolWhen the light switch is in the“OFF”
position, you can adjust the brightness of
the instrument panel illumination for better
visibility.
The brightness of audio, air conditioner,
multi-function display (if equipped) and
instrument panel illumination automati-
cally dims when the light switch is in the
“
” or “
”position. You can adjust
brightness of the illumination for better
visibility.
To brighten, turn the control dial upward.
To darken, turn the control dial downward.
NOTEWhen the control dial is turned fully
upward, the illumination brightness
becomes the maximum and the auto-
matic dimming function does not work
at all.
ProCarManuals.com
Page 177 of 409
Antenna system............................................... 5-2
Printed antenna................................................ 5-2
FM reception .................................................... 5-2
XM
TM
satellite radio reception
(if equipped) .................................................. 5-2
Installation of accessories ............................... 5-4
Audio set .......................................................... 5-4
Type A audio set .............................................. 5-4
Type B audio set .............................................. 5-4
Type A audio set (if equipped) ........................ 5-5
Radio operation................................................ 5-5 Compact disc player operation .
....................... 5-11
Type B audio set (if equipped)...................... 5-16
Radio operation.............................................. 5-16
Built in CD changer operation .. ....................... 5-22
Audio control buttons................................... 5-27
MODE button.................................................. 5-27
Aux unit operation ......................................... 5-29
Rear Seat Entertainment (RSE) system operation (if equipped) ................................... 5-29
Precautions to observe when handling a compact disc ............................................... 5-30
Audio
5
ProCarManuals.com
Page 178 of 409
5-2
Audio
Antenna system&Printed antenna
CAUTION
Do not use sharp instruments or
window cleaner containing abra-
sives to clean the inner surface of
the window on which the antenna is
printed. Doing so may damage the
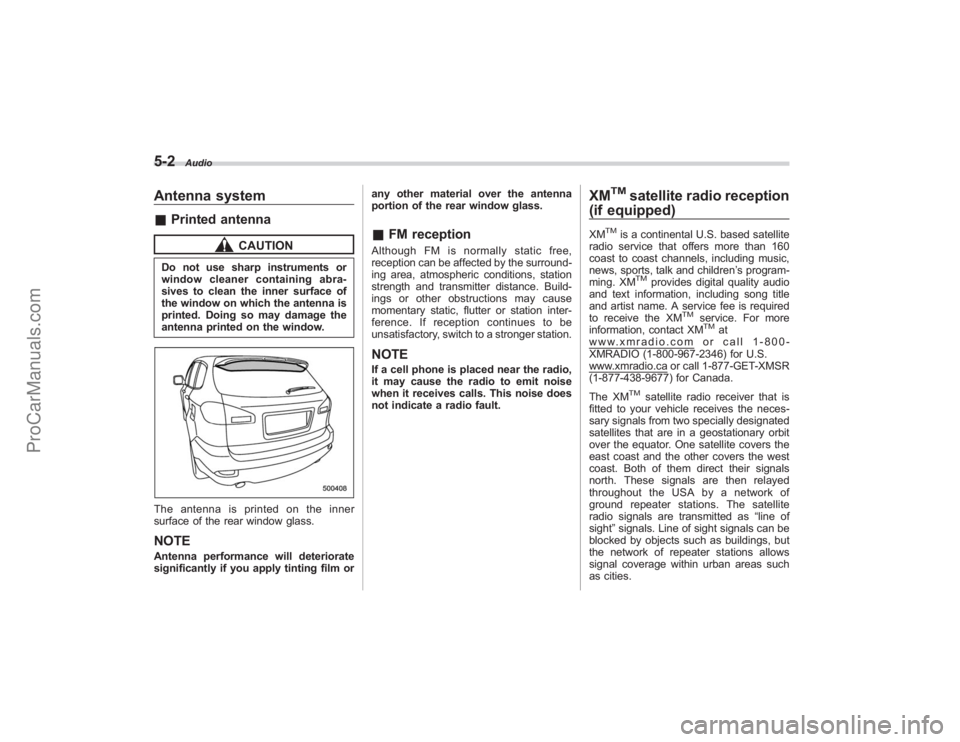
antenna printed on the window.The antenna is printed on the inner
surface of the rear window glass.NOTEAntenna performance will deteriorate
significantly if you apply tinting film or any other material over the antenna
portion of the rear window glass.
&
FM receptionAlthough FM is normally static free,
reception can be affected by the surround-
ing area, atmospheric conditions, station
strength and transmitter distance. Build-
ings or other obstructions may cause
momentary static, flutter or station inter-
ference. If reception continues to be
unsatisfactory, switch to a stronger station.NOTEIf a cell phone is placed near the radio,
it may cause the radio to emit noise
when it receives calls. This noise does
not indicate a radio fault.
XM
TM
satellite radio reception
(if equipped)
XM
TM
is a continental U.S. based satellite
radio service that offers more than 160
coast to coast channels, including music,
news, sports, talk and children ’s program-
ming. XM
TM
provides digital quality audio
and text information, including song title
and artist name. A service fee is required
to receive the XM
TM
service. For more
information, contact XMTM
at
www.xmradio.com or call 1-800-
XMRADIO (1-800-967-2346) for U.S.www.xmradio.ca or call 1-877-GET-XMSR
(1-877-438-9677) for Canada.
The XM
TM
satellite radio receiver that is
fitted to your vehicle receives the neces-
sary signals from two specially designated
satellites that are in a geostationary orbit
over the equator. One satellite covers the
east coast and the other covers the west
coast. Both of them direct their signals
north. These signals are then relayed
throughout the USA by a network of
ground repeater stations. The satellite
radio signals are transmitted as “line of
sight ”signals. Line of sight signals can be
blocked by objects such as buildings, but
the network of repeater stations allows
signal coverage within urban areas such
as cities.
ProCarManuals.com