Page 203 of 409

!How to unload CDs from the player
! Ejecting a CD from the player
Of the discs loaded, you can select and
remove only one disc.
1. Use the disc select button (9) to select
the disc to be ejected.
2. Briefly press the “
”button (8). The
selected disc will be ejected. The disc
number indicator will flash at this time.
When you remove the ejected disc, the
disc number indicator will go off.
To remove more discs in succession,
repeat Steps 1 and 2.
! Ejecting all discs from the player (All
disc ejection mode)
1. If you continue to press the “
”button
(8), the player will produce beep sound
and will enter the all disc ejection mode.
2. Remove the disc that has been
ejected. The other discs loaded will then
be ejected one after another. If you do not
remove the disc that has been ejected, the
“All disc ejection mode ”will be canceled.
NOTE. Avoid driving the vehicle with a CD
sticking out, because vibration might
make it fall out.
. If you press the “
”button while the player is in all disc ejection mode,
the mode will be cancelled following
ejection of the disc that is currently
being ejected.
.
If you press the “CD ”button while
the player is in all disc ejection mode,
the player will draw in the discs that
have been ejected and play them.
Audio control buttonsThese buttons are located on the spokes
of the steering wheel. They allow the
driver to control audio functions without
taking his/her hands off the steering
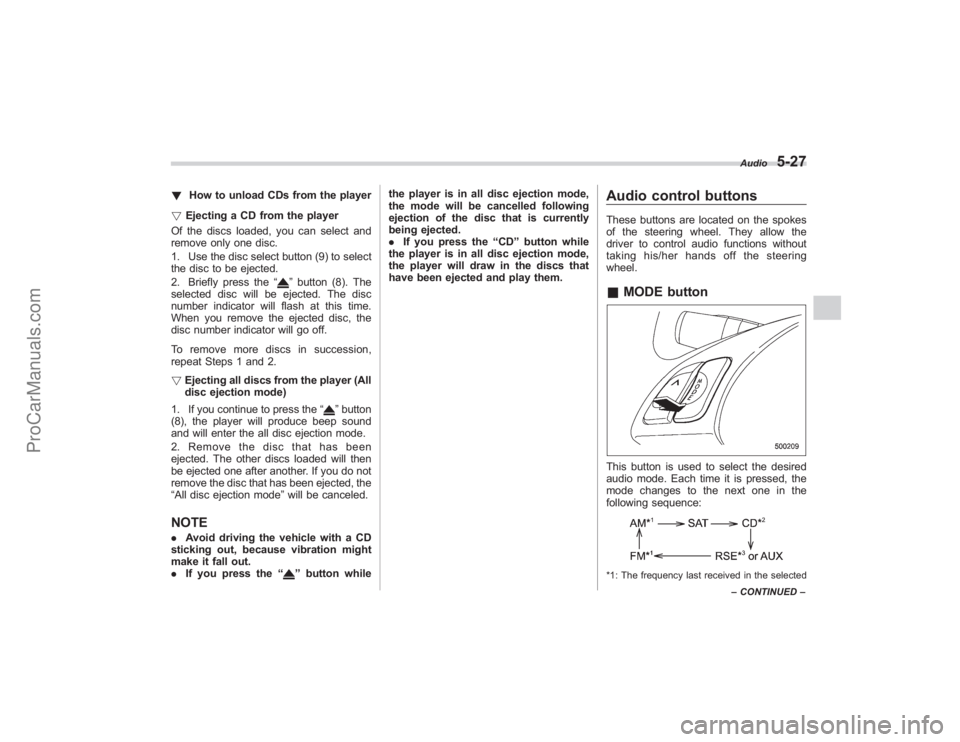
wheel.& MODE buttonThis button is used to select the desired
audio mode. Each time it is pressed, the
mode changes to the next one in the
following sequence:*1: The frequency last received in the selected Audio
5-27
–
CONTINUED –
ProCarManuals.com
Page 204 of 409

5-28
Audio
waveband will be displayed.
*2: Only when a CD is in the player.
*3: Only vehicle equipped with RSE (Rear Seat Entertainment)
! “
”and “
”buttons
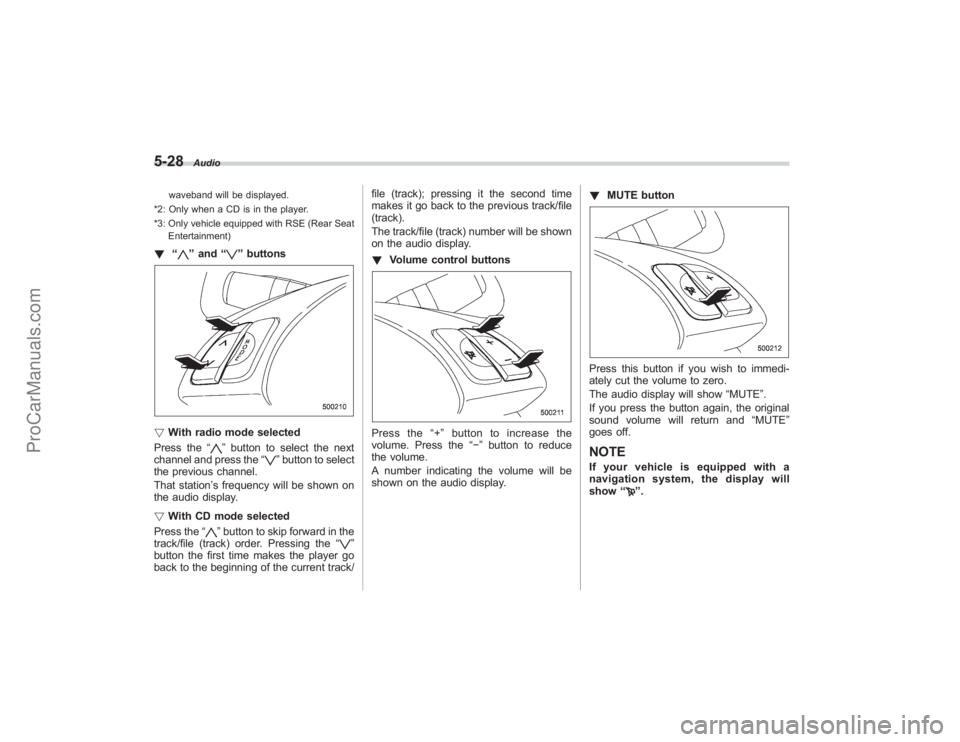
! With radio mode selected
Press the “
”button to select the next
channel and press the “
”button to select
the previous channel.
That station ’s frequency will be shown on
the audio display.
! With CD mode selected
Press the “
”button to skip forward in the
track/file (track) order. Pressing the “
”
button the first time makes the player go
back to the beginning of the current track/ file (track); pressing it the second time
makes it go back to the previous track/file
(track).
The track/file (track) number will be shown
on the audio display.
!
Volume control buttons
Press the “+ ” button to increase the
volume. Press the “−”button to reduce
the volume.
A number indicating the volume will be
shown on the audio display. !
MUTE button
Press this button if you wish to immedi-
ately cut the volume to zero.
The audio display will show “MUTE”.
If you press the button again, the original
sound volume will return and “MUTE ”
goes off.NOTEIf your vehicle is equipped with a
navigation system, the display will
show “
”.
ProCarManuals.com
Page 205 of 409

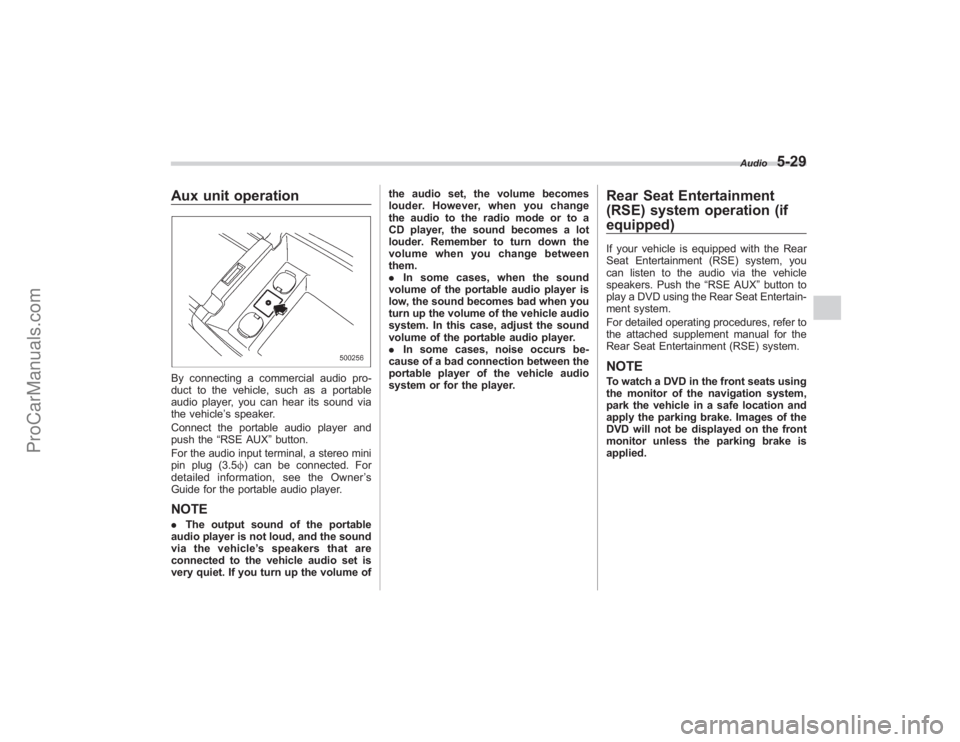
Aux unit operationBy connecting a commercial audio pro-
duct to the vehicle, such as a portable
audio player, you can hear its sound via
the vehicle’s speaker.
Connect the portable audio player and
push the “RSE AUX ”button.
For the audio input terminal, a stereo mini
pin plug (3.5 f) can be connected. For
detailed information, see the Owner ’s
Guide for the portable audio player.NOTE. The output sound of the portable
audio player is not loud, and the sound
via the vehicle ’s speakers that are
connected to the vehicle audio set is
very quiet. If you turn up the volume of the audio set, the volume becomes
louder. However, when you change
the audio to the radio mode or to a
CD player, the sound becomes a lot
louder. Remember to turn down the
volume when you change between
them.
.
In some cases, when the sound
volume of the portable audio player is
low, the sound becomes bad when you
turn up the volume of the vehicle audio
system. In this case, adjust the sound
volume of the portable audio player.
. In some cases, noise occurs be-
cause of a bad connection between the
portable player of the vehicle audio
system or for the player.
Rear Seat Entertainment
(RSE) system operation (if
equipped)If your vehicle is equipped with the Rear
Seat Entertainment (RSE) system, you
can listen to the audio via the vehicle
speakers. Push the “RSE AUX”button to
play a DVD using the Rear Seat Entertain-
ment system.
For detailed operating procedures, refer to
the attached supplement manual for the
Rear Seat Entertainment (RSE) system.NOTETo watch a DVD in the front seats using
the monitor of the navigation system,
park the vehicle in a safe location and
apply the parking brake. Images of the
DVD will not be displayed on the front
monitor unless the parking brake is
applied.
Audio
5-29
ProCarManuals.com
Page 206 of 409
5-30
Audio
Precautions to observe when
handling a compact discUse only compact discs (CDs, CD-Rs and
CD-RWs) that have the mark shown in the
following illustration. Also, some compact
discs cannot be played.
.You cannot use a DualDisc in the CD
player. If you insert a DualDisc into the
player, the disc may not come out again,
possibly causing the player to malfunction.
. In cold and/or rainy weather, dew can
form inside the CD player, preventing
normal operation. If this happens, eject
the CD and wait for the player to dry out.
. Skipping may occur when the CD
player is subjected to severe vibration
(for example, when the vehicle is driven
on a rough surface).
. To remove a disc from the case, press
the center of the case and hold both
edges of the disc. If the disc surface is
touched directly, contamination could
cause poor tone quality. Do not touch the
disc surface.
. Use a clean disc whenever possible. If
ProCarManuals.com
Page 207 of 409
there are deposits, wipe the disc surface
from the center outward with a dry, soft
cloth. Be sure not to use a hard cloth,
thinner, benzine, alcohol, etc.
.Do not use any disc that is scratched,
deformed, or cracked. Also, do not use
any disc that has a non-standard shape
(for example, a heart shape). Malfunctions
or problems might result.
. A disc is vulnerable to heat. Never
keep it either in places exposed to direct
sunlight, near heaters or in vehicles
parked in the sun or on hot days.
Audio
5-31
ProCarManuals.com
Page 317 of 409
Exterior care................................................... 10-2
Washing......................................................... 10-2
Waxing and polishing ..................................... 10-3
Cleaning aluminum wheels ............................. 10-3
Corrosion protection...................................... 10-4
Most common causes of corrosion ................. 10-4
To help prevent corrosion ............................... 10-4
Cleaning the interior...................................... 10-5
Seat fabric...................................................... 10-5
Leather seat materials ..................................... 10-5
Synthetic leather upholstery ............................ 10-5
Climate control panel, audio panel, instrument panel, console panel, switches, combination
meter, and other plastic surface .................... 10-5
Navigation monitor (if equipped) ........................ 10-6
Appearance care
10
ProCarManuals.com
Page 321 of 409

Cleaning the interiorUse a soft, damp cloth to clean the climate
control panel, audio equipment, instru-
ment panel, center console, combination
meter panel, and switches. (Do not use
organic solvents.)&Seat fabricRemove loose dirt, dust or debris with a
vacuum cleaner. If the dirt is caked on the
fabric or hard to remove with a vacuum
cleaner, use a soft blush then vacuum it.
Wipe the fabric surface with a tightly
wrung cloth and dry the seat fabric
thoroughly. If the fabric is still dirty, wipe
using a solution of mild soap and luke-
warm water then dry thoroughly.
If the stain does not come out, try a
commercially-available fabric cleaner. Use
the cleaner on a hidden place and make
sure it does not affect the fabric adversely.
Use the cleaner according to its instruc-
tions.NOTEWhen cleaning the seat, do not use
benzine, paint thinner, or any similar
materials.
&Leather seat materialsThe leather used by SUBARU is a high
quality natural product which will retain its
distinctive appearance and feel for many
years with proper care.
Allowing dust or road dirt to build up on the
surface can cause the material to become
brittle and to wear prematurely. Regular
cleaning with a soft, moist, natural fiber
cloth should be performed monthly, taking
care not to soak the leather or allow water
to penetrate the stitched seams.
A mild detergent suitable for cleaning
woolen fabrics may be used to remove
difficult dirt spots, rubbing with a soft, dry
cloth afterwards to restore the luster. If
your SUBARU is to be parked for a long
time in bright sunlight, it is recommended
that the seats and headrests be covered,
or the windows shaded, to prevent fading
or shrinkage.
Minor surface blemishes or bald patches
may be treated with a commercial leather
spray lacquer. You will discover that each
leather seat section will develop soft folds
or wrinkles, which is characteristic of
genuine leather.&Synthetic leather upholsteryThe synthetic leather material used on the
SUBARU may be cleaned using mild soap or detergent and water, after first vacuum-
ing or brushing away loose dirt. Allow the
soap to soak in for a few minutes and wipe
off with a clean, damp cloth. Commercial
foam-type cleaners suitable for synthetic
leather materials may be used when
necessary.
NOTEStrong cleaning agents such as sol-
vents, paint thinners, window cleaner
or gasoline must never be used on
leather or synthetic interior materials.&
Climate control panel, audio
panel, instrument panel,
console panel, switches,
combination meter, and other
plastic surfaceUse a soft, damp cloth to clean the climate
control panel, audio equipment, instru-
ment panel, center console, combination
meter panel, and switches.NOTEDo not use organic solvents such as
paint thinners or gasoline, or strong
cleaning agents that contain those
solvents.
Appearance care
10-5
–CONTINUED –
ProCarManuals.com
Page 378 of 409
12-6
Specifications
Fuse
panel Fuse
rating Circuit
13 20A .Cargo socket
14 15A .Position light
. Tail light
. Rear combination light
15 Empty
16 10A .Illumination
17 15A .Seat heaters
18 10A .Back-up light
19 7.5A .
Headlight right side re-
lay
20 Empty
21 7.5A .Starter relay
22 15A .Air conditioner
. Rear window defogger
relay coil
23 15A .Rear wiper
. Rear window washer
24 15A .Audio unit
25 15A .
SRS airbag system
(Main)
26 7.5A .Power window relay
27 15A .
Rear blower fan Fuse
panel Fuse
rating Circuit
28 15A .Rear blower fan
29 15A .Fog light
30 30A .Front wiper
31 7.5A .Auto air conditioner unit
. Integrated unit
32 7.5A .Headlight left side relay
33 7.5A .
Vehicle dynamics con-
trol unit
ProCarManuals.com