2008 SUBARU TRIBECA change key battery
[x] Cancel search: change key batteryPage 24 of 409

22Function settingsA SUBARU dealer can change the settings of the functions shown in the following table to meet your personal requirements. Contact
the nearest SUBARU dealer for details. If your vehicle is equipped with navigation system, the settings for some of these functions can
be changed using the monitor. For details, please refer to the Owner’s Manual supplement for the monitor.Item Function Possible settingsDefault setting Page
Alarm system Alarm system Operation / Non-operationOperation 2-15
Monitoring start delay time (after closure of
doors) 0 second / 30 seconds
30 seconds 2-15
Impact sensor operation (only vehicles with
shock sensors (dealer option)) Operation / Non-operation
Non-operation 2-18
Passive arming Operation / Non-operationNon-operation 2-17
Remote keyless entry system Hazard warning flasher Operation / Non-operationOperation 2-7
Audible signal Operation / Non-operationOperation 2-10
Key lock-in prevention Key lock-in prevention Operation / Non-operationOperation 2-6
Rear window defogger Rear window defogger Operation for 15 minutes / Continuous
operation Operation for 15
minutes3-37
Windshield wiper deicer (if
equipped) Windshield wiper deicer
Operation for 15 minutes / Continuous
operation Operation for 15
minutes3-36
Map light/Dome light Operation in interlock with remote keyless
entry system OFF / Short / Normal / Long
Normal6-2
Battery drainage prevention
function Battery drainage prevention function Operation / Non-operation
Operation 2-6
ProCarManuals.com
Page 100 of 409
2-6
Keys and doors
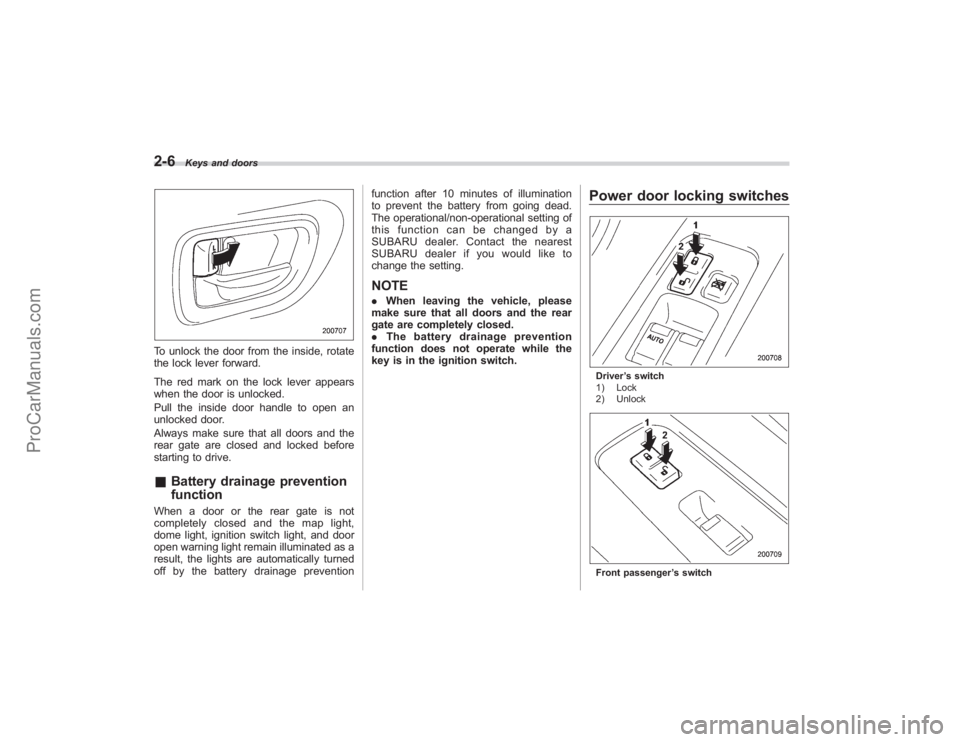
To unlock the door from the inside, rotate
the lock lever forward.
The red mark on the lock lever appears
when the door is unlocked.
Pull the inside door handle to open an
unlocked door.
Always make sure that all doors and the
rear gate are closed and locked before
starting to drive.&Battery drainage prevention
functionWhen a door or the rear gate is not
completely closed and the map light,
dome light, ignition switch light, and door
open warning light remain illuminated as a
result, the lights are automatically turned
off by the battery drainage prevention function after 10 minutes of illumination
to prevent the battery from going dead.
The operational/non-operational setting of
this function can be changed by a
SUBARU dealer. Contact the nearest
SUBARU dealer if you would like to
change the setting.
NOTE.
When leaving the vehicle, please
make sure that all doors and the rear
gate are completely closed.
. The battery drainage prevention
function does not operate while the
key is in the ignition switch.
Power door locking switchesDriver ’s switch
1) Lock
2) UnlockFront passenger ’s switch
ProCarManuals.com
Page 111 of 409
.The 30-second standby time can be
eliminated if you prefer. Have it per-
formed by your SUBARU dealer.
. The system is in the standby mode
for a 30-second period after locking the
doors with the remote transmitter. The
security indicator light will flash at
short intervals during this period.
. If any of the following actions is
done during the standby period, the
system will not switch to the surveil-
lance state.
.Doors are unlocked using the
remote transmitter.
. Any door (including the rear gate)
is opened.
. Ignition switch is turned to the
“ ON ”position.& Disarming the systemBriefly press the “
”button (for less than
2 seconds) on the remote transmitter. The
driver ’s door will unlock, an electronic
chirp will sound twice, the turn signal
lights will flash twice and the indicator
light will go off.
To unlock all other doors and the rear
gate, briefly press the “
”button a
second time within 5 seconds.
NOTEIf the interval between the first and
second presses of the “
”button (for
unlocking of all of the doors and the
rear gate) is extremely short, the sys-
tem may not respond.
! Emergency disarming
If you cannot disarm the system using the
transmitter (i.e. the transmitter is lost,
broken or the transmitter battery is too
weak), you can disarm the system without
using the transmitter.
The system can be disarmed if you turn
the ignition switch from the “LOCK” to the
“ON ”position with a registered key.
& Valet modeWhen you choose the valet mode, the
alarm system does not operate. In valet
mode, the remote transmitter is used only
for locking and unlocking the doors and
rear gate and panic activation.
To enter the valet mode, change the
setting of your vehicle’ s alarm system for
deactivation mode. (Refer to “Activating
and deactivating the alarm system ”in this
section.) The security indicator light will
continue to flash once every 3 seconds
indicating that the system is in the valet
mode. To exit valet mode, change the setting of
your vehicle’
s alarm system for activation
mode. (Refer to “Activating and deactivat-
ing the alarm system ”in this section.)
& Passive armingWhen passive arming mode has been
programmed by the dealer, arming of the
system is automatically accomplished
without using the remote transmitter. Note
that in this mode, DOORS MUST BE
MANUALLY LOCKED.
! To enter the passive mode
If you wish to program the passive arming
mode, have it done by your SUBARU
dealer.
! Arming the system
CAUTION
In passive mode, the system will
automatically activate the alarm but
WILL NOT automatically lock the
doors. In order to lock the doors
you must either lock them as in-
dicated in step 4 below or with the
key once they have been closed.
Failure to lock the doors manually
will result in a higher security risk.
1. Turn the ignition switch to the “ON”
Keys and doors
2-17
–CONTINUED –
ProCarManuals.com
Page 210 of 409
6-2
Interior equipment
Interior lightWhen leaving your vehicle, make sure the
light is turned off to avoid battery dis-
charge.&Dome lightVehicles with Rear Seat Entertainment
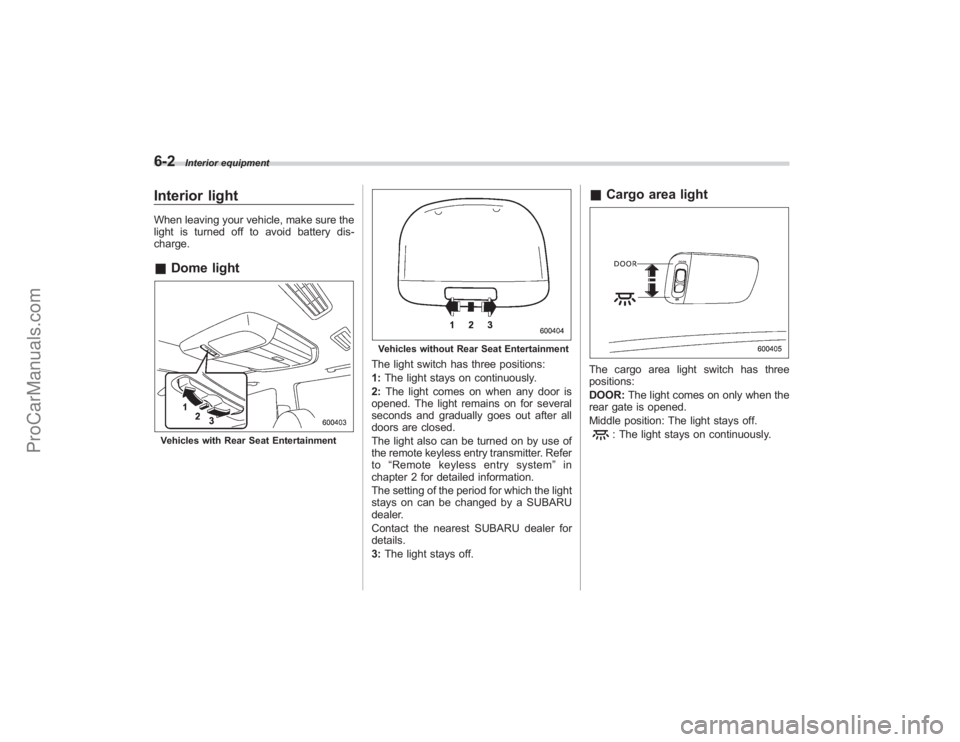
Vehicles without Rear Seat EntertainmentThe light switch has three positions:
1:The light stays on continuously.
2: The light comes on when any door is
opened. The light remains on for several
seconds and gradually goes out after all
doors are closed.
The light also can be turned on by use of
the remote keyless entry transmitter. Refer
to “Remote keyless entry system ”in
chapter 2 for detailed information.
The setting of the period for which the light
stays on can be changed by a SUBARU
dealer.
Contact the nearest SUBARU dealer for
details.
3: The light stays off.
& Cargo area lightThe cargo area light switch has three
positions:
DOOR: The light comes on only when the
rear gate is opened.
Middle position: The light stays off.
: The light stays on continuously.
ProCarManuals.com
Page 211 of 409
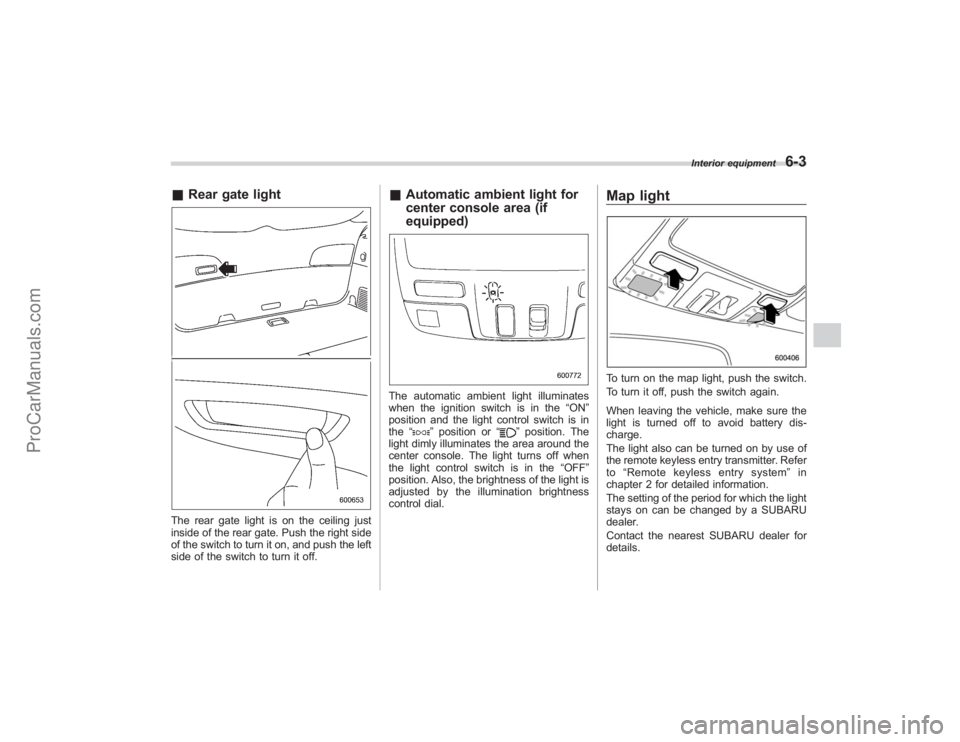
&Rear gate lightThe rear gate light is on the ceiling just
inside of the rear gate. Push the right side
of the switch to turn it on, and push the left
side of the switch to turn it off.
&Automatic ambient light for
center console area (if
equipped)The automatic ambient light illuminates
when the ignition switch is in the “ON”
position and the light control switch is in
the “
”position or “
”position. The
light dimly illuminates the area around the
center console. The light turns off when
the light control switch is in the “OFF”
position. Also, the brightness of the light is
adjusted by the illumination brightness
control dial.
Map lightTo turn on the map light, push the switch.
To turn it off, push the switch again.
When leaving the vehicle, make sure the
light is turned off to avoid battery dis-
charge.
The light also can be turned on by use of
the remote keyless entry transmitter. Refer
to “Remote keyless entry system ”in
chapter 2 for detailed information.
The setting of the period for which the light
stays on can be changed by a SUBARU
dealer.
Contact the nearest SUBARU dealer for
details.
Interior equipment
6-3
ProCarManuals.com
Page 245 of 409
feature ON or OFF each time.
7. To exit the remote transmitter and
feature programming mode, turn the igni-
tion switch to the“LOCK”position, remove
the key from the ignition switch and test
operation of the remote transmitter(s) and
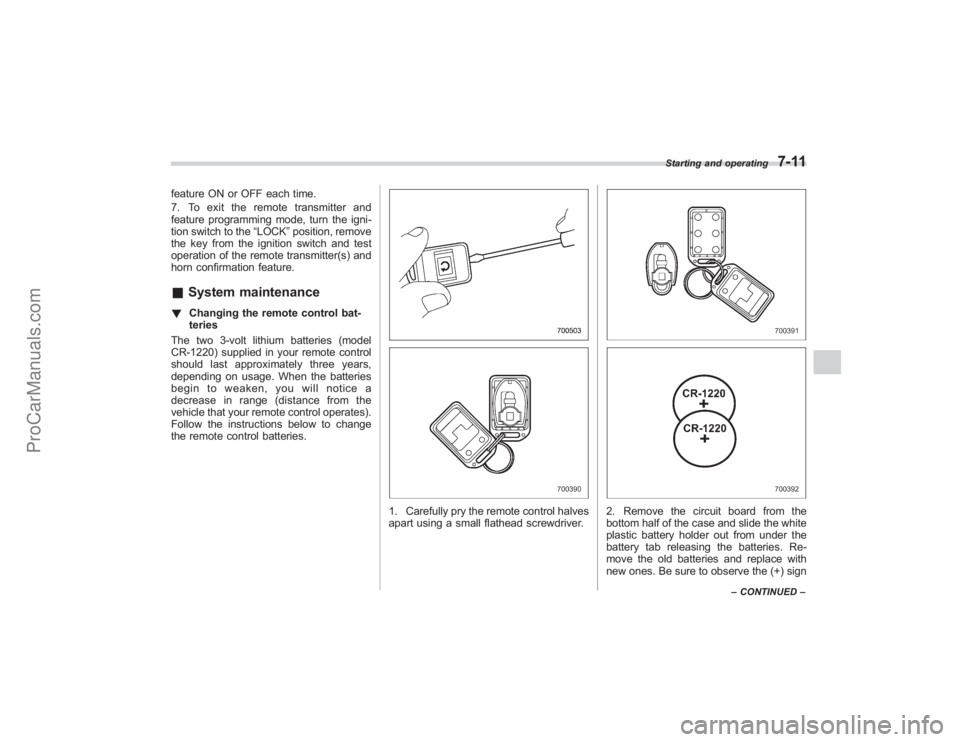
horn confirmation feature.& System maintenance! Changing the remote control bat-
teries
The two 3-volt lithium batteries (model
CR-1220) supplied in your remote control
should last approximately three years,
depending on usage. When the batteries
begin to weaken, you will notice a
decrease in range (distance from the
vehicle that your remote control operates).
Follow the instructions below to change
the remote control batteries.
1. Carefully pry the remote control halves
apart using a small flathead screwdriver.
2. Remove the circuit board from the
bottom half of the case and slide the white
plastic battery holder out from under the
battery tab releasing the batteries. Re-
move the old batteries and replace with
new ones. Be sure to observe the (+) sign
Starting and operating
7-11
– CONTINUED –
ProCarManuals.com