2008 PONTIAC GRAND PRIX display
[x] Cancel search: displayPage 204 of 450

TRACTION CONTROL OFF
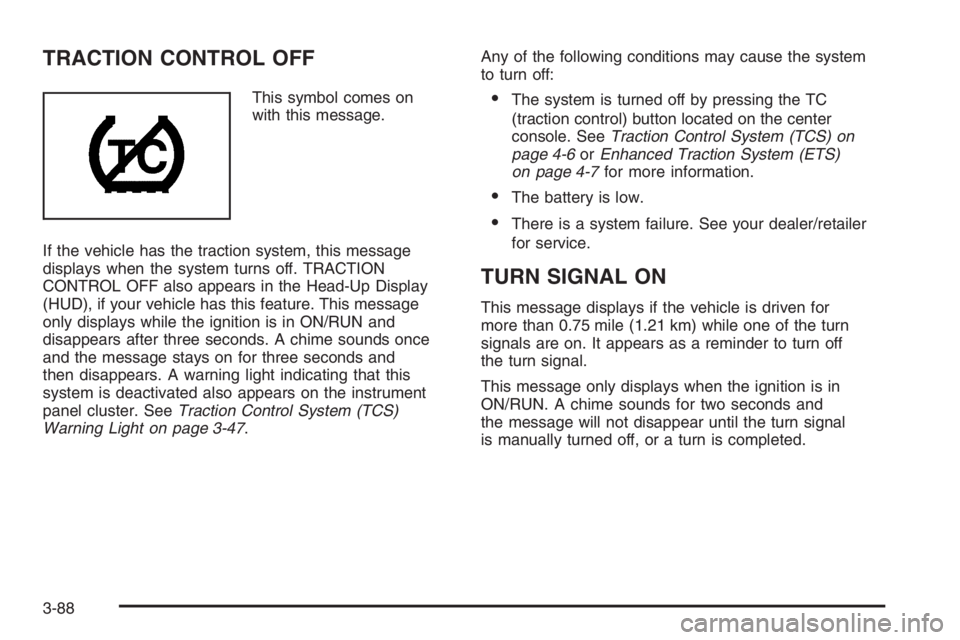
This symbol comes on
with this message.
If the vehicle has the traction system, this message
displays when the system turns off. TRACTION
CONTROL OFF also appears in the Head-Up Display
(HUD), if your vehicle has this feature. This message
only displays while the ignition is in ON/RUN and
disappears after three seconds. A chime sounds once
and the message stays on for three seconds and
then disappears. A warning light indicating that this
system is deactivated also appears on the instrument
panel cluster. SeeTraction Control System (TCS)
Warning Light on page 3-47.Any of the following conditions may cause the system
to turn off:The system is turned off by pressing the TC
(traction control) button located on the center
console. SeeTraction Control System (TCS) on
page 4-6orEnhanced Traction System (ETS)
on page 4-7for more information.
The battery is low.
There is a system failure. See your dealer/retailer
for service.
TURN SIGNAL ON
This message displays if the vehicle is driven for
more than 0.75 mile (1.21 km) while one of the turn
signals are on. It appears as a reminder to turn off
the turn signal.
This message only displays when the ignition is in
ON/RUN. A chime sounds for two seconds and
the message will not disappear until the turn signal
is manually turned off, or a turn is completed.
3-88
Page 205 of 450

DIC Vehicle Customization
Your vehicle may have customization capabilities that
allow you to program certain features to one preferred
setting. Customization features can only be programmed
to one setting on the vehicle and cannot be programmed
to a preferred setting for two different drivers.
All of the customization options may not be available on
your vehicle. Only the options available will be displayed
on the DIC.
The default settings for the customization features were
set when your vehicle left the factory, but may have
been changed from their default state since then. The
customization preferences are automatically recalled.
To change customization preferences, use the
following procedure.
Entering the Personal Programming Mode
1. Turn the ignition on and make sure the vehicle
is in PARK (P).
To avoid excessive drain on the battery, it is
recommended that the headlamps are turned off.
2. Press the options button until PERSONAL
PROGRAMMING MODE appears on the DIC.3. Press the set/reset button to display the
�rst screen.
4. Press the options button to access these modes:
Personal Programming Mode Screens
EXTERIOR LIGHTING DELAY:This screen allows
this feature to be turned off, or allows the selection of the
number of seconds the exterior lamps are turned on
after the key is removed from the ignition, or the vehicle
is unlocked using the Remote Keyless Entry (RKE)
transmitter.
If OFF is selected, the exterior lamps will not turn on.
If a time delay is chosen, the lamps will turn on for
the selected time. The time delay will be cancelled
and the exterior lamps will turn on automatically when
the key is removed from the ignition, or the vehicle
is unlocked using the RKE transmitter.
To program this mode:
1. Press and release the set/reset button to scroll to
the selection you want to program. Choose from
OFF, 15, 30, 60, or 90 seconds.
2. Press the options button again to advance to the
next screen.
3-89
Page 208 of 450

If the vehicle does not have a content theft-deterrent
system, the next screens with PROGRAMMING
FINISHED and DISPLAY OFF will appear.
If the vehicle does have a content theft-deterrent
system, the next screen will appear.
THEFT DETERRENT:The vehicle may have a content
theft-deterrent system. Once it is turned on, the
system will activate if someone tries to enter the vehicle
without using the RKE transmitter or the correct key.
This screen allows this feature to be turned OFF or ON.
If OFF is selected, the content theft-deterrent system
will not function.
If ON is selected, the content theft-deterrent system
will be activated.
To program this mode:
1. Press the set/reset button to scroll to OFF or ON.
2. Press the options button again to advance to
the next screen.KEY CYLINDER DISARM:If the vehicle has a content
theft-deterrent system, and ON was selected on the
THEFT DETERRENT screen, this screen allows
this feature to be turned OFF or ON. This feature
determines whether the driver’s door key cylinder may
be used to disarm the content theft-deterrent system.
If OFF is selected, the vehicle’s content theft-deterrent
system can not be disarmed by unlocking the driver’s
door using the driver’s door key cylinder. Selecting OFF
prevents a thief from disarming the vehicle’s content
theft-deterrent system by attacking the driver’s door key
cylinder, and may make the vehicle more secure.
However, if OFF is selected, unlocking an armed vehicle
by using the driver’s door key cylinder and opening
the door will cause the content theft alarm to activate.
For this reason, it is recommended that the vehicle
be unlocked using the remote keyless entry system
when this feature is set to OFF.
If ON is selected, the vehicle’s content theft-deterrent
system can be disarmed by unlocking the driver’s
door using the driver’s door key cylinder.
To program this mode:
1. Press the set/reset button to scroll to OFF or ON.
2. Press the options button again to advance to
the next screen.
3-92
Page 211 of 450

Your vehicle may have a feature called Retained
Accessory Power (RAP). With RAP, the audio system
can be played even after the ignition is turned off.
SeeRetained Accessory Power (RAP) on page 2-24
for more information.
Setting the Clock
The radio may have a button marked with an H or HR to
represent hours and an M or MN to represent minutes.
Press and hold the hour button until the correct hour
displays. AM or PM displays for morning or evening
hours. Press and hold the minute button until the correct
minute displays. The time can be set with the ignition
on or off.
To synchronize the time with an FM station broadcasting
Radio Data System (RDS) information, press and
hold the hour and minute buttons at the same time
until UPDATED and the clock symbol appear on
the display. If the time is not available from the
station, NO UPDATE or NO UPDAT will appear on
the display.
RDS time is broadcast once a minute. After tuning to
an RDS broadcast station, it could take a few minutes
for the time to update.
Radio(s)
Your vehicle has one of these radios as its audio system.Radio with CD (MP3) shown,
Radio with CD (Base) similar
3-95
Page 212 of 450

Radio Data System (RDS)
The audio system has a Radio Data System (RDS).
RDS features are available for use only on FM stations
that broadcast RDS information.
With RDS, the radio can do the following:
Seek to stations broadcasting the selected type of
programming
Receive announcements concerning local and
national emergencies
Display messages from radio stations
Seek to stations with traffic announcements
This system relies upon receiving speci�c information
from these stations and only works when the information
is available. In rare cases, a radio station may
broadcast incorrect information that causes the radio
features to work improperly. If this happens, contact the
radio station.
While the radio is tuned to an RDS station, the station
name or the call letters appear on the display instead
of the frequency. RDS stations may also provide
the time of day, a program type (PTY) for current
programming, and the name of the program being
broadcast.
XM™ Satellite Radio Service
XM™ is a satellite radio service that is based in the
48 contiguous United States and 10 Canadian provinces.
XM™ Satellite Radio has a wide variety of programming
and commercial-free music, coast-to-coast, and in
digital-quality sound. During your trial or when you
subscribe, you will get unlimited access to XM™ Radio
Online for when you are not in your vehicle. A service
fee is required to receive the XM™ service. For more
information, contact XM™ at www.xmradio.com or
call 1-800-929-2100 in the U.S. and www.xmradio.ca
or call 1-877-438-9677 in Canada.
Playing the Radio
PWR (Power):Push this knob to turn the system
on and off.
VOL (Volume):Turn this knob clockwise or
counterclockwise to increase or to decrease the volume.
RCL (Recall):Push this knob to switch the display
between the radio station frequency and the time.
When the ignition is turned off, push this knob to display
the time.
For RDS, push the RCL knob to change what appears
on the display while using RDS. The display options
are station name, RDS station frequency, PTY, and the
name of the program (if available).
3-96
Page 213 of 450

For XM™ (if equipped), push the RCL knob while
in XM™ mode to retrieve four different categories
of information related to the current song or
channel: Artist, Song Title, Category or PTY,
Channel Number/Channel Name.
To change the default on the display, push the RCL
knob until you see the desired display, then hold
the knob until the display �ashes. The selected
display is now the default.
SCV (Speed-Compensated Volume):Vehicles with
the SCV feature, automatically lets the audio system
adjust volume to make up for road and wind noise
while driving.
Set the volume at the desired level. Press this button
to select MIN (minimum), MED (medium), or MAX
(maximum). Each higher setting allows for more volume
compensation at faster vehicle speeds. Then, as you
drive, SCV automatically increases the volume, as
necessary, to overcome noise at any speed. The volume
level should always sound the same while driving.
To turn SCV off, press this button until OFF displays.
AUTO VOL (Automatic Volume):Vehicles with
automatic volume, automatically lets the audio system
adjust volume to make up for road and wind noise
as you drive.Set the volume at the desired level. Press this button
to select MIN (minimum), MED (medium), or MAX
(maximum). Each higher setting allows for more volume
compensation at faster vehicle speeds. Then, as you
drive, automatic volume increases the volume, as
necessary, to overcome noise at any speed. The volume
level should always sound the same to you as you
drive. To turn automatic volume off, press this button
until OFF displays.
Finding a Station
BAND:Press this button to switch between FM1, FM2,
AM, or XM1 or XM2 (if equipped). The display shows
the selection.
TUNE:Turn this knob to select radio stations.
wxorstSEEK:Press the up or the down arrow
to go to the next or to the previous station and stay there.
The radio only seeks stations with a strong signal that are
in the selected band.
wxorstSCAN:Press and hold either SCAN
arrow for two seconds until SCAN or SC displays and a
beep sounds. The radio goes to a station, plays for a
few seconds, then goes to the next station. Press either
SCAN arrow again to stop scanning.
3-97
Page 214 of 450

To scan preset stations, press and hold either SCAN
arrow for more than four seconds until PSCAN or
PRESET SCAN and the preset number displays and a
double beep sounds. The radio goes to the �rst
preset station, plays for a few seconds, then goes to the
next preset station. Press either SCAN arrow again to
stop scanning presets.
The radio scans stations only with a strong signal that
are in the selected band.
Setting Preset Stations
Up to 30 stations (six FM1, six FM2, and six AM,
six XM1 and six XM2 (if equipped)), can be programmed
on the six numbered pushbuttons, by performing the
following steps:
1. Turn the radio on.
2. Press BAND to select FM1, FM2, AM, or XM1
or XM2.
3. Tune in the desired station.
4. Press EQ, or depending on the radio, AUTO EQ,
to select the equalization.
5. Press and hold one of the six numbered
pushbuttons until a beep sounds. When that
numbered pushbutton is pressed, the station that
was set returns and the equalization that was
selected is stored for that pushbutton.
6. Repeat the steps for each pushbutton.
Setting the Tone
(Bass/Midrange/Treble)
TONE:Press and release the TONE button until BASS,
MID (midrange), or TREB (treble) displays. The
SELECT LED indicator lights to show that the tone
control can be adjusted. Turn the SELECT knob
to increase or to decrease. If a station is weak or has
static, decrease the treble.
To return all of the tone controls to the middle position,
press and hold the TONE button until FLAT displays.
AUDIO (Radio with Six-Disc CD Player):Push
the AUDIO knob until BASS, MID (midrange), or
TREB (treble) displays. Turn the knob to increase
or to decrease. If a station is weak or noisy, decrease
the treble.
To adjust bass, midrange, or treble to the middle
position, select BASS, MID, or TREB and push and
hold the AUDIO knob. The display level adjusts to the
middle position and a beep sounds.
To adjust all tone and speaker controls to the middle
position, push and hold the AUDIO knob when no tone
or speaker control is displayed. CENTERED displays
and one beep sounds.
3-98
Page 215 of 450

EQ or AUTO EQ (Equalization):Press this button to
select customized equalization settings.
Up to six customized equalization settings, can be
programmed on the six numbered pushbuttons,
by performing the following steps:
1. Turn the radio on.
2. Use the TONE button and the SELECT knob to
create the desired equalization.
3. Press and hold the EQ or AUTO EQ button for
two seconds. SELECT EQ # displays and the
EQ symbol �ashes.
4. Press EQ or turn the SELECT knob to select the
desired EQ number.
5. Press and hold the EQ or AUTO EQ button or push
the SELECT knob to store the equalization setting
and the number. A beep sounds and EQ SAVED
displays.
6. Repeat the steps for the other EQ settings and
numbers.
EQ 5 has been programmed at the factory for use with
talk radio, but it can be set to a different tone.Adjusting the Speakers (Balance/Fade)
BAL (Balance):Press this button until BAL displays,
to adjust the balance between the right and the left
speakers. The SELECT LED indicator lights to show
that the speakers can be adjusted. Turn the SELECT
knob to move the sound toward the right or the left
speakers.
FADE:Press this button until FADE displays, to adjust
the fade between the front and the rear speakers.
The SELECT LED indicator lights to show that the
speakers can be adjusted. Turn the SELECT knob to
move the sound toward the front or the rear speakers.
Press and hold the BAL FADE button for two seconds
to return all speaker settings to the middle position.
AUDIO (Radio with Six-Disc CD Player):Push
the AUDIO knob until BAL (balance) displays, to adjust
the balance between the right and the left speakers.
Turn the knob to move the sound toward the right or
the left speakers.
To adjust the fade between the front and rear
speakers, push and hold the AUDIO knob until FAD
(fade) displays. Turn the knob to move the sound
toward the front or the rear speakers.
To adjust the balance and the fade to the middle
position, select balance or fade and push and hold
the AUDIO knob. The display level adjusts to the
middle position and a beep sounds.
3-99