Page 9 of 36

* XM® presets are only available on XM® Satellite Radio equipped vehicles.
07
06
08
09
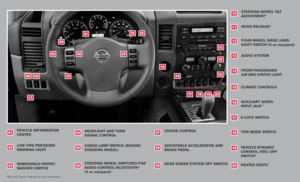
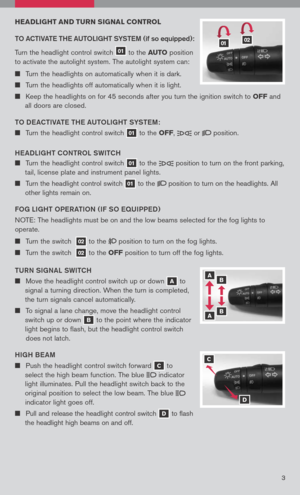
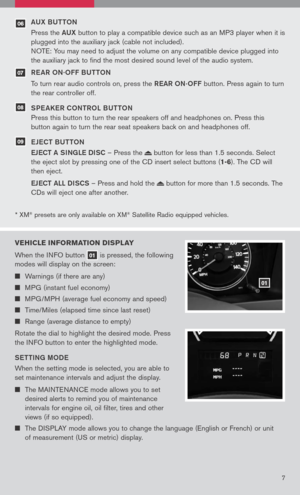
VEHICLE INFORMATION DI sPLAY
When the INFO button
01 is pressed, the following
modes will display on the screen:
Warnings (if there are any)
MPG (instant fuel economy)
MPG/MPH (average fuel economy and speed)
Time/Miles (elapsed time since last reset)
Range (average distance to empty)
Rotate the dial to highlight the desired mode. Press
the INFO button to enter the highlighted mode.
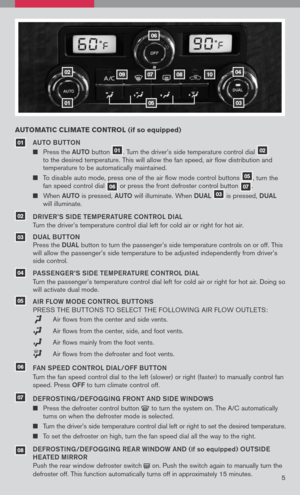
S eTTIN g MOD e
When the setting mode is selected, you are able to
set maintenance intervals and adjust the display.
The MAINTENANCE mode allows you to set
desired alerts to remind you of maintenance
intervals for engine oil, oil filter, tires and other
views (if so equipped).
The DISPLAY mode allows you to change the language (English or French) or unit
of measurement (US or metric) display.
01
7
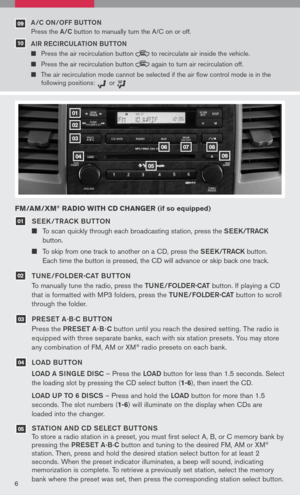
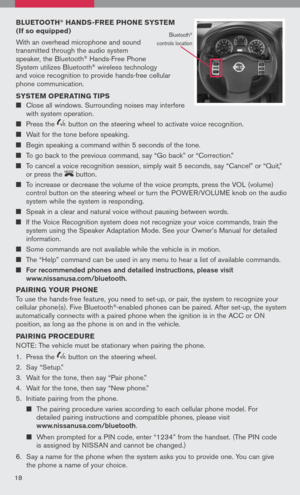
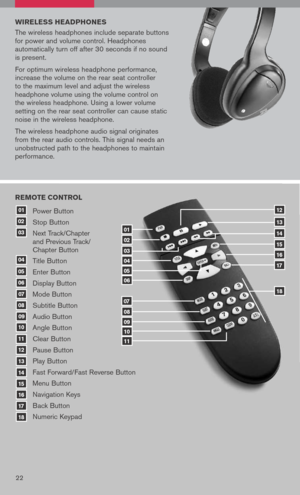
aUX BUTTON
Press the aUX button to play a compatible device such as an MP3 player when it is
plugged into the auxiliary jack (cable not included).
NOTE: You may need to adjust the volume on any compatible device plugged into
the auxiliary jack to find the most desired sound level of the audio system.
R e a R ON
.OFF BUTTON
To turn rear audio controls on, press the ReaR
ON.OFF button. Press again to turn
the rear controller off.
SP e aKeR CONTROL BUTTON
Press this button to turn the rear speakers off and headphones on. Press this
button again to turn the rear seat speakers back on and headphones off.
e Je CT BUTTON
e JeCT a SINg Le DISC – Press the
button for less than 1.5 seconds. Select
the eject slot by pressing one of the CD insert select buttons (
1-6). The CD will
then eject.
e JeCT aLL DISCS – Press and hold the
button for more than 1.5 seconds. The
CDs will eject one after another.
Page 10 of 36

TRIP BUTTON
When the
TRIP button is pressed, the following
modes will display on the screen:
Warning messages (if th")
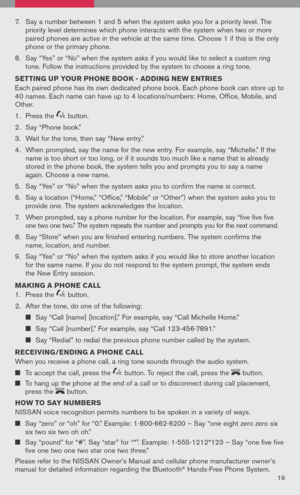
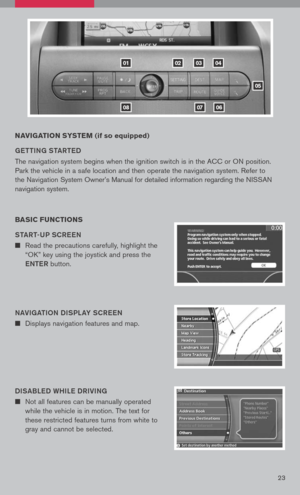
CONTROL PANEL DIsPLAY w ITH
N AVI gATION sY sTEM
(if so equipped)
TRIP BUTTON
When the
TRIP button is pressed, the following
modes will display on the screen:
Warning messages (if there are any)
TRIP 1 (Elapsed Time, Driving
Distance, Average Speed)
TRIP 2 (Elapsed Time, Driving Distance, Average Speed)
FUEL ECONOMY (Average Fuel Economy, Distance to Empty)
MAINTENANCE (Engine Oil, Tire Rotation and Tire Pressure)
OFF
M aINT eN aNC e IT eMS
You can set the engine oil and the tire rotation interval. To display the setting of the
maintenance interval, select the eNg INe OIL or TIR e ROT aTION key using the joystick
and press the eNTe R button.
To set the maintenance interval, select the MaINTe NaNCe SCH eDUL e key by using
the joystick and pushing the joystick to the right or left. To reset the maintenance interval,
select the ReSeT key using the joystick and press the eNTe R button. To view the
vehicle’s tire pressure, select the TIRe PR eSSUR e key using the joystick and press the
e NTe R button.
DISPL aY SCR eeN S eTTIN gS
The setting screen will appear when the SeTTINg button is pressed. Select the
DISPLa Y key with the joystick and press the eNTe R button to choose from various
display screen options. The DISPLa Y key will allow you to adjust the information shown
on the screen, such as brightness or contrast.
Refer to both the Navigation System Owner’s Manual and your Owner’s Manual for
additional information
8
CLOCK sET/ADJ usTMENT ( Navigation system only)
The clock on the display screen can be adjusted using the joystick by the following
procedures.
First select SYSTe M SeTTINg S from the SeTTINg S menu on the display screen.
Next select CLOCK to enter the CLOCK S eTTINgS mode.
Then select the HOURS or MINUTe S key and hold the joystick left or right to adjust
the time. After the desired time is shown on the display screen, press the BaCK
button to store.
Refer to both the Navigation System Owner’s Manual and your Owner’s Manual for addi
-
tional information.
Page 11 of 36

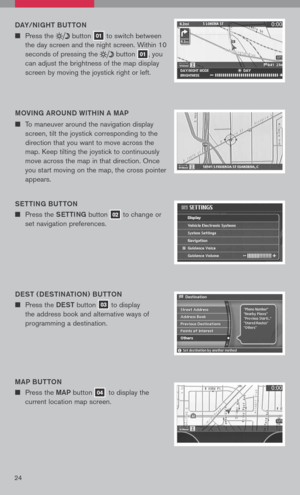
9
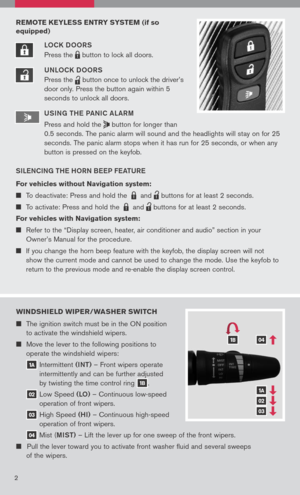
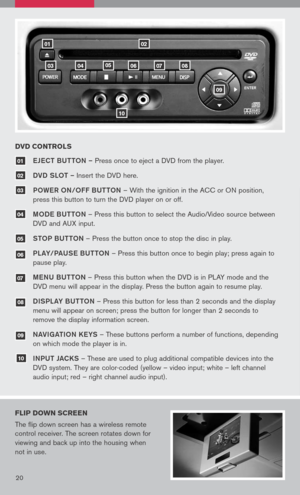
INsTR uMENT BRI gHTNE ss CONTROL/TRIP
CHAN gE B uTTON
The instrument brightness control operates when
the headlight control switch is in the
or
position.
Turn the control to adjust the brightness of the
instrument panel lights.
Press the change button to select trip computer
features.
CLOCK sET/ADJ usTMENT ( Non Navigation system only)
The clock on the radio screen can be adjusted using the following procedure:
Press and hold the H button to advance hours.
Press and hold the M button to advance minutes.
Refer to the Owner’s Manual for additional information.
CLOCK sET/ADJ usTMENT ( single CD only
)
If the clock is not displayed with the ignition switch in the ACC or ON position, you
need to select the CLK ON mode. Press the MeNU button repeatedly until CLOCK is
displayed. Use the See K button to enable CLK ON mode.
Press the MeNU button repeatedly until CLOCK mode appears; press the See K
button until CLK ON appears.
Press the MeNU button again; the hours will start flashing.
Press the See K button to adjust the hour.
Press the MeNU button again; the display will switch to the minute adjustment mode.
The minutes will start flashing. Press the See K button to adjust the minutes.
Press the MeNU button again to exit the clock set mode.
Refer to the Owner’s Manual for additional information.
Page 12 of 36

The automatic driver positioner system has two features:
Memory storage function.
Entry/exit function.
M eMORY STOR age FUNCTION
T")
10
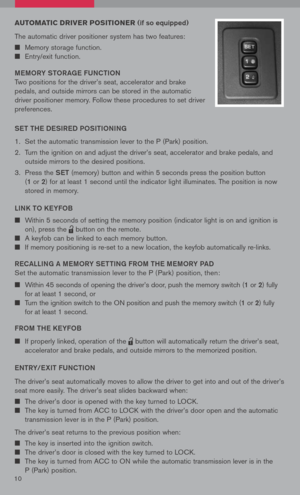
Au TOMATIC DRIVER PO sITIONER (if so equipped)
The automatic driver positioner system has two features:
Memory storage function.
Entry/exit function.
M eMORY STOR age FUNCTION
Two positions for the driver’s seat, accelerator and brake
pedals, and outside mirrors can be stored in the automatic
driver positioner memory. Follow these procedures to set driver
preferences.
S eT TH e DeSIR eD POSITIONIN g
1. Set the automatic transmission lever to the P (Park) position.
2. Turn the ignition on and adjust the driver’s seat, accelerator and brake pedals, and
outside mirrors to the desired positions.
3. Press the SeT (memory) button and within 5 seconds press the position button
(1 or 2 ) for at least 1 second until the indicator light illuminates. The position is now
stored in memory.
LINK TO K eYFOB
Within 5 seconds of setting the memory position (indicator light is on and ignition is
on), press the
lpd0151
button on the remote.
A keyfob can be linked to each memory button.
If memory positioning is re-set to a new location, the keyfob automatically re-links.
R eC aLLIN g a M eMORY S eTTIN g FROM TH e MeMORY P aD
Set the automatic transmission lever to the P ( Park) position, then:
Within 45 seconds of opening the driver’s door, push the memory switch (1 or 2) fully
for at least 1 second, or
Turn the ignition switch to the ON position and push the memory switch (1 or 2) fully
for at least 1 second.
FROM TH e KeYFOB
If properly linked, operation of the
lpd0151
button will automatically return the driver’s seat,
accelerator and brake pedals, and outside mirrors to the memorized position.
e NTRY/ eXIT FUNCTION
The driver’s seat automatically moves to allow the driver to get into and out of the driver’s
seat more easily. The driver’s seat slides backward when:
The driver’s door is opened with the key turned to LOCK.
The key is turned from ACC to LOCK with the driver’s door open and the automatic
transmission lever is in the P (Park) position.
The driver’s seat returns to the previous position when:
The key is inserted into the ignition switch.
The driver’s door is closed with the key turned to LOCK.
The key is turned from ACC to ON while the automatic transmission lever is in the
P (Park) position.
Page 13 of 36

The accelerator and brake pedals can be adjusted for your driving
comfort.
Adjust the pedals when the automatic transmissi")
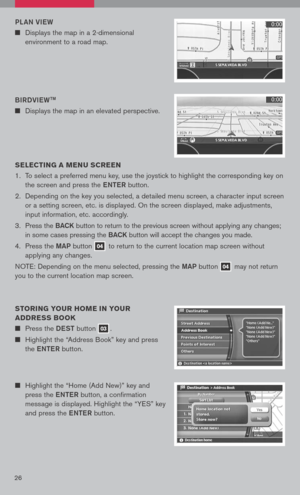
11
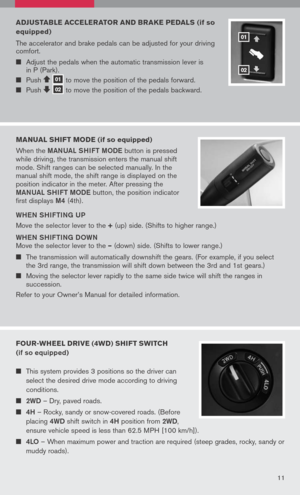
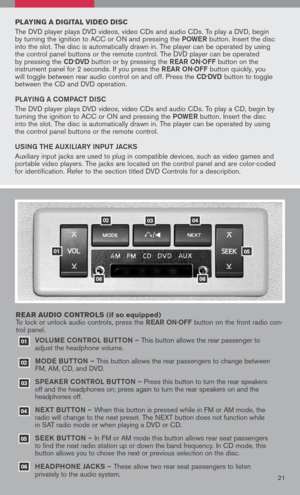
ADJusTABLE ACCELERATOR AND BRAKE PEDAL s (if so
equipped)
The accelerator and brake pedals can be adjusted for your driving
comfort.
Adjust the pedals when the automatic transmission lever is
in P (Park).
Push 01 to move the position of the pedals forward.
Push 02 to
move the position of the pedals backward.
01
02
MANuAL sHIFT MODE (if so equipped)
When the MaNU aL SHIFT MODe button is pressed
while driving, the transmission enters the manual shift
mode. Shift ranges can be selected manually. In the
manual shift mode, the shift range is displayed on the
position indicator in the meter. After pressing the
MaNU aL SHIFT MODe button, the position indicator
first displays
M4 (4th).
W HeN SHIF TIN g UP
Move the selector lever to the
+ (up) side. (Shifts to higher range.)
W HeN SHIF TIN g DOWN
Move the selector lever to the – (down) side. (Shifts to lower range.)
The transmission will automatically downshift the gears. (For example, if you select
the 3rd range, the transmission will shift down between the 3rd and 1st gears.)
Moving the selector lever rapidly to the same side twice will shift the ranges in succession.
Refer to your Owner’s Manual for detailed information.
FOuR- wHEEL DRIVE (4 wD) s HIFT sw ITCH
(if so equipped)
This system provides 3 positions so the driver can
select the desired drive mode according to driving
conditions.
2WD – Dry, paved roads.
4H – Rocky, sandy or snow-covered roads. (Before
placing
4WD shift switch in 4H position from 2WD ,
ensure vehicle speed is less than 62.5 MPH [100 km/h]).
4LO – When maximum power and traction are required (steep grades, rocky, sandy or
muddy roads).
11
Page 14 of 36

The Electronic Locking Rear Differential (E-Lock) system can help
provide added traction if the vehicle is stuck or becoming stuck.
To activate the system:")
E-LOCK swITCH (if so equipped)
The Electronic Locking Rear Differential (E-Lock) system can help
provide added traction if the vehicle is stuck or becoming stuck.
To activate the system:
The 4WD switch must be in the 4LO position (4-wheel drive
vehicles),
The vehicle must be stopped or moving at 4 mph or less, and
The E-Lock system switch must be turned on.
Once the vehicle is free, the system should be turned off.
12
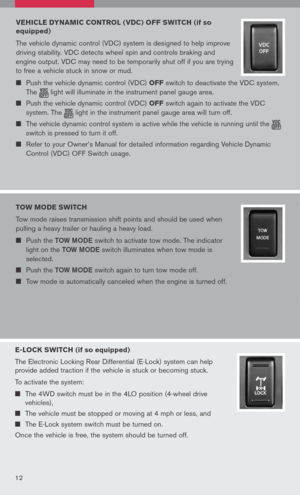
VEHICLE DYNAMIC CONTROL ( VDC) OFF sw ITCH (if so
equipped)
The vehicle dynamic control (VDC) system is designed to help improve
driving stability. VDC detects wheel spin and controls braking and
engine output. VDC may need to be temporarily shut off if you are trying
to free a vehicle stuck in snow or mud.
Push the vehicle dynamic control (VDC) OFF switch to deactivate the VDC system.
The light
will illuminate in the instrument panel gauge area. Push the vehicle dynamic control (VDC) OFF switch again to activate the VDC
system. The
light
in the instrument panel gauge area will turn off. The vehicle dynamic control system is active while the vehicle is running until the
switch is pressed to turn it off.
Refer to your Owner’s Manual for detailed information regarding Vehicle Dynamic
Control (VDC) OFF Switch usage.
TOw MODE swITCH
Tow mode raises transmission shift points and should be used when
pulling a heavy trailer or hauling a heavy load.
Push the TOW MODe switch to activate tow mode. The indicator
light on the TOW MODe switch illuminates when tow mode is
selected.
Push the TOW MODe switch again to turn tow mode off.
Tow mode is automatically canceled when the engine is turned off.
Page 15 of 36

13
FRONT-PAssEN gER AIR BA g sTAT us LI gHT
This vehicle is equipped with the Nissan Advanced Air Bag
system. Under some conditions, depending on the type of
occupant or object detected in the front passenger seat by the
occupant classification sensor, the front-passenger air bag is
designed to automatically turn
OFF. When the front-passenger air
bag is OFF, the front-passenger air bag status light will illuminate*.
For example:
When the system detects that the front-passenger’s seat is occupied by a small
adult, child or child restraint as outlined in the Owner’s Manual, the
2 will illuminate
to indicate that the front-passenger air bag is OFF and will not inflate in a crash.
When the front-passenger’s seat is occupied and the passenger meets the
conditions outlined in the Owner’s Manual, the
2 will not illuminate to indicate that
the front-passenger air bag is operational.
*When the system detects that the front-passenger’s seat is unoccupied, the passenger air bag status light will not illuminate even though the front-passenger air bag is OFF.
Refer to the Owner’s Manual for detailed information regarding the Nissan Advanced Air
Bag System.
TIRE PRE ssuRE MONITORIN g sY s TEM (TPM s)
This system monitors tire pressure. If the low tire pressure warning
light illuminates, check the tire pressure in all four tires.
Adjust the low tire pressure to the recommended COLD tire
pressure shown on the Tire and Loading Information label located
in the driver’s door opening. After tire pressure is adjusted, the
vehicle will need to be driven at speeds above 16 MPH (25 km/h)
to activate the TPMS and turn off the low tire pressure warning light.
sEAT BELT wARNIN g LIgHT AND CHIME
The light and chime remind you to fasten your seat belts. The
light illuminates whenever the ignition key is turned to the ON
or START position and remains illuminated until the driver’s
seat belt is fastened. At the same time, the chime sounds for
approximately 6 seconds unless the driver’s seat belt is securely
fastened.
The seat belt warning light may also illuminate if the front passenger’s seat belt is
not fastened when the front passenger’s seat is occupied. For 7 seconds after the
ignition switch is in the ON position, the system does not activate the warning light
for the front passenger.
Refer to the Owner’s Manual for detailed information regarding seat belt usage.
Page 16 of 36

14
CARgO LI gHT sw ITCH
Push the switch down 01 to
turn on the cargo light.
The cargo light stays on for approximately 20 seconds when
the ignition is turned off unless the switch is pushed to the off
position.
01
REAR sONAR sY s TEM OFF swITCH (if so equipped)
When backing up, this system will beep to alert you to obstacles
within 6 ft. of the rear bumper. The system beeps faster as the
vehicle gets closer to the obstacle. A continuous tone sounds when
an obstacle is less than 10 inches away from the bumper. Turn the
system off by pushing the rear sonar system
OFF switch. Push the
switch again to enable the system. The system will automatically reset
the next time the ignition switch is turned on.
Refer to your Owner’s Manual for detailed information regarding the Rear Sonar Systems.
CHILD sAFETY REAR DOOR LOCK s (Crew Cab models only)
Child safety locks help prevent the rear doors from being opened
accidentally, especially when small children are in the vehicle. The
child safety lock levers are located on the edge of the rear doors.
When the lever is in the LOCK position, the door can be opened only
from the outside.
wIDE OPEN DOOR s (King Cab models
only)
The wide open doors open 168 degrees to allow
access to the rear of the cab.
Open the driver’s or passenger’s door.
From the outside, pull the door handle toward
you.
From the inside, pull the inside door handle toward you. The door will unlock
automatically.
Open the door to the desired position.
Do not open the driver’s side wide open door while refueling or damage may result to
the fuel filler door or the wide open door.