2008 NISSAN TITAN radio controls
[x] Cancel search: radio controlsPage 3 of 36

TAB LE O F C O NTE NTS
Remote Keyless Entry System . . . . . . . . . . . . . . . . . . 2
Windshield Wiper/Washer Switch
. . . . . . . . . . . . . . . . 2
Headlight and Turn Signal Control
. . . . . . . . . . . . . . . . 3
Steering Wheel Switches for Audio Control/ Bluetooth
® . . . . 4
Cruise Control
. . . . . . . . . . . . . . . . . . . . . . . . . . 4
Automatic Climate Control
. . . . . . . . . . . . . . . . . . . . 5
FM/AM/XM® Radio with CD Changer . . . . . . . . . . . . . . 6
Vehicle Information Display
. . . . . . . . . . . . . . . . . . . . 7
Control Panel Display with Navigation System
. . . . . . . . . 8
Clock/Set Adjustment
. . . . . . . . . . . . . . . . . . . . . . 8
Instrument Brightness Control/Trip Change Button
. . . . . . . 9
Automatic Driver Positioner
. . . . . . . . . . . . . . . . . . . 10
Adjustable Accelerator and Brake Pedals
. . . . . . . . . . . . 11
Manual Shift Mode
. . . . . . . . . . . . . . . . . . . . . . . . 11
Four-Wheel Drive (4WD) Shift Switch
. . . . . . . . . . . . . . 11
Vehicle Dynamic Control (VDC) Off Switch
. . . . . . . . . . . 12
Tow Mode Switch
. . . . . . . . . . . . . . . . . . . . . . . . . 12
E-Lock Switch
. . . . . . . . . . . . . . . . . . . . . . . . . . . 12
Front-Passenger Air Bag Status Light
. . . . . . . . . . . . . . 13
Tire Pressure Monitoring System (TPMS)
. . . . . . . . . . . . 13
Seatbelt Warning Light and Chime
. . . . . . . . . . . . . . . 13
Cargo Light Switch
. . . . . . . . . . . . . . . . . . . . . . . . 14
Rear Sonar System Off Switch
. . . . . . . . . . . . . . . . . 14
Child Safety Rear Door Locks
. . . . . . . . . . . . . . . . . . 14
Wide Open Doors
. . . . . . . . . . . . . . . . . . . . . . . . 14
High Utility Bed and Utili-Track
™ Channel System . . . . . . . . 15
Outside Mirror Control Switch
. . . . . . . . . . . . . . . . . . 15
Sunroof Controls
. . . . . . . . . . . . . . . . . . . . . . . . . 15
Front Seat Adjustments
. . . . . . . . . . . . . . . . . . . . . 16
Folding the Rear Bench Seat
. . . . . . . . . . . . . . . . . . 16
Homelink® Universal Transceiver . . . . . . . . . . . . . . . . . 16
Bluetooth® Hands-Free Phone System . . . . . . . . . . . . . 18
DVD Controls
. . . . . . . . . . . . . . . . . . . . . . . . . . . 20
Rear Audio Controls
. . . . . . . . . . . . . . . . . . . . . . . 21
Navigation System
. . . . . . . . . . . . . . . . . . . . . . . . 23
Page 9 of 36

* XM® presets are only available on XM® Satellite Radio equipped vehicles.
07
06
08
09
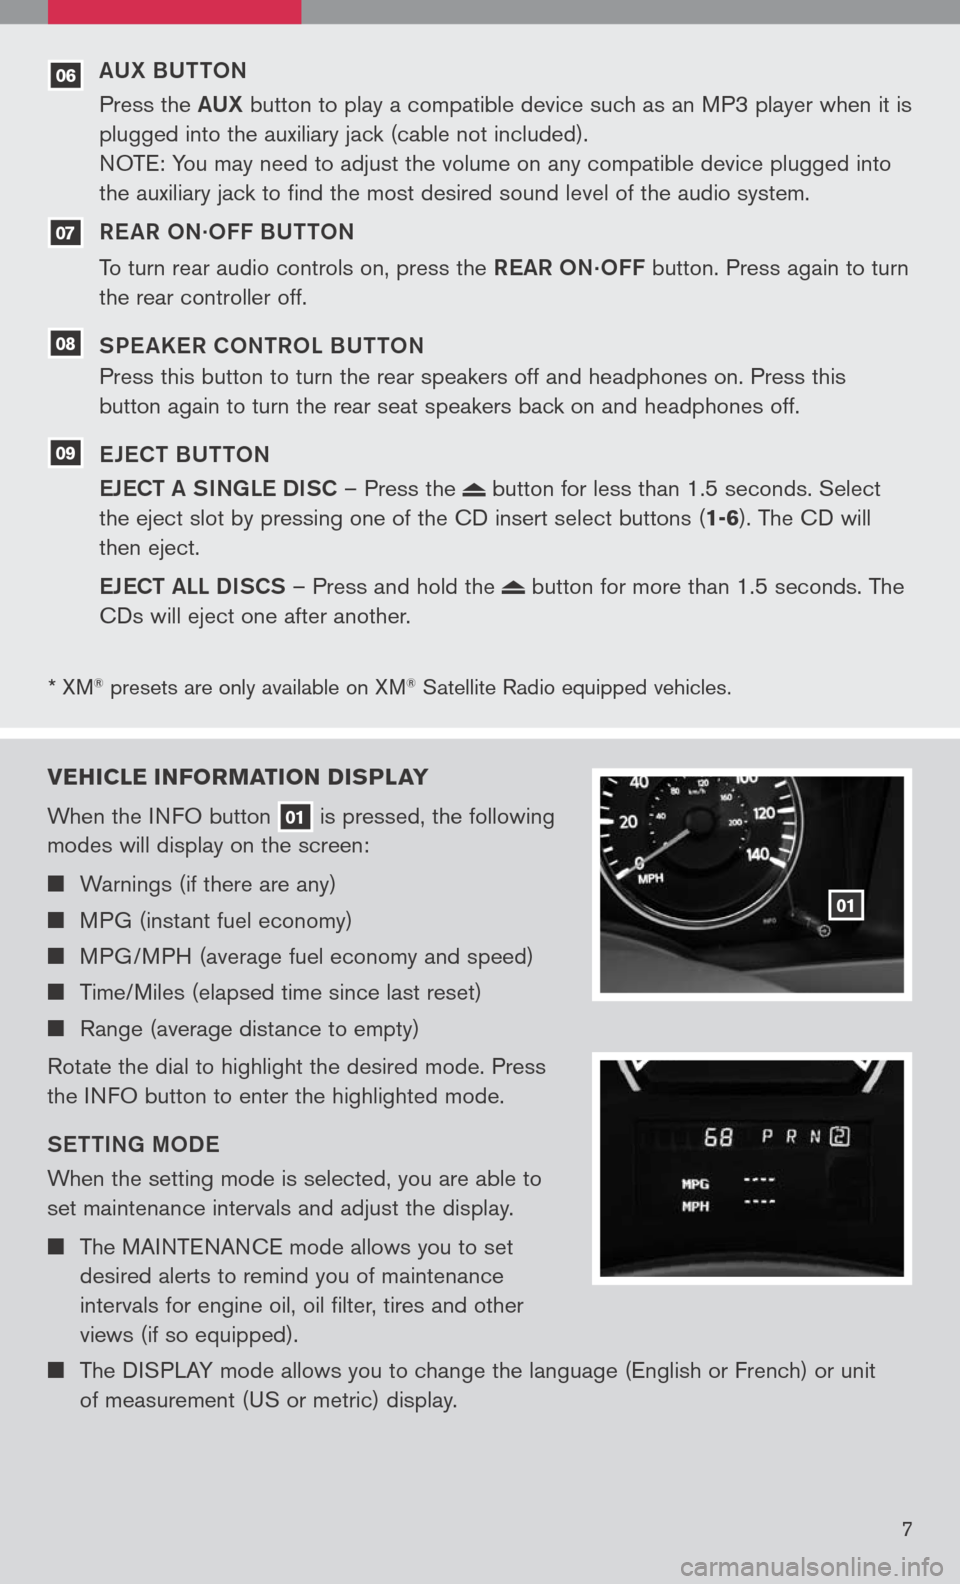
VEHICLE INFORMATION DI sPLAY
When the INFO button
01 is pressed, the following
modes will display on the screen:
Warnings (if there are any)
MPG (instant fuel economy)
MPG/MPH (average fuel economy and speed)
Time/Miles (elapsed time since last reset)
Range (average distance to empty)
Rotate the dial to highlight the desired mode. Press
the INFO button to enter the highlighted mode.
S eTTIN g MOD e
When the setting mode is selected, you are able to
set maintenance intervals and adjust the display.
The MAINTENANCE mode allows you to set
desired alerts to remind you of maintenance
intervals for engine oil, oil filter, tires and other
views (if so equipped).
The DISPLAY mode allows you to change the language (English or French) or unit
of measurement (US or metric) display.
01
7
aUX BUTTON
Press the aUX button to play a compatible device such as an MP3 player when it is
plugged into the auxiliary jack (cable not included).
NOTE: You may need to adjust the volume on any compatible device plugged into
the auxiliary jack to find the most desired sound level of the audio system.
R e a R ON
.OFF BUTTON
To turn rear audio controls on, press the ReaR
ON.OFF button. Press again to turn
the rear controller off.
SP e aKeR CONTROL BUTTON
Press this button to turn the rear speakers off and headphones on. Press this
button again to turn the rear seat speakers back on and headphones off.
e Je CT BUTTON
e JeCT a SINg Le DISC – Press the
button for less than 1.5 seconds. Select
the eject slot by pressing one of the CD insert select buttons (
1-6). The CD will
then eject.
e JeCT aLL DISCS – Press and hold the
button for more than 1.5 seconds. The
CDs will eject one after another.
Page 23 of 36

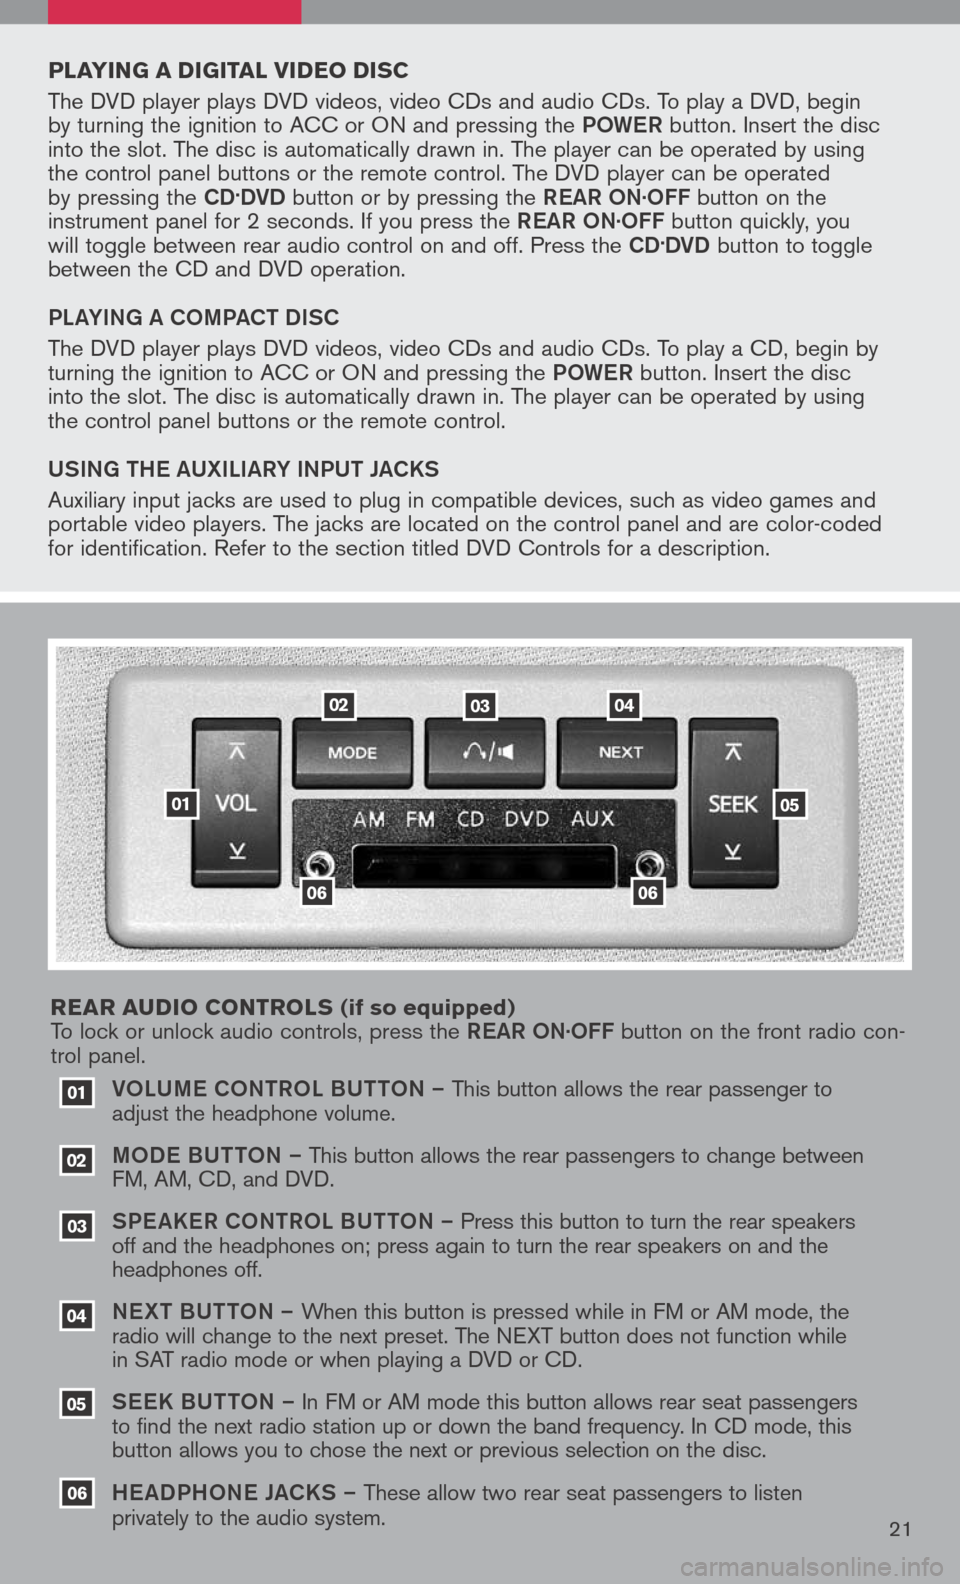
VOLUM e CONTROL BUTTON – This button allows the rear passenger to
adjust the headphone volume.
MOD e B UTTON – This button allows the rear passengers to change between
FM, AM, CD, and DVD.
SPe a KeR C ONTROL BUTTON – Press this button to turn the rear speakers
off and the headphones on; press again to turn the rear speakers on and the
headphones off.
NeXT BUTTON – When this button is pressed while in FM or AM mode, the
radio will change to the next preset. The NEXT button does not function while
in SAT radio mode or when playing a DVD or CD.
SeeK B UTTON – In FM or AM mode this button allows rear seat passengers
to find the next radio station up or down the band frequency. In CD mode, this
button allows you to chose the next or previous selection on the disc.
He aDPHON e JaCKS – These allow two rear seat passengers to listen
privately to the audio system.
03
02
01
06
06
05
04
020304
05
06
01
PLAYIN g A DI gITAL VIDEO DI sC
The DVD player plays DVD videos, video CDs and audio CDs. To play a DVD, begin
by turning the ignition to ACC or ON and pressing the POW eR button. Insert the disc
into the slot. The disc is automatically drawn in. The player can be operated by using
the control panel buttons or the remote control. The DVD player can be operated
by pressing the
CD.DVD button or by pressing the ReaR ON·OFF button on the
instrument panel for 2 seconds. If you press the ReaR ON·OFF button quickly, you
will toggle between rear audio control on and off. Press the
CD.DVD button to toggle
between the CD and DVD operation.
PL aYIN g a COMP aCT DISC
The DVD player plays DVD videos, video CDs and audio CDs. To play a CD, begin by
turning the ignition to ACC or ON and pressing the POW eR button. Insert the disc
into the slot. The disc is automatically drawn in. The player can be operated by using
the control panel buttons or the remote control.
USIN g TH e a UXILI aRY INPUT J aCKS
Auxiliary input jacks are used to plug in compatible devices, such as video games and
portable video players. The jacks are located on the control panel and are color-coded
for identification. Refer to the section titled DVD Controls for a description.
REAR A uDIO CONTROL s
(if so equipped)
To lock or unlock audio controls, press the ReaR ON·OFF button on the front radio con-
trol panel.
21