2008 NISSAN TITAN wheel
[x] Cancel search: wheelPage 2 of 36
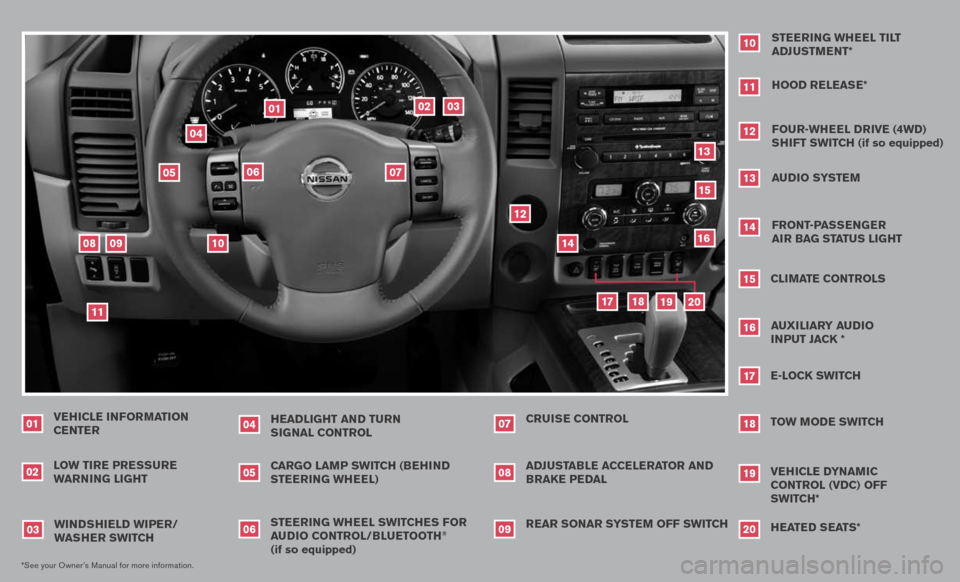
VEHICLE INFORMATION CENTER
LO w TIRE PRE ssuRE
wARNIN g LIgHT
01
HEADLI gHT AND Tu RN
s Ig NAL CONTROL
04
02*See your Owner’s Manual for more information.
sTEERIN g wHEEL swITCHE s FOR
A u DIO CONTROL/BLu ETOOTH
®
(if so equipped) CARgO LAMP swITCH (BEHIND
sTEERIN g wHEEL)
wIND sHIELD wIPER/
w As HER swITCH
03
0506
REAR sONAR sY sTEM OFF swITCH
ADJ
usTABLE ACCELERATOR AND BRAKE PEDAL CRuIs E CONTROL
070809
sTEERIN g wHEEL TILT
ADJ usTMENT*
10
HOOD RELEAs E*
11
FOuR-wHEEL DRIVE (4wD)
s HIFT swITCH (if so equipped)
12
Au DIO sY sTEM
13
FRONT-PAss ENgER
AIR BA g sTATus LI gHT
14
CLIMATE CONTROLs
15
E-LOCK swITCH
17
TOw MODE swITCH
18
11
09
03
02
04
06
01
05
15
18
19
17
14
13
12
07
08
10
VEHICLE DYNAMIC CONTROL (VDC) OFF
swITCH*
19
16
AuxILIARY Au DIO
I NPuT JACK *
16
H EATED s EATs*
20
20
Page 3 of 36
TAB LE O F C O NTE NTS
Remote Keyless Entry System . . . . . . . . . . . . . . . . . . 2
Windshield Wiper/Washer Switch
. . . . . . . . . . . . . . . . 2
Headlight and Turn Signal Control
. . . . . . . . . . . . . . . . 3
Steering Wheel Switches for Audio Control/ Bluetooth
® . . . . 4
Cruise Control
. . . . . . . . . . . . . . . . . . . . . . . . . . 4
Automatic Climate Control
. . . . . . . . . . . . . . . . . . . . 5
FM/AM/XM® Radio with CD Changer . . . . . . . . . . . . . . 6
Vehicle Information Display
. . . . . . . . . . . . . . . . . . . . 7
Control Panel Display with Navigation System
. . . . . . . . . 8
Clock/Set Adjustment
. . . . . . . . . . . . . . . . . . . . . . 8
Instrument Brightness Control/Trip Change Button
. . . . . . . 9
Automatic Driver Positioner
. . . . . . . . . . . . . . . . . . . 10
Adjustable Accelerator and Brake Pedals
. . . . . . . . . . . . 11
Manual Shift Mode
. . . . . . . . . . . . . . . . . . . . . . . . 11
Four-Wheel Drive (4WD) Shift Switch
. . . . . . . . . . . . . . 11
Vehicle Dynamic Control (VDC) Off Switch
. . . . . . . . . . . 12
Tow Mode Switch
. . . . . . . . . . . . . . . . . . . . . . . . . 12
E-Lock Switch
. . . . . . . . . . . . . . . . . . . . . . . . . . . 12
Front-Passenger Air Bag Status Light
. . . . . . . . . . . . . . 13
Tire Pressure Monitoring System (TPMS)
. . . . . . . . . . . . 13
Seatbelt Warning Light and Chime
. . . . . . . . . . . . . . . 13
Cargo Light Switch
. . . . . . . . . . . . . . . . . . . . . . . . 14
Rear Sonar System Off Switch
. . . . . . . . . . . . . . . . . 14
Child Safety Rear Door Locks
. . . . . . . . . . . . . . . . . . 14
Wide Open Doors
. . . . . . . . . . . . . . . . . . . . . . . . 14
High Utility Bed and Utili-Track
™ Channel System . . . . . . . . 15
Outside Mirror Control Switch
. . . . . . . . . . . . . . . . . . 15
Sunroof Controls
. . . . . . . . . . . . . . . . . . . . . . . . . 15
Front Seat Adjustments
. . . . . . . . . . . . . . . . . . . . . 16
Folding the Rear Bench Seat
. . . . . . . . . . . . . . . . . . 16
Homelink® Universal Transceiver . . . . . . . . . . . . . . . . . 16
Bluetooth® Hands-Free Phone System . . . . . . . . . . . . . 18
DVD Controls
. . . . . . . . . . . . . . . . . . . . . . . . . . . 20
Rear Audio Controls
. . . . . . . . . . . . . . . . . . . . . . . 21
Navigation System
. . . . . . . . . . . . . . . . . . . . . . . . 23
Page 6 of 36
4
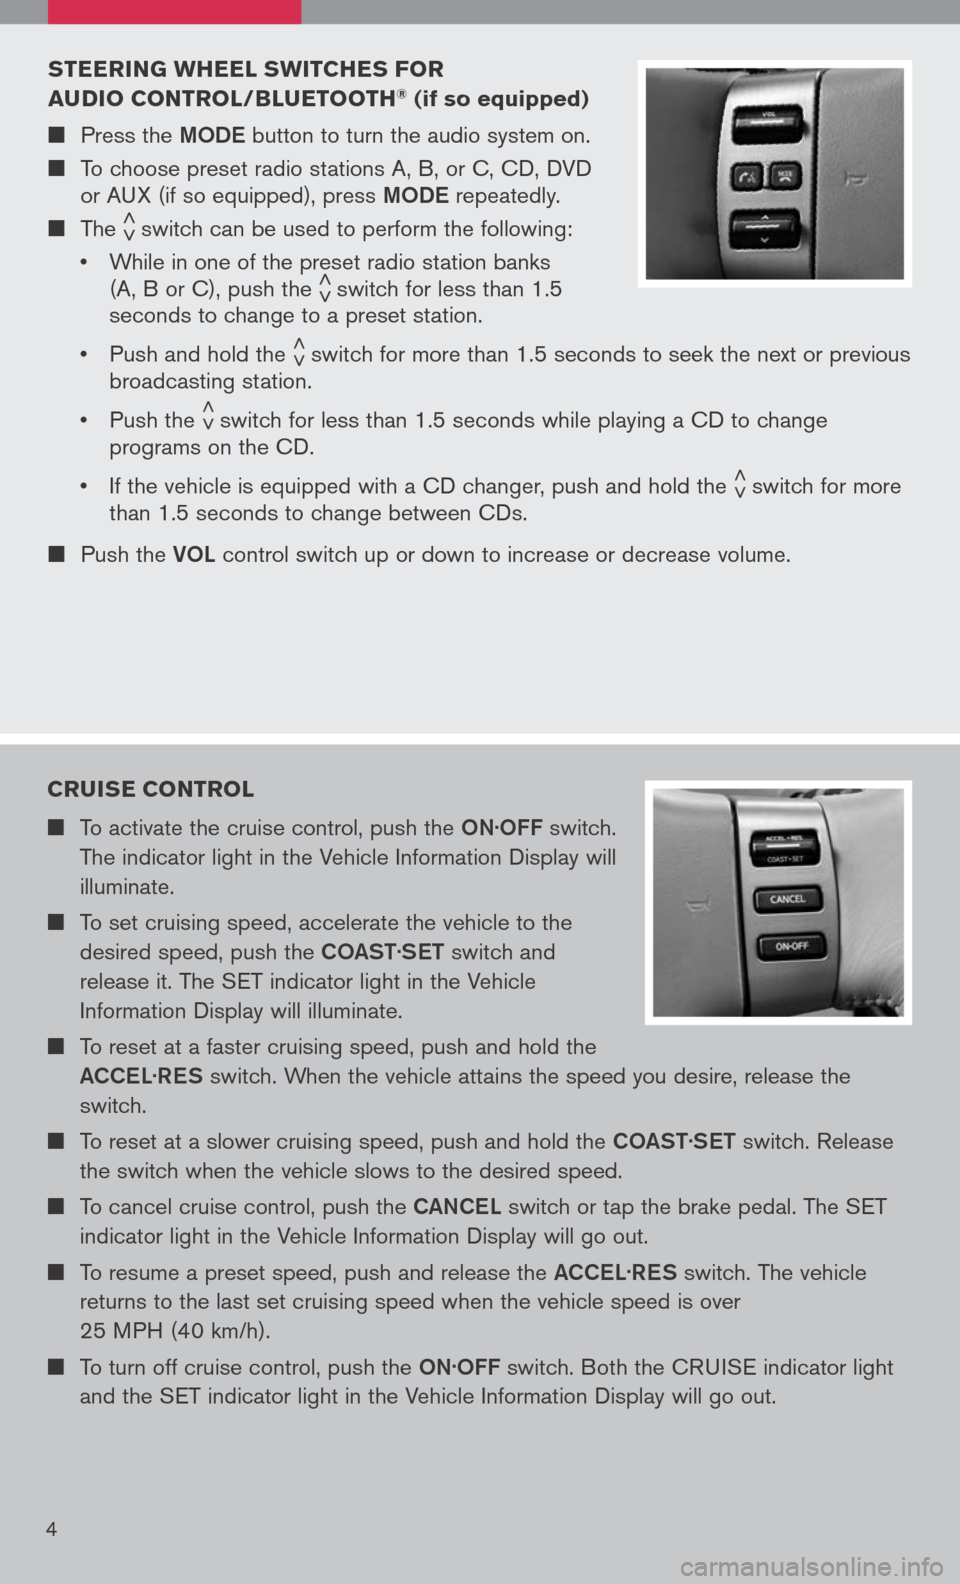
sTEERIN g wHEEL swITCHE s FOR
A u DIO CONTROL/B Lu ETOOTH® (if so equipped)
Press the MODe button to turn the audio system on.
To choose preset radio stations A, B, or C, CD, DVD
or AUX (if so equipped), press MODe repeatedly.
The < >switch can be used to perform the following:
• While in one of the preset radio station banks
(A, B or C), push the < >switch for less than 1.5
seconds to change to a preset station.
• Push and hold the
< >switch for more than 1.5 seconds to seek the next or previous
broadcasting station.
• Push the
< >switch for less than 1.5 seconds while playing a CD to change
programs on the CD.
• If the vehicle is equipped with a CD changer, push and hold the
< >switch for more
than 1.5 seconds to change between CDs.
Push the VOL control switch up or down to increase or decrease volume.
CRuIs E CONTROL
To activate the cruise control, push the ON.OFF switch.
The indicator light in the Vehicle Information Display will
illuminate.
To set cruising speed, accelerate the vehicle to the
desired speed, push the COaST.
S eT switch and
release it. The SET indicator light in the Vehicle
Information Display will illuminate.
To reset at a faster cruising speed, push and hold the
a CCe L.
R eS switch. When the vehicle attains the speed you desire, release the
switch.
To reset at a slower cruising speed, push and hold the COaST.
S eT switch. Release
the switch when the vehicle slows to the desired speed.
To cancel cruise control, push the CaNCe L switch or tap the brake pedal. The SET
indicator light in the Vehicle Information Display will go out.
To resume a preset speed, push and release the aCCe L.
R eS switch. The vehicle
returns to the last set cruising speed when the vehicle speed is over
25 MPH (40 km/h).
To turn off cruise control, push the ON.OFF switch. Both the CRUISE indicator light
and the SET indicator light in the Vehicle Information Display will go out.
Page 13 of 36
11
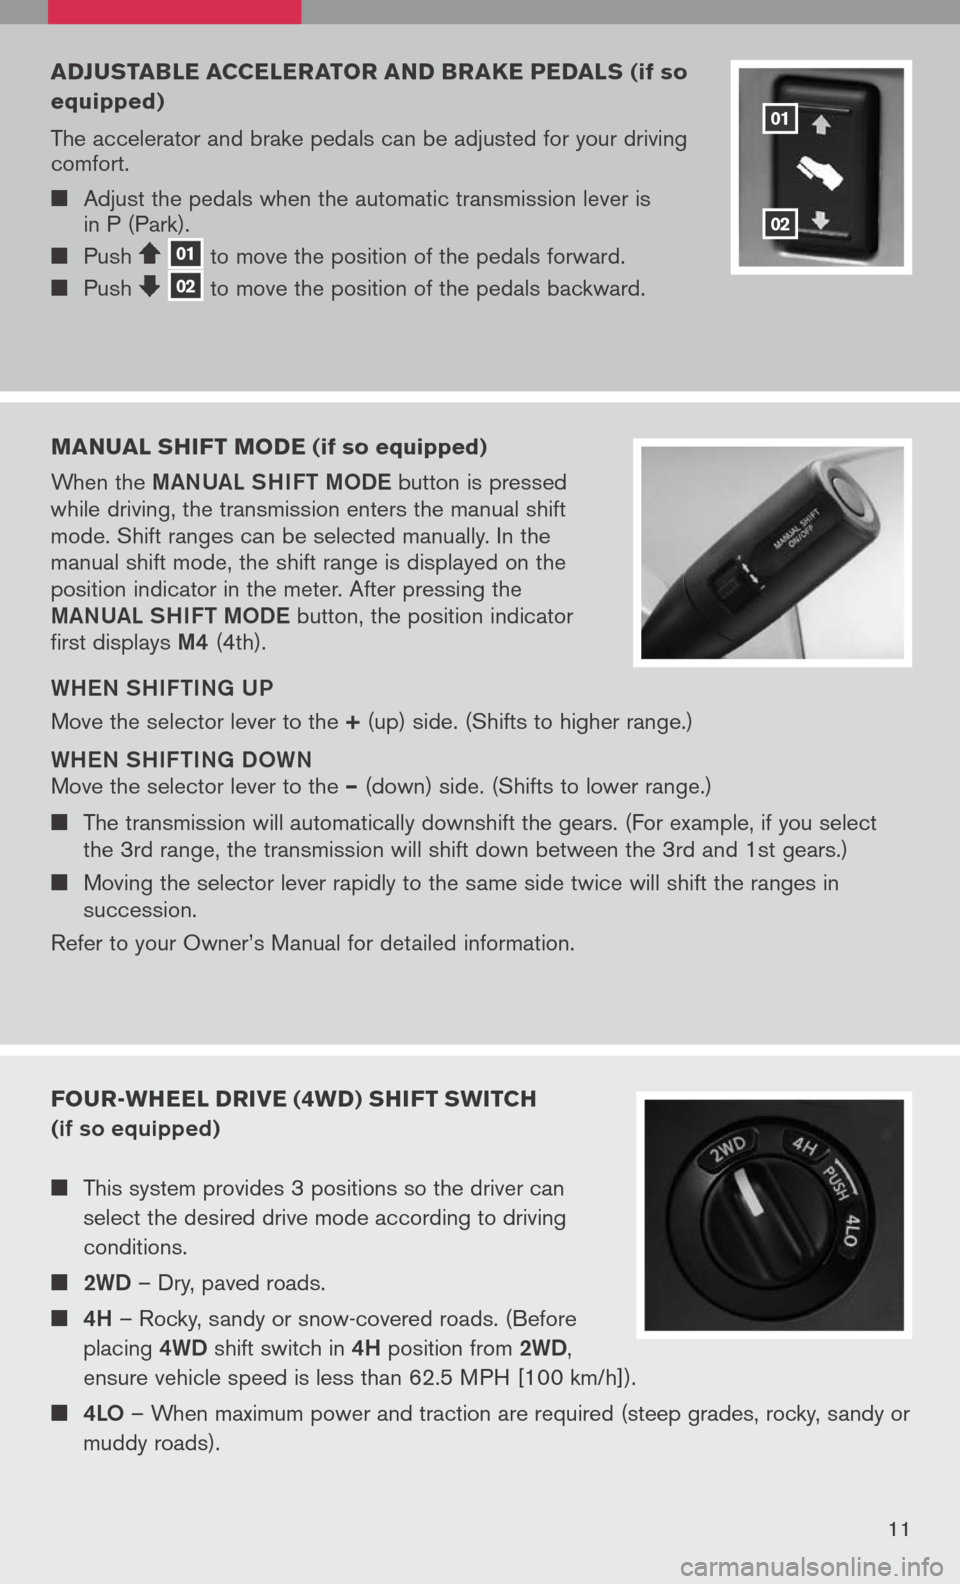
ADJusTABLE ACCELERATOR AND BRAKE PEDAL s (if so
equipped)
The accelerator and brake pedals can be adjusted for your driving
comfort.
Adjust the pedals when the automatic transmission lever is
in P (Park).
Push 01 to move the position of the pedals forward.
Push 02 to
move the position of the pedals backward.
01
02
MANuAL sHIFT MODE (if so equipped)
When the MaNU aL SHIFT MODe button is pressed
while driving, the transmission enters the manual shift
mode. Shift ranges can be selected manually. In the
manual shift mode, the shift range is displayed on the
position indicator in the meter. After pressing the
MaNU aL SHIFT MODe button, the position indicator
first displays
M4 (4th).
W HeN SHIF TIN g UP
Move the selector lever to the
+ (up) side. (Shifts to higher range.)
W HeN SHIF TIN g DOWN
Move the selector lever to the – (down) side. (Shifts to lower range.)
The transmission will automatically downshift the gears. (For example, if you select
the 3rd range, the transmission will shift down between the 3rd and 1st gears.)
Moving the selector lever rapidly to the same side twice will shift the ranges in succession.
Refer to your Owner’s Manual for detailed information.
FOuR- wHEEL DRIVE (4 wD) s HIFT sw ITCH
(if so equipped)
This system provides 3 positions so the driver can
select the desired drive mode according to driving
conditions.
2WD – Dry, paved roads.
4H – Rocky, sandy or snow-covered roads. (Before
placing
4WD shift switch in 4H position from 2WD ,
ensure vehicle speed is less than 62.5 MPH [100 km/h]).
4LO – When maximum power and traction are required (steep grades, rocky, sandy or
muddy roads).
11
Page 14 of 36
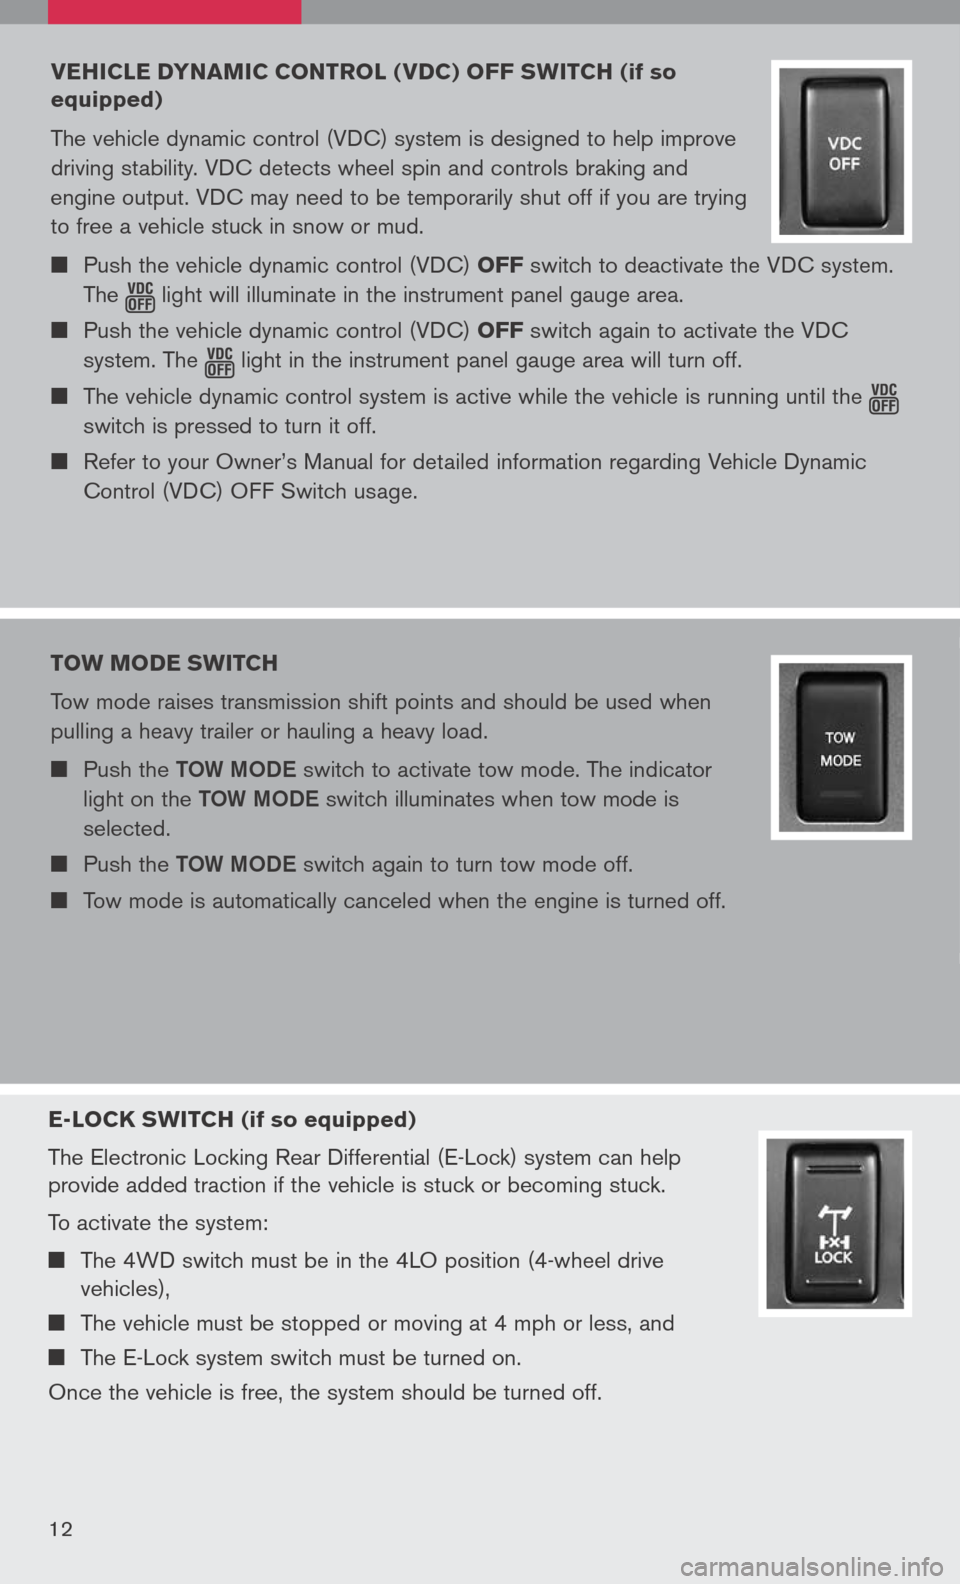
E-LOCK swITCH (if so equipped)
The Electronic Locking Rear Differential (E-Lock) system can help
provide added traction if the vehicle is stuck or becoming stuck.
To activate the system:
The 4WD switch must be in the 4LO position (4-wheel drive
vehicles),
The vehicle must be stopped or moving at 4 mph or less, and
The E-Lock system switch must be turned on.
Once the vehicle is free, the system should be turned off.
12
VEHICLE DYNAMIC CONTROL ( VDC) OFF sw ITCH (if so
equipped)
The vehicle dynamic control (VDC) system is designed to help improve
driving stability. VDC detects wheel spin and controls braking and
engine output. VDC may need to be temporarily shut off if you are trying
to free a vehicle stuck in snow or mud.
Push the vehicle dynamic control (VDC) OFF switch to deactivate the VDC system.
The light
will illuminate in the instrument panel gauge area. Push the vehicle dynamic control (VDC) OFF switch again to activate the VDC
system. The
light
in the instrument panel gauge area will turn off. The vehicle dynamic control system is active while the vehicle is running until the
switch is pressed to turn it off.
Refer to your Owner’s Manual for detailed information regarding Vehicle Dynamic
Control (VDC) OFF Switch usage.
TOw MODE swITCH
Tow mode raises transmission shift points and should be used when
pulling a heavy trailer or hauling a heavy load.
Push the TOW MODe switch to activate tow mode. The indicator
light on the TOW MODe switch illuminates when tow mode is
selected.
Push the TOW MODe switch again to turn tow mode off.
Tow mode is automatically canceled when the engine is turned off.
Page 20 of 36
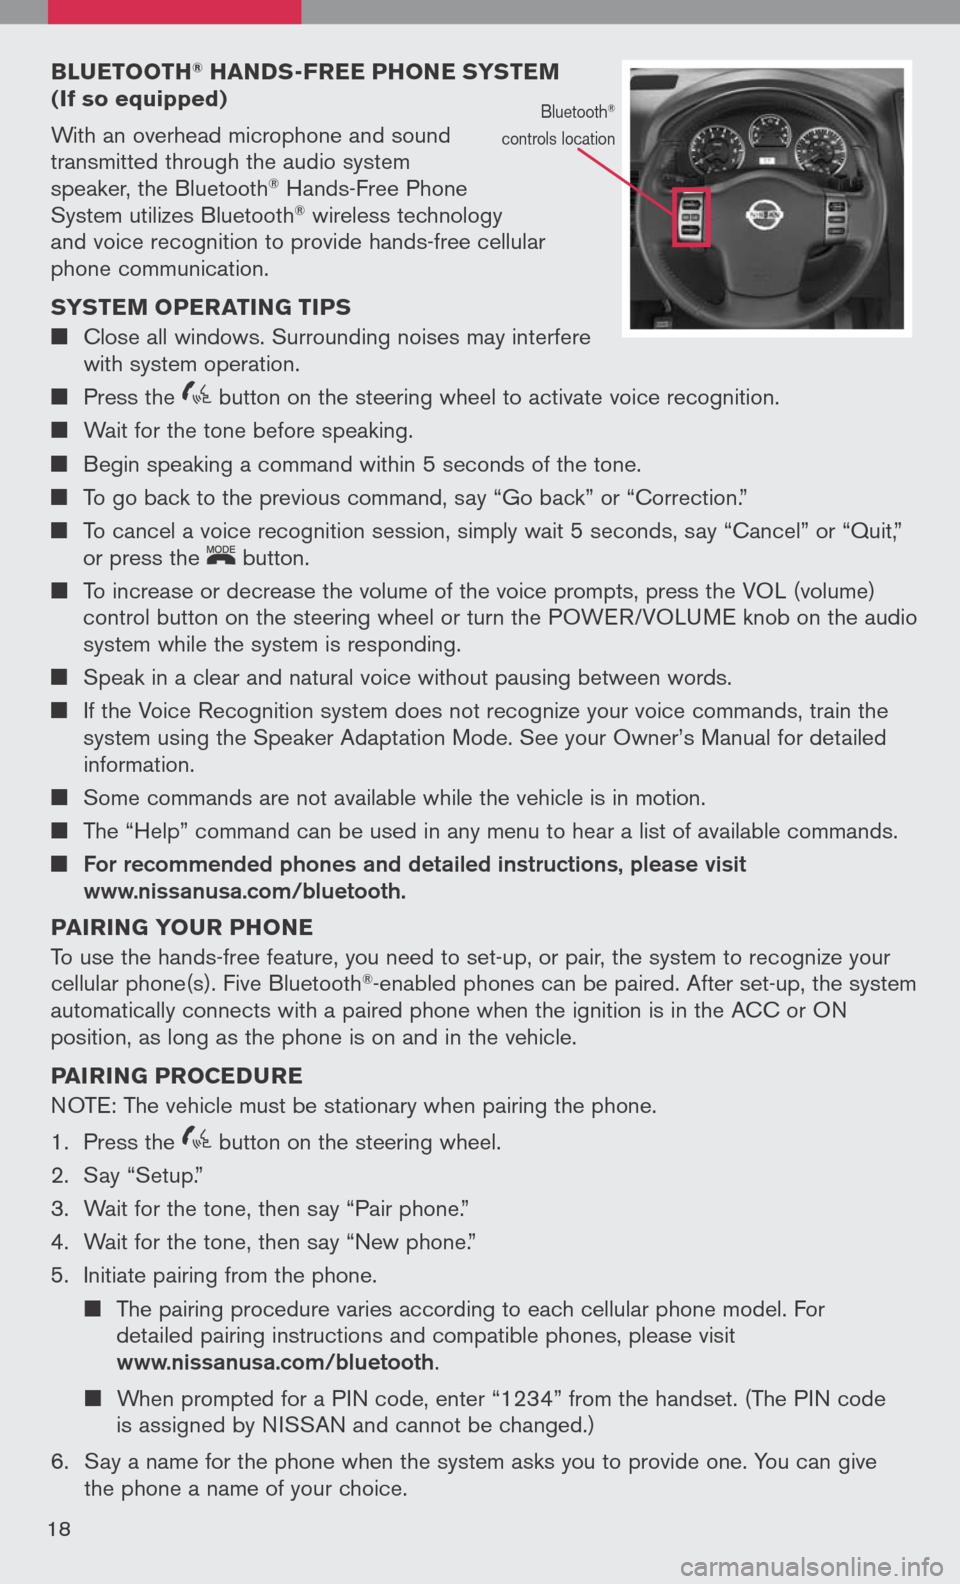
BLuETOOTH® HAND s-FREE PHONE sY s TEM (If so equipped)
With an overhead microphone and sound
transmitted through the audio system
speaker, the Bluetooth® Hands-Free Phone
System utilizes Bluetooth® wireless technology
and voice recognition to provide hands-free cellular
phone communication.
s Y s TEM OPERATIN g TIPs
Close all windows. Surrounding noises may interfere
with system operation.
Press the
icon C button on the steering wheel to activate voice recognition.
Wait for the tone before speaking.
Begin speaking a command within 5 seconds of the tone.
To go back to the previous command, say “Go back” or “Correction.”
To cancel a voice recognition session, simply wait 5 seconds, say “Cancel” or “Quit,”
or press the
LCN0090
button.
To increase or decrease the volume of the voice prompts, press the VOL (volume)
control button on the steering wheel or turn the POWER/VOLUME knob on the audio
system while the system is responding.
Speak in a clear and natural voice without pausing between words.
If the Voice Recognition system does not recognize your voice commands, train the
system using the Speaker Adaptation Mode. See your Owner’s Manual for detailed
information.
Some commands are not available while the vehicle is in motion.
The “Help” command can be used in any menu to hear a list of available commands.
For recommended phones and detailed instructions, please visit www.nissanusa.com/bluetooth.
PAIRIN g YOuR PHONE
To use the hands-free feature, you need to set-up, or pair, the system to recognize your
cellular phone(s). Five Bluetooth
®-enabled phones can be paired. After set-up, the system
automatically connects with a paired phone when the ignition is in the ACC or ON
position, as long as the phone is on and in the vehicle.
PAIRIN g PROCED uRE
NOTE: The vehicle must be stationary when pairing the phone.
1. Press the
icon C button on the steering wheel.
2. Say “Setup.”
3. Wait for the tone, then say “Pair phone.”
4. Wait for the tone, then say “New phone.”
5. Initiate pairing from the phone.
The pairing procedure varies according to each cellular phone model. For
detailed pairing instructions and compatible phones, please visit
www.nissanusa.com/bluetooth.
When prompted for a PIN code, enter “1234” from the handset. (The PIN code
is assigned by NISSAN and cannot be changed.)
6. Say a name for the phone when the system asks you to provide one. You can give
the phone a name of your choice.
18
Bluetooth®
controls location