2008 NISSAN TITAN engine
[x] Cancel search: enginePage 9 of 36

* XM® presets are only available on XM® Satellite Radio equipped vehicles.
07
06
08
09
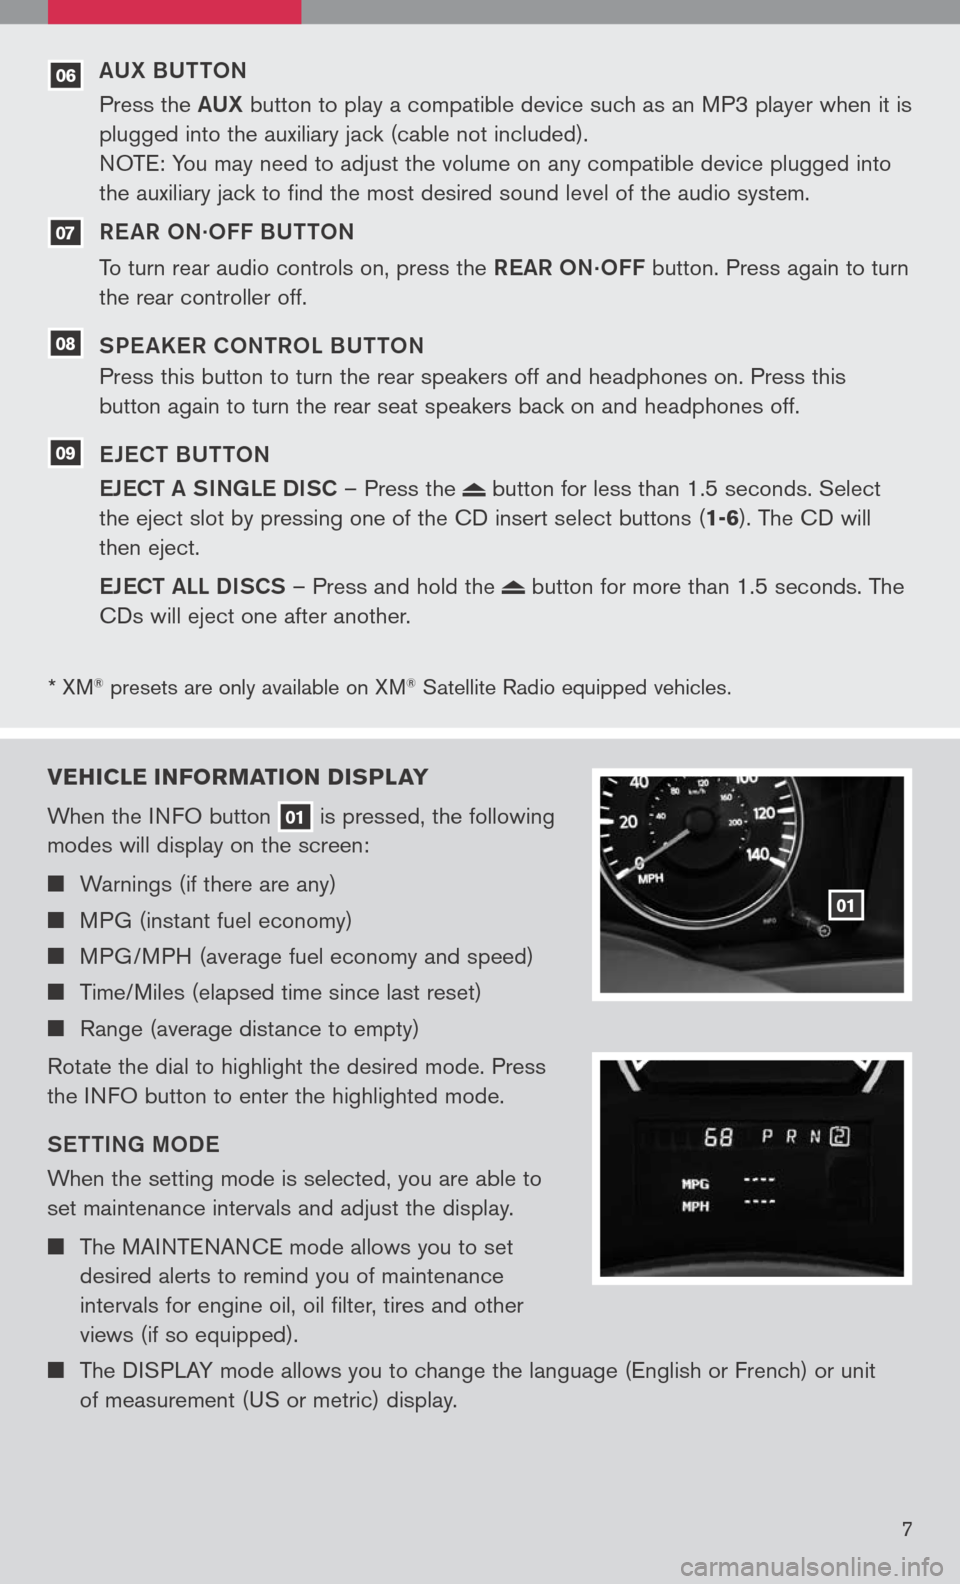
VEHICLE INFORMATION DI sPLAY
When the INFO button
01 is pressed, the following
modes will display on the screen:
Warnings (if there are any)
MPG (instant fuel economy)
MPG/MPH (average fuel economy and speed)
Time/Miles (elapsed time since last reset)
Range (average distance to empty)
Rotate the dial to highlight the desired mode. Press
the INFO button to enter the highlighted mode.
S eTTIN g MOD e
When the setting mode is selected, you are able to
set maintenance intervals and adjust the display.
The MAINTENANCE mode allows you to set
desired alerts to remind you of maintenance
intervals for engine oil, oil filter, tires and other
views (if so equipped).
The DISPLAY mode allows you to change the language (English or French) or unit
of measurement (US or metric) display.
01
7
aUX BUTTON
Press the aUX button to play a compatible device such as an MP3 player when it is
plugged into the auxiliary jack (cable not included).
NOTE: You may need to adjust the volume on any compatible device plugged into
the auxiliary jack to find the most desired sound level of the audio system.
R e a R ON
.OFF BUTTON
To turn rear audio controls on, press the ReaR
ON.OFF button. Press again to turn
the rear controller off.
SP e aKeR CONTROL BUTTON
Press this button to turn the rear speakers off and headphones on. Press this
button again to turn the rear seat speakers back on and headphones off.
e Je CT BUTTON
e JeCT a SINg Le DISC – Press the
button for less than 1.5 seconds. Select
the eject slot by pressing one of the CD insert select buttons (
1-6). The CD will
then eject.
e JeCT aLL DISCS – Press and hold the
button for more than 1.5 seconds. The
CDs will eject one after another.
Page 10 of 36

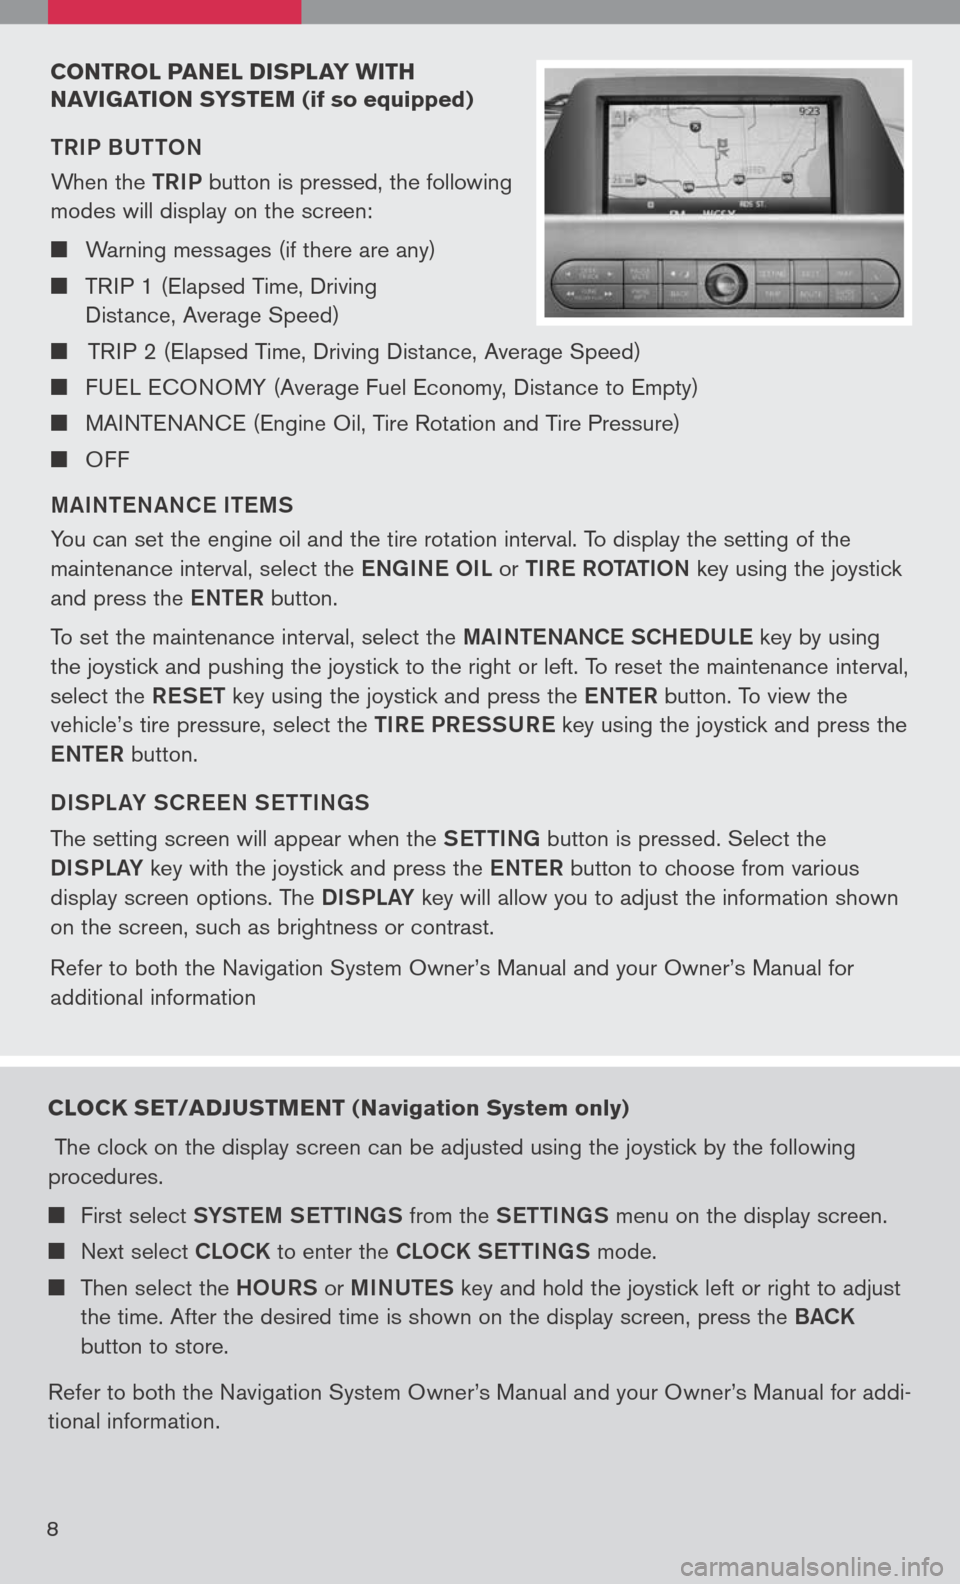
CONTROL PANEL DIsPLAY w ITH
N AVI gATION sY sTEM
(if so equipped)
TRIP BUTTON
When the
TRIP button is pressed, the following
modes will display on the screen:
Warning messages (if there are any)
TRIP 1 (Elapsed Time, Driving
Distance, Average Speed)
TRIP 2 (Elapsed Time, Driving Distance, Average Speed)
FUEL ECONOMY (Average Fuel Economy, Distance to Empty)
MAINTENANCE (Engine Oil, Tire Rotation and Tire Pressure)
OFF
M aINT eN aNC e IT eMS
You can set the engine oil and the tire rotation interval. To display the setting of the
maintenance interval, select the eNg INe OIL or TIR e ROT aTION key using the joystick
and press the eNTe R button.
To set the maintenance interval, select the MaINTe NaNCe SCH eDUL e key by using
the joystick and pushing the joystick to the right or left. To reset the maintenance interval,
select the ReSeT key using the joystick and press the eNTe R button. To view the
vehicle’s tire pressure, select the TIRe PR eSSUR e key using the joystick and press the
e NTe R button.
DISPL aY SCR eeN S eTTIN gS
The setting screen will appear when the SeTTINg button is pressed. Select the
DISPLa Y key with the joystick and press the eNTe R button to choose from various
display screen options. The DISPLa Y key will allow you to adjust the information shown
on the screen, such as brightness or contrast.
Refer to both the Navigation System Owner’s Manual and your Owner’s Manual for
additional information
8
CLOCK sET/ADJ usTMENT ( Navigation system only)
The clock on the display screen can be adjusted using the joystick by the following
procedures.
First select SYSTe M SeTTINg S from the SeTTINg S menu on the display screen.
Next select CLOCK to enter the CLOCK S eTTINgS mode.
Then select the HOURS or MINUTe S key and hold the joystick left or right to adjust
the time. After the desired time is shown on the display screen, press the BaCK
button to store.
Refer to both the Navigation System Owner’s Manual and your Owner’s Manual for addi
-
tional information.
Page 14 of 36

E-LOCK swITCH (if so equipped)
The Electronic Locking Rear Differential (E-Lock) system can help
provide added traction if the vehicle is stuck or becoming stuck.
To activate the system:
The 4WD switch must be in the 4LO position (4-wheel drive
vehicles),
The vehicle must be stopped or moving at 4 mph or less, and
The E-Lock system switch must be turned on.
Once the vehicle is free, the system should be turned off.
12
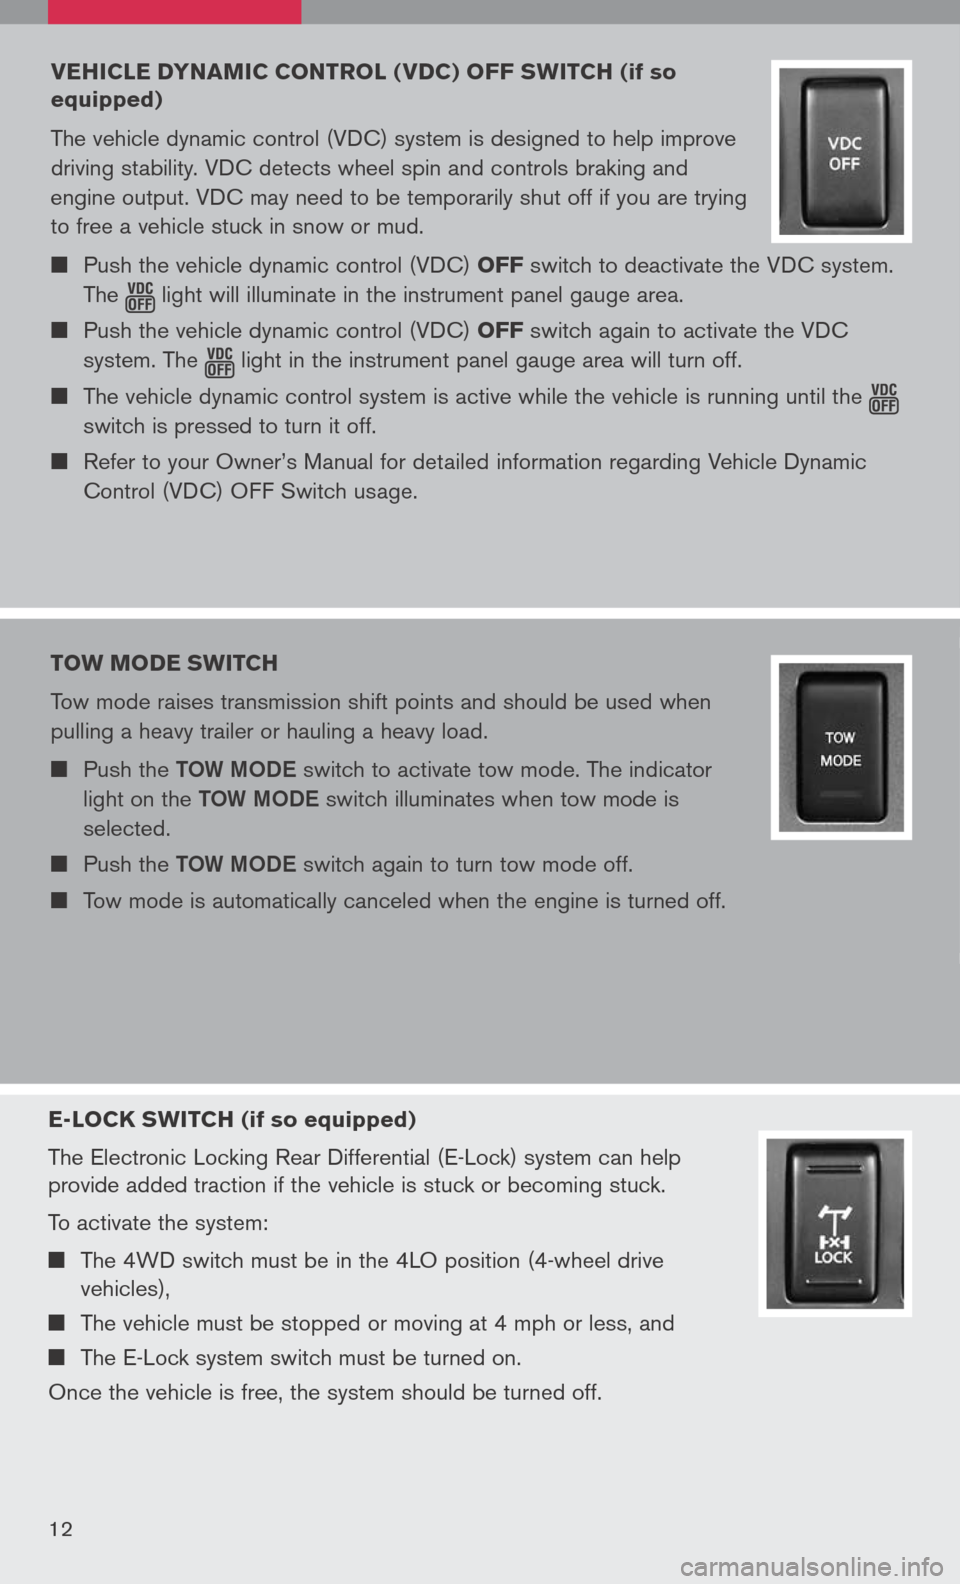
VEHICLE DYNAMIC CONTROL ( VDC) OFF sw ITCH (if so
equipped)
The vehicle dynamic control (VDC) system is designed to help improve
driving stability. VDC detects wheel spin and controls braking and
engine output. VDC may need to be temporarily shut off if you are trying
to free a vehicle stuck in snow or mud.
Push the vehicle dynamic control (VDC) OFF switch to deactivate the VDC system.
The light
will illuminate in the instrument panel gauge area. Push the vehicle dynamic control (VDC) OFF switch again to activate the VDC
system. The
light
in the instrument panel gauge area will turn off. The vehicle dynamic control system is active while the vehicle is running until the
switch is pressed to turn it off.
Refer to your Owner’s Manual for detailed information regarding Vehicle Dynamic
Control (VDC) OFF Switch usage.
TOw MODE swITCH
Tow mode raises transmission shift points and should be used when
pulling a heavy trailer or hauling a heavy load.
Push the TOW MODe switch to activate tow mode. The indicator
light on the TOW MODe switch illuminates when tow mode is
selected.
Push the TOW MODe switch again to turn tow mode off.
Tow mode is automatically canceled when the engine is turned off.
Page 18 of 36

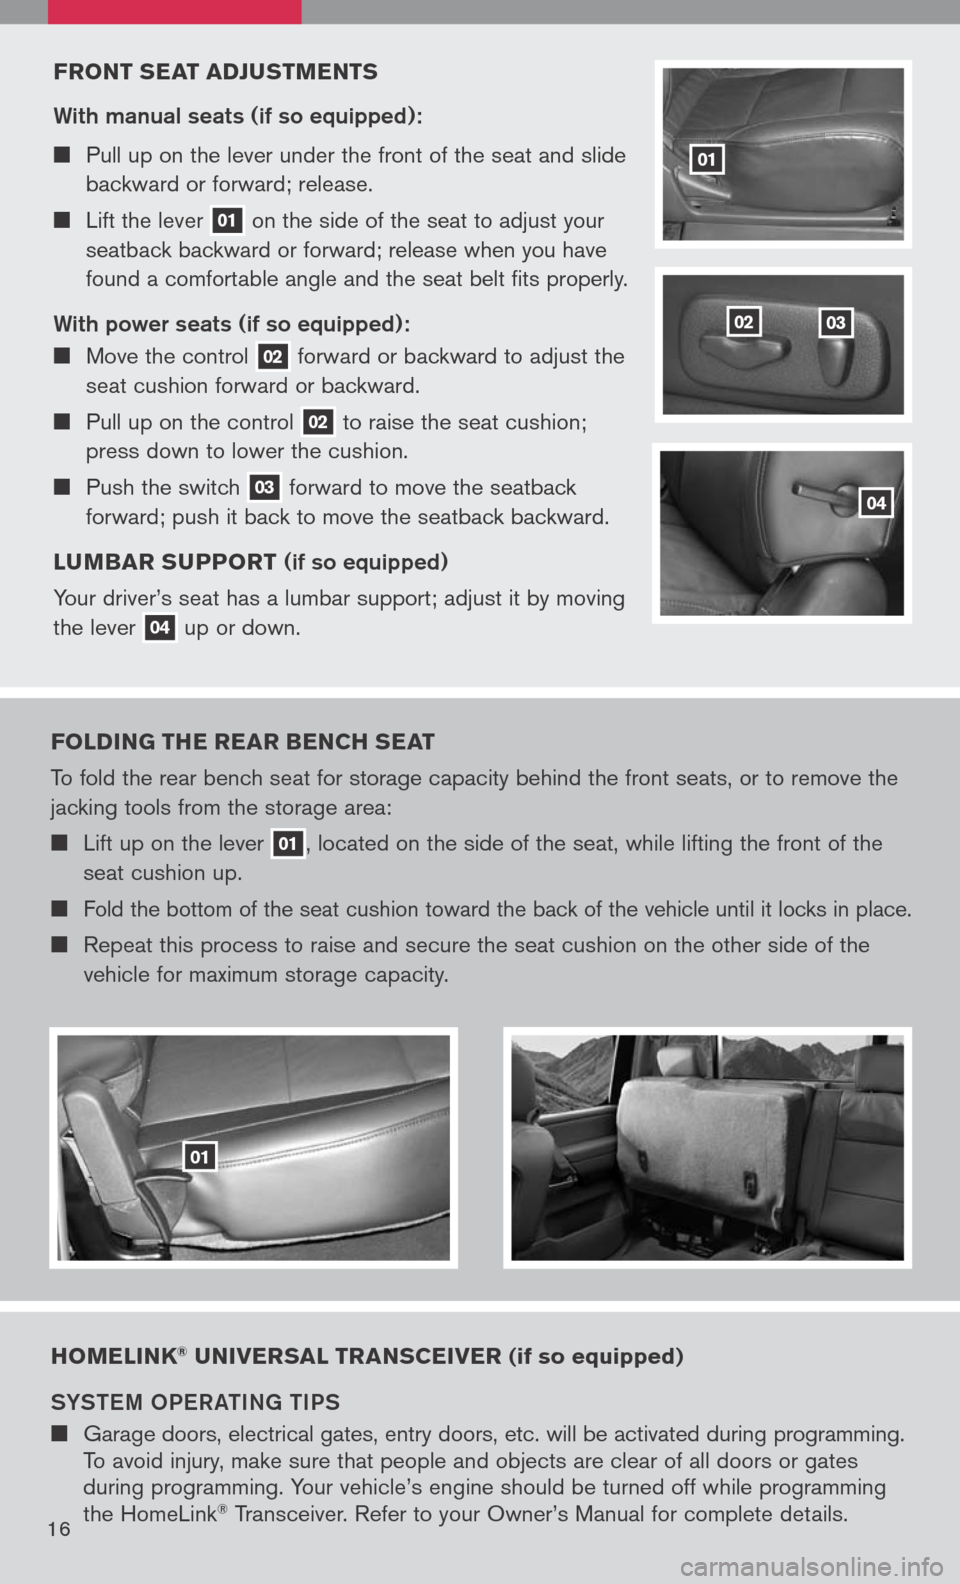
FRONT sEAT ADJ usTMENT s
With manual seats (if so equipped):
Pull up on the lever under the front of the seat and slide
backward or forward; release.
Lift the lever 01 on
the side of the seat to adjust your
seatback backward or forward; release when you have
found a comfortable angle and the seat belt fits properly.
With power seats (if so equipped):
Move the control 02 forward
or backward to adjust the
seat cushion forward or backward.
Pull up on the control 02 to
raise the seat cushion;
press down to lower the cushion.
Push the switch 03 forward
to move the seatback
forward; push it back to move the seatback backward.
L u MBAR suPPORT
(if so equipped)
Your driver’s seat has a lumbar support; adjust it by moving
the lever
04 up
or down.
0302
01
04
FOLDIN g THE REAR BENCH sEAT
To fold the rear bench seat for storage capacity behind the front seats, or to remove the
jacking tools from the storage area:
Lift up on the lever 01, located on the side of the seat, while lifting the front of the
seat cushion up.
Fold the bottom of the seat cushion toward the back of the vehicle until it locks in place.
Repeat this process to raise and secure the seat cushion on the other side of the
vehicle for maximum storage capacity.
01
HOMELINK® u NIVER sAL TRAN sCEIVER (if so equipped)
SYST eM OP eR aTIN g TIPS
Garage doors, electrical gates, entry doors, etc. will be activated during programming.
To avoid injury, make sure that people and objects are clear of all doors or gates
during programming. Your vehicle’s engine should be turned off while programming
the HomeLink
® Transceiver. Refer to your Owner’s Manual for complete details.16