2008 NISSAN TITAN instrument panel
[x] Cancel search: instrument panelPage 3 of 36
TAB LE O F C O NTE NTS
Remote Keyless Entry System . . . . . . . . . . . . . . . . . . 2
Windshield Wiper/Washer Switch
. . . . . . . . . . . . . . . . 2
Headlight and Turn Signal Control
. . . . . . . . . . . . . . . . 3
Steering Wheel Switches for Audio Control/ Bluetooth
® . . . . 4
Cruise Control
. . . . . . . . . . . . . . . . . . . . . . . . . . 4
Automatic Climate Control
. . . . . . . . . . . . . . . . . . . . 5
FM/AM/XM® Radio with CD Changer . . . . . . . . . . . . . . 6
Vehicle Information Display
. . . . . . . . . . . . . . . . . . . . 7
Control Panel Display with Navigation System
. . . . . . . . . 8
Clock/Set Adjustment
. . . . . . . . . . . . . . . . . . . . . . 8
Instrument Brightness Control/Trip Change Button
. . . . . . . 9
Automatic Driver Positioner
. . . . . . . . . . . . . . . . . . . 10
Adjustable Accelerator and Brake Pedals
. . . . . . . . . . . . 11
Manual Shift Mode
. . . . . . . . . . . . . . . . . . . . . . . . 11
Four-Wheel Drive (4WD) Shift Switch
. . . . . . . . . . . . . . 11
Vehicle Dynamic Control (VDC) Off Switch
. . . . . . . . . . . 12
Tow Mode Switch
. . . . . . . . . . . . . . . . . . . . . . . . . 12
E-Lock Switch
. . . . . . . . . . . . . . . . . . . . . . . . . . . 12
Front-Passenger Air Bag Status Light
. . . . . . . . . . . . . . 13
Tire Pressure Monitoring System (TPMS)
. . . . . . . . . . . . 13
Seatbelt Warning Light and Chime
. . . . . . . . . . . . . . . 13
Cargo Light Switch
. . . . . . . . . . . . . . . . . . . . . . . . 14
Rear Sonar System Off Switch
. . . . . . . . . . . . . . . . . 14
Child Safety Rear Door Locks
. . . . . . . . . . . . . . . . . . 14
Wide Open Doors
. . . . . . . . . . . . . . . . . . . . . . . . 14
High Utility Bed and Utili-Track
™ Channel System . . . . . . . . 15
Outside Mirror Control Switch
. . . . . . . . . . . . . . . . . . 15
Sunroof Controls
. . . . . . . . . . . . . . . . . . . . . . . . . 15
Front Seat Adjustments
. . . . . . . . . . . . . . . . . . . . . 16
Folding the Rear Bench Seat
. . . . . . . . . . . . . . . . . . 16
Homelink® Universal Transceiver . . . . . . . . . . . . . . . . . 16
Bluetooth® Hands-Free Phone System . . . . . . . . . . . . . 18
DVD Controls
. . . . . . . . . . . . . . . . . . . . . . . . . . . 20
Rear Audio Controls
. . . . . . . . . . . . . . . . . . . . . . . 21
Navigation System
. . . . . . . . . . . . . . . . . . . . . . . . 23
Page 5 of 36
3
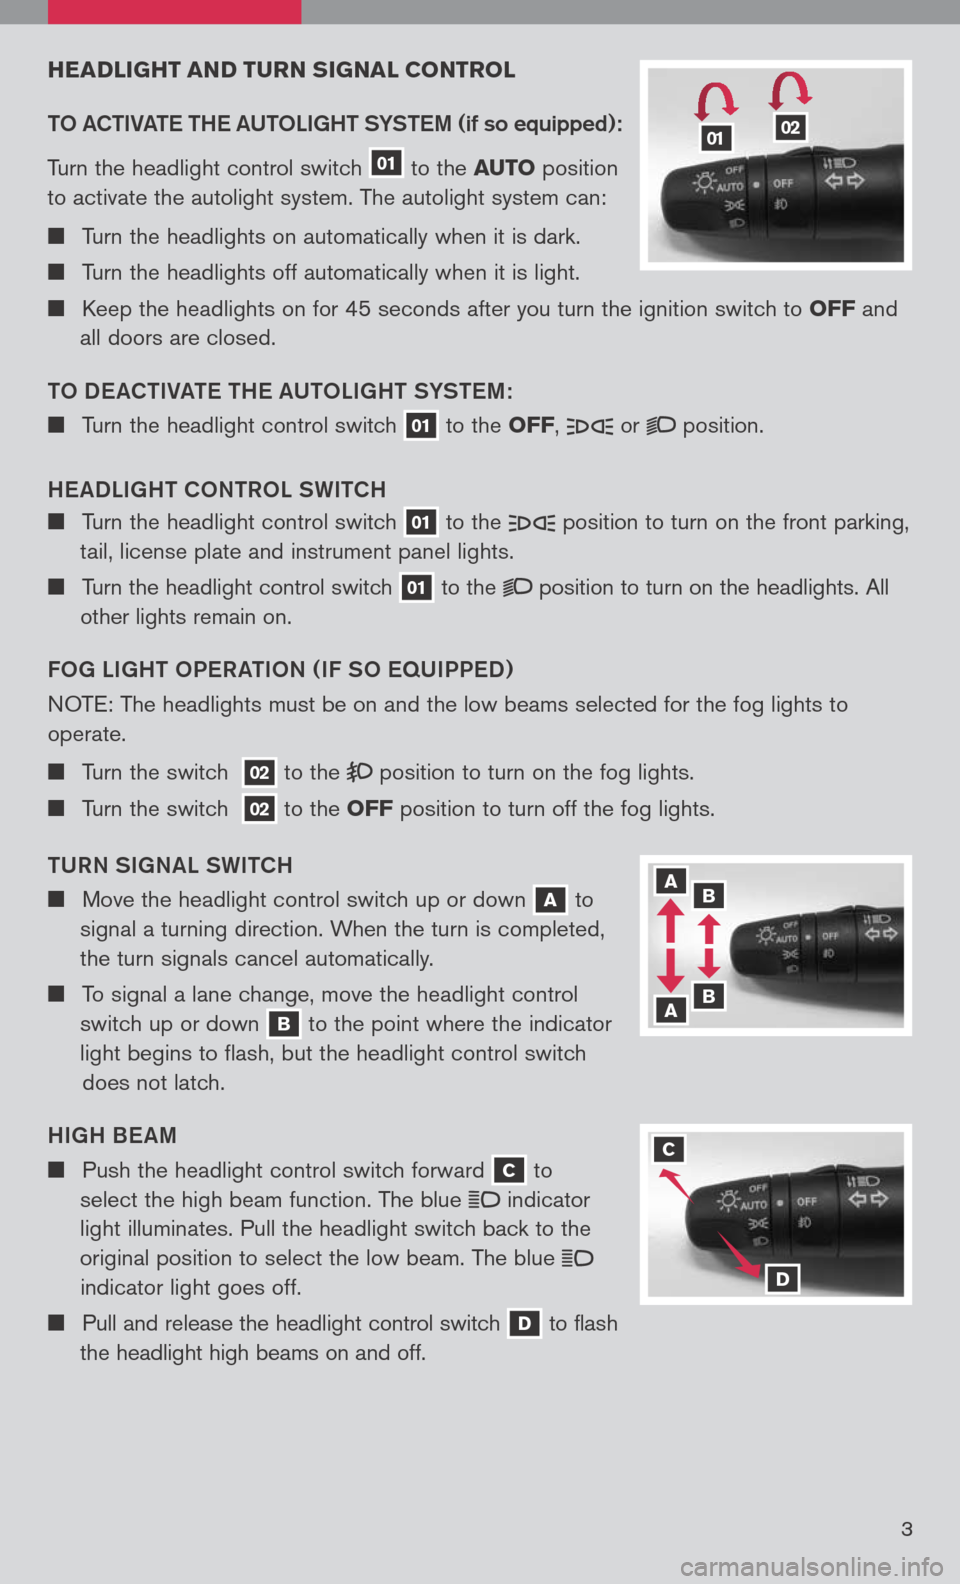
HEADLIgHT AND T uRN sIg NAL CONTROL
TO aCTIV aTe TH e a UTOLI gHT SYST eM
(if so equipped):
Turn the headlight control switch
01
to the AuTO position
to activate the autolight system. The autolight system can:
Turn the headlights on automatically when it is dark.
Turn the headlights off automatically when it is light.
Keep the headlights on for 45 seconds after you turn the ignition switch to OFF and
all doors are closed.
TO D eaCTIV aTe TH e aUTOLI gHT SYST eM :
Turn the headlight control switch 01 to the OFF, or position.
H ea DLI gHT CONTROL SWITCH
Turn the headlight control switch 01 to the position
to turn on the front parking,
tail, license plate and instrument panel lights.
Turn the headlight control switch 01 to the position
to turn on the headlights. All
other lights remain on.
FO g LI gHT OP eR aTION ( IF SO eq UIPPeD )
N OTE: The headlights must be on and the low beams selected for the fog lights to
operate.
Turn the switch 02 to the position
to turn on the fog lights.
Turn the switch 02 to the OFF position to turn off the fog lights.
TURN SI gNaL SWITCH
Move the headlight control switch up or down A to
signal a turning direction. When the turn is completed,
the turn signals cancel automatically.
To signal a lane change, move the headlight control
switch up or down
B to the point where the indicator
light begins to flash, but the headlight control switch
does not latch.
HI gH B eaM
Push the headlight control switch forward C to
select the high beam function. The blue
indicator
light illuminates. Pull the headlight switch back to the
original position to select the low beam. The blue
indicator light goes off.
Pull and release the headlight control switch D to flash
the headlight high beams on and off.
0102
A B
B A
C
D
3
Page 11 of 36
9
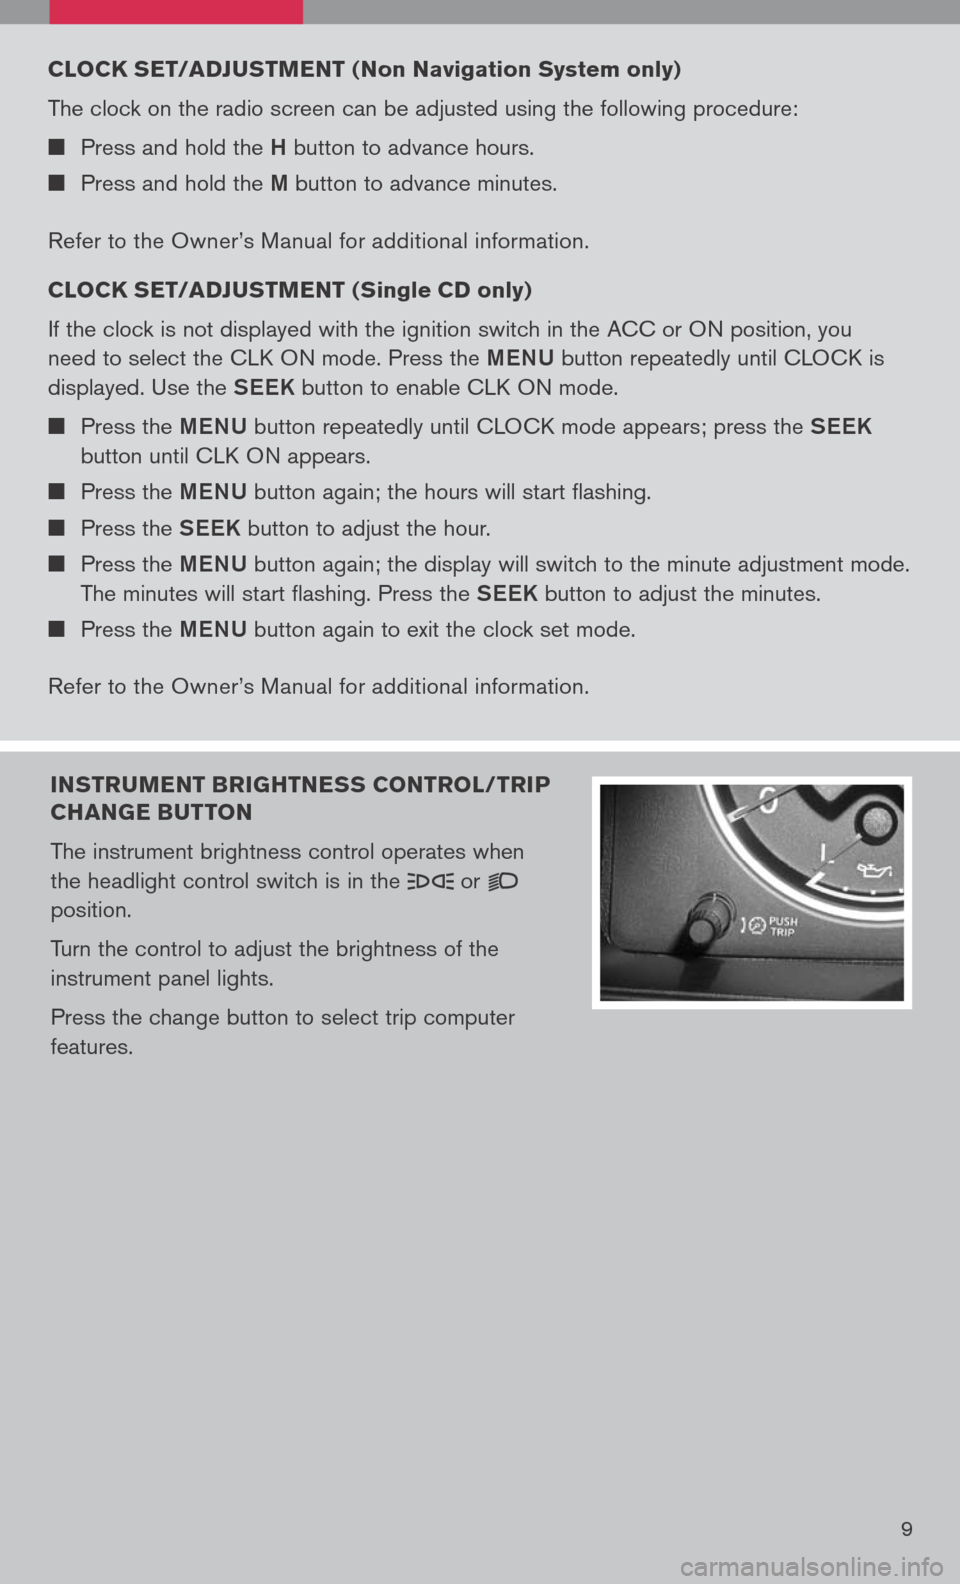
INsTR uMENT BRI gHTNE ss CONTROL/TRIP
CHAN gE B uTTON
The instrument brightness control operates when
the headlight control switch is in the
or
position.
Turn the control to adjust the brightness of the
instrument panel lights.
Press the change button to select trip computer
features.
CLOCK sET/ADJ usTMENT ( Non Navigation system only)
The clock on the radio screen can be adjusted using the following procedure:
Press and hold the H button to advance hours.
Press and hold the M button to advance minutes.
Refer to the Owner’s Manual for additional information.
CLOCK sET/ADJ usTMENT ( single CD only
)
If the clock is not displayed with the ignition switch in the ACC or ON position, you
need to select the CLK ON mode. Press the MeNU button repeatedly until CLOCK is
displayed. Use the See K button to enable CLK ON mode.
Press the MeNU button repeatedly until CLOCK mode appears; press the See K
button until CLK ON appears.
Press the MeNU button again; the hours will start flashing.
Press the See K button to adjust the hour.
Press the MeNU button again; the display will switch to the minute adjustment mode.
The minutes will start flashing. Press the See K button to adjust the minutes.
Press the MeNU button again to exit the clock set mode.
Refer to the Owner’s Manual for additional information.
Page 14 of 36
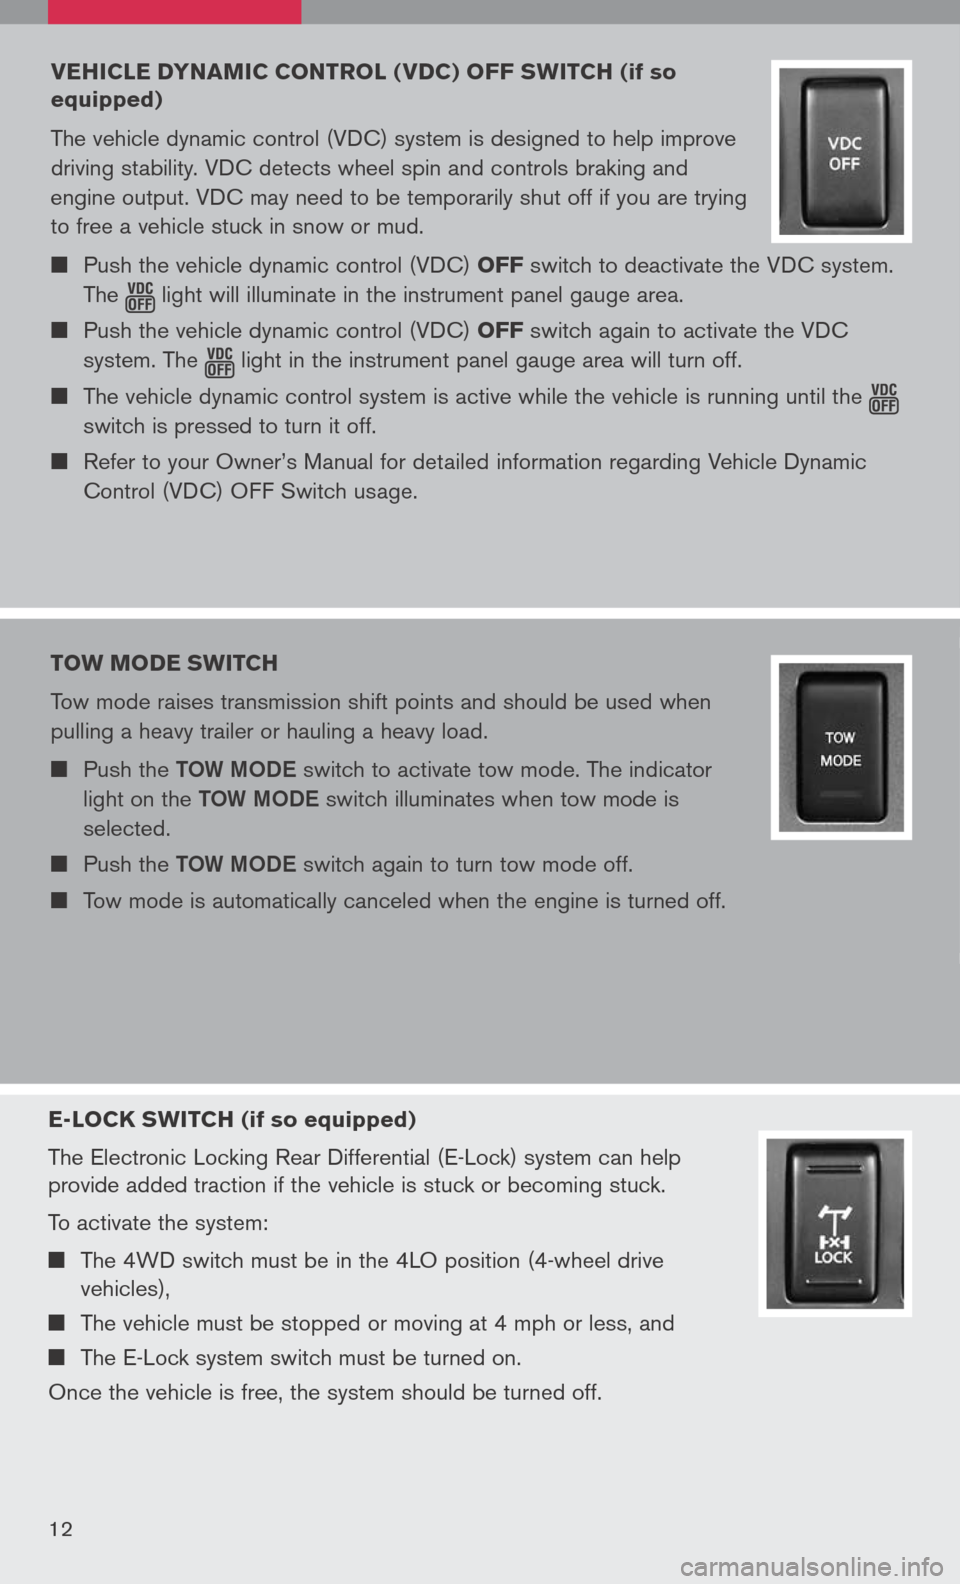
E-LOCK swITCH (if so equipped)
The Electronic Locking Rear Differential (E-Lock) system can help
provide added traction if the vehicle is stuck or becoming stuck.
To activate the system:
The 4WD switch must be in the 4LO position (4-wheel drive
vehicles),
The vehicle must be stopped or moving at 4 mph or less, and
The E-Lock system switch must be turned on.
Once the vehicle is free, the system should be turned off.
12
VEHICLE DYNAMIC CONTROL ( VDC) OFF sw ITCH (if so
equipped)
The vehicle dynamic control (VDC) system is designed to help improve
driving stability. VDC detects wheel spin and controls braking and
engine output. VDC may need to be temporarily shut off if you are trying
to free a vehicle stuck in snow or mud.
Push the vehicle dynamic control (VDC) OFF switch to deactivate the VDC system.
The light
will illuminate in the instrument panel gauge area. Push the vehicle dynamic control (VDC) OFF switch again to activate the VDC
system. The
light
in the instrument panel gauge area will turn off. The vehicle dynamic control system is active while the vehicle is running until the
switch is pressed to turn it off.
Refer to your Owner’s Manual for detailed information regarding Vehicle Dynamic
Control (VDC) OFF Switch usage.
TOw MODE swITCH
Tow mode raises transmission shift points and should be used when
pulling a heavy trailer or hauling a heavy load.
Push the TOW MODe switch to activate tow mode. The indicator
light on the TOW MODe switch illuminates when tow mode is
selected.
Push the TOW MODe switch again to turn tow mode off.
Tow mode is automatically canceled when the engine is turned off.
Page 23 of 36
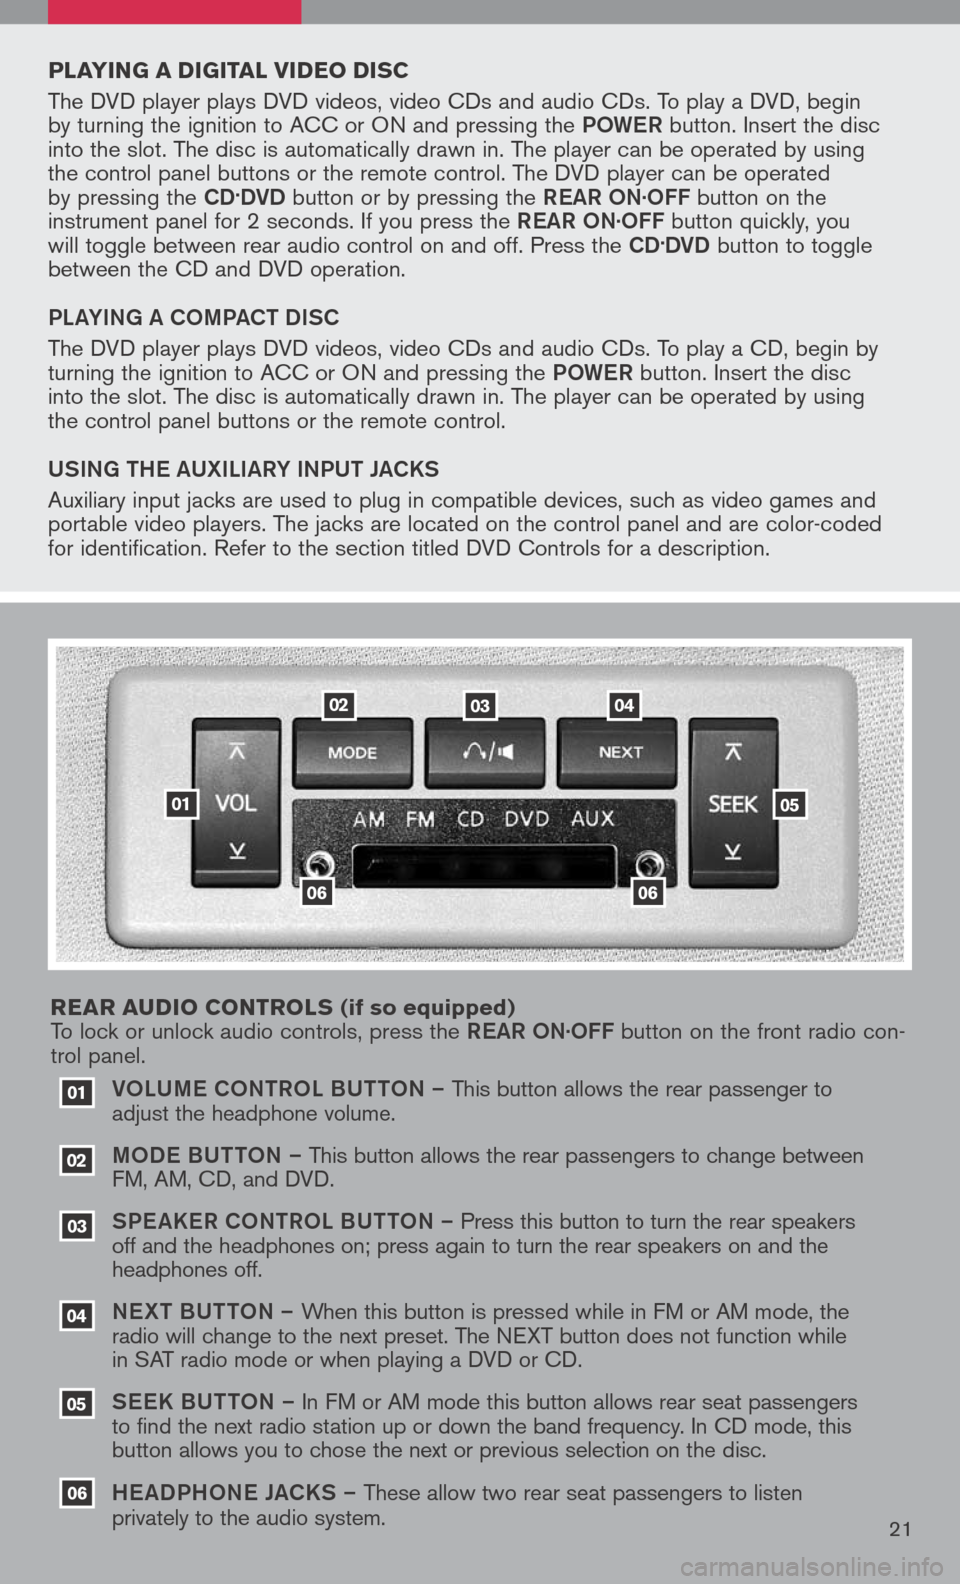
VOLUM e CONTROL BUTTON – This button allows the rear passenger to
adjust the headphone volume.
MOD e B UTTON – This button allows the rear passengers to change between
FM, AM, CD, and DVD.
SPe a KeR C ONTROL BUTTON – Press this button to turn the rear speakers
off and the headphones on; press again to turn the rear speakers on and the
headphones off.
NeXT BUTTON – When this button is pressed while in FM or AM mode, the
radio will change to the next preset. The NEXT button does not function while
in SAT radio mode or when playing a DVD or CD.
SeeK B UTTON – In FM or AM mode this button allows rear seat passengers
to find the next radio station up or down the band frequency. In CD mode, this
button allows you to chose the next or previous selection on the disc.
He aDPHON e JaCKS – These allow two rear seat passengers to listen
privately to the audio system.
03
02
01
06
06
05
04
020304
05
06
01
PLAYIN g A DI gITAL VIDEO DI sC
The DVD player plays DVD videos, video CDs and audio CDs. To play a DVD, begin
by turning the ignition to ACC or ON and pressing the POW eR button. Insert the disc
into the slot. The disc is automatically drawn in. The player can be operated by using
the control panel buttons or the remote control. The DVD player can be operated
by pressing the
CD.DVD button or by pressing the ReaR ON·OFF button on the
instrument panel for 2 seconds. If you press the ReaR ON·OFF button quickly, you
will toggle between rear audio control on and off. Press the
CD.DVD button to toggle
between the CD and DVD operation.
PL aYIN g a COMP aCT DISC
The DVD player plays DVD videos, video CDs and audio CDs. To play a CD, begin by
turning the ignition to ACC or ON and pressing the POW eR button. Insert the disc
into the slot. The disc is automatically drawn in. The player can be operated by using
the control panel buttons or the remote control.
USIN g TH e a UXILI aRY INPUT J aCKS
Auxiliary input jacks are used to plug in compatible devices, such as video games and
portable video players. The jacks are located on the control panel and are color-coded
for identification. Refer to the section titled DVD Controls for a description.
REAR A uDIO CONTROL s
(if so equipped)
To lock or unlock audio controls, press the ReaR ON·OFF button on the front radio con-
trol panel.
21