2008 NISSAN TITAN ignition
[x] Cancel search: ignitionPage 4 of 36
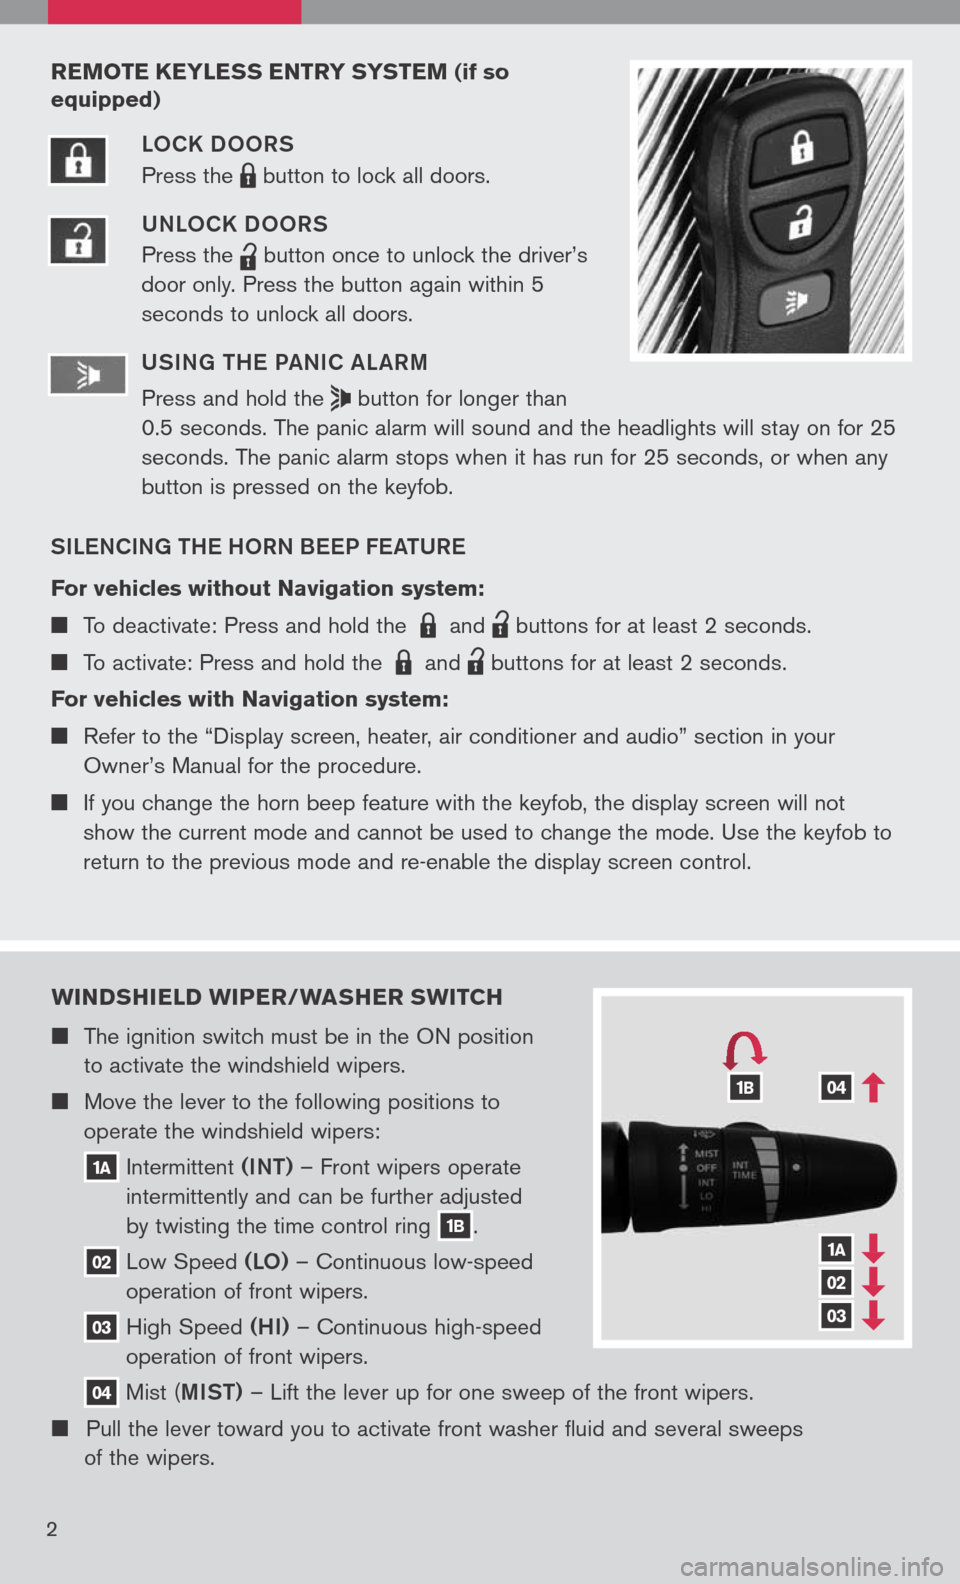
wIND sHIELD wIPER/ wAsHER swITCH
The ignition switch must be in the ON position
to activate the windshield wipers.
Move the lever to the following positions to
operate the windshield wipers:
1A Intermittent (INT)
– Front wipers operate
intermittently and can be further adjusted
by twisting the time control ring
1B.
02 Low
Speed (LO) – Continuous low-speed
operation of front wipers.
03 High
Speed (HI) – Continuous high-speed
operation of front wipers.
04 Mist
(MIST) – Lift the lever up for one sweep of the front wipers.
Pull the lever toward you to activate front washer fluid and several sweeps
of the wipers.
1A
02
03
041B
2
REMOTE KEYLE ss ENTRY sY s TEM (if so
equipped)
LOCK DOORS
Press the
LPD0150 button
to lock all doors.
UNLOCK DOORS
Press the
lpd0151
button
once to unlock the driver’s
door only. Press the button again within 5
seconds to unlock all doors.
U SIN g TH e Pa NIC aL aRM
Press and hold the
button for longer than
0.5 seconds. The panic alarm will sound and the headlights will stay on for 25
seconds. The panic alarm stops when it has run for 25 seconds, or when any
button is pressed on the keyfob.
SIL eNCIN g TH e HORN B eeP F eaTUR e
For vehicles without Navigation system:
To deactivate: Press and hold the LPD0150 and
lpd0151
buttons for at least 2 seconds.
To activate: Press and hold the LPD0150 and
lpd0151
buttons for at least 2 seconds.
For vehicles with Navigation system:
Refer to the “Display screen, heater, air conditioner and audio” section in your
Owner’s Manual for the procedure.
If you change the horn beep feature with the keyfob, the display screen will not
show the current mode and cannot be used to change the mode. Use the keyfob to
return to the previous mode and re-enable the display screen control.
Page 5 of 36
3
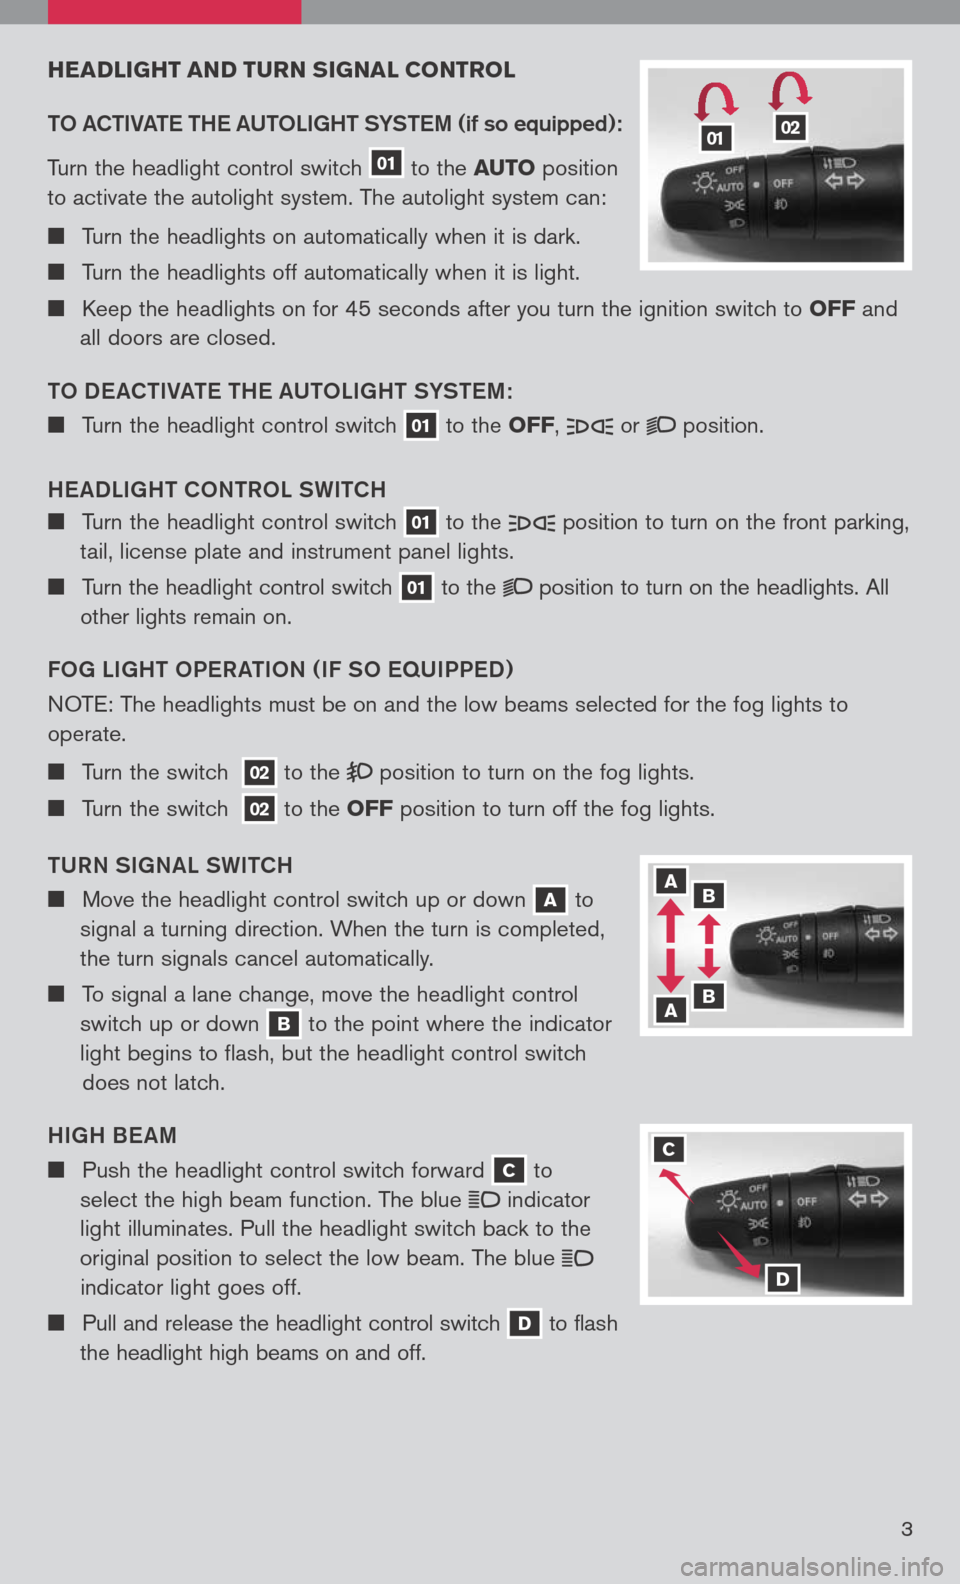
HEADLIgHT AND T uRN sIg NAL CONTROL
TO aCTIV aTe TH e a UTOLI gHT SYST eM
(if so equipped):
Turn the headlight control switch
01
to the AuTO position
to activate the autolight system. The autolight system can:
Turn the headlights on automatically when it is dark.
Turn the headlights off automatically when it is light.
Keep the headlights on for 45 seconds after you turn the ignition switch to OFF and
all doors are closed.
TO D eaCTIV aTe TH e aUTOLI gHT SYST eM :
Turn the headlight control switch 01 to the OFF, or position.
H ea DLI gHT CONTROL SWITCH
Turn the headlight control switch 01 to the position
to turn on the front parking,
tail, license plate and instrument panel lights.
Turn the headlight control switch 01 to the position
to turn on the headlights. All
other lights remain on.
FO g LI gHT OP eR aTION ( IF SO eq UIPPeD )
N OTE: The headlights must be on and the low beams selected for the fog lights to
operate.
Turn the switch 02 to the position
to turn on the fog lights.
Turn the switch 02 to the OFF position to turn off the fog lights.
TURN SI gNaL SWITCH
Move the headlight control switch up or down A to
signal a turning direction. When the turn is completed,
the turn signals cancel automatically.
To signal a lane change, move the headlight control
switch up or down
B to the point where the indicator
light begins to flash, but the headlight control switch
does not latch.
HI gH B eaM
Push the headlight control switch forward C to
select the high beam function. The blue
indicator
light illuminates. Pull the headlight switch back to the
original position to select the low beam. The blue
indicator light goes off.
Pull and release the headlight control switch D to flash
the headlight high beams on and off.
0102
A B
B A
C
D
3
Page 11 of 36
9
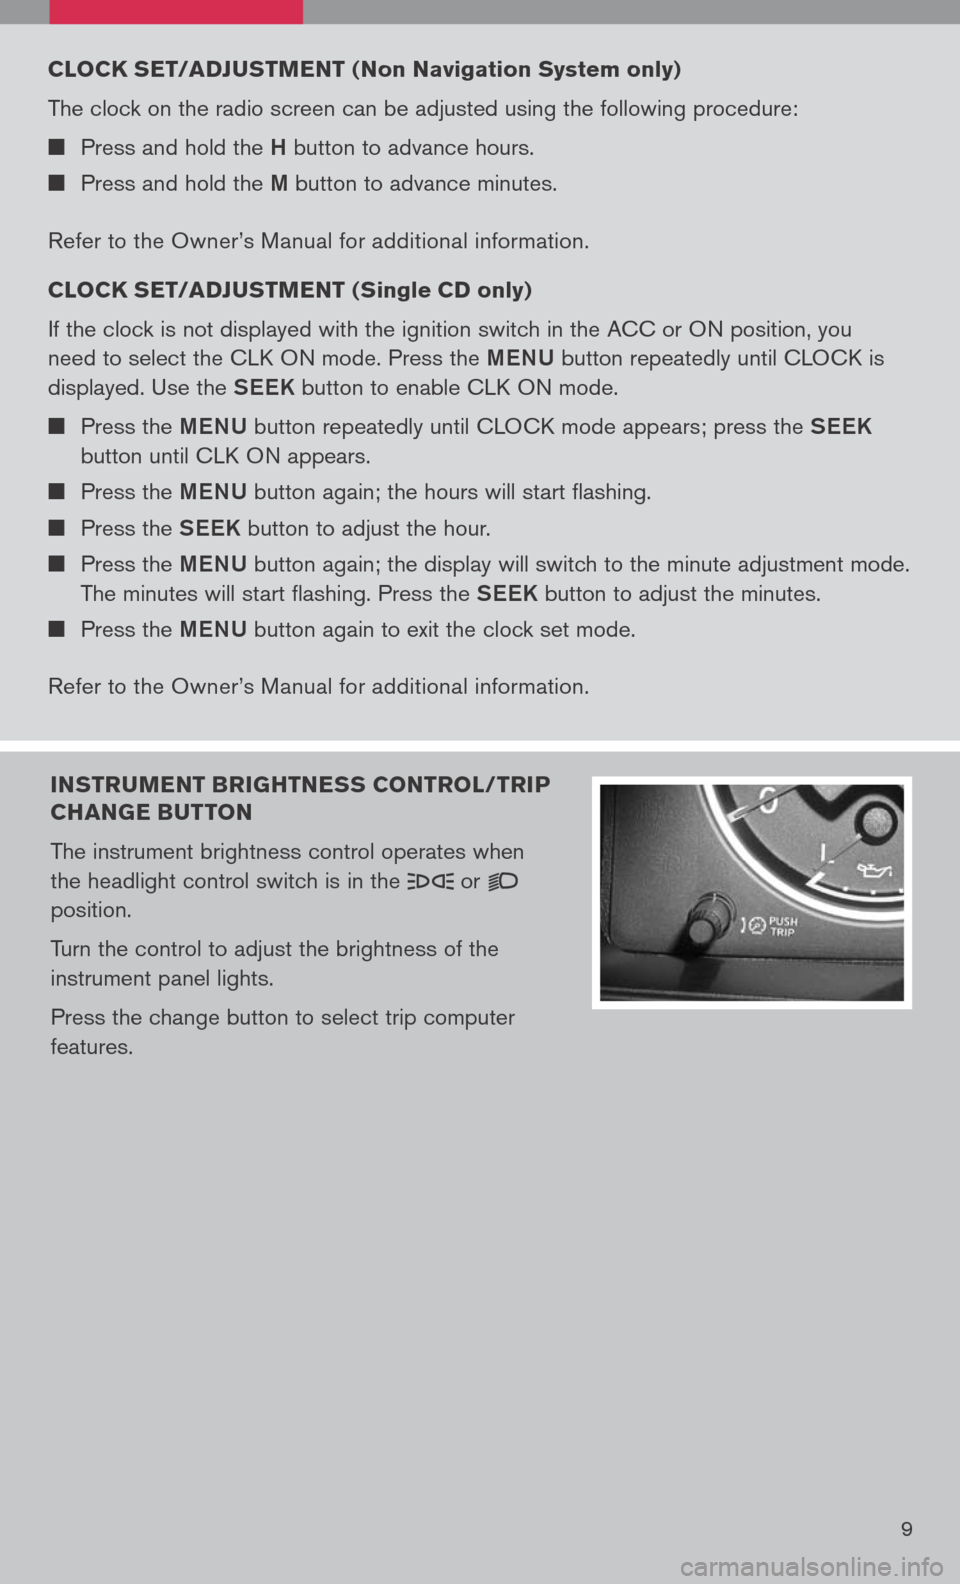
INsTR uMENT BRI gHTNE ss CONTROL/TRIP
CHAN gE B uTTON
The instrument brightness control operates when
the headlight control switch is in the
or
position.
Turn the control to adjust the brightness of the
instrument panel lights.
Press the change button to select trip computer
features.
CLOCK sET/ADJ usTMENT ( Non Navigation system only)
The clock on the radio screen can be adjusted using the following procedure:
Press and hold the H button to advance hours.
Press and hold the M button to advance minutes.
Refer to the Owner’s Manual for additional information.
CLOCK sET/ADJ usTMENT ( single CD only
)
If the clock is not displayed with the ignition switch in the ACC or ON position, you
need to select the CLK ON mode. Press the MeNU button repeatedly until CLOCK is
displayed. Use the See K button to enable CLK ON mode.
Press the MeNU button repeatedly until CLOCK mode appears; press the See K
button until CLK ON appears.
Press the MeNU button again; the hours will start flashing.
Press the See K button to adjust the hour.
Press the MeNU button again; the display will switch to the minute adjustment mode.
The minutes will start flashing. Press the See K button to adjust the minutes.
Press the MeNU button again to exit the clock set mode.
Refer to the Owner’s Manual for additional information.
Page 12 of 36
10
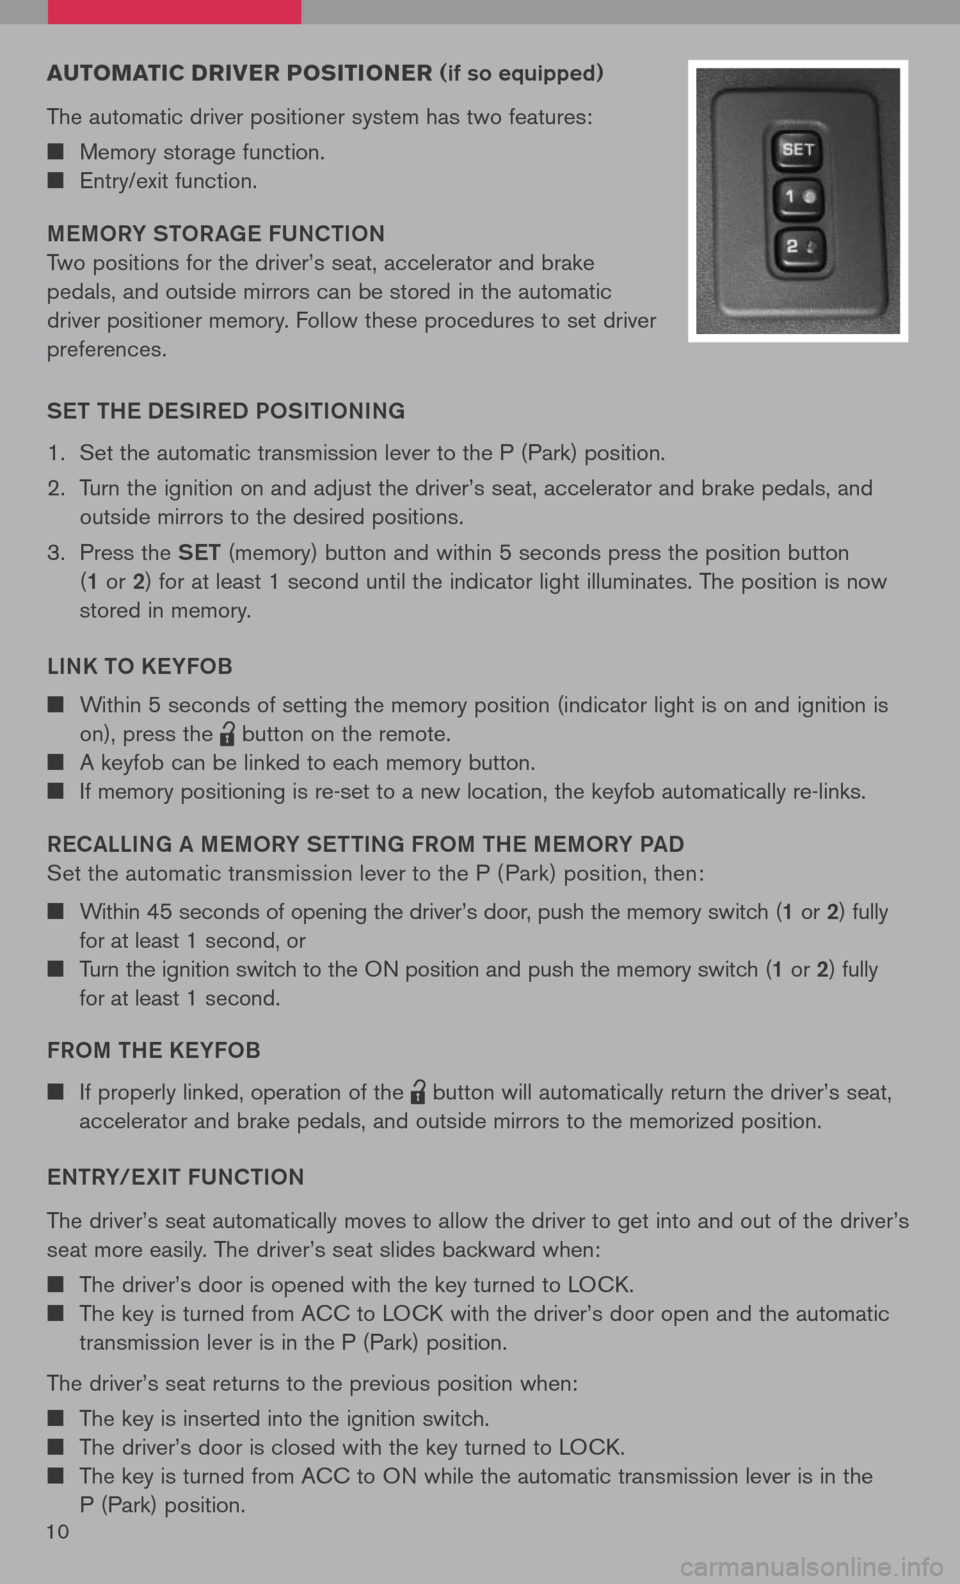
Au TOMATIC DRIVER PO sITIONER (if so equipped)
The automatic driver positioner system has two features:
Memory storage function.
Entry/exit function.
M eMORY STOR age FUNCTION
Two positions for the driver’s seat, accelerator and brake
pedals, and outside mirrors can be stored in the automatic
driver positioner memory. Follow these procedures to set driver
preferences.
S eT TH e DeSIR eD POSITIONIN g
1. Set the automatic transmission lever to the P (Park) position.
2. Turn the ignition on and adjust the driver’s seat, accelerator and brake pedals, and
outside mirrors to the desired positions.
3. Press the SeT (memory) button and within 5 seconds press the position button
(1 or 2 ) for at least 1 second until the indicator light illuminates. The position is now
stored in memory.
LINK TO K eYFOB
Within 5 seconds of setting the memory position (indicator light is on and ignition is
on), press the
lpd0151
button on the remote.
A keyfob can be linked to each memory button.
If memory positioning is re-set to a new location, the keyfob automatically re-links.
R eC aLLIN g a M eMORY S eTTIN g FROM TH e MeMORY P aD
Set the automatic transmission lever to the P ( Park) position, then:
Within 45 seconds of opening the driver’s door, push the memory switch (1 or 2) fully
for at least 1 second, or
Turn the ignition switch to the ON position and push the memory switch (1 or 2) fully
for at least 1 second.
FROM TH e KeYFOB
If properly linked, operation of the
lpd0151
button will automatically return the driver’s seat,
accelerator and brake pedals, and outside mirrors to the memorized position.
e NTRY/ eXIT FUNCTION
The driver’s seat automatically moves to allow the driver to get into and out of the driver’s
seat more easily. The driver’s seat slides backward when:
The driver’s door is opened with the key turned to LOCK.
The key is turned from ACC to LOCK with the driver’s door open and the automatic
transmission lever is in the P (Park) position.
The driver’s seat returns to the previous position when:
The key is inserted into the ignition switch.
The driver’s door is closed with the key turned to LOCK.
The key is turned from ACC to ON while the automatic transmission lever is in the
P (Park) position.
Page 15 of 36
13
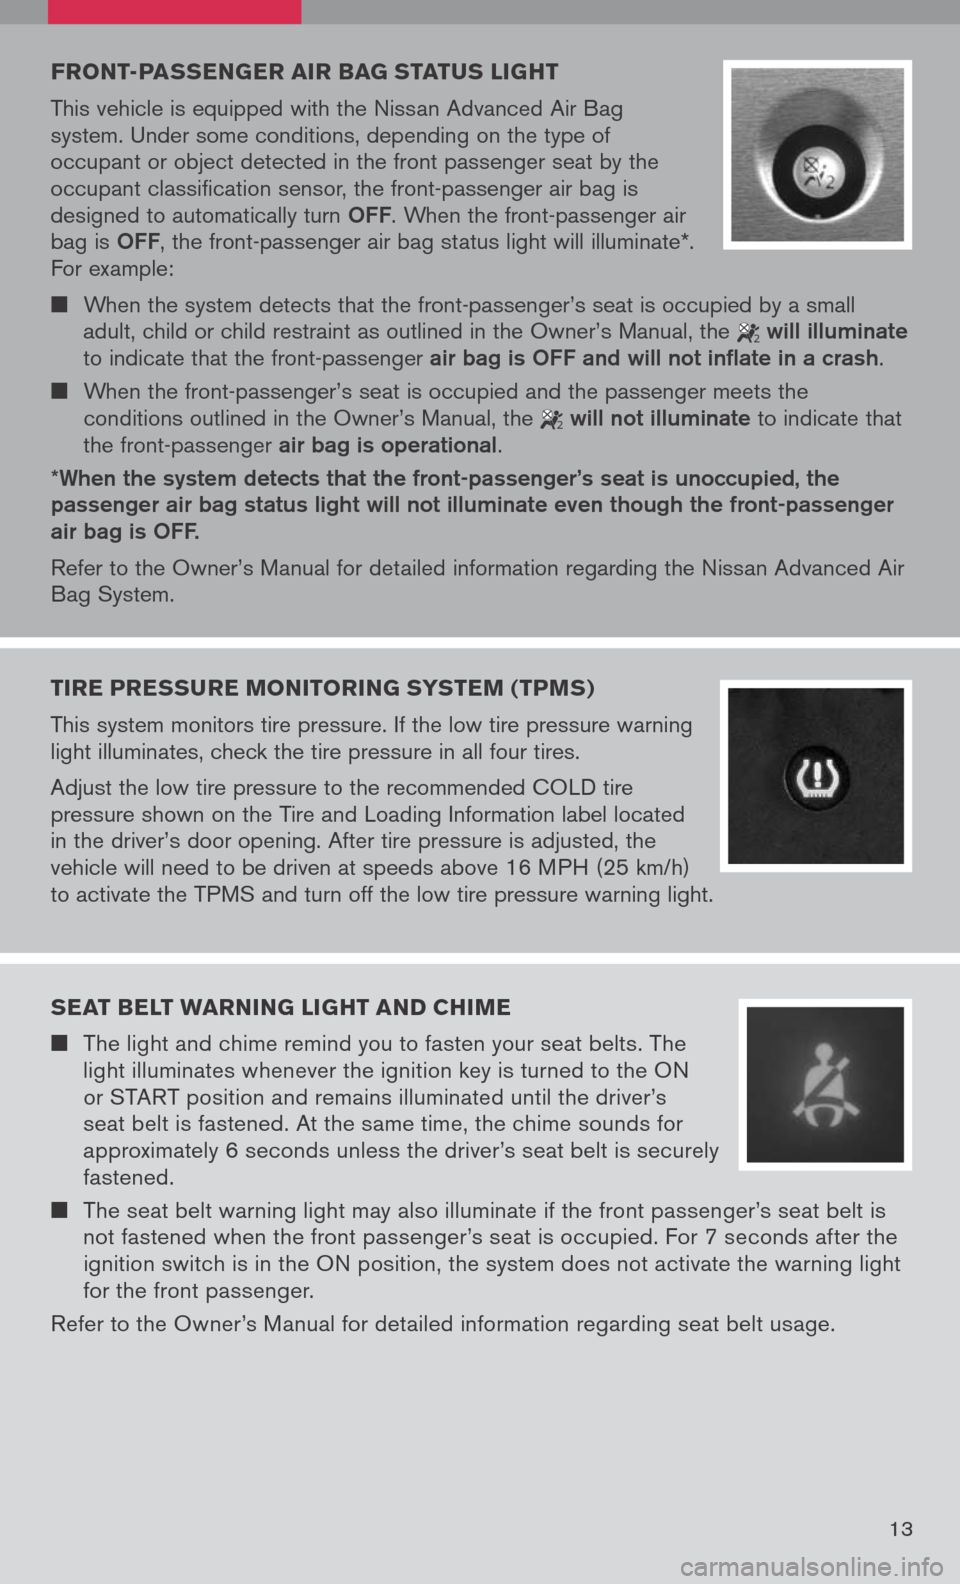
FRONT-PAssEN gER AIR BA g sTAT us LI gHT
This vehicle is equipped with the Nissan Advanced Air Bag
system. Under some conditions, depending on the type of
occupant or object detected in the front passenger seat by the
occupant classification sensor, the front-passenger air bag is
designed to automatically turn
OFF. When the front-passenger air
bag is OFF, the front-passenger air bag status light will illuminate*.
For example:
When the system detects that the front-passenger’s seat is occupied by a small
adult, child or child restraint as outlined in the Owner’s Manual, the
2 will illuminate
to indicate that the front-passenger air bag is OFF and will not inflate in a crash.
When the front-passenger’s seat is occupied and the passenger meets the
conditions outlined in the Owner’s Manual, the
2 will not illuminate to indicate that
the front-passenger air bag is operational.
*When the system detects that the front-passenger’s seat is unoccupied, the passenger air bag status light will not illuminate even though the front-passenger air bag is OFF.
Refer to the Owner’s Manual for detailed information regarding the Nissan Advanced Air
Bag System.
TIRE PRE ssuRE MONITORIN g sY s TEM (TPM s)
This system monitors tire pressure. If the low tire pressure warning
light illuminates, check the tire pressure in all four tires.
Adjust the low tire pressure to the recommended COLD tire
pressure shown on the Tire and Loading Information label located
in the driver’s door opening. After tire pressure is adjusted, the
vehicle will need to be driven at speeds above 16 MPH (25 km/h)
to activate the TPMS and turn off the low tire pressure warning light.
sEAT BELT wARNIN g LIgHT AND CHIME
The light and chime remind you to fasten your seat belts. The
light illuminates whenever the ignition key is turned to the ON
or START position and remains illuminated until the driver’s
seat belt is fastened. At the same time, the chime sounds for
approximately 6 seconds unless the driver’s seat belt is securely
fastened.
The seat belt warning light may also illuminate if the front passenger’s seat belt is
not fastened when the front passenger’s seat is occupied. For 7 seconds after the
ignition switch is in the ON position, the system does not activate the warning light
for the front passenger.
Refer to the Owner’s Manual for detailed information regarding seat belt usage.
Page 16 of 36
14
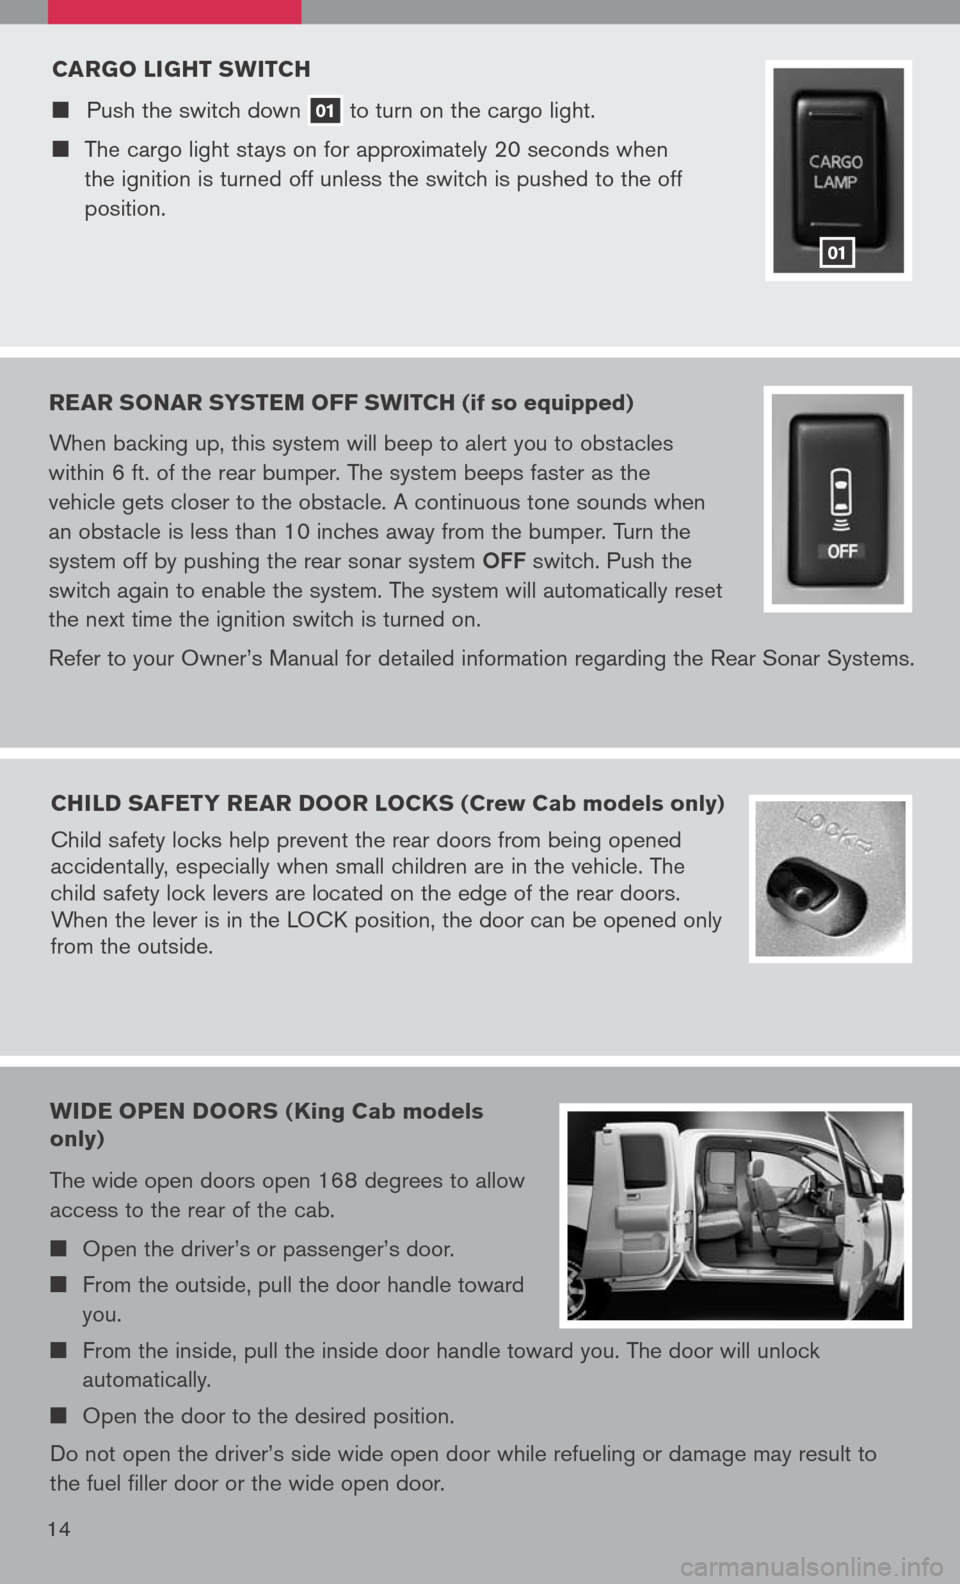
CARgO LI gHT sw ITCH
Push the switch down 01 to
turn on the cargo light.
The cargo light stays on for approximately 20 seconds when
the ignition is turned off unless the switch is pushed to the off
position.
01
REAR sONAR sY s TEM OFF swITCH (if so equipped)
When backing up, this system will beep to alert you to obstacles
within 6 ft. of the rear bumper. The system beeps faster as the
vehicle gets closer to the obstacle. A continuous tone sounds when
an obstacle is less than 10 inches away from the bumper. Turn the
system off by pushing the rear sonar system
OFF switch. Push the
switch again to enable the system. The system will automatically reset
the next time the ignition switch is turned on.
Refer to your Owner’s Manual for detailed information regarding the Rear Sonar Systems.
CHILD sAFETY REAR DOOR LOCK s (Crew Cab models only)
Child safety locks help prevent the rear doors from being opened
accidentally, especially when small children are in the vehicle. The
child safety lock levers are located on the edge of the rear doors.
When the lever is in the LOCK position, the door can be opened only
from the outside.
wIDE OPEN DOOR s (King Cab models
only)
The wide open doors open 168 degrees to allow
access to the rear of the cab.
Open the driver’s or passenger’s door.
From the outside, pull the door handle toward
you.
From the inside, pull the inside door handle toward you. The door will unlock
automatically.
Open the door to the desired position.
Do not open the driver’s side wide open door while refueling or damage may result to
the fuel filler door or the wide open door.
Page 20 of 36
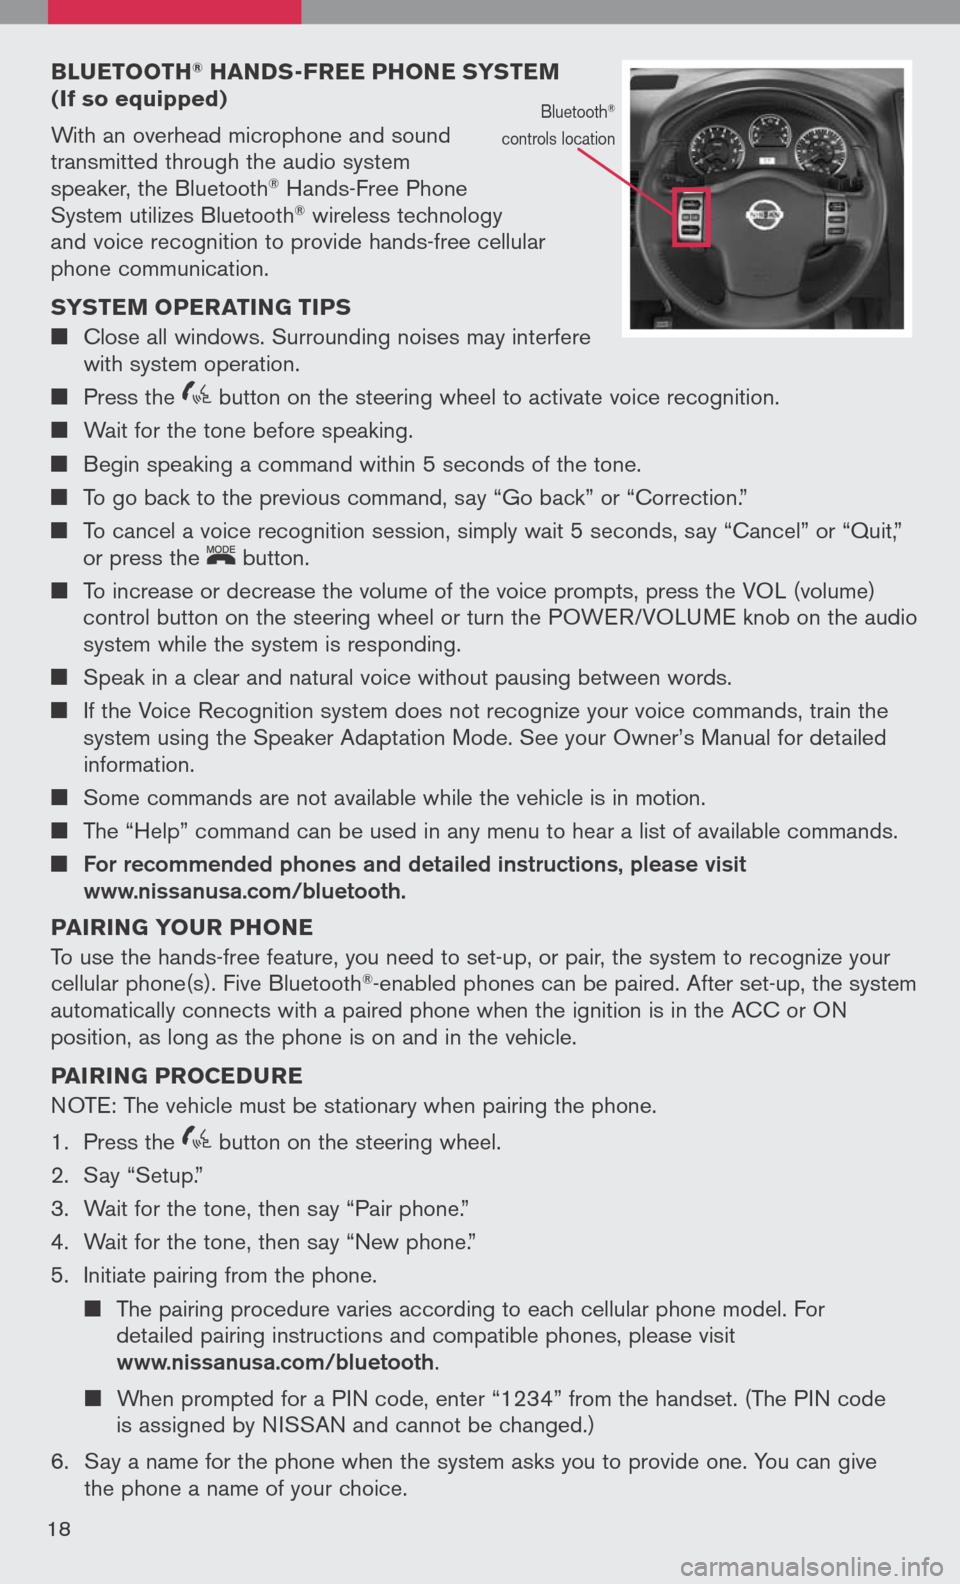
BLuETOOTH® HAND s-FREE PHONE sY s TEM (If so equipped)
With an overhead microphone and sound
transmitted through the audio system
speaker, the Bluetooth® Hands-Free Phone
System utilizes Bluetooth® wireless technology
and voice recognition to provide hands-free cellular
phone communication.
s Y s TEM OPERATIN g TIPs
Close all windows. Surrounding noises may interfere
with system operation.
Press the
icon C button on the steering wheel to activate voice recognition.
Wait for the tone before speaking.
Begin speaking a command within 5 seconds of the tone.
To go back to the previous command, say “Go back” or “Correction.”
To cancel a voice recognition session, simply wait 5 seconds, say “Cancel” or “Quit,”
or press the
LCN0090
button.
To increase or decrease the volume of the voice prompts, press the VOL (volume)
control button on the steering wheel or turn the POWER/VOLUME knob on the audio
system while the system is responding.
Speak in a clear and natural voice without pausing between words.
If the Voice Recognition system does not recognize your voice commands, train the
system using the Speaker Adaptation Mode. See your Owner’s Manual for detailed
information.
Some commands are not available while the vehicle is in motion.
The “Help” command can be used in any menu to hear a list of available commands.
For recommended phones and detailed instructions, please visit www.nissanusa.com/bluetooth.
PAIRIN g YOuR PHONE
To use the hands-free feature, you need to set-up, or pair, the system to recognize your
cellular phone(s). Five Bluetooth
®-enabled phones can be paired. After set-up, the system
automatically connects with a paired phone when the ignition is in the ACC or ON
position, as long as the phone is on and in the vehicle.
PAIRIN g PROCED uRE
NOTE: The vehicle must be stationary when pairing the phone.
1. Press the
icon C button on the steering wheel.
2. Say “Setup.”
3. Wait for the tone, then say “Pair phone.”
4. Wait for the tone, then say “New phone.”
5. Initiate pairing from the phone.
The pairing procedure varies according to each cellular phone model. For
detailed pairing instructions and compatible phones, please visit
www.nissanusa.com/bluetooth.
When prompted for a PIN code, enter “1234” from the handset. (The PIN code
is assigned by NISSAN and cannot be changed.)
6. Say a name for the phone when the system asks you to provide one. You can give
the phone a name of your choice.
18
Bluetooth®
controls location
Page 22 of 36
18
0201
10
080706040503
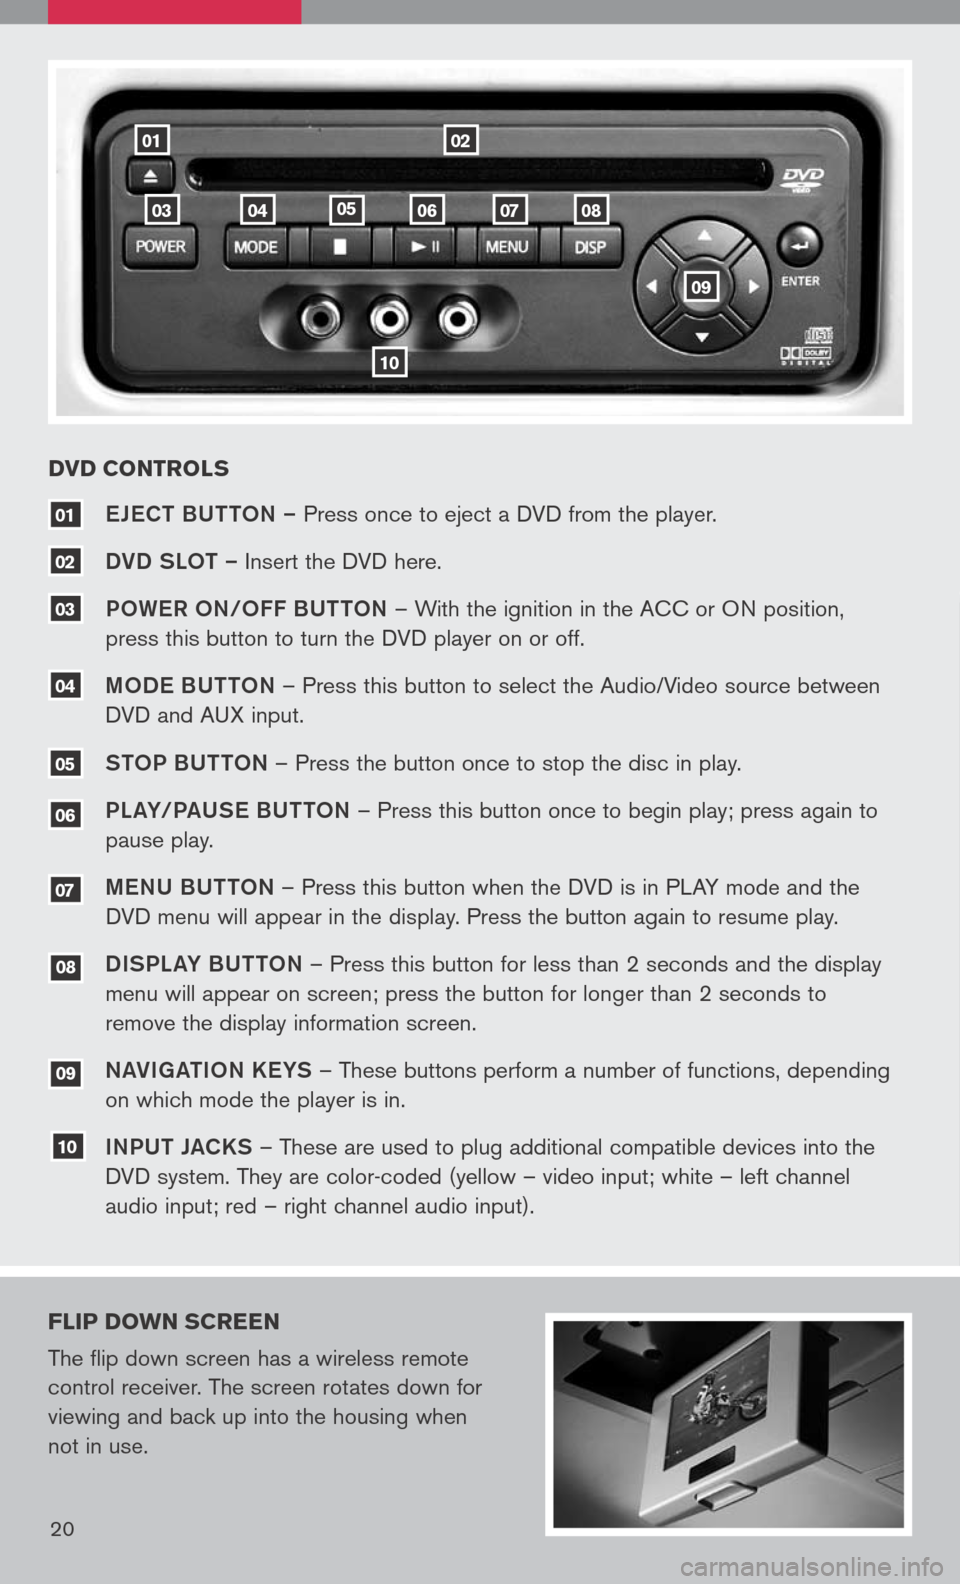
eJe CT BUTTON – Press once to eject a DVD from the player.
DVD SLOT – Insert the DVD here.
P OW eR O N/O FF BUTTON – With the ignition in the ACC or ON position,
press this button to turn the DVD player on or off.
M OD e BUTTON – Press this button to select the Audio/Video source between
DVD and AUX input.
S TOP BUTTON – Press the button once to stop the disc in play.
P La Y/Pa USe B UTTON – Press this button once to begin play; press again to
pause play.
Me NU BUTTON – Press this button when the DVD is in PLAY mode and the
DVD menu will appear in the display. Press the button again to resume play.
D ISPL aY B UTTON – Press this button for less than 2 seconds and the display
menu will appear on screen; press the button for longer than 2 seconds to
remove the display information screen.
Na VIga TION K eYS – These buttons perform a number of functions, depending
on which mode the player is in.
I NPUT JaCKS – These are used to plug additional compatible devices into the
DVD system. They are color-coded (yellow – video input; white – left channel
audio input; red – right channel audio input).
10
09
08
07
06
04
03
02
01
DVD CONTROL s
FLIP DO wN sCREEN
The flip down screen has a wireless remote
control receiver. The screen rotates down for
viewing and back up into the housing when
not in use.
20
09
05