2008 NISSAN TITAN homelink
[x] Cancel search: homelinkPage 3 of 36

TAB LE O F C O NTE NTS
Remote Keyless Entry System . . . . . . . . . . . . . . . . . . 2
Windshield Wiper/Washer Switch
. . . . . . . . . . . . . . . . 2
Headlight and Turn Signal Control
. . . . . . . . . . . . . . . . 3
Steering Wheel Switches for Audio Control/ Bluetooth
® . . . . 4
Cruise Control
. . . . . . . . . . . . . . . . . . . . . . . . . . 4
Automatic Climate Control
. . . . . . . . . . . . . . . . . . . . 5
FM/AM/XM® Radio with CD Changer . . . . . . . . . . . . . . 6
Vehicle Information Display
. . . . . . . . . . . . . . . . . . . . 7
Control Panel Display with Navigation System
. . . . . . . . . 8
Clock/Set Adjustment
. . . . . . . . . . . . . . . . . . . . . . 8
Instrument Brightness Control/Trip Change Button
. . . . . . . 9
Automatic Driver Positioner
. . . . . . . . . . . . . . . . . . . 10
Adjustable Accelerator and Brake Pedals
. . . . . . . . . . . . 11
Manual Shift Mode
. . . . . . . . . . . . . . . . . . . . . . . . 11
Four-Wheel Drive (4WD) Shift Switch
. . . . . . . . . . . . . . 11
Vehicle Dynamic Control (VDC) Off Switch
. . . . . . . . . . . 12
Tow Mode Switch
. . . . . . . . . . . . . . . . . . . . . . . . . 12
E-Lock Switch
. . . . . . . . . . . . . . . . . . . . . . . . . . . 12
Front-Passenger Air Bag Status Light
. . . . . . . . . . . . . . 13
Tire Pressure Monitoring System (TPMS)
. . . . . . . . . . . . 13
Seatbelt Warning Light and Chime
. . . . . . . . . . . . . . . 13
Cargo Light Switch
. . . . . . . . . . . . . . . . . . . . . . . . 14
Rear Sonar System Off Switch
. . . . . . . . . . . . . . . . . 14
Child Safety Rear Door Locks
. . . . . . . . . . . . . . . . . . 14
Wide Open Doors
. . . . . . . . . . . . . . . . . . . . . . . . 14
High Utility Bed and Utili-Track
™ Channel System . . . . . . . . 15
Outside Mirror Control Switch
. . . . . . . . . . . . . . . . . . 15
Sunroof Controls
. . . . . . . . . . . . . . . . . . . . . . . . . 15
Front Seat Adjustments
. . . . . . . . . . . . . . . . . . . . . 16
Folding the Rear Bench Seat
. . . . . . . . . . . . . . . . . . 16
Homelink® Universal Transceiver . . . . . . . . . . . . . . . . . 16
Bluetooth® Hands-Free Phone System . . . . . . . . . . . . . 18
DVD Controls
. . . . . . . . . . . . . . . . . . . . . . . . . . . 20
Rear Audio Controls
. . . . . . . . . . . . . . . . . . . . . . . 21
Navigation System
. . . . . . . . . . . . . . . . . . . . . . . . 23
Page 18 of 36

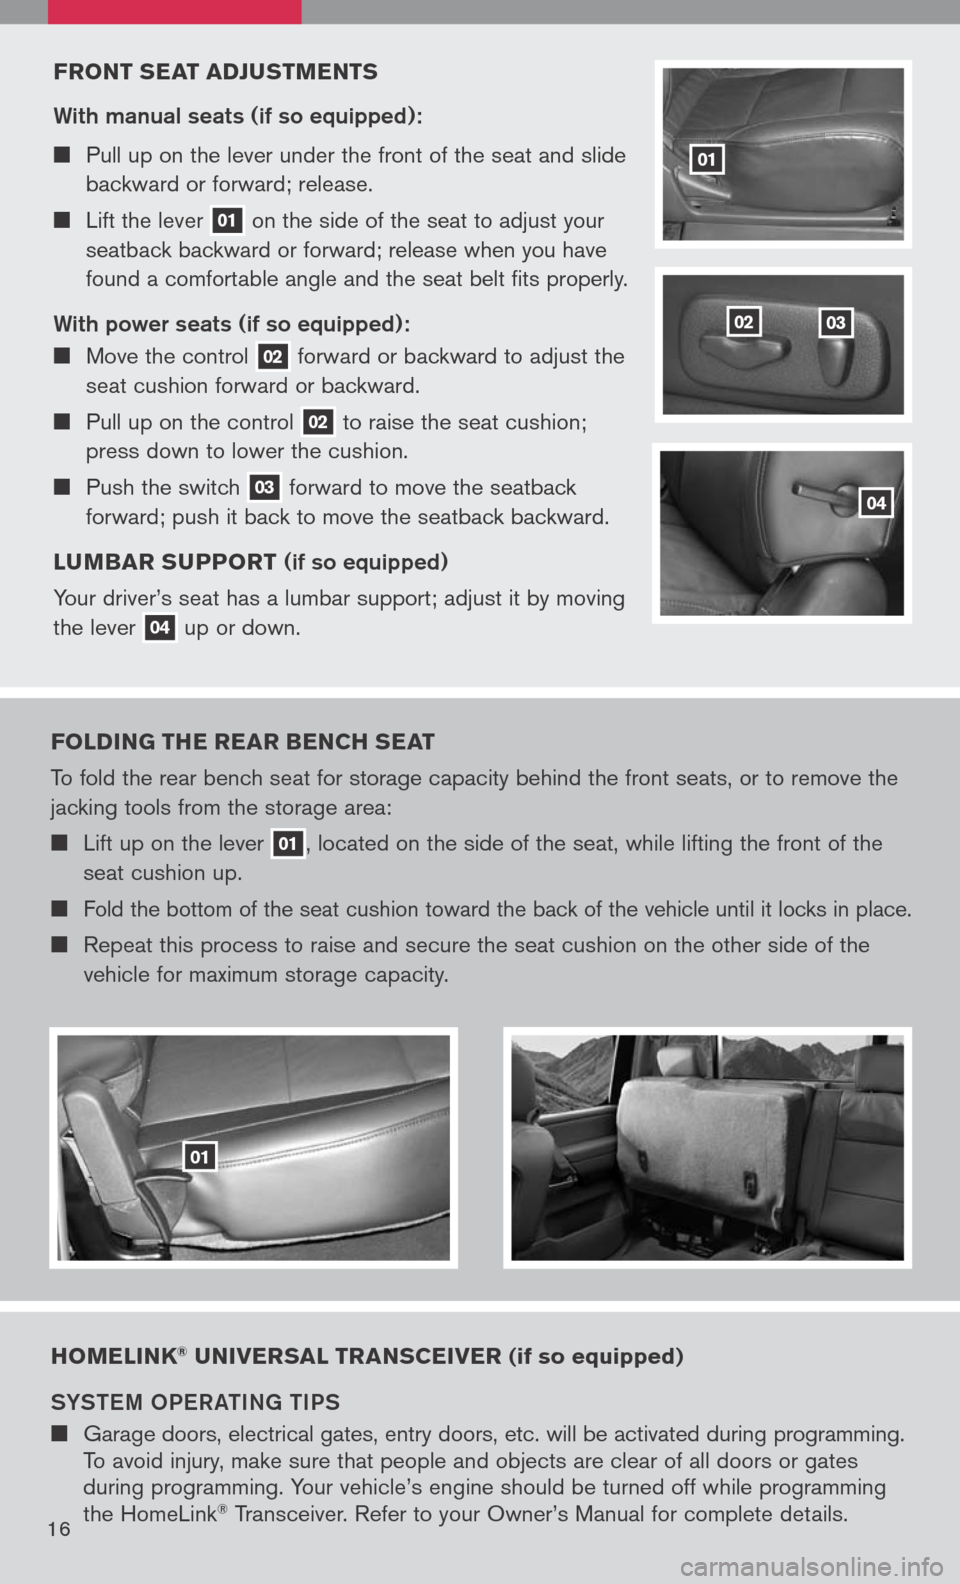
FRONT sEAT ADJ usTMENT s
With manual seats (if so equipped):
Pull up on the lever under the front of the seat and slide
backward or forward; release.
Lift the lever 01 on
the side of the seat to adjust your
seatback backward or forward; release when you have
found a comfortable angle and the seat belt fits properly.
With power seats (if so equipped):
Move the control 02 forward
or backward to adjust the
seat cushion forward or backward.
Pull up on the control 02 to
raise the seat cushion;
press down to lower the cushion.
Push the switch 03 forward
to move the seatback
forward; push it back to move the seatback backward.
L u MBAR suPPORT
(if so equipped)
Your driver’s seat has a lumbar support; adjust it by moving
the lever
04 up
or down.
0302
01
04
FOLDIN g THE REAR BENCH sEAT
To fold the rear bench seat for storage capacity behind the front seats, or to remove the
jacking tools from the storage area:
Lift up on the lever 01, located on the side of the seat, while lifting the front of the
seat cushion up.
Fold the bottom of the seat cushion toward the back of the vehicle until it locks in place.
Repeat this process to raise and secure the seat cushion on the other side of the
vehicle for maximum storage capacity.
01
HOMELINK® u NIVER sAL TRAN sCEIVER (if so equipped)
SYST eM OP eR aTIN g TIPS
Garage doors, electrical gates, entry doors, etc. will be activated during programming.
To avoid injury, make sure that people and objects are clear of all doors or gates
during programming. Your vehicle’s engine should be turned off while programming
the HomeLink
® Transceiver. Refer to your Owner’s Manual for complete details.16
Page 19 of 36

To program your HomeLink® Transceiver to operate a garage door, gate, or entry door
opener, home or office lighting, you need to be at the same location as the device.
NOTe: garage door openers (manufactured after 1996) have “rolling code
protection”. To program a garage door opener equipped with “rolling code protection”, you will need to use a ladder to get up to the garage door opener motor to be able to access the “smart or learn” program button.
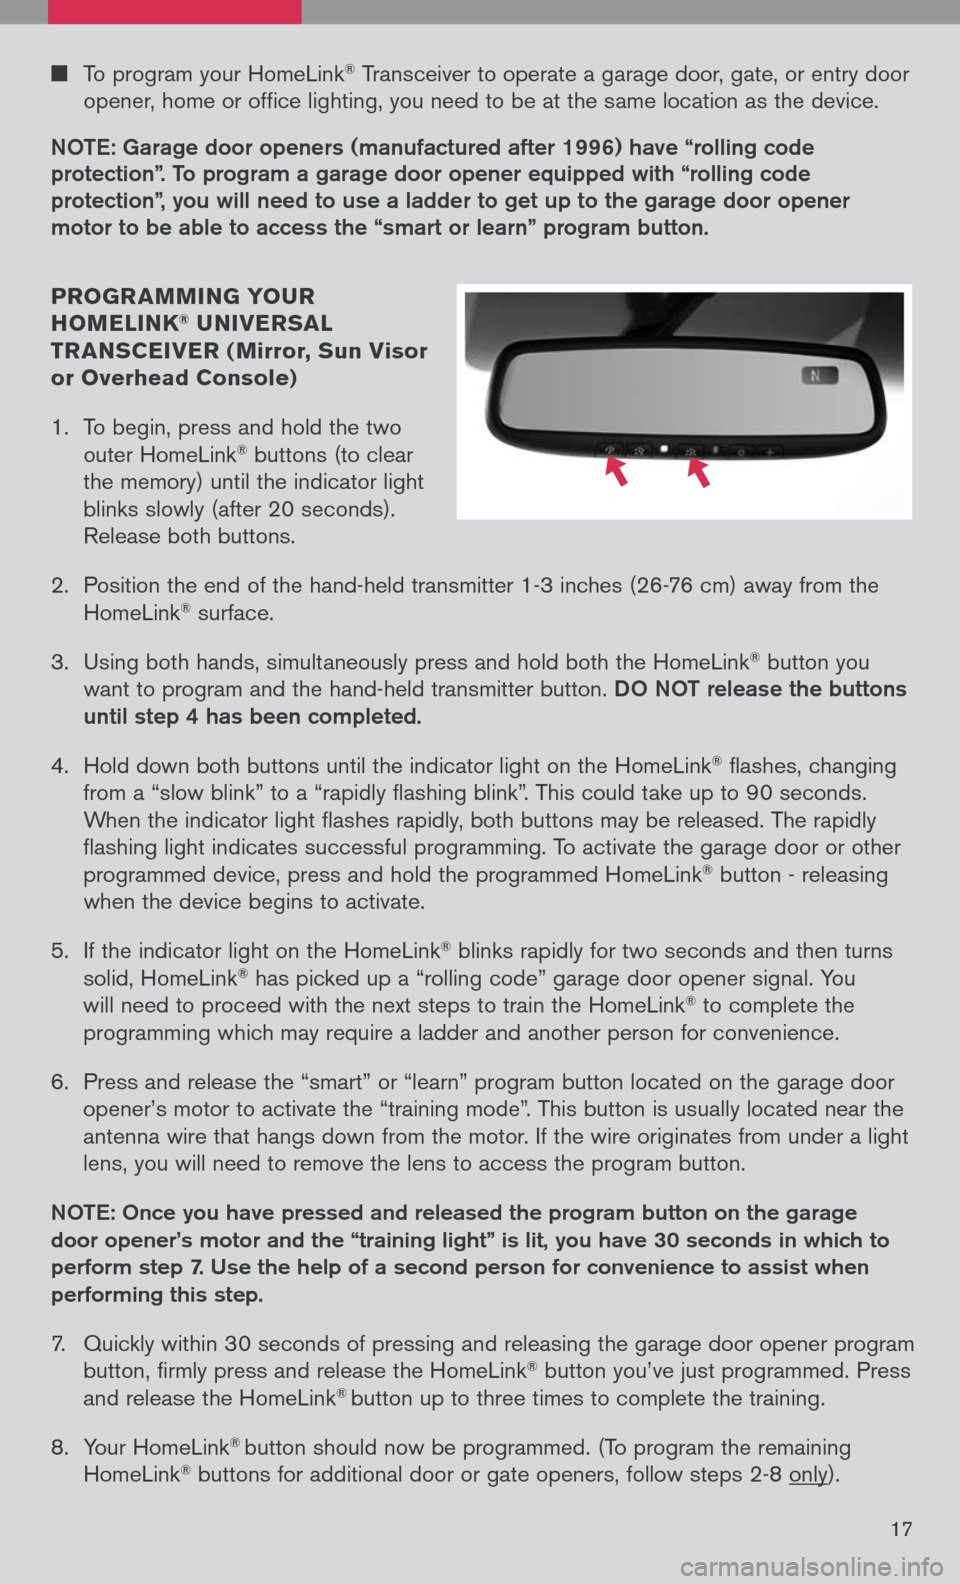
PROgR AMMIN g YO uR
HOMELINK® u NIVER sAL
TR AN sCEIVER ( Mirror, sun Visor
or Overhead Console)
1. To begin, press and hold the two
outer HomeLink
® buttons (to clear
the memory) until the indicator light
blinks slowly (after 20 seconds).
Release both buttons.
2. Position the end of the hand-held transmitter 1-3 inches (26-76 cm) away from the
HomeLink® surface.
3. Using both hands, simultaneously press and hold both the HomeLink
® button you
want to program and the hand-held transmitter button.
DO NOT release the buttons
until step 4 has been completed.
4. Hold down both buttons until the indicator light on the HomeLink
® flashes, changing
from a “slow blink” to a “rapidly flashing blink”. This could take up to 90 seconds.
When the indicator light flashes rapidly, both buttons may be released. The rapidly
flashing light indicates successful programming. To activate the garage door or other
programmed device, press and hold the programmed HomeLink
® button - releasing
when the device begins to activate.
5. If the indicator light on the HomeLink
® blinks rapidly for two seconds and then turns
solid, HomeLink® has picked up a “rolling code” garage door opener signal. You
will need to proceed with the next steps to train the HomeLink® to complete the
programming which may require a ladder and another person for convenience.
6. Press and release the “smart” or “learn” program button located on the garage door
opener’s motor to activate the “training mode”. This button is usually located near the
antenna wire that hangs down from the motor. If the wire originates from under a light
lens, you will need to remove the lens to access the program button.
NOTe: Once you have pressed and released the program button on the garage
door opener’s motor and the “training light” is lit, you have 30 seconds in which to
perform step 7. Use the help of a second person for convenience to assist when
performing this step.
7. Quickly within 30 seconds of pressing and releasing the garage door opener program
button, firmly press and release the HomeLink® button you’ve just programmed. Press
and release the HomeLink® button up to three times to complete the training.
8. Your HomeLink
® button should now be programmed. (To program the remaining
HomeLink® buttons for additional door or gate openers, follow steps 2-8 only).
17