2008 NISSAN TITAN manual radio set
[x] Cancel search: manual radio setPage 3 of 36

TAB LE O F C O NTE NTS
Remote Keyless Entry System . . . . . . . . . . . . . . . . . . 2
Windshield Wiper/Washer Switch
. . . . . . . . . . . . . . . . 2
Headlight and Turn Signal Control
. . . . . . . . . . . . . . . . 3
Steering Wheel Switches for Audio Control/ Bluetooth
® . . . . 4
Cruise Control
. . . . . . . . . . . . . . . . . . . . . . . . . . 4
Automatic Climate Control
. . . . . . . . . . . . . . . . . . . . 5
FM/AM/XM® Radio with CD Changer . . . . . . . . . . . . . . 6
Vehicle Information Display
. . . . . . . . . . . . . . . . . . . . 7
Control Panel Display with Navigation System
. . . . . . . . . 8
Clock/Set Adjustment
. . . . . . . . . . . . . . . . . . . . . . 8
Instrument Brightness Control/Trip Change Button
. . . . . . . 9
Automatic Driver Positioner
. . . . . . . . . . . . . . . . . . . 10
Adjustable Accelerator and Brake Pedals
. . . . . . . . . . . . 11
Manual Shift Mode
. . . . . . . . . . . . . . . . . . . . . . . . 11
Four-Wheel Drive (4WD) Shift Switch
. . . . . . . . . . . . . . 11
Vehicle Dynamic Control (VDC) Off Switch
. . . . . . . . . . . 12
Tow Mode Switch
. . . . . . . . . . . . . . . . . . . . . . . . . 12
E-Lock Switch
. . . . . . . . . . . . . . . . . . . . . . . . . . . 12
Front-Passenger Air Bag Status Light
. . . . . . . . . . . . . . 13
Tire Pressure Monitoring System (TPMS)
. . . . . . . . . . . . 13
Seatbelt Warning Light and Chime
. . . . . . . . . . . . . . . 13
Cargo Light Switch
. . . . . . . . . . . . . . . . . . . . . . . . 14
Rear Sonar System Off Switch
. . . . . . . . . . . . . . . . . 14
Child Safety Rear Door Locks
. . . . . . . . . . . . . . . . . . 14
Wide Open Doors
. . . . . . . . . . . . . . . . . . . . . . . . 14
High Utility Bed and Utili-Track
™ Channel System . . . . . . . . 15
Outside Mirror Control Switch
. . . . . . . . . . . . . . . . . . 15
Sunroof Controls
. . . . . . . . . . . . . . . . . . . . . . . . . 15
Front Seat Adjustments
. . . . . . . . . . . . . . . . . . . . . 16
Folding the Rear Bench Seat
. . . . . . . . . . . . . . . . . . 16
Homelink® Universal Transceiver . . . . . . . . . . . . . . . . . 16
Bluetooth® Hands-Free Phone System . . . . . . . . . . . . . 18
DVD Controls
. . . . . . . . . . . . . . . . . . . . . . . . . . . 20
Rear Audio Controls
. . . . . . . . . . . . . . . . . . . . . . . 21
Navigation System
. . . . . . . . . . . . . . . . . . . . . . . . 23
Page 8 of 36

6
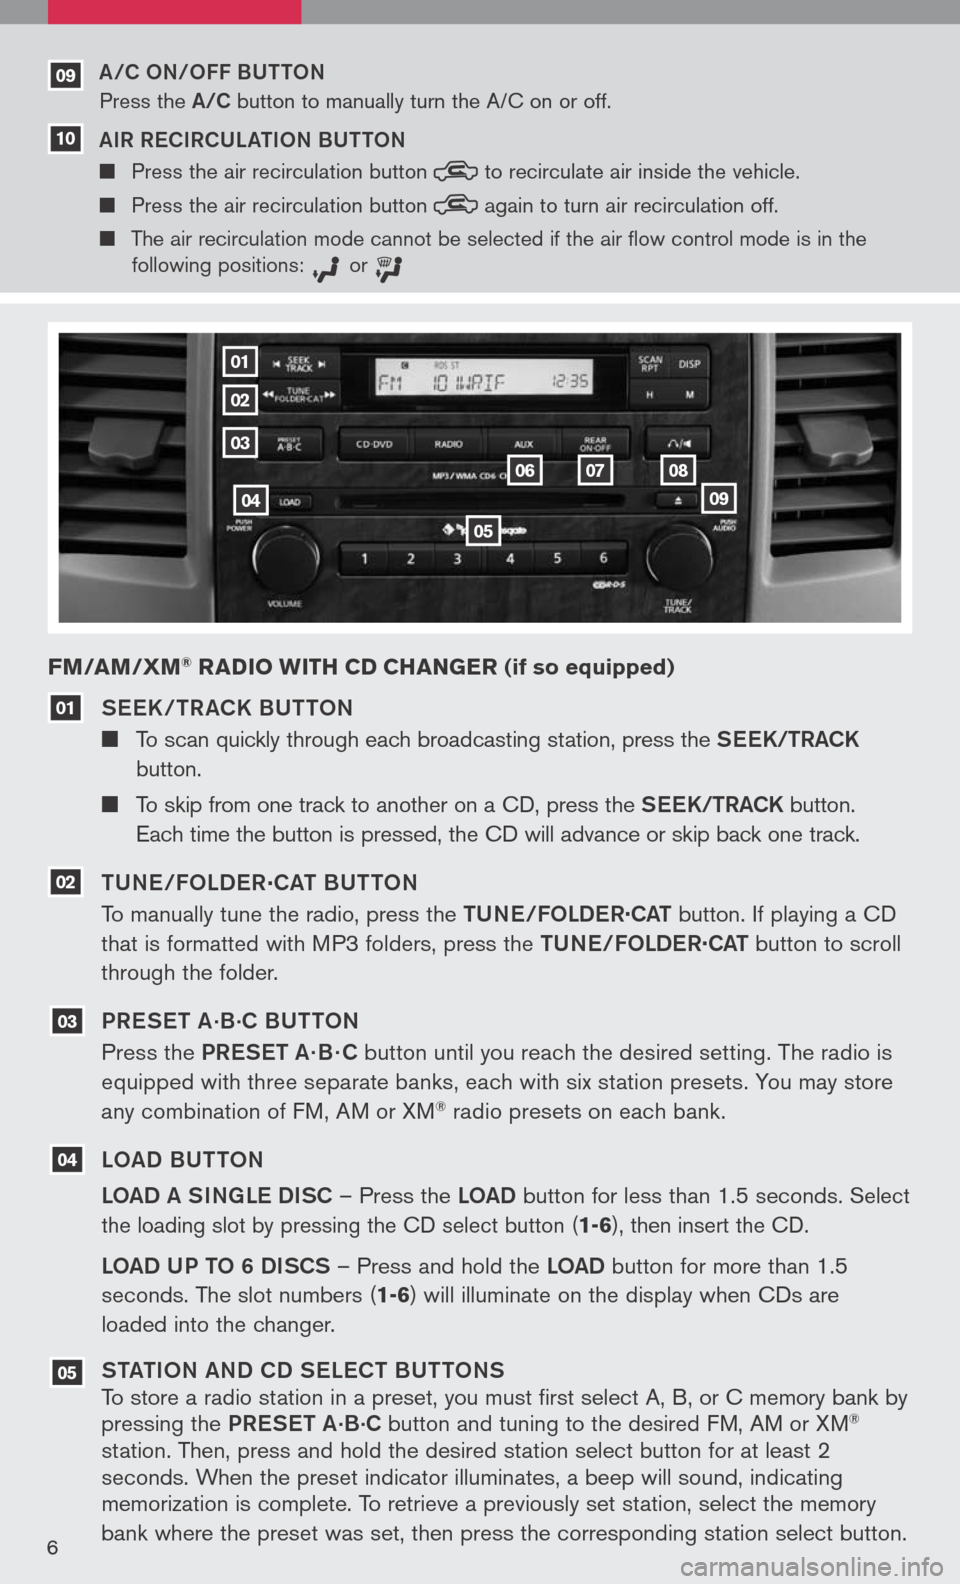
See K / TR aCK BUTTON
To scan quickly through each broadcasting station, press the S ee K/TR aCK
button.
To skip from one track to another on a CD, press the S ee K/TR aCK button.
Each time the button is pressed, the CD will advance or skip back one track.
TUN e/FOLD eR
.
C aT BUTTON
To manually tune the radio, press the TUN e/FOLDe R
.
C aT button. If playing a CD
that is formatted with MP3 folders, press the TUN e/FOLDe R
.
C aT button to scroll
through the folder.
PR eS eT a
.B.C BUTTON
Press the PR eS eT a· B · C button until you reach the desired setting. The radio is
equipped with three separate banks, each with six station presets. You may store
any combination of FM, AM or XM
® radio presets on each bank.
LO aD BUTTON
LO aD a SINg Le DISC – Press the LOaD button for less than 1.5 seconds.
Select
the loading slot by pressing the CD select button
(1-6), then insert the CD.
LOaD UP TO 6 DISCS – Press and hold the LOaD button for more than 1.5
seconds. The slot numbers (
1-6) will illuminate on the display when CDs are
loaded into the changer.
ST aTION aND CD S eLe CT BUTTONS
To store a radio station in a preset, you must first select A, B, or C memory bank by
pressing the PReS eT a
.B.C button and tuning to the desired FM, AM or XM®
station. Then, press and hold the desired station select button for at least 2
seconds. When the preset indicator illuminates, a beep will sound, indicating
memorization is complete. To retrieve a previously set station, select the memory
bank where the preset was set, then press the corresponding station select button.
FM/AM/ xM® RADIO wITH CD CHAN gER (if so equipped)
05
04
03
02
01
01
02
03
04
05
060708
09
a/C ON/OFF BUTTON
Press the a/C button to manually turn the A/C on or off.
a IR R eCIRCUL aTION BUTTON
Press the air recirculation button to
recirculate air inside the vehicle.
Press the air recirculation button again
to turn air recirculation off.
The air recirculation mode cannot be selected if the air
flow control mode is in the
following positions: or
09
10
Page 11 of 36

9
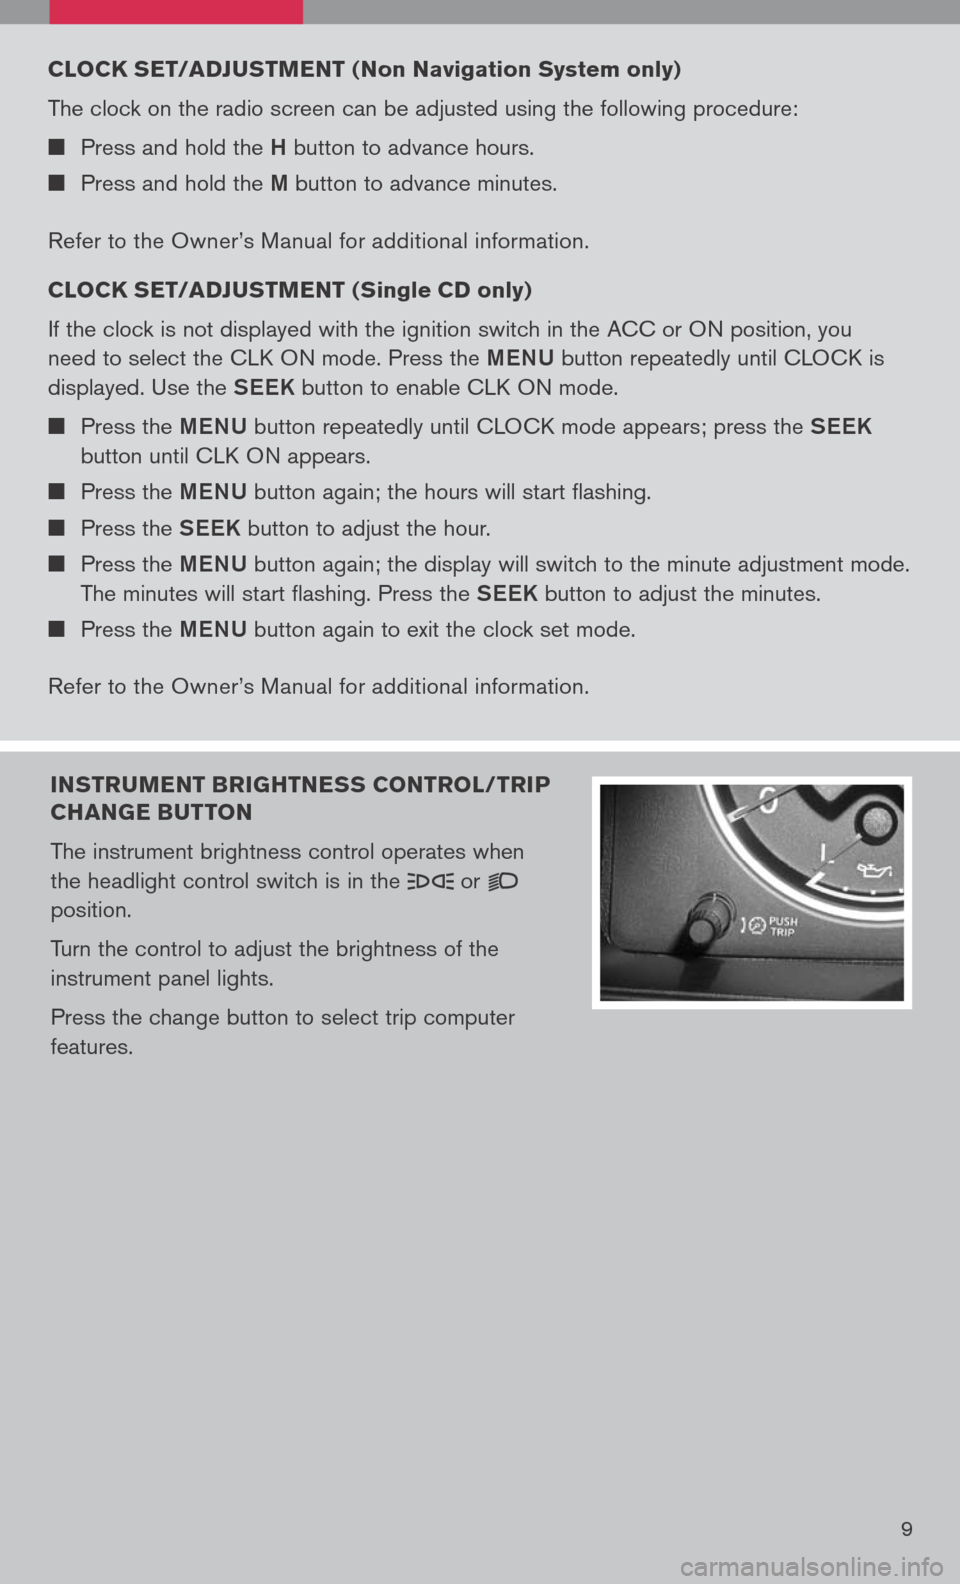
INsTR uMENT BRI gHTNE ss CONTROL/TRIP
CHAN gE B uTTON
The instrument brightness control operates when
the headlight control switch is in the
or
position.
Turn the control to adjust the brightness of the
instrument panel lights.
Press the change button to select trip computer
features.
CLOCK sET/ADJ usTMENT ( Non Navigation system only)
The clock on the radio screen can be adjusted using the following procedure:
Press and hold the H button to advance hours.
Press and hold the M button to advance minutes.
Refer to the Owner’s Manual for additional information.
CLOCK sET/ADJ usTMENT ( single CD only
)
If the clock is not displayed with the ignition switch in the ACC or ON position, you
need to select the CLK ON mode. Press the MeNU button repeatedly until CLOCK is
displayed. Use the See K button to enable CLK ON mode.
Press the MeNU button repeatedly until CLOCK mode appears; press the See K
button until CLK ON appears.
Press the MeNU button again; the hours will start flashing.
Press the See K button to adjust the hour.
Press the MeNU button again; the display will switch to the minute adjustment mode.
The minutes will start flashing. Press the See K button to adjust the minutes.
Press the MeNU button again to exit the clock set mode.
Refer to the Owner’s Manual for additional information.