2008 MERCEDES-BENZ E-CLASS ESTATE engine
[x] Cancel search: enginePage 103 of 401
Lights
100
X
To switch on: turn the light switch to
M orU.
The dipped-beam headlamps, side lamps
and licence plate lamp are switched on
when the engine is running.
i When you turn the light switch to any
position other than MorU, the cor-
responding light goes on.
Automatic headlamp mode The side lamps, dipped-beam headlamps and
licence plate lamp are switched on or off
automatically, depending on the brightness of
the ambient light. G
Risk of accident
When the light switch is set to U, the
lights are not switched on automatically in
foggy conditions. This could endanger you
and others. Therefore, turn the light switch
to B in darkness and fog.
Automatic headlamp mode is only a driving
aid. You are responsible for the vehicle
lighting at all times. G
Risk of accident
When it is dark or foggy, turn the light
switch from UtoB in good time. You
could otherwise cause an accident if the
headlamps were to switch off temporarily.
X To switch on: turn the light switch to
U.
The side lamps are switched on and off
automatically when the key is in position
1 in the ignition lock.
The dipped-beam headlamps, side lamps
and licence plate lamp are switched on
automatically when the engine is running.
When the dipped-beam headlamps are
switched on, the green dipped-beam indi-
cator lamp in the instrument cluster lights
up.
Front foglamps/Rear foglamp G
Risk of accident
If you suspect that driving conditions will be
foggy, turn the light switch to Bbefore
you start your journey. Otherwise, your
vehicle may not be visible and you could
therefore endanger yourself and others. G
Risk of accident
When it is dark or foggy, turn the light
switch from UtoB in good time. You
could otherwise cause an accident if the
headlamps were to switch off temporarily.
When the light switch is set to Uyou can-
not switch on the front or rear foglamps.
X Make sure that the key is in position 2in
the ignition lock.
X To switch on the front foglamps: turn the
light switch to the BorC position.
X Pull the light switch out to the first stop.
The ¥ green indicator lamp next to the
light switch lights up.
X To switch on the rear foglamp: turn the
light switch to BorC.
X Pull the light switch out to the second
detent.
The † yellow indicator lamp next to the
light switch lights up.
X To switch off the front foglamps/rear
foglamps: push in the light switch to the
stop.
The corresponding indicator lamp goes out. Controls
211_AKB; 2; 5, en-GB
mkalafa,
Version: 2.9.4 2008-02-29T16:57:07+01:00 - Seite 100Dateiname: 6515_3416_02_buchblock.pdf; preflight
Page 104 of 401
Lights
101Combination switch (turn signals,
main-beam headlamps and headlamp
flasher)
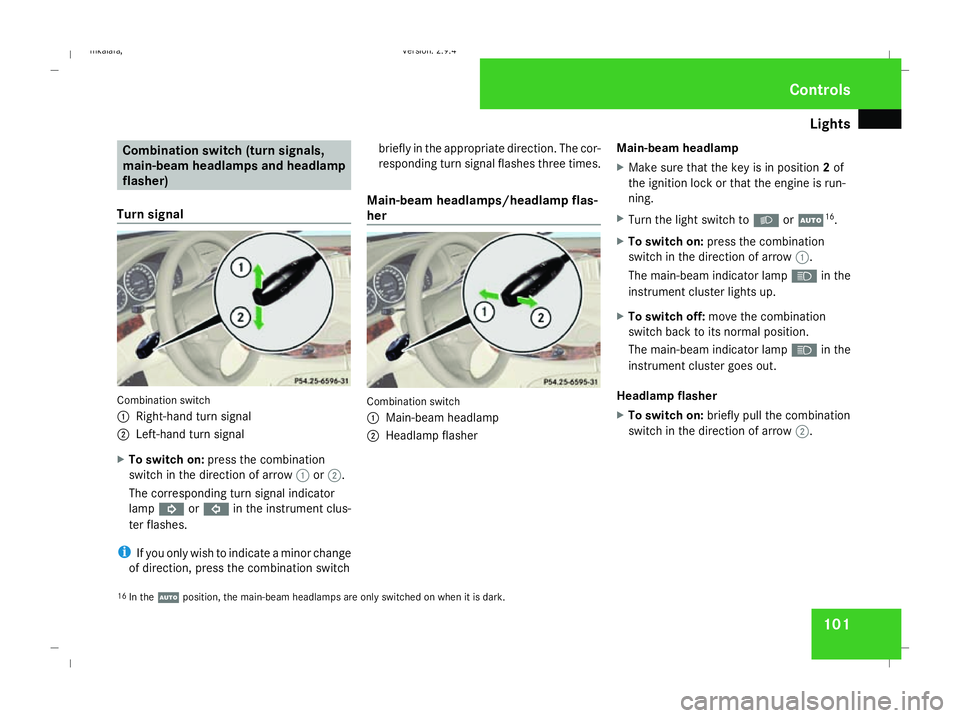
Turn signal Combination switch
1
Right-hand turn signal
2 Left-hand turn signal
X To switch on: press the combination
switch in the direction of arrow 1or2.
The corresponding turn signal indicator
lamp K orL in the instrument clus-
ter flashes.
i If you only wish to indicate a minor change
of direction, press the combination switch briefly in the appropriate direction. The cor-
responding turn signal flashes three times.
Main-beam headlamps/headlamp flas-
her Combination switch
1
Main-beam headlamp
2 Headlamp flasher Main-beam headlamp
X
Make sure that the key is in position 2of
the ignition lock or that the engine is run-
ning.
X Turn the light switch to BorU 16
.
X To switch on: press the combination
switch in the direction of arrow 1.
The main-beam indicator lamp Ain the
instrument cluster lights up.
X To switch off: move the combination
switch back to its normal position.
The main-beam indicator lamp Ain the
instrument cluster goes out.
Headlamp flasher
X To switch on: briefly pull the combination
switch in the direction of arrow 2.
16 In the Uposition, the main-beam headlamps are only switched on when it is dark. Controls
211_AKB; 2; 5, en-GB
mkalafa,
Version: 2.9.4 2008-02-29T16:57:07+01:00 - Seite 101 ZDateiname: 6515_3416_02_buchblock.pdf; preflight
Page 105 of 401
Lights
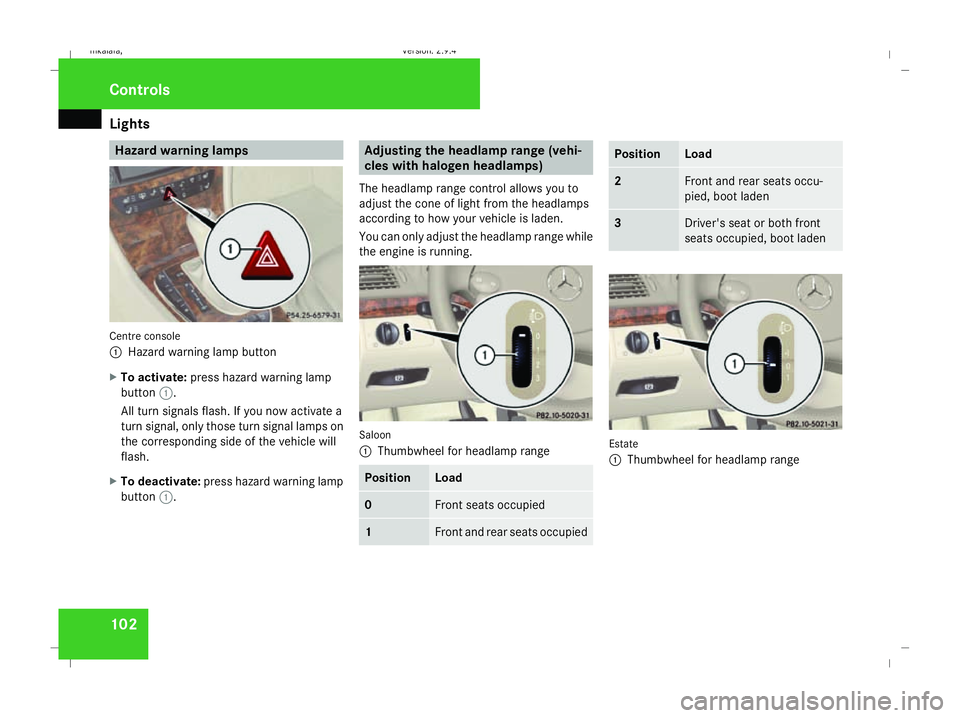
102 Hazard warning lamps
Centre console
1
Hazard warning lamp button
X To activate: press hazard warning lamp
button 1.
All turn signals flash. If you now activate a
turn signal, only those turn signal lamps on
the corresponding side of the vehicle will
flash.
X To deactivate: press hazard warning lamp
button 1. Adjusting the headlamp range (vehi-
cles with halogen headlamps)
The headlamp range control allows you to
adjust the cone of light from the headlamps
according to how your vehicle is laden.
You can only adjust the headlamp range while
the engine is running. Saloon
1
Thumbwheel for headlamp range Position Load
0 Front seats occupied
1 Front and rear seats occupied Position Load
2 Front and rear seats occu-
pied, boot laden
3 Driver's seat or both front
seats occupied, boot laden
Estate
1
Thumbwheel for headlamp range Controls
211_AKB; 2; 5, en-GB
mkalafa,
Version: 2.9.4
2008-02-29T16:57:07+01:00 - Seite 102 Dateiname: 6515_3416_02_buchblock.pdf; preflight
Page 106 of 401
Lights
103Position Load
-1 Front and rear seats occupied
or
Front and rear seats occu-
pied, luggage compartment
laden
0 Front seats occupied
1 Driver's seat occupied, lug-
gage compartment laden
X
Turn thumbwheel for headlamp range 1to
the position which corresponds to the load
in your vehicle. Headlamp cleaning system*
The headlamps are cleaned automatically if
the "Wipe with windscreen washer fluid" func-
tion is operated five times while the lights are
on and the engine is running. When you
switch off the ignition, the automatic head-
lamp cleaning system is reset and counting is
resumed from 0. Intelligent Light System* (vehicles
with bi-xenon headlamps*)
The Intelligent Light System adapts the light-
ing of the front headlamps to the prevailing
driving conditions so that the road is illumi-
nated better.
i The Intelligent Light System is only active
when it is dark.
The Intelligent Light System comprises:
R Active light function
R Cornering light function
R Motorway mode
R Extended range foglamps Active light function For the active light function, the dipped-beam
headlamps swivel horizontally. The swivel
angle changes according to the respective
driving situation. The active light function is
not active when the vehicle is stationary.
Cornering light function
Specially designed headlamps light up the
area into which you are driving when turning
corners.
If you are driving at speeds below 40 km/h,
the cornering light function is activated either
by the turn signals or when the steering wheel
is turned. If you are driving at speeds above
40 km/h the cornering light function is deac-
tivated.
Switching on
X
Make sure that the engine is running.
X Switch on the dipped-beam headlamps.
X Switch off the fog lights.
X Switch on the turn signal.
The cornering light on the same side as the
turn signal comes on, even if you turn the
steering wheel in the opposite direction
after indicating. Controls
* optional
211_AKB; 2; 5, en-GB
mkalafa,
Version: 2.9.4
2008-02-29T16:57:07+01:00 - Seite 103 ZDateiname: 6515_3416_02_buchblock.pdf; preflight
Page 113 of 401
Driving and pa
rking 110
With the key
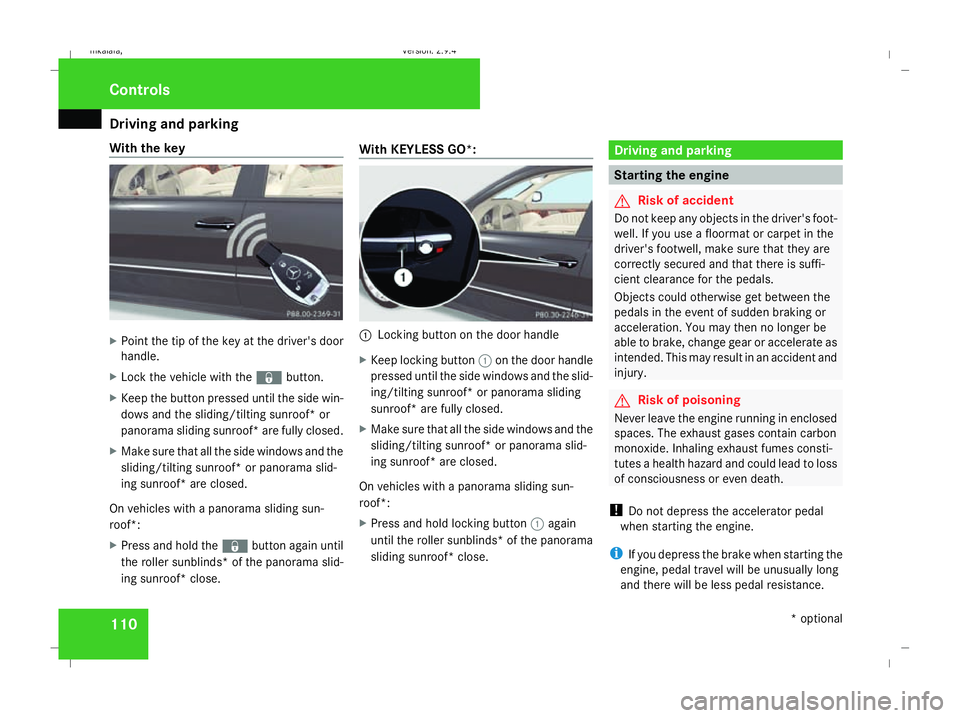
X
Point the tip of the key at the driver's door
handle.
X Lock the vehicle with the jbutton.
X Keep the button pressed until the side win-
dows and the sliding/tilting sunroof* or
panorama sliding sunroof* are fully closed.
X Make sure that all the side windows and the
sliding/tilting sunroof* or panorama slid-
ing sunroof* are closed.
On vehicles with a panorama sliding sun-
roof*:
X Press and hold the jbutton again until
the roller sunblinds* of the panorama slid-
ing sunroof* close. With KE
YLESS GO*: 1
Locking button on the door handle
X Keep locking button 1on the door handle
pressed until the side windows and the slid-
ing/tilting sunroof* or panorama sliding
sunroof* are fully closed.
X Make sure that all the side windows and the
sliding/tilting sunroof* or panorama slid-
ing sunroof* are closed.
On vehicles with a panorama sliding sun-
roof*:
X Press and hold locking button 1again
until the roller sunblinds* of the panorama
sliding sunroof* close. Driving and parking
Starting the engine
G
Risk of accident
Do not keep any objects in the driver's foot-
well. If you use a floormat or carpet in the
driver's footwell, make sure that they are
correctly secured and that there is suffi-
cient clearance for the pedals.
Objects could otherwise get between the
pedals in the event of sudden braking or
acceleration. You may then no longer be
able to brake, change gear or accelerate as
intended. This may result in an accident and
injury. G
Risk of poisoning
Never leave the engine running in enclosed
spaces. The exhaust gases contain carbon
monoxide. Inhaling exhaust fumes consti-
tutes a health hazard and could lead to loss
of consciousness or even death.
! Do not depress the accelerator pedal
when starting the engine.
i If you depress the brake when starting the
engine, pedal travel will be unusually long
and there will be less pedal resistance. Cont
rols
* optional
211_AKB; 2; 5, en-GB
mkalafa
,V ersion: 2.9.4
2008-02-29T16:57:07+01:00 - Seite 110 Dateiname: 6515_3416_02_buchblock.pdf; preflight
Page 114 of 401
Driving and pa
rking 111
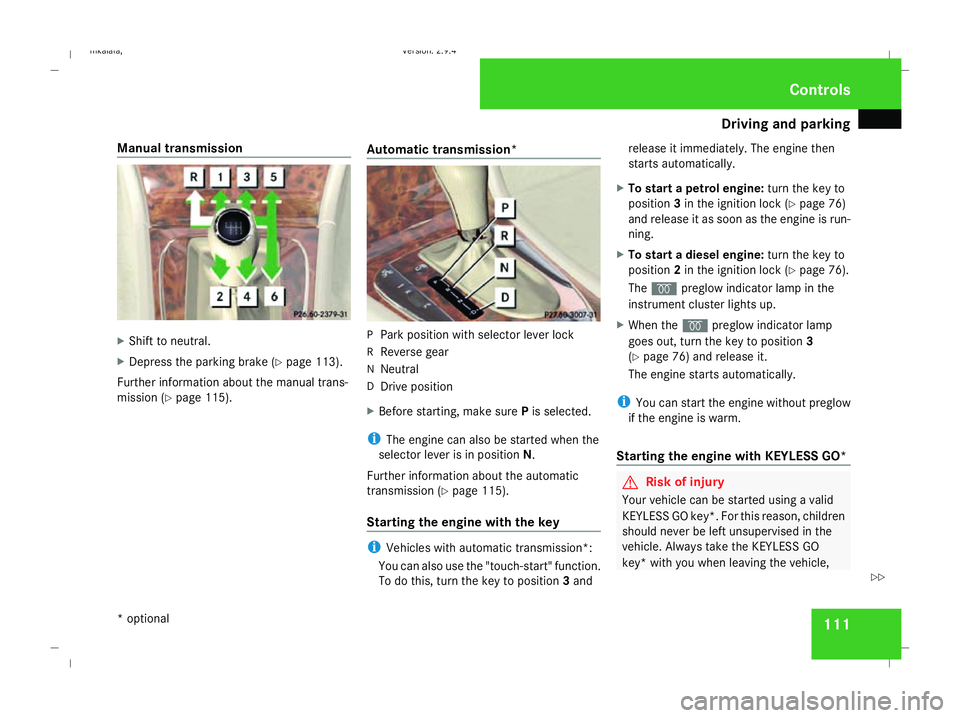
Manual transmission
X
Shift to neutral.
X Depress the parking brake (Y page 113).
Further information about the manual trans-
mission (Y page 115). Automatic transmission* P
Park position with selector lever lock
R Reverse gear
N Neutral
D Drive position
X Before starting, make sure Pis selected.
i The engine can also be started when the
selector lever is in position N.
Further information about the automatic
transmission (Y page 115).
Starting the engine with the key i
Vehicles with automatic transmission*:
You can also use the "touch-start" function.
To do this, turn the key to position 3and release it immediately. The engine then
starts automatically.
X To start a petrol engine: turn the key to
position 3in the ignition lock (Y page 76)
and release it as soon as the engine is run-
ning.
X To start a diesel engine: turn the key to
position 2in the ignition lock (Y page 76).
The q preglow indicator lamp in the
instrument cluster lights up.
X When the qpreglow indicator lamp
goes out, turn the key to position 3
(Y page 76) and release it.
The engine starts automatically.
i You can start the engine without preglow
if the engine is warm.
Starting the engine with KE YLESS GO* G
Risk of injury
Your vehicle can be started using a valid
KEYLESS GO key*. For this reason, children
should never be left unsupervised in the
vehicle. Always take the KEYLESS GO
key* with you when leaving the vehicle, Cont
rols
* optional
211_AKB; 2; 5, en-GB
mkalafa
,V ersion: 2.9.4
2008-02-29T16:57:07+01:00 - Seite 111 ZDateiname: 6515_3416_02_buchblock.pdf; preflight
Page 115 of 401
Driving and pa
rking 112 even if you are only leaving it for a short
time.
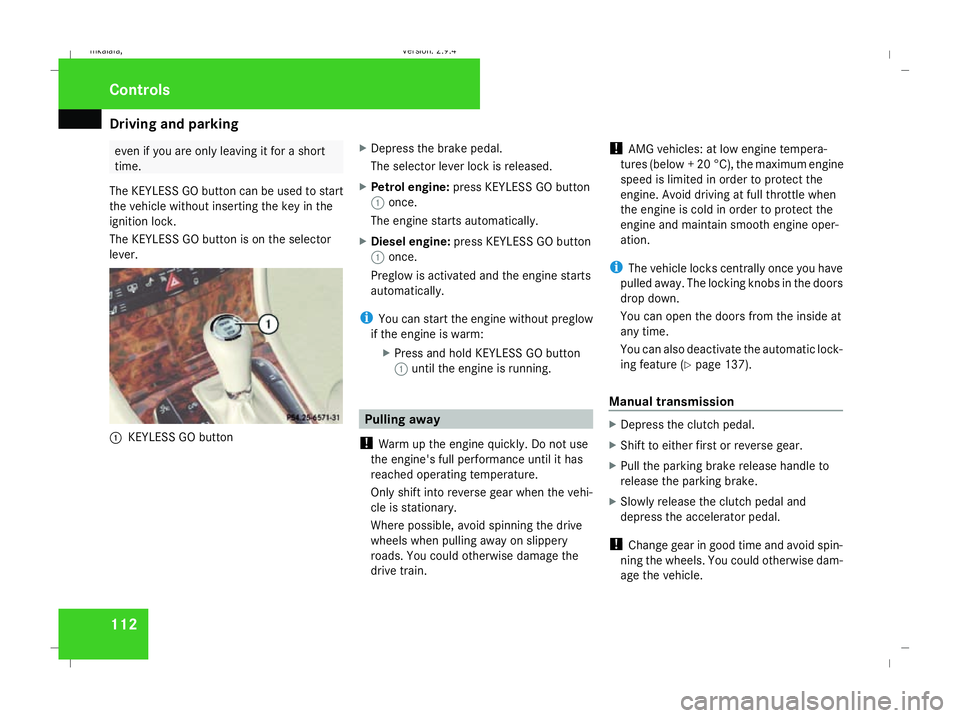
The KEYLESS GO button can be used to start
the vehicle without inserting the key in the
ignition lock.
The KEYLESS GO button is on the selector
lever. 1
KEYLESS GO button X
Depress the brake pedal.
The selector lever lock is released.
X Petrol engine: press KEYLESS GO button
1 once.
The engine starts automatically.
X Diesel engine: press KEYLESS GO button
1 once.
Preglow is activated and the engine starts
automatically.
i You can start the engine without preglow
if the engine is warm:
XPress and hold KEYLESS GO button
1 until the engine is running. Pulling away
! Warm up the engine quickly. Do not use
the engine's full performance until it has
reached operating temperature.
Only shift into reverse gear when the vehi-
cle is stationary.
Where possible, avoid spinning the drive
wheels when pulling away on slippery
roads. You could otherwise damage the
drive train. !
AMG vehicles: at low engine tempera-
tures (below + 20 °C), the maximum engine
speed is limited in order to protect the
engine. Avoid driving at full throttle when
the engine is cold in order to protect the
engine and maintain smooth engine oper-
ation.
i The vehicle locks centrally once you have
pulled away. The locking knobs in the doors
drop down.
You can open the doors from the inside at
any time.
You can also deactivate the automatic lock-
ing feature (Y page 137).
Manual transmission X
Depress the clutch pedal.
X Shift to either first or reverse gear.
X Pull the parking brake release handle to
release the parking brake.
X Slowly release the clutch pedal and
depress the accelerator pedal.
! Change gear in good time and avoid spin-
ning the wheels. You could otherwise dam-
age the vehicle. Controls
211_AKB; 2; 5, en-GB
mkalafa
, Version: 2.9.4 2008-02-29T16:57:07+01:00 - Seite 112Dateiname: 6515_3416_02_buchblock.pdf; preflight
Page 116 of 401
Driving and pa
rking 113
Automatic transmission* i
It is only possible to move the selector
lever to the desired position if you depress
the brake pedal. Only then is the selector
lever lock released.
X Depress the brake pedal and hold it down.
X Pull the parking brake release handle to
release the parking brake.
X Move the selector lever to position Dor R.
i Wait for the shift process to complete
before pulling away.
X Release the brake pedal.
X Carefully depress the accelerator pedal.
i Upshifts take place at higher engine
speeds after a cold start. This helps the
catalytic converter to reach its operating
temperature more quickly. Parking
G
Risk of accident
Only remove the key from the ignition lock
when the vehicle is stationary since you
cannot steer the vehicle with the key
removed.
Never leave children unsupervised in the
vehicle. They could release the parking
brake. This could lead to a serious or fatal
accident. G
Risk of fire
Make sure that the exhaust system does
not under any circumstances come into
contact with easily ignitable material such
as dry grass or petrol. The material could
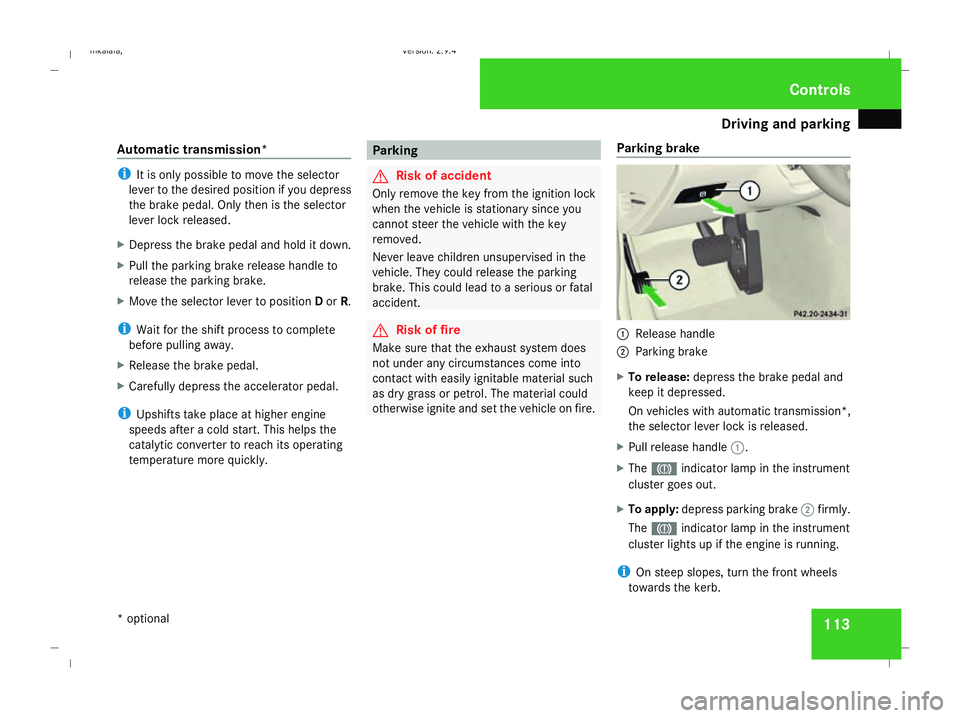
otherwise ignite and set the vehicle on fire. Parking brake 1
Release handle
2 Parking brake
X To release: depress the brake pedal and
keep it depressed.
On vehicles with automatic transmission*,
the selector lever lock is released.
X Pull release handle 1.
X The 3 indicator lamp in the instrument
cluster goes out.
X To apply: depress parking brake 2firmly.
The 3 indicator lamp in the instrument
cluster lights up if the engine is running.
i On steep slopes, turn the front wheels
towards the kerb. Controls
* optional
211_AKB; 2; 5, en-GB
mkalafa
,V ersion: 2.9.4
2008-02-29T16:57:07+01:00 - Seite 113 ZDateiname: 6515_3416_02_buchblock.pdf; preflight