2008 MERCEDES-BENZ E-CLASS ESTATE length
[x] Cancel search: lengthPage 88 of 401
Seats
85
5
Lumbar region support
6 Seat cushion length
X To activate/deactivate: press button1.
The indicator lamp in the button lights up/
goes out.
When switched on, the message Driving
dynamics seat adjustment appears in
the multi-function display for five seconds.
Massage function (PULSE) The massage function helps you to prevent
muscle tension on long journeys.
X Press button 3.
The indicator lamp in the button lights up.
The air cushions in the lumbar region
vibrate for approximately five minutes. Seat ventilation*
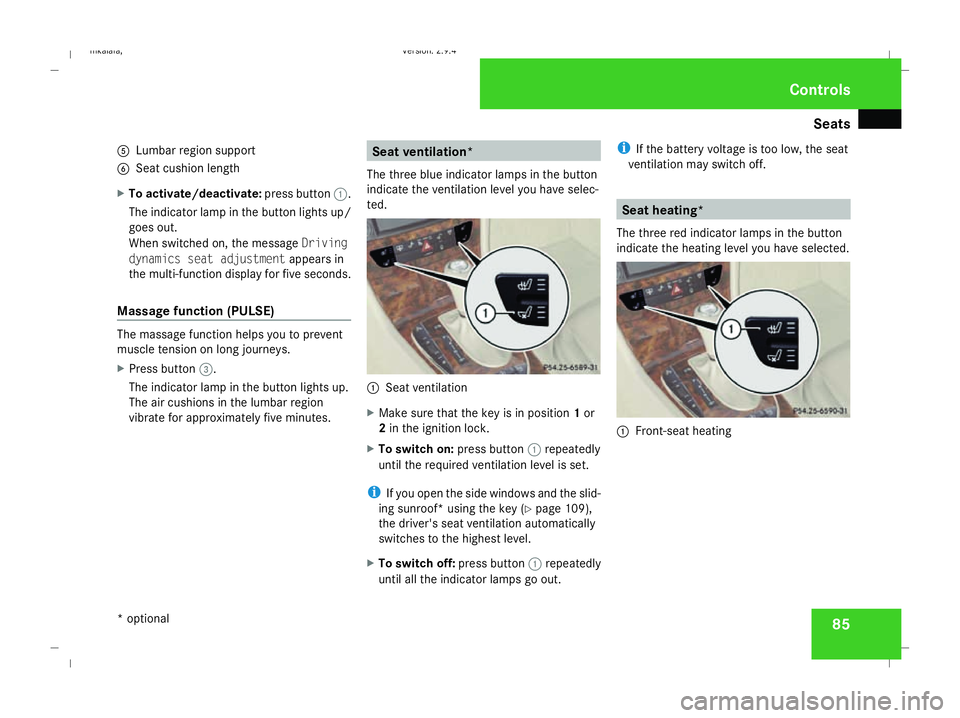
The three blue indicator lamps in the button
indicate the ventilation level you have selec-
ted. 1
Seat ventilation
X Make sure that the key is in position 1or
2 in the ignition lock.
X To switch on: press button1repeatedly
until the required ventilation level is set.
i If you open the side windows and the slid-
ing sunroof* using the key (Y page 109),
the driver's seat ventilation automatically
switches to the highest level.
X To switch off: press button1repeatedly
until all the indicator lamps go out. i
If the battery voltage is too low, the seat
ventilation may switch off. Seat heating*
The three red indicator lamps in the button
indicate the heating level you have selected. 1
Front-seat heating Controls
* optional
211_AKB; 2; 5, en-GB
mkalafa,
Version: 2.9.4 2008-02-29T16:57:07+01:00 - Seite 85 ZDateiname: 6515_3416_02_buchblock.pdf; preflight
Page 131 of 401
On-board computer
128
3
Fastest lap time (best lap)
4 Lap
Resetting the current lap
X Press the æbutton to stop the RACE-
TIMER.
X Press the çbutton to reset the lap time
to "0".
Deleting all laps
If you have switched off the engine, the RACE-
TIMER is reset to "0" after 30 seconds. All laps
are deleted.
It is not possible to delete a single stored lap
on its own.
X Press the æbutton to stop the RACE-
TIMER.
X Press the reset button on the left of the
instrument cluster twice.
X Press the æbutton to start the RACE-
TIMER.
All laps are deleted. Overall evaluation This function is only available if you have
stored at least one lap and have stopped the
RACETIMER.
X
Press the èor· button to select the
AMG menu.
X Press the jbutton repeatedly until the
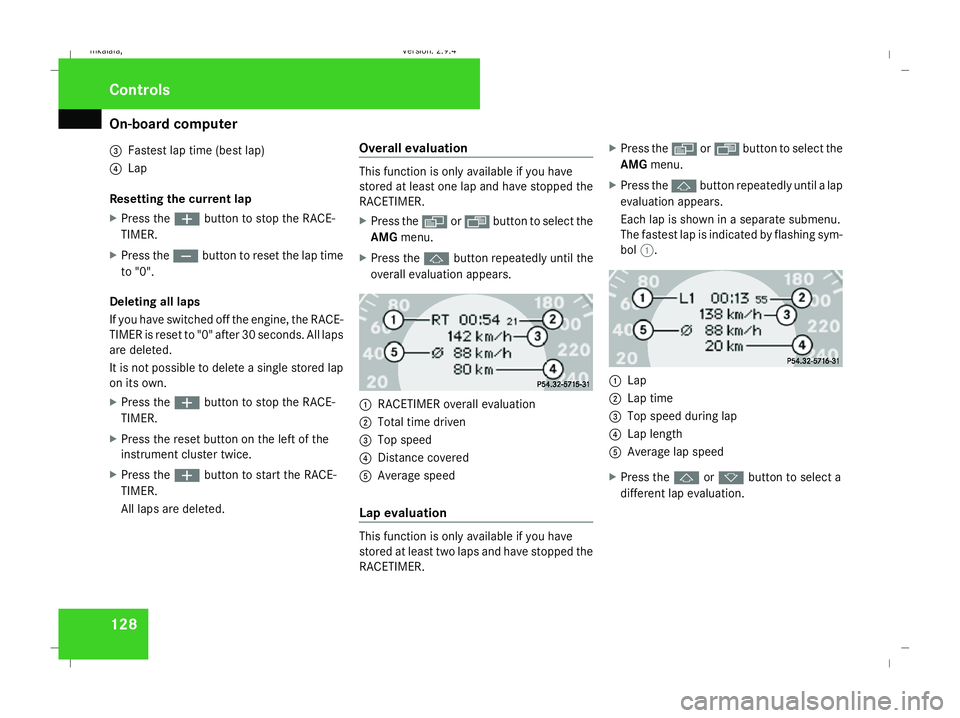
overall evaluation appears. 1
RACETIMER overall evaluation
2 Total time driven
3 Top speed
4 Distance covered
5 Average speed
Lap evaluation This function is only available if you have
stored at least two laps and have stopped the
RACETIMER.X
Press the èor· button to select the
AMG menu.
X Press the jbutton repeatedly until a lap
evaluation appears.
Each lap is shown in a separate submenu.
The fastest lap is indicated by flashing sym-
bol 1. 1
Lap
2 Lap time
3 Top speed during lap
4 Lap length
5 Average lap speed
X Press the jork button to select a
different lap evaluation. Controls
211_AKB; 2; 5, en-GB
mkalafa, Version: 2.9.4 2008-02-29T16:57:07+01:00 - Seite 128Dateiname: 6515_3416_02_buchblock.pdf; preflight
Page 200 of 401
Loading and stowing
197X
Open the boot/luggage compartment.
X Pull the right-hand or left-hand release han-
dle on the backrest.
The corresponding backrest is released
and the head restraints fold back.
X Fold backrest 2forwards.
! Make sure that the head restraints fit fully
in the seat cushion pockets. This prevents
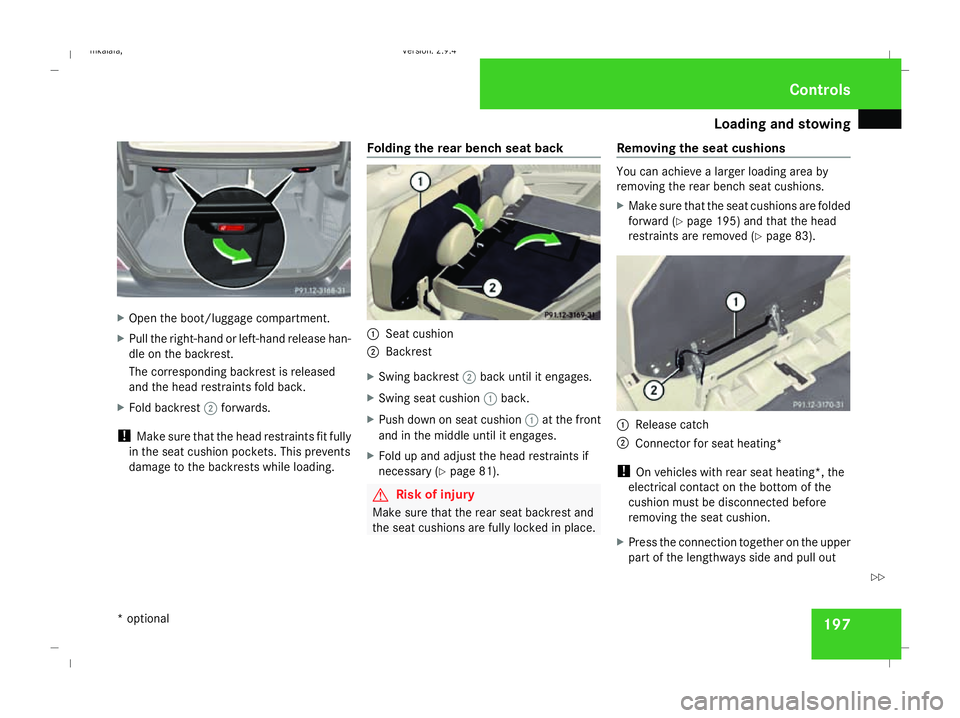
damage to the backrests while loading. Folding the rear bench seat back 1
Seat cushion
2 Backrest
X Swing backrest 2back until it engages.
X Swing seat cushion 1back.
X Push down on seat cushion 1at the front
and in the middle until it engages.
X Fold up and adjust the head restraints if
necessary (Y page 81). G
Risk of injury
Make sure that the rear seat backrest and
the seat cushions are fully locked in place. Removing the seat cushions You can achieve a larger loading area by
removing the rear bench seat cushions.
X
Make sure that the seat cushions are folded
forward (Y page 195) and that the head
restraints are removed (Y page 83). 1
Release catch
2 Connector for seat heating*
! On vehicles with rear seat heating*, the
electrical contact on the bottom of the
cushion must be disconnected before
removing the seat cushion.
X Press the connection together on the upper
part of the lengthways side and pull out Controls
* optional
211_AKB; 2; 5, en-GB
mkalafa,
Version: 2.9.4 2008-02-29T16:57:07+01:00 - Seite 197 ZDateiname: 6515_3416_02_buchblock.pdf; preflight
Page 203 of 401
Loading and stowing
200
Folding the rear bench seat back
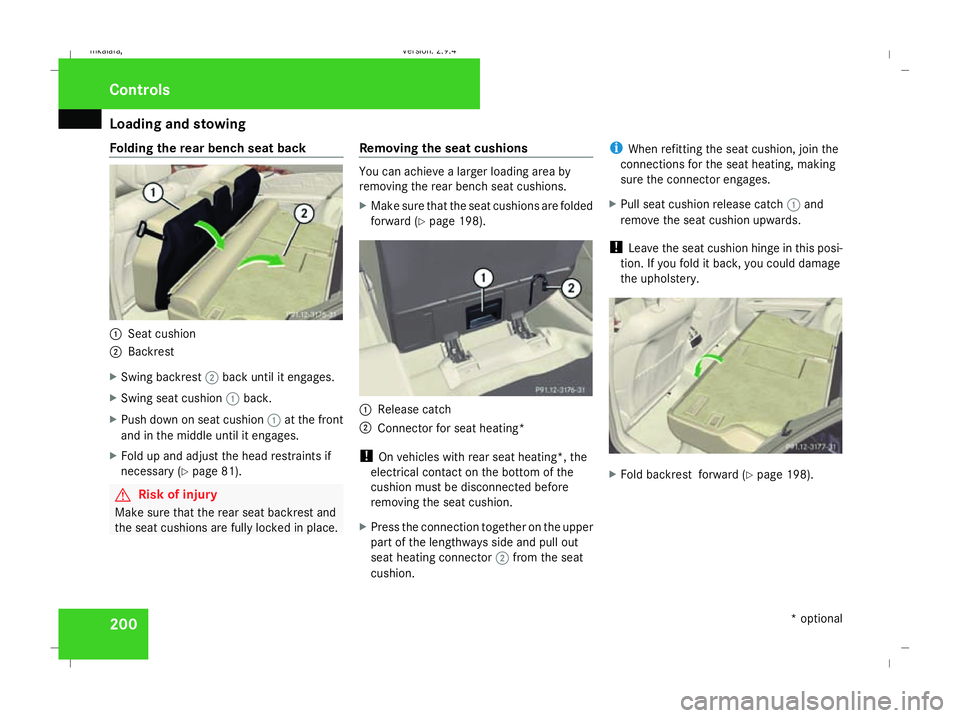
1
Seat cushion
2 Backrest
X Swing backrest 2back until it engages.
X Swing seat cushion 1back.
X Push down on seat cushion 1at the front
and in the middle until it engages.
X Fold up and adjust the head restraints if
necessary (Y page 81). G
Risk of injury
Make sure that the rear seat backrest and
the seat cushions are fully locked in place. Removing the seat cushions You can achieve a larger loading area by
removing the rear bench seat cushions.
X
Make sure that the seat cushions are folded
forward (Y page 198). 1
Release catch
2 Connector for seat heating*
! On vehicles with rear seat heating*, the
electrical contact on the bottom of the
cushion must be disconnected before
removing the seat cushion.
X Press the connection together on the upper
part of the lengthways side and pull out
seat heating connector 2from the seat
cushion. i
When refitting the seat cushion, join the
connections for the seat heating, making
sure the connector engages.
X Pull seat cushion release catch 1and
remove the seat cushion upwards.
! Leave the seat cushion hinge in this posi-
tion. If you fold it back, you could damage
the upholstery. X
Fold backrest forward (Y page 198).Controls
* optional
211_AKB; 2; 5, en-GB
mkalafa,
Version: 2.9.4 2008-02-29T16:57:07+01:00 - Seite 200Dateiname: 6515_3416_02_buchblock.pdf; preflight
Page 332 of 401
Battery
329Battery
Notes on the battery
In order for the battery to achieve the maxi-
mum possible service life, it must always be
sufficiently charged.
Have the battery charge checked more fre-
quently if you use the vehicle mainly for short
trips or if you leave it standing idle for a
lengthy period.
To prevent damage from corrosion, only
replace the battery with one that has a central
ventilation cover.
Consult a Mercedes-Benz Service Centre if
you wish to leave your vehicle parked up for
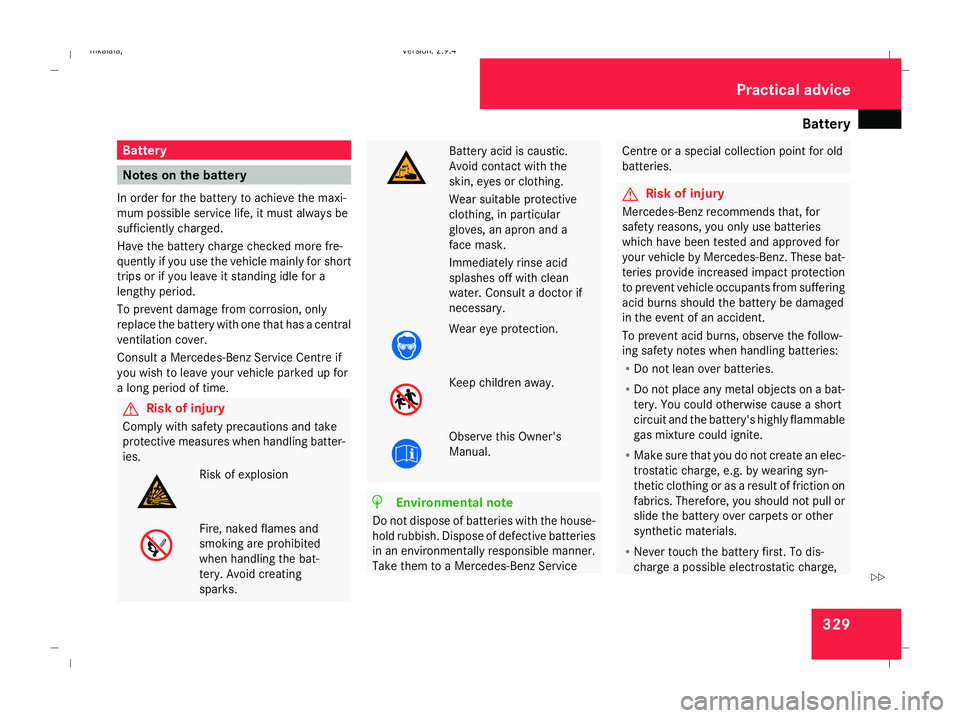
a long period of time. G
Risk of injury
Comply with safety precautions and take
protective measures when handling batter-
ies. Risk of explosion
Fire, naked flames and
smoking are prohibited
when handling the bat-
tery. Avoid creating
sparks. Battery acid is caustic.
Avoid contact with the
skin, eyes or clothing.
Wear suitable protective
clothing, in particular
gloves, an apron and a
face mask.
Immediately rinse acid
splashes off with clean
water. Consult a doctor if
necessary.
Wear eye protection.
Keep children away.
Observe this Owner's
Manual.
H
Environmental note
Do not dispose of batteries with the house-
hold rubbish. Dispose of defective batteries
in an environmentally responsible manner.
Take them to a Mercedes-Benz Service Centre or a special collection point for old
batteries.
G
Risk of injury
Mercedes-Benz recommends that, for
safety reasons, you only use batteries
which have been tested and approved for
your vehicle by Mercedes-Benz. These bat-
teries provide increased impact protection
to prevent vehicle occupants from suffering
acid burns should the battery be damaged
in the event of an accident.
To prevent acid burns, observe the follow-
ing safety notes when handling batteries:
R Do not lean over batteries.
R Do not place any metal objects on a bat-
tery. You could otherwise cause a short
circuit and the battery's highly flammable
gas mixture could ignite.
R Make sure that you do not create an elec-
trostatic charge, e.g. by wearing syn-
thetic clothing or as a result of friction on
fabrics. Therefore, you should not pull or
slide the battery over carpets or other
synthetic materials.
R Never touch the battery first. To dis-
charge a possible electrostatic charge, Practical advice
211_AKB; 2; 5, en-GB
mkalafa,
Version: 2.9.4
2008-02-29T16:57:07+01:00 - Seite 329 ZDateiname: 6515_3416_02_buchblock.pdf; preflight
Page 336 of 401
Jump-starting
333
X
Charge the battery. Observe the notes in
the operating instructions for your battery
charger.
X Refit the charged battery.
To do this, follow the steps described in
"Removing the battery" (Y page 332) in
reverse order.
! Do not fit refillable batteries without elec-
trostatic protection. The electrostatic dis-
charge could otherwise cause the battery
to explode. The battery acid released could
cause damage to your vehicle.
Further information on electrostatic protec-
tion (Y page 331). G
Risk of injury
Battery acid is caustic. Avoid contact with
the skin, eyes or clothing. Reconnecting the battery
! Always reconnect the battery in the
sequence described below. Never swap the
terminal clamps. You may otherwise dam-
age the vehicle electronics.
X Switch off all electrical consumers.
X Connect the positive terminal clamp and
secure the cover.
X Connect the negative terminal clamp.
X Connect the breather hose. Make sure that
a cell cap is fitted between the battery and
the breather hose.
X Refit the electrostatic protection if neces-
sary (Y page 331).
i If the battery power supply has been inter-
rupted (e.g. if it has been reconnected), you
must carry out the following tasks:
R Set the time (Y page 135).
R Reset the sliding/tilting sunroof*
(Y page 182).
R Reset the function for folding the exterior
mirrors in/out automatically* by folding
the mirrors out once (Y page 91). Jump-starting
Jump-starting your vehicle
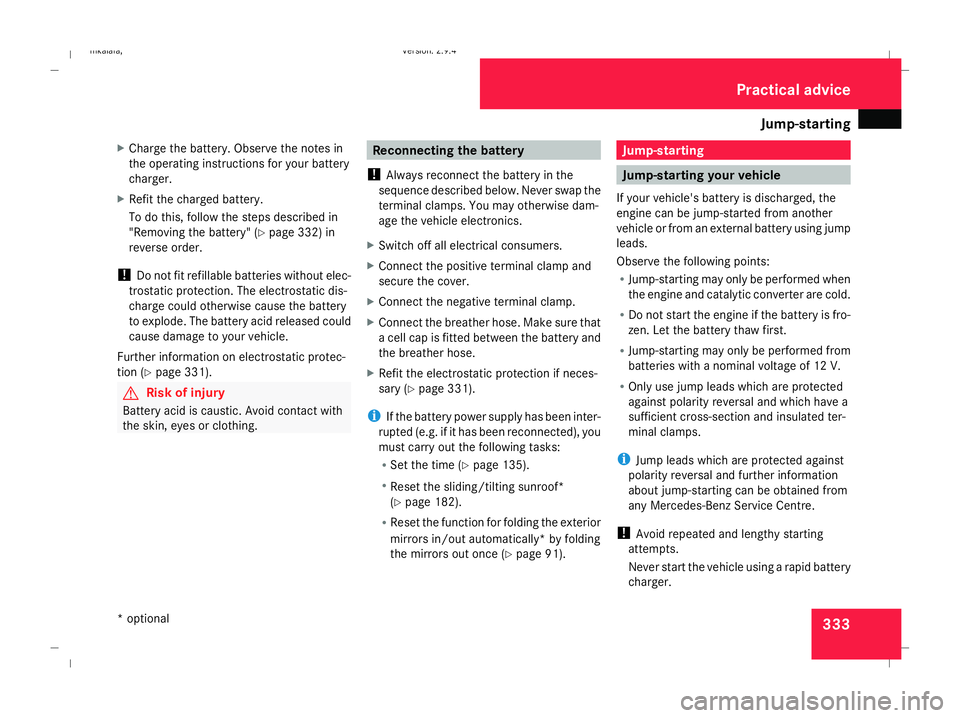
If your vehicle's battery is discharged, the
engine can be jump-started from another
vehicle or from an external battery using jump
leads.
Observe the following points:
R Jump-starting may only be performed when
the engine and catalytic converter are cold.
R Do not start the engine if the battery is fro-
zen. Let the battery thaw first.
R Jump-starting may only be performed from
batteries with a nominal voltage of 12 V.
R Only use jump leads which are protected
against polarity reversal and which have a
sufficient cross-section and insulated ter-
minal clamps.
i Jump leads which are protected against
polarity reversal and further information
about jump-starting can be obtained from
any Mercedes-Benz Service Centre.
! Avoid repeated and lengthy starting
attempts.
Never start the vehicle using a rapid battery
charger. Practical advice
* optional
211_AKB; 2; 5, en-GB
mkalafa,
Version: 2.9.4
2008-02-29T16:57:07+01:00 - Seite 333 ZDateiname: 6515_3416_02_buchblock.pdf; preflight
Page 342 of 401
Towing and tow-starting
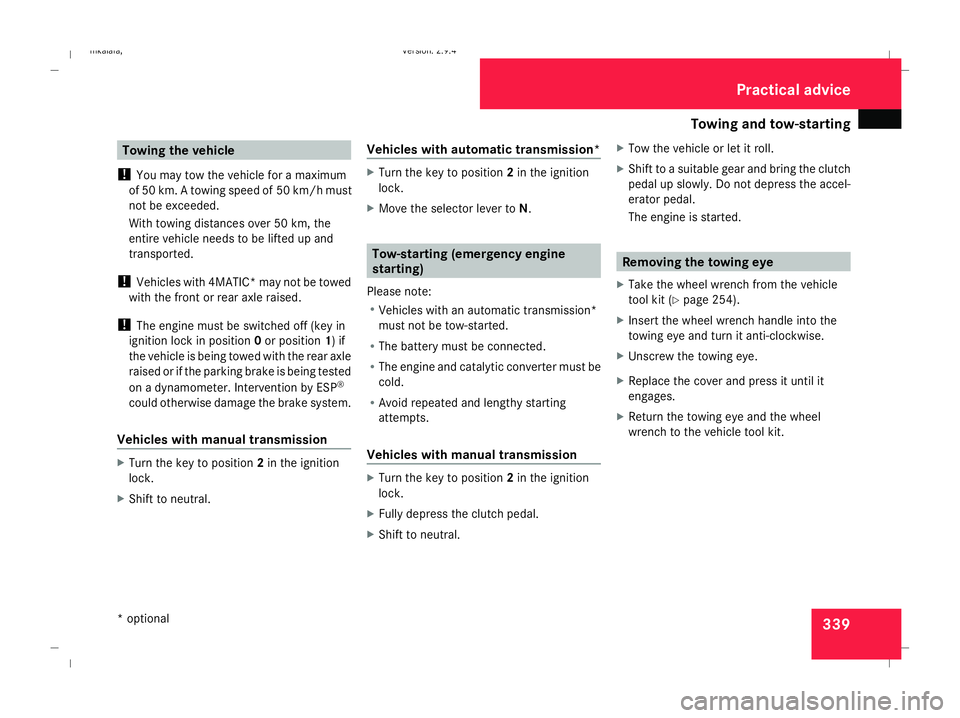
339Towing the vehicle
! You may tow the vehicle for a maximum
of 50 km. A towing speed of 50 km/h must
not be exceeded.
With towing distances over 50 km, the
entire vehicle needs to be lifted up and
transported.
! Vehicles with 4MATIC* may not be towed
with the front or rear axle raised.
! The engine must be switched off (key in
ignition lock in position 0or position 1) if
the vehicle is being towed with the rear axle
raised or if the parking brake is being tested
on a dynamometer. Intervention by ESP ®
could otherwise damage the brake system.
Vehicles with manual transmission X
Turn the key to position 2in the ignition
lock.
X Shift to neutral. Vehicles with automatic transmission* X
Turn the key to position 2in the ignition
lock.
X Move the selector lever to N. Tow-starting (emergency engine
starting)
Please note:
R Vehicles with an automatic transmission*
must not be tow-started.
R The battery must be connected.
R The engine and catalytic converter must be
cold.
R Avoid repeated and lengthy starting
attempts.
Vehicles with manual transmission X
Turn the key to position 2in the ignition
lock.
X Fully depress the clutch pedal.
X Shift to neutral. X
Tow the vehicle or let it roll.
X Shift to a suitable gear and bring the clutch
pedal up slowly. Do not depress the accel-
erator pedal.
The engine is started. Removing the towing eye
X Take the wheel wrench from the vehicle
tool kit ( Ypage 254).
X Insert the wheel wrench handle into the
towing eye and turn it anti-clockwise.
X Unscrew the towing eye.
X Replace the cover and press it until it
engages.
X Return the towing eye and the wheel
wrench to the vehicle tool kit. Practical advice
* optional
211_AKB; 2; 5, en-GB
mkalafa
,V ersion: 2.9.4
2008-02-29T16:57:07+01:00 - Seite 339 ZDateiname: 6515_3416_02_buchblock.pdf; preflight
Page 369 of 401
Vehicle dimensions
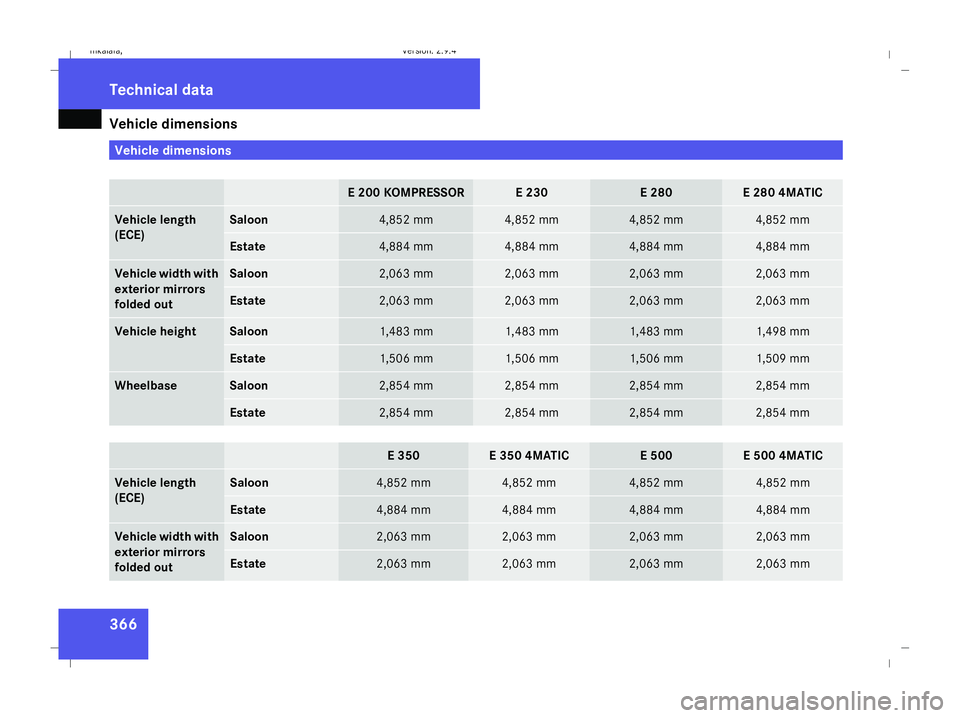
366 Vehicle dimensions
E 200 KOMPRESSOR E 230 E 280 E 280 4MATIC
Vehicle length
(ECE) Saloon 4,852 mm 4,852 mm 4,852 mm 4,852 mm
Estate 4,884 mm 4,884 mm 4,884 mm 4,884 mm
Vehicle width with
exterior mirrors
folded out Saloon 2,063 mm 2,063 mm 2,063 mm 2,063 mm
Estate 2,063 mm 2,063 mm 2,063 mm 2,063 mm
Vehicle height Saloon 1,483 mm 1,483 mm 1,483 mm 1,498 mm
Estate 1,506 mm 1,506 mm 1,506 mm 1,509 mm
Wheelbase Saloon 2,854 mm 2,854 mm 2,854 mm 2,854 mm
Estate 2,854 mm 2,854 mm 2,854 mm 2,854 mm
E 350 E 350 4MATIC E 500 E 500 4MATIC
Vehicle length
(ECE) Saloon 4,852 mm 4,852 mm 4,852 mm 4,852 mm
Estate 4,884 mm 4,884 mm 4,884 mm 4,884 mm
Vehicle width with
exterior mirrors
folded out Saloon 2,063 mm 2,063 mm 2,063 mm 2,063 mm
Estate 2,063 mm 2,063 mm 2,063 mm 2,063 mmTechnical data
211_AKB; 2; 5, en-GB
mkalafa,
Version: 2.9.4 2008-02-29T16:57:07+01:00 - Seite 366Dateiname: 6515_3416_02_buchblock.pdf; preflight