2008 MERCEDES-BENZ CLS COUPE wipers
[x] Cancel search: wipersPage 101 of 329
Side windows
98 Single wipe
X Briefly press the combination switch to the
pressure point in the direction of arrow
2. Wiping with washer fluid
X Press the combination switch beyond the
pressure point in the direction of arrow
2. Intermittent wipe/rain sensor
X Turn the combination switch in the direc-
tion of arrow 1 to position U or V.
The rain sensor is activated. The appropri-
ate wiping frequency is set automatically
according to the intensity of the rain. Continuous wipe
X Depending on the intensity of the rain, turn
the combination switch in the direction of
arrow 1 to position u or t. Switching off the windscreen wipers
X Turn the combination switch to position
M. Side windows
Opening/closing the side windows
G
Risk of injury
Make sure that nobody can become trap-
ped between the side window and the door
frame as a side window is opened. Do not
touch or lean against the side window dur-
ing the opening procedure. You could
become trapped between the side window
and the door frame as the window moves
down. If danger threatens, release the
switch or pull the switch upwards to close
the side window again. G
Risk of injury
Make sure that nobody can become trap-
ped as you close a side window. If danger
threatens, release the switch or press the
switch
a second time to open the side win-
dow again. G
Risk of injury
Never leave children unsupervised in the
vehicle.
Always take the key with you when
leaving the vehicle, even if you only leave it
for a short time. Controls
219_AKB; 2; 4, en-GB
mkalafa,
2007-11-13T09:28:36+01:00 - Seite 98
Page 167 of 329
Air conditioning
164 Windows misted up
Windows misted up on the inside X
Activate the "cooling function with air-
dehumidification" function.
X Activate the automatic mode.
X If the windows continue to mist up, activate
the "demisting" function.
Windows misted up on the outside X
Activate the windscreen wipers.
X 2-zone Thermatic: press and hold the
© or ª button until the a, Ú
or Y symbol is shown in the display.
X 4-zone Thermotronic*: turn the thumb-
wheel for air distribution to the Y or
a symbol.
i You should only select this setting until
the windscreen is clear again. Switching the rear window heating
on/off
G
Risk of accident
Clear all windows of ice or snow before set-
ting off. Impaired visibility could otherwise
endanger yourself and others.
i At very low temperatures, the rear win-
dow heating is only switched on once the
vehicle interior has warmed up.
i The rear window heating has a high cur-
rent draw. You should therefore switch it
off
as soon as the window is clear, as it only
switches itself off automatically after
between six and twenty minutes.
i If the battery voltage is too low, the rear
window heating may switch off.
X Make sure that the key is in position 2 in
the ignition lock.
X Press the ¯ button.
The
indicator lamp in the ¯ switch lights
up or goes out. Activating/deactivating air-recircula-
tion mode
You can deactivate the flow of fresh air if
unpleasant odours are entering the vehicle
from outside. The air already inside the vehi-
cle will then be recirculated. G
Risk of accident
Only switch over to air-recirculation mode
briefly
at low outside temperatures. Other-
wise, the windows could mist up, thus
impairing visibility and endangering your-
self and others. This may prevent you from
observing the traffic conditions, thereby
causing an accident.
X To activate: press the , button.
The indicator lamp in the , button
comes on.
i Air-recirculation mode is activated auto-
matically at high outside temperatures.
When air-recirculation mode is activated
automatically, the indicator lamp in
the , button is not lit.
Outside air is added after about 30
minutes. Controls
* optional
219_AKB; 2; 4, en-GB
mkalafa,
2007-11-13T09:28:36+01:00 - Seite 164
Page 197 of 329
Engine compartment
194 The electronic ignition system uses high
voltage. For this reason you must never
touch components of the ignition system
(ignition coil, ignition cable, spark plug con-
nector or test socket) when:
R
the engine is running
R the engine is being started
R the ignition is switched on and the engine
is being cranked by hand
Vehicles with a diesel engine:
The electronic injection control uses high
voltage. Therefore, never touch fuel injec-
tion system components when:
R the engine is running
R the engine is being started
R the ignition is switched on
X Make sure that the windscreen wipers are
switched off. G
Risk of injury
The windscreen wipers and wiper rods
could be set in motion.
When the bonnet is open, you or others
could be injured by the wiper rods. Make sure that the windscreen wipers are
switched off and that the key has been
pulled out of the ignition lock before open-
ing the bonnet.
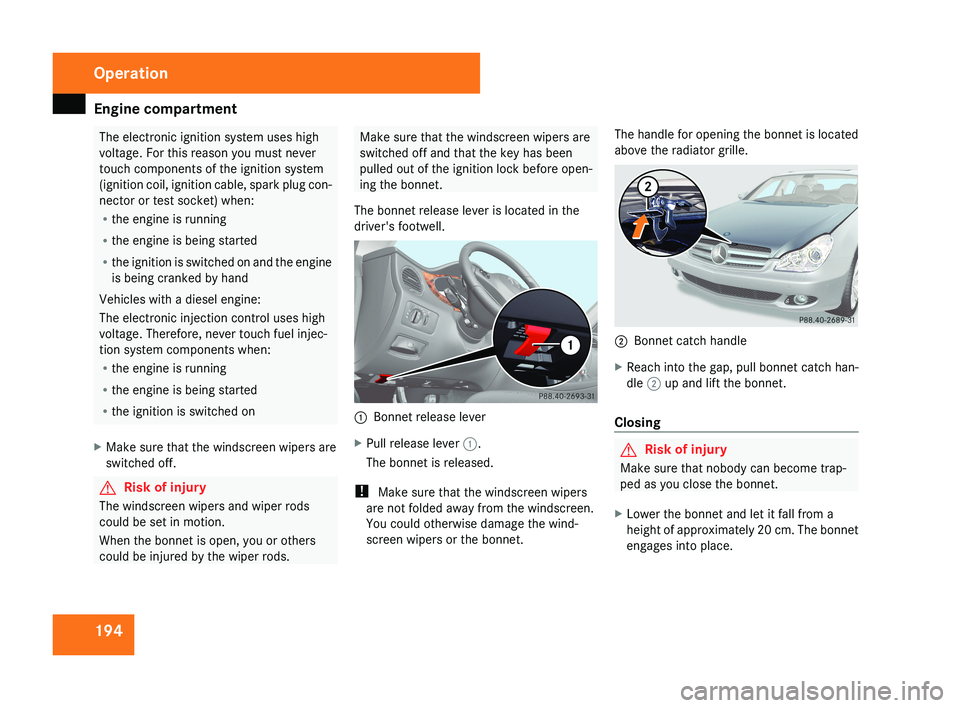
The bonnet release lever is located in the
driver's footwell.1 Bonnet release lever
X Pull release lever 1.
The bonnet is released.
! Make sure that the windscreen wipers
are not folded away from the windscreen.
You could otherwise damage the wind-
screen wipers or the bonnet. The handle for opening the bonnet is located
above the radiator grille.
2
Bonnet catch handle
X Reach into the gap, pull bonnet catch han-
dle 2 up and lift the bonnet.
Closing
G Risk of injury
Make sure that nobody can become trap-
ped as you close the bonnet.
X Lower the bonnet and let it fall from a
height of approximately 20 cm. The bonnet
engages into place.
Operation
219_AKB; 2; 4, en-GB
mkalafa,
2007-11-13T09:28:36+01:00 - Seite 194
Page 214 of 329
Care
211
Automatic car wash G
Risk of accident
The vehicle is braked when HOLD is activa-
ted. Therefore, deactivate HOLD before the
vehicle is washed in an automatic car wash.
You can wash the vehicle in an automatic car
wash from the very start.
! Do not use a touch-free automatic car
wash that uses chemical agents to wash
the vehicle.
Preferably use one with high-pressure jets for
prewashing.
If the vehicle is very dirty, prewash it before
cleaning it in an automatic car wash.
! Make sure that the automatic car wash is
suitable for the size of the vehicle. Fold in
the exterior mirrors before the vehicle is
washed. There is otherwise a risk of dam-
age to the exterior mirrors.
! Make sure the side windows are com-
pletely closed, the ventilation/heater
blower is fully turned off and the wind-
screen wiper switch is set to 0. The rain
sensor may otherwise be activated, for
instance, leading to inadvertent wiper sweeps being triggered. This could cause
damage to the vehicle.
After using an automatic car wash, wipe off
wax from the windscreen and the wiper
blades. This will prevent smears and reduce
wiping
noises caused by residue on the wind-
screen.
High-pressure cleaners G
Risk of accident
Do not use high-pressure cleaners with cir-
cular-jet nozzles (dirt grinders) to clean
your vehicle or - especially - the tyres. You
could otherwise damage the tyres and
cause an accident.
! Observe the instructions issued by the
equipment manufacturer concerning the
distance to be maintained between the
nozzle
of the high-pressure cleaner and the
vehicle (at least 30 cm).
Move the high-pressure cleaner nozzle
around when cleaning your vehicle.
Do not aim directly at any of the following:
R Tyres
R Door joint
R Electrical components R
Battery
R Connectors
R Bulbs
R Seals
Damaged seals or electrical components
can lead to failures or leaks.
Cleaning the wiper blades and the out-
side of the windscreen G
Risk of injury
Turn the key to position 0 in the ignition
lock
before cleaning the windscreen or the
wiper blades. There is otherwise a risk of
the windscreen wipers being set in motion
and causing injury.
X Turn the key to position 1 in the ignition
lock (Y page 74).
X Set the windscreen wipers to the u
position on the combination switch
(Y page 97).
X Turn the key to position 0
or remove it when
the wiper arms are vertical ( Y page 74). Operation
219_AKB; 2; 4, en-GB
mkalafa,
2007-11-13T09:28:36+01:00 - Seite 211
Page 215 of 329
Care
212
!
Only fold the windscreen wipers away
from the windscreen when vertical, other-
wise you will damage the bonnet.
X Fold the wiper arms away from the wind-
screen until you feel them engage.
X Clean the windscreen and the wiper blades.
X Fold the windscreen wipers back again
before the ignition is switched on.
! Do not clean the wiper blades too often,
as otherwise the coating may come off.
This could cause wiper noise.
Cleaning the windows !
Do not use dry cloths, abrasive products,
solvents or cleaning agents containing sol-
vents to clean the inside of the windows.
Clean the insides of the windows with a
damp cloth or commercially-available glass
cleaner. Avoid touching the inside of the
rear windscreen and the side windows with
hard objects, e.g. ice scrapers or rings. You
could otherwise cause damage to the win-
dows, rear window heating or aerial on the
rear window. i
Anti-glare
film retrofitted to the insides of
the windows could interfere with radio or
mobile phone reception, especially if it is
conductive or metal-coated film. Informa-
tion about anti-glare film can be obtained
from any Mercedes-Benz Service Centre.
Cleaning the headlamps X
Clean the headlamp lenses with a wet
sponge.
! Only use washer fluid which is suitable
for plastic lenses. Unsuitable washer fluid
could damage the plastic lenses of the
headlamps.
Therefore, do not use the following:
R dry cloths
R abrasive cleaning agents
R solvents
R cleaning agents containing solvent
You
could otherwise scratch or damage the
surface of the lenses. Plastic trim !
Do
not use dry, coarse or hard cloths and
do not scrub. Doing so will scratch or dam-
age the surfaces.
X Wipe plastic parts with a damp, lint-free
cloth (e.g. a microfibre cloth).
X Light soiling:
use a low-foaming soap (e.g.
a light liquid hand soap) diluted in water.
X Heavy soiling:
use a cleaning agent that is
solvent-free and non-corrosive. Mercedes-
Benz recommends that you use a
Mercedes-Benz cleaning product for this
purpose.
Cleaning the steering wheel boss and
dashboard X
Moisten a clean lint-free cloth with water.
X Clean the plastic parts and the dashboard.
X If particularly dirty, use a mild detergent. G
Risk of injury
Do not use cleaners and cockpit care
sprays containing solvents to clean the
cockpit and steering wheel boss. Cleaners
containing solvents cause the surface to
become porous and in the event of an air- Operation
219_AKB; 2; 4, en-GB
mkalafa,
2007-11-13T09:28:36+01:00 - Seite 212
Page 262 of 329
Troubleshooting
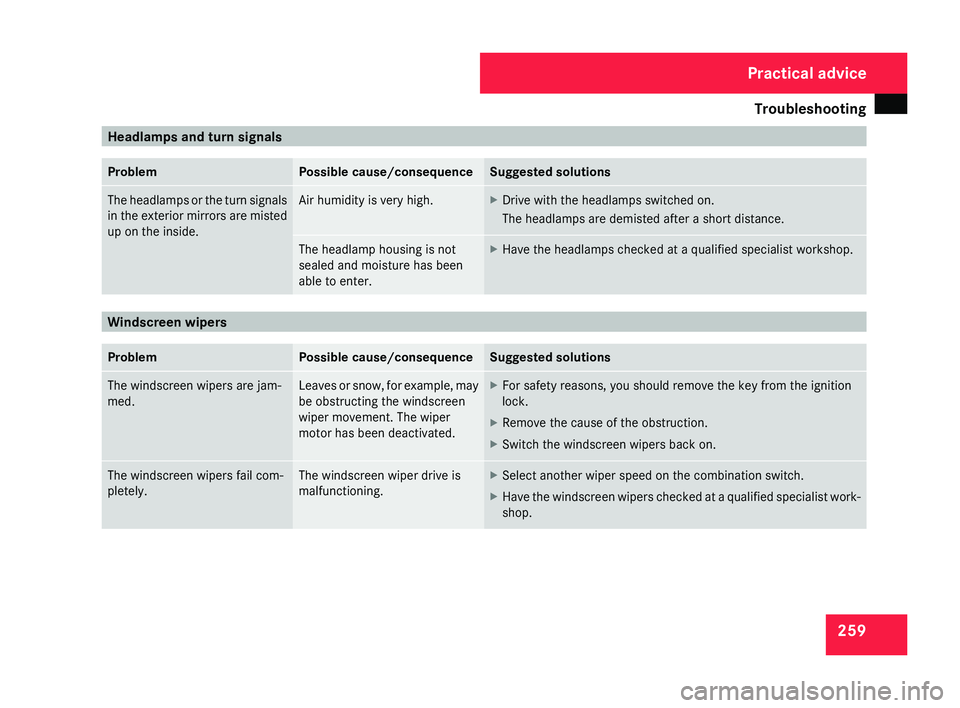
259Headlamps and turn signals
Problem Possible cause/consequence Suggested solutions
The headlamps or the turn signals
in
the exterior mirrors are misted
up on the inside. Air humidity is very high. X
Drive with the headlamps switched on.
The headlamps are demisted after a short distance. The headlamp housing is not
sealed and moisture has been
able to enter. X
Have the headlamps checked at a qualified specialist workshop. Windscreen wipers
Problem Possible cause/consequence Suggested solutions
The windscreen wipers are jam-
med. Leaves or snow, for example, may
be obstructing the windscreen
wiper movement. The wiper
motor has been deactivated. X
For safety reasons, you should remove the key from the ignition
lock.
X Remove the cause of the obstruction.
X Switch the windscreen wipers back on. The windscreen wipers fail com-
pletely. The windscreen wiper drive is
malfunctioning. X
Select another wiper speed on the combination switch.
X Have the windscreen wipers checked at a qualified specialist work-
shop. Practical advice
219_AKB; 2; 4, en-GB
mkalafa,
2007-11-13T09:28:36+01:00 - Seite 259
Page 278 of 329
Replacing the wiper blades
275Replacing the wiper blades
G
Risk of accident
The windscreen will no longer be properly
wiped if the wiper blades are worn. This
may prevent you from observing the traffic
conditions, thereby causing an accident.
Replace the wiper blades twice a year, ide-
ally in spring and autumn. G
Risk of accident
The wiper arms could start moving and
cause an injury if you leave the windscreen
wipers switched on.
Remove the key from the ignition lock
before replacing the wiper blades.
! Make sure that you touch only the wiper
arm of the windscreen wiper to avoid dam-
aging the windscreen wiper blades. Removing
Vehicles without KEYLESS GO* X
Make sure that the key is in position 1 or
2 in the ignition lock.
X Set the windscreen wipers to posi-
tion u (Y page 98) on the combination
switch.
X When the wiper arms have reached a ver-
tical position, turn the key to position 0 and
remove it from the ignition lock.
X Fold the wiper arm away from the wind-
screen until it engages.
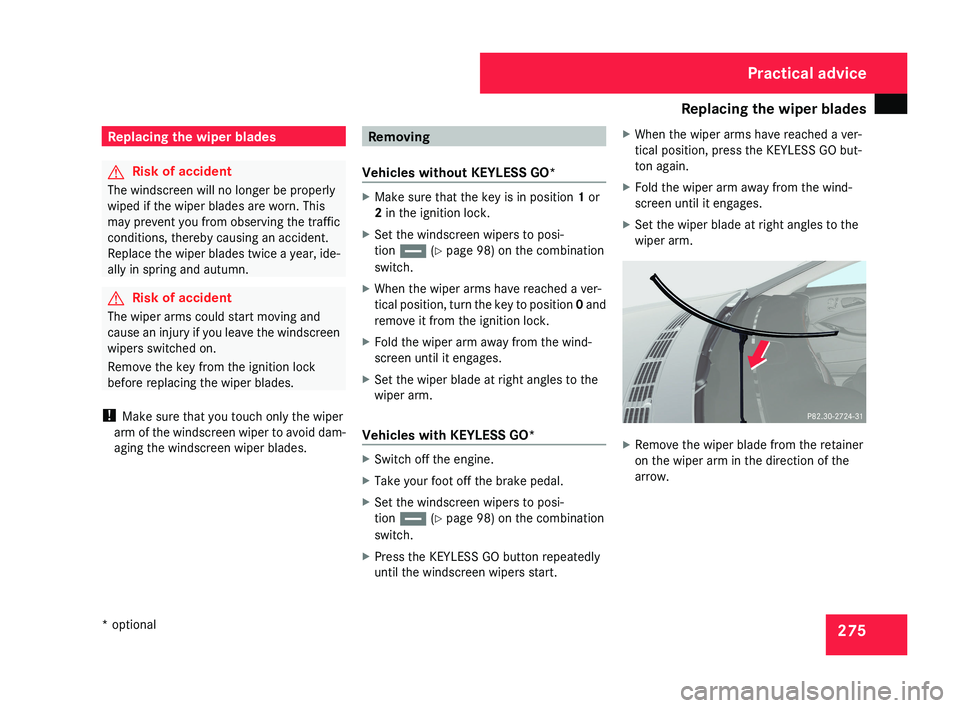
X Set the wiper blade at right angles to the
wiper arm.
Vehicles with KEYLESS GO* X
Switch off the engine.
X Take your foot off the brake pedal.
X Set the windscreen wipers to posi-
tion u (Y page 98) on the combination
switch.
X Press the KEYLESS GO button repeatedly
until the windscreen wipers start. X
When the wiper arms have reached a ver-
tical position, press the KEYLESS GO but-
ton again.
X Fold the wiper arm away from the wind-
screen until it engages.
X Set the wiper blade at right angles to the
wiper arm. X
Remove the wiper blade from the retainer
on the wiper arm in the direction of the
arrow. Practical advice
* optional
219_AKB; 2; 4, en-GB
mkalafa,
2007-11-13T09:28:36+01:00 - Seite 275