Page 86 of 329

Mirrors
83Easy-entry/exit feature*
The Easy-entry/exit feature makes getting in
and out of your vehicle easier.
The steering wheel swings upwards when
you:
R remove the key from the ignition lock
R open the driver's door when the key is in
the ignition lock or in position 1
The steering wheel is moved automatically to
the position previously set when the key is
inserted into the ignition lock with the driver's
door closed. G
Risk of injury
Make sure that nobody can become trap-
ped when you activate the easy-entry/exit
feature.
If there is a risk of becoming trapped, stop
the adjustment procedure. To halt the pro-
cedure:
R press the steering-column adjustment
switch
R press one of the memory function posi-
tion buttons
The steering column stops moving immedi-
ately. Never leave children unsupervised in the
vehicle. They could open the driver's door
and thereby unintentionally activate the
easy-entry feature and become trapped.
The most recent position of the steering
wheel is stored when you switch off the igni-
tion or when you store a memory position
(Y page 86).
You can activate and deactivate the Easy-
entry/exit feature via the on-board computer
(Y page 128). Mirrors
Before starting off, adjust the mirrors in such
a way that you can get a good overview of
road and traffic conditions. Rear-view mirror
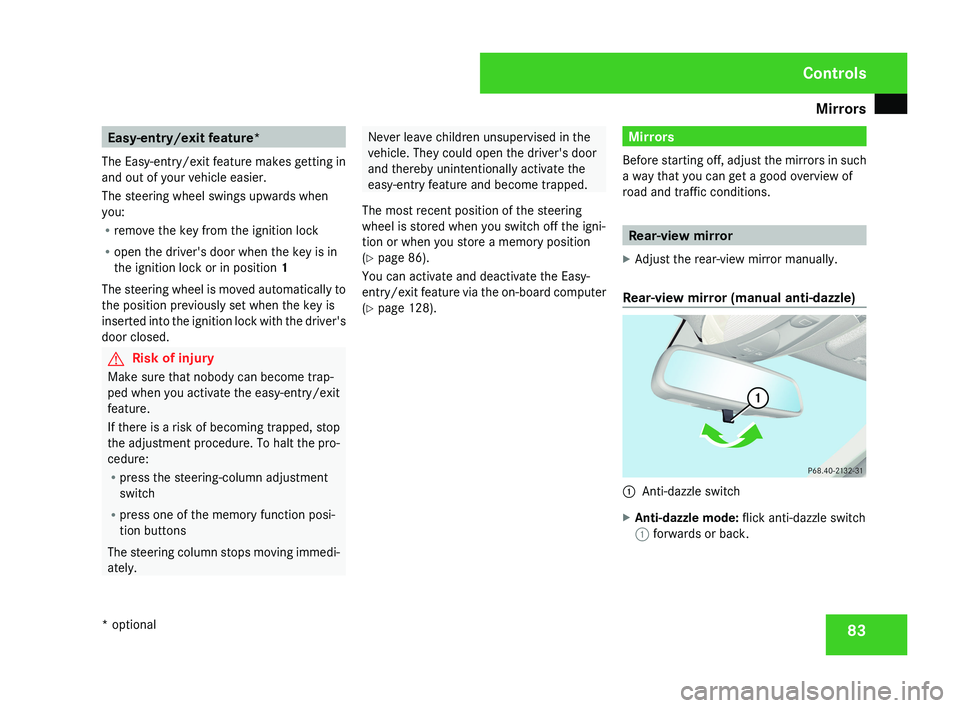
X Adjust the rear-view mirror manually.
Rear-view mirror (manual anti-dazzle) 1
Anti-dazzle switch
X Anti-dazzle mode: flick anti-dazzle switch
1 forwards or back. Controls
* optional
219_AKB; 2; 4, en-GB
mkalafa,
2007-11-13T09:28:36+01:00 - Seite 83
Page 120 of 329

On-board computer
1171
Gear indicator
2 On-board voltage
RACETIMER
The RACETIMER allows time measurements
to be saved.
While you have the RACETIMER displayed,
you will not be able to adjust the volume using
the æ and ç buttons.
X Press the j button repeatedly until the
RACETIMER appears.
1 Gear indicator
2 RACETIMER 3
Lap
You can start the RACETIMER when the
engine is running or if the key is in position
2 in the ignition lock.
X To start: press the æ button to start the
RACETIMER.
X To display the intermediate time: press
the ç button to show the intermediate
time.
The intermediate time is displayed for five
seconds.
X To stop: press the æ button to stop the
RACETIMER.
The RACETIMER interrupts timing when you
stop the vehicle and turn the key to position
1 in the ignition lock. When you turn the key
to position 2 or 3 and then press the æ
button, timing is continued.
Storing the lap time and starting a new lap
It is possible to store a maximum of nine laps. X
Press the ç button to show the inter-
mediate time during timing.
The intermediate time is displayed for five
seconds.
X Press the ç button again within 5 sec-
onds.
The displayed intermediate time is stored
as a lap time.
Timing starts for a new lap. The new lap is
timed from when the intermediate time is
called up.
1 Gear indicator
2 RACETIMER
3 Fastest lap time (best lap)
4 Lap
Controls
219_AKB; 2; 4, en-GB
mkalafa,
2007-11-13T09:28:36+01:00 - Seite 117
Page 121 of 329

On-board computer
118
Resetting the current lap
X
Press the æ button to stop the RACE-
TIMER.
X Press the ç button to reset the lap time
to "0".
Deleting all laps
If you have switched off the engine, the RACE-
TIMER is reset to "0" after 30 seconds. All laps
are deleted.
It is not possible to delete a single stored lap
on its own.
X Press the æ button to stop the RACE-
TIMER.
X Press the reset button on the left of the
instrument cluster twice.
X Press the æ button to start the RACE-
TIMER.
All laps are deleted.
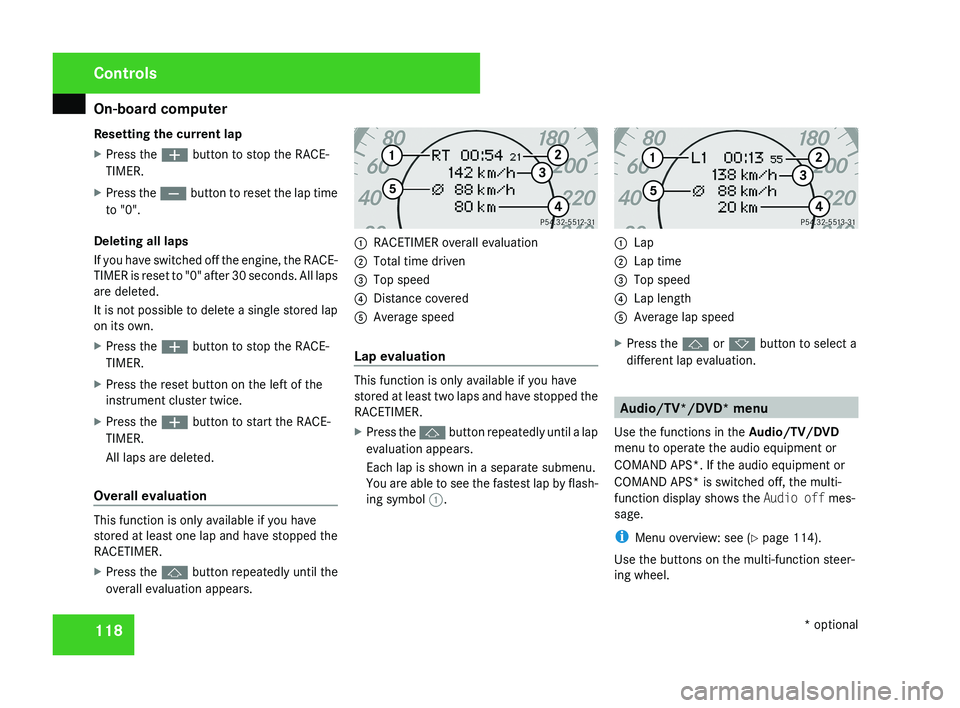
Overall evaluation This function is only available if you have
stored at least one lap and have stopped the
RACETIMER.
X
Press the j button repeatedly until the
overall evaluation appears. 1
RACETIMER overall evaluation
2 Total time driven
3 Top speed
4 Distance covered
5 Average speed
Lap evaluation This function is only available if you have
stored at least two laps and have stopped the
RACETIMER.
X
Press the j button repeatedly until a lap
evaluation appears.
Each lap is shown in a separate submenu.
You are able to see the fastest lap by flash-
ing symbol 1. 1
Lap
2 Lap time
3 Top speed
4 Lap length
5 Average lap speed
X Press the j or k button to select a
different lap evaluation. Audio/TV*/DVD* menu
Use the functions in the Audio/TV/DVD
menu to operate the audio equipment or
COMAND APS*. If the audio equipment or
COMAND APS* is switched off, the multi-
function display shows the Audio off mes-
sage.
i Menu overview: see ( Y page 114).
Use the buttons on the multi-function steer-
ing wheel. Controls
* optional
219_AKB; 2; 4, en-GB
mkalafa,
2007-11-13T09:28:36+01:00 - Seite 118
Page 149 of 329

Driving systems
146
display. Immediately depress the brake firmly
until the warning message disappears from
the multi-function display or move the selec-
tor lever to
P. This deactivates HOLD. AIRMATIC DC*
Vehicle level Your vehicle automatically adjusts its ride
height to reduce petrol consumption and
improve driving safety.
The following vehicle levels are possible:
R
Normal
R Raised
R Lowered
The "Normal" and "Raised" vehicle levels can
be set manually.
The "Lowered" vehicle level is set automati-
cally:
R at speeds above 140 km/h
R if you have selected "Sports tuning I or
II" ( Y page 147)
R if you have selected "Comfort tun-
ing" (Y page 147) and then lock the vehicle within 60 seconds of the engine being
switched off G
Risk of injury
If you have selected “Comfort tuning”, the
vehicle will be lowered if you lock it within
60 seconds of the engine being switched
off. Make sure, therefore, that nobody is in
the vicinity of the wheel housing or under
the vehicle when you lock the vehicle. Oth-
erwise, limbs could become trapped.
! If you have selected “Comfort tuning”,
the vehicle will be lowered if you lock it
within 60 seconds of the engine being
switched off. Make sure when parking that
you stop your vehicle so that it does not
make contact with the kerb as it descends.
Your vehicle could otherwise be damaged.
Setting the vehicle level manually
Select the "Normal" setting for normal road
surfaces and "Raised" for driving with snow
chains or on particularly poor road surfaces. G
Risk of injury
Make sure that nobody is in the vicinity of
the wheel housing or under the vehicle
while lowering the vehicle when it is sta- tionary. Otherwise, limbs could become
trapped.
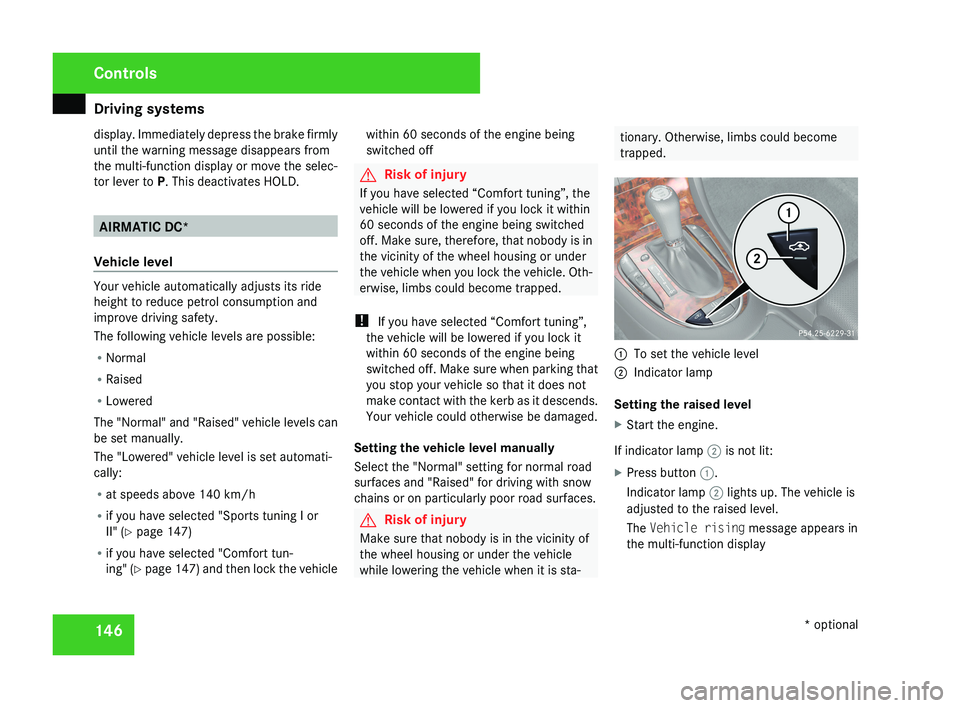
1
To set the vehicle level
2 Indicator lamp
Setting the raised level
X Start the engine.
If indicator lamp 2 is not lit:
X Press button 1.
Indicator lamp 2 lights up. The vehicle is
adjusted to the raised level.
The Vehicle rising message appears in
the multi-function display Controls
* optional
219_AKB; 2; 4, en-GB
mkalafa,
2007-11-13T09:28:36+01:00 - Seite 146