2008 MERCEDES-BENZ CLS COUPE set clock
[x] Cancel search: set clockPage 30 of 329
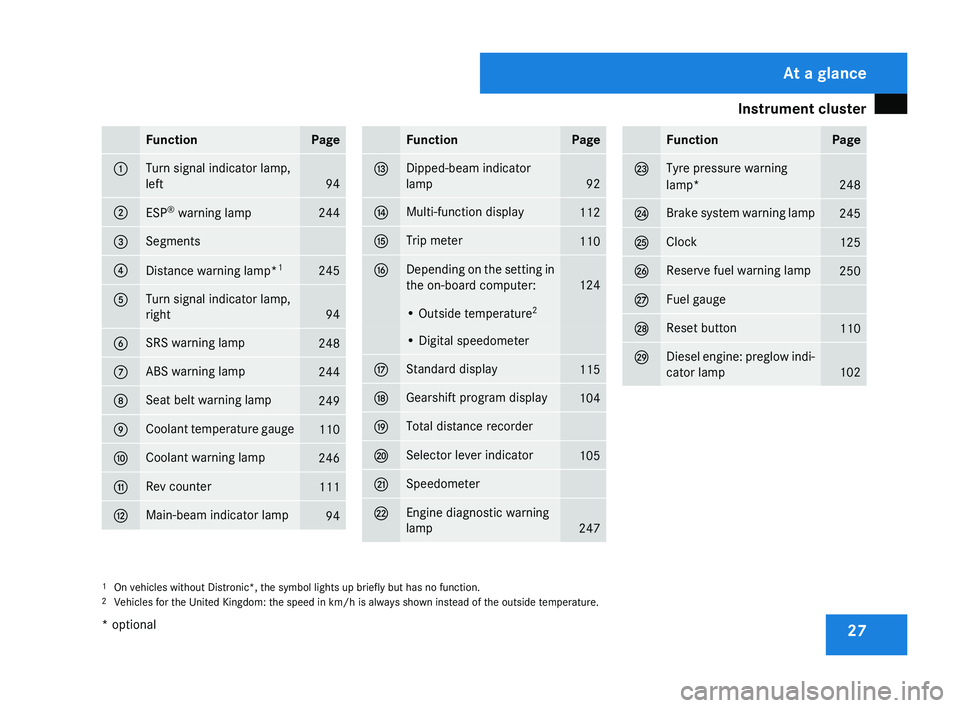
Instrument cluster
27Function Page
1 Turn signal indicator lamp,
left
94
2
ESP
®
warning lamp 244
3 Segments
4
Distance warning lamp*
1 245
5 Turn signal indicator lamp,
right
94
6 SRS warning lamp
248
7 ABS warning lamp
244
8 Seat belt warning lamp
249
9 Coolant temperature gauge
110
a Coolant warning lamp
246
b Rev counter
111
c Main-beam indicator lamp
94 Function Page
d Dipped-beam indicator
lamp
92
e Multi-function display
112
f Trip meter
110
g Depending on the setting in
the on-board computer:
124
• Outside temperature
2 • Digital speedometer
h Standard display
115
j Gearshift program display
104
k Total distance recorder
l Selector lever indicator
105
m Speedometer
n Engine diagnostic warning
lamp
247 Function Page
o Tyre pressure warning
lamp*
248
p Brake system warning lamp
245
q Clock
125
r Reserve fuel warning lamp
250
s Fuel gauge
t Reset button
110
u Diesel engine: preglow indi-
cator lamp
102
1
On vehicles without Distronic*, the symbol lights up briefly but has no function.
2 Vehicles for the United Kingdom: the speed in km/h
is always shown instead of the outside temperature. At a glance
* optional
219_AKB; 2; 4, en-GB
mkalafa,
2007-11-13T09:28:36+01:00 - Seite 27
Page 32 of 329
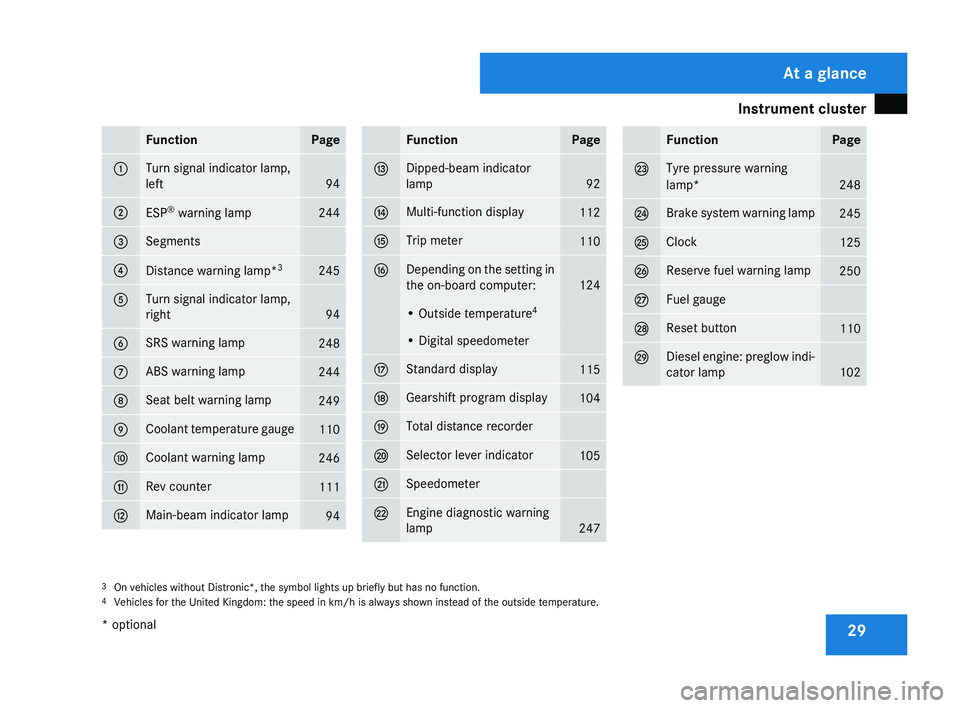
Instrument cluster
29Function Page
1 Turn signal indicator lamp,
left
94
2
ESP
®
warning lamp 244
3 Segments
4
Distance warning lamp*
3 245
5 Turn signal indicator lamp,
right
94
6 SRS warning lamp
248
7 ABS warning lamp
244
8 Seat belt warning lamp
249
9 Coolant temperature gauge
110
a Coolant warning lamp
246
b Rev counter
111
c Main-beam indicator lamp
94 Function Page
d Dipped-beam indicator
lamp
92
e Multi-function display
112
f Trip meter
110
g Depending on the setting in
the on-board computer:
124
• Outside temperature
4 • Digital speedometer
h Standard display
115
j Gearshift program display
104
k Total distance recorder
l Selector lever indicator
105
m Speedometer
n Engine diagnostic warning
lamp
247 Function Page
o Tyre pressure warning
lamp*
248
p Brake system warning lamp
245
q Clock
125
r Reserve fuel warning lamp
250
s Fuel gauge
t Reset button
110
u Diesel engine: preglow indi-
cator lamp
102
3
On vehicles without Distronic*, the symbol lights up briefly but has no function.
4 Vehicles for the United Kingdom: the speed in km/h
is always shown instead of the outside temperature. At a glance
* optional
219_AKB; 2; 4, en-GB
mkalafa,
2007-11-13T09:28:36+01:00 - Seite 29
Page 113 of 329
Instrument cluster
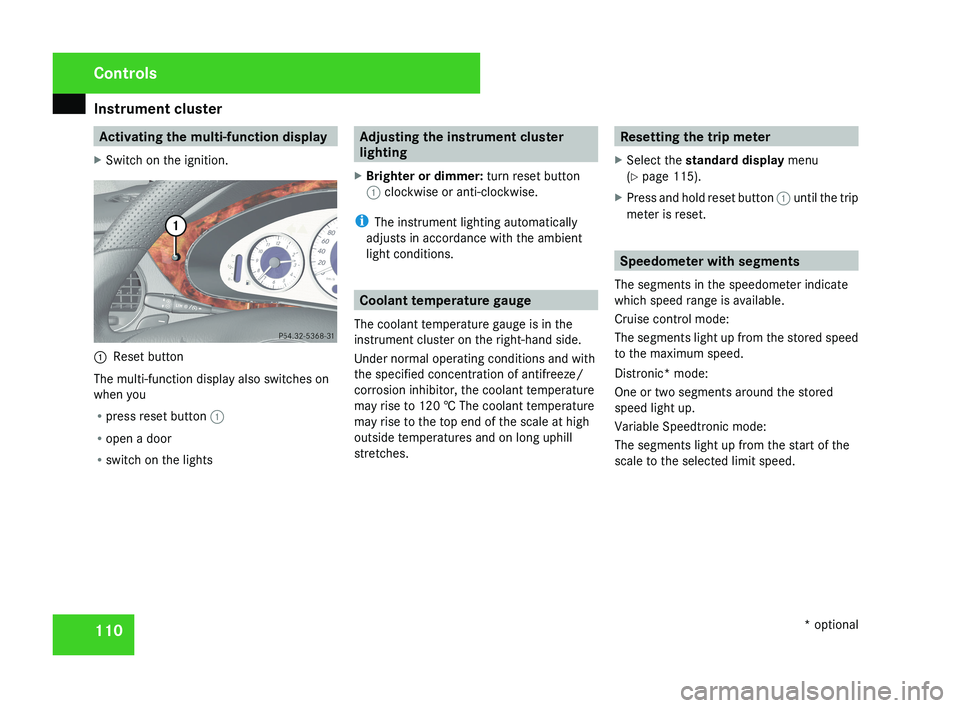
110 Activating the multi-function display
X Switch on the ignition.1 Reset button
The multi-function display also switches on
when you
R press reset button 1
R open a door
R switch on the lights
Adjusting the instrument cluster
lighting
X Brighter or dimmer: turn reset button
1 clockwise or anti-clockwise.
i The instrument lighting automatically
adjusts in accordance with the ambient
light conditions.
Coolant temperature gauge
The coolant temperature gauge is in the
instrument cluster on the right-hand side.
Under normal operating conditions and with
the specified concentration of antifreeze/
corrosion inhibitor, the coolant temperature
may rise to 120 † The coolant temperature
may rise to the top end of the scale at high
outside temperatures and on long uphill
stretches.
Resetting the trip meter
X Select the standard display menu
(Y page 115).
X Press and hold reset button 1 until the trip
meter is reset.
Speedometer with segments
The segments in the speedometer indicate
which speed range is available.
Cruise control mode:
The segments light up from the stored speed
to the maximum speed.
Distronic* mode:
One or two segments around the stored
speed light up.
Variable Speedtronic mode:
The segments light up from the start of the
scale to the selected limit speed.
Controls
* optional
219_AKB; 2; 4, en-GB
mkalafa,
2007-11-13T09:28:36+01:00 - Seite 110
Page 128 of 329
On-board computer
125
X
Press the è or · button to select the
Settings... menu.
X Press the j
button to call up the selec-
tion of submenus.
X Press the æ
or ç button to select the
Time/Date submenu.
Setting the time
X Use j to select Clock, hours Con-
firm by press. R (or Clock, minutes
Confirm by press. R).
X Press the æ or ç button to set a
value.
X Press the reset button on the left of the
instrument cluster.
The set time is stored.
Setting the date
X Press the j
button to select Set date
Day (or Set date Month or Set date
Year).
X Press the æ or ç button to set the
values.
X Press the j, è or ÿ button to
select a different display. Setting constant headlamp mode If you have set constant headlamp mode and
the light switch is in position M orU,
the
side lamps, dipped-beam headlamps and
licence plate lighting are switched on auto-
matically when the engine is running. Turning
the light switch to a different position
switches on the corresponding lights.
For safety reasons, it is only possible to set
this function when the vehicle is stationary.
In countries in which constant headlamp
mode is a legal requirement, Constant is the
factory setting.
X Press the è
or · button to select the
Settings... menu.
X Press the j
button to call up the selec-
tion of submenus.
X Press the æ
or ç button to select the
Lighting submenu.
X Press the j button to select Headlamp
mode.
X Press the æ or ç button to set the
mode
for the headlamps to Manual or Con-
stant (constant headlamp mode).
X Press the j, è or ÿ button to
select a different display. Switching the surround lighting on or
off If the surround lighting is switched on, the
following lights will be switched on automat-
ically
in the dark after you have unlocked the
vehicle using the key:
R the side lamps
R the tail lamps
R the licence plate lighting
R the front foglamps
R the lights* in the exterior mirrors
The surround lighting switches off automati-
cally if you open the driver's door or after 40
seconds.
X Press the è
or · button to select the
Settings... menu.
X Press the j
button to call up the selec-
tion of submenus.
X Press the æ
or ç button to select the
Lighting submenu.
X Press the j button to select the Sur-
round lighting function. Controls
* optional
219_AKB; 2; 4, en-GB
mkalafa,
2007-11-13T09:28:36+01:00 - Seite 125 Z
Page 162 of 329
Air conditioning
159
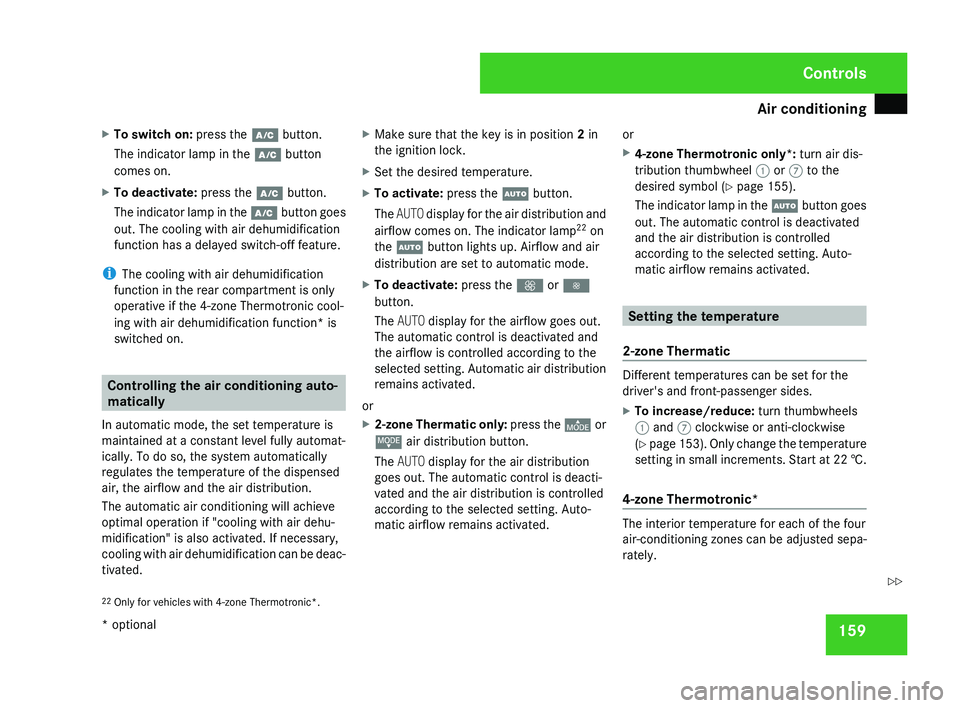
X
To switch on: press the œ button.
The indicator lamp in the œ button
comes on.
X To deactivate: press the œ button.
The indicator lamp in the œ button goes
out. The cooling with air dehumidification
function has a delayed switch-off feature.
i The cooling with air dehumidification
function in the rear compartment is only
operative if the 4-zone Thermotronic cool-
ing with air dehumidification function* is
switched on. Controlling the air conditioning auto-
matically
In automatic mode, the set temperature is
maintained at a constant level fully automat-
ically. To do so, the system automatically
regulates the temperature of the dispensed
air, the airflow and the air distribution.
The automatic air conditioning will achieve
optimal operation if "cooling with air dehu-
midification" is also activated. If necessary,
cooling
with air dehumidification can be deac-
tivated. X
Make sure that the key is in position 2 in
the ignition lock.
X Set the desired temperature.
X To activate: press the U button.
The AUTO
display for the air distribution and
airflow comes on. The indicator lamp 22
on
the U button lights up. Airflow and air
distribution are set to automatic mode.
X To deactivate: press the Q or ·
button.
The AUTO display for the airflow goes out.
The automatic control is deactivated and
the airflow is controlled according to the
selected
setting. Automatic air distribution
remains activated.
or
X 2-zone Thermatic only: press
the © or
ª air distribution button.
The AUTO display for the air distribution
goes out. The automatic control is deacti-
vated and the air distribution is controlled
according to the selected setting. Auto-
matic airflow remains activated. or
X
4-zone Thermotronic only*: turn air dis-
tribution thumbwheel 1 or 7 to the
desired symbol
(Y page 155).
The indicator lamp in the U button goes
out. The automatic control is deactivated
and the air distribution is controlled
according to the selected setting. Auto-
matic airflow remains activated. Setting the temperature
2-zone Thermatic Different temperatures can be set for the
driver's and front-passenger sides.
X
To increase/reduce: turn thumbwheels
1 and 7 clockwise or anti-clockwise
(Y
page 153). Only change the temperature
setting in small increments. Start at 22 †.
4-zone Thermotronic* The interior temperature for each of the four
air-conditioning zones can be adjusted sepa-
rately.
22 Only for vehicles with 4-zone Thermotronic*. Controls
* optional
219_AKB; 2; 4, en-GB
mkalafa,
2007-11-13T09:28:36+01:00 - Seite 159 Z
Page 166 of 329
Air conditioning
163
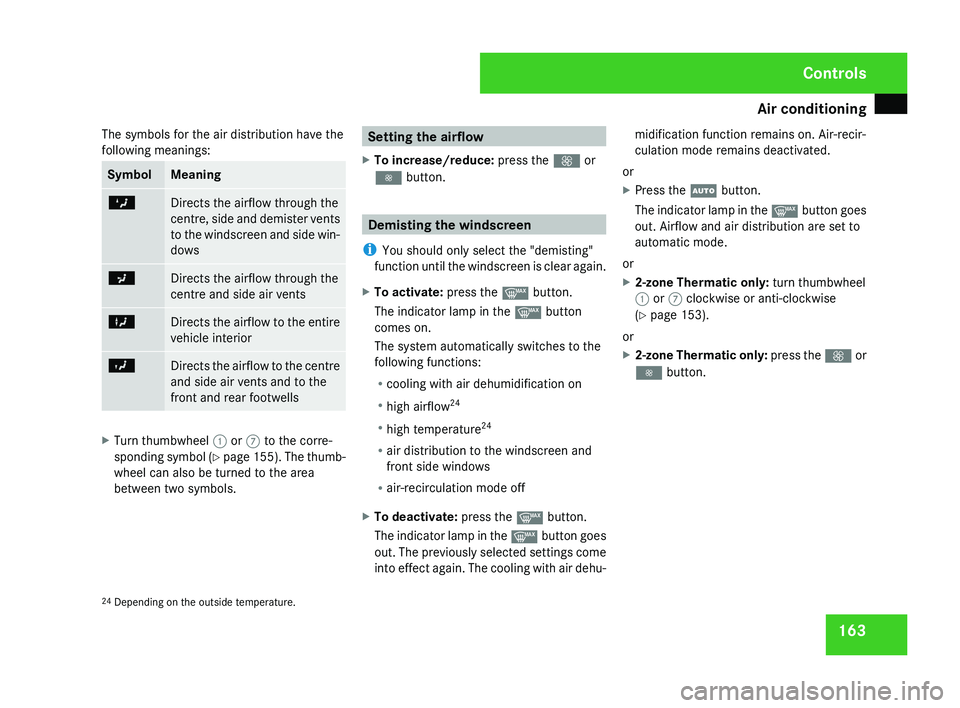
The symbols for the air distribution have the
following meanings: Symbol Meaning
Z
Directs the airflow through the
centre,
side and demister vents
to the windscreen and side win-
dows a
Directs the airflow through the
centre and side air vents
X
Directs the airflow to the entire
vehicle interior
Y
Directs the airflow to the centre
and side air vents and to the
front and rear footwells
X
Turn thumbwheel 1 or 7 to the corre-
sponding
symbol (Y page 155). The thumb-
wheel can also be turned to the area
between two symbols. Setting the airflow
X To increase/reduce: press the Q or
· button. Demisting the windscreen
i You should only select the "demisting"
function
until the windscreen is clear again.
X To activate: press the y button.
The indicator lamp in the y button
comes on.
The system automatically switches to the
following functions:
R cooling with air dehumidification on
R high airflow 24
R high temperature 24
R air distribution to the windscreen and
front side windows
R air-recirculation mode off
X To deactivate: press the y button.
The
indicator lamp in the y button goes
out. The previously selected settings come
into effect again. The cooling with air dehu- midification function remains on. Air-recir-
culation mode remains deactivated.
or
X Press the U button.
The
indicator lamp in the y button goes
out. Airflow and air distribution are set to
automatic mode.
or
X 2-zone Thermatic only: turn thumbwheel
1 or 7 clockwise or anti-clockwise
(Y page 153).
or
X 2-zone Thermatic only: press
the Q or
· button.
24 Depending on the outside temperature. Controls
219_AKB; 2; 4, en-GB
mkalafa,
2007-11-13T09:28:36+01:00 - Seite 163