2008 MERCEDES-BENZ CLS COUPE buttons
[x] Cancel search: buttonsPage 15 of 329
12
Side windows
Cleaning . . . . . . . . . . . . . . . . . . . . . 212
Skibag . . . . . . . . . . . . . . . . . . . . . . . . . 174
Sliding/tilting sunroof . . . . . . . . . . . 169
Rain closing feature . . . . . . . . . . . . 171
Resetting . . . . . . . . . . . . . . . . . . . . 171
Sliding sunroof
see Sliding/tilting sunroof
Snow chains . . . . . . . . . . . . . . . . . . . . 205
Socket Cockpit . . . . . . . . . . . . . . . . . . . . . . 182
Rear compartment . . . . . . . . . . . . . 182
Spare wheel
Fitting . . . . . . . . . . . . . . . . . . . . . . . 282
Storage location . . . . . . . . . . . . . . . 217
Technical data . . . . . . . . . . . . . . . . 308
Speed
Technical data . . . . . . . . . . . . . . . . 303
Speed limiter
Speedtronic . . . . . . . . . . . . . . . . . . 142
Speedometer
Digital speedometer (on-board
computer) . . . . . . . . . . . . . . . . . . . 116
Segments . . . . . . . . . . . . . . . . . . . . 110
Setting the unit (on-board com-
puter) . . . . . . . . . . . . . . . . . . . . . . . 123
Speedtronic . . . . . . . . . . . . . . . . . . . . 142
Display message . . . . . . . . . . . . . . 227
Permanent . . . . . . . . . . . . . . . . . . . 144
Variable . . . . . . . . . . . . . . . . . . . . . 142 SRS (Supplemental Restraint Sys-
tem)
. . . . . . . . . . . . . . . . . . . . . . . . . . . . 43
warning lamp . . . . . . . . . . . . . . . . . . 43
Standard display (on-board com-
puter) . . . . . . . . . . . . . . . . . . . . . . . . . 115
Selecting the display . . . . . . . . . . . 124
Station
see Radio
Status line (on-board computer) . . . 112
Selecting the display . . . . . . . . . . . 124
Steering wheel
Adjusting . . . . . . . . . . . . . . . . . . 81, 82
Buttons (on-board computer) . . . . . 111
Storing settings . . . . . . . . . . . . . . . . 86
Steering wheel gearshift paddles . . 107
Steering wheel heating . . . . . . . . . . . . 82
Malfunction indicator lamp . . . . . . 242
Stowage compartment . . . . . . . . . . . 177
Armrest (in front) . . . . . . . . . . . . . . 178
Armrest (under) . . . . . . . . . . . . . . . 178
Centre console . . . . . . . . . . . . . . . . 177
Centre console (rear) . . . . . . . . . . . 178
Driver's seat . . . . . . . . . . . . . . . . . . 179
Glove compartment . . . . . . . . . . . . 177
Rear seat armrest . . . . . . . . . . . . . 179
Ventilating . . . . . . . . . . . . . . . . . . . 178
Stowage compartments
Overview . . . . . . . . . . . . . . . . . . . . . 38
Stowage space
Cup holder . . . . . . . . . . . . . . . . . . . 172 Submenu (on-board computer)
. . . . 122
Convenience . . . . . . . . . . . . . . . . . 123
Dynamic driving seat . . . . . . . . . . . 129
Heating . . . . . . . . . . . . . . . . . . . . . 123
Instrument cluster . . . . . . . . . . . . . 122
Lighting . . . . . . . . . . . . . . . . . . . . . 122
Time/Date . . . . . . . . . . . . . . . . . . . 122
Vehicle . . . . . . . . . . . . . . . . . . . . . . 123
Summer opening . . . . . . . . . . . . . . . . 100
Sun visor . . . . . . . . . . . . . . . . . . . . . . . 180
Supplemental Restraint System
see SRS
Supplemental Restraint System (SRS)
Display message . . . . . . . . . . . . . . 227
Warning lamp . . . . . . . . . . . . . . . . . 248
Surround lighting
Switching on/off (on-board com-
puter) . . . . . . . . . . . . . . . . . . . . . . . 125
Switching off the alarm
ATA . . . . . . . . . . . . . . . . . . . . . . . . . . 61 T
Tail lamps Display message
. . . . . . . . . . . . . . 236
Tank capacity . . . . . . . . . . . . . . . . . . . 311
Technical data Acceleration . . . . . . . . . . . . . . . . . . 303
Engine . . . . . . . . . . . . . . . . . . . . . . 302
Tyres . . . . . . . . . . . . . . . . . . . . . . . 305 Index
219_AKB; 2; 4, en-GB
mkalafa,
2007-11-13T09:28:36+01:00 - Seite 12
Page 39 of 329
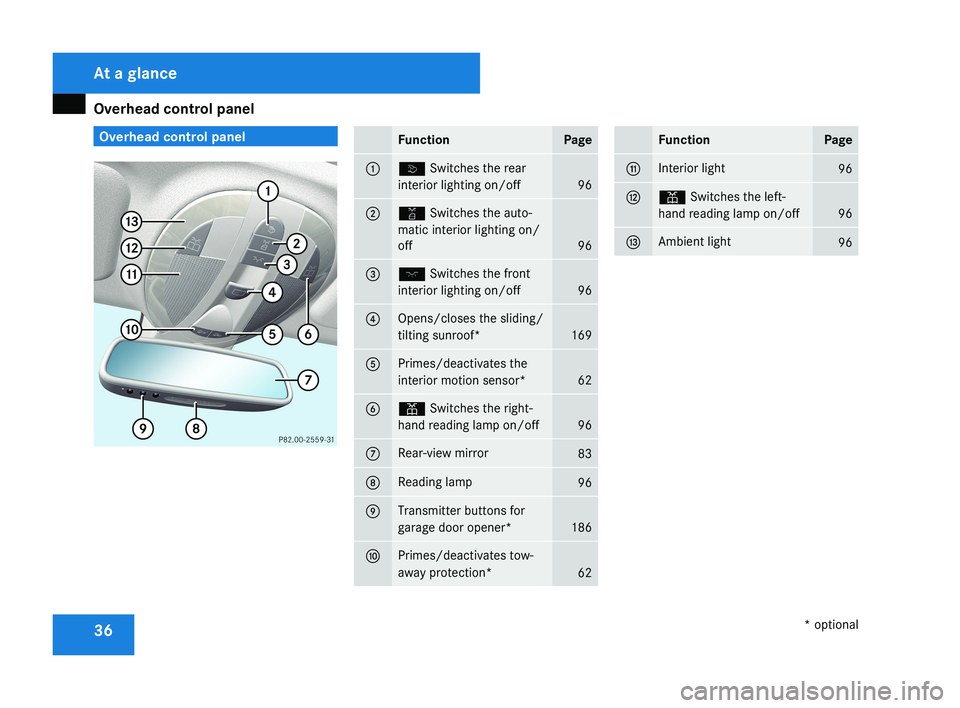
Overhead control panel
36 Overhead control panelFunctionPage
1ò Switches the rear
interior lighting on/off
96
2¡ Switches the auto-
matic interior lighting on/
off
96
3ð Switches the front
interior lighting on/off
96
4Opens/closes the sliding/
tilting sunroof*
169
5Primes/deactivates the
interior motion sensor*
62
6X Switches the right-
hand reading lamp on/off
96
7Rear-view mirror83
8Reading lamp96
9Transmitter buttons for
garage door opener*
186
aPrimes/deactivates tow-
away protection*
62
FunctionPage
bInterior light96
cX Switches the left-
hand reading lamp on/off
96
dAmbient light96
At a glance
* optional
219_AKB; 2; 4, en-GB
mkalafa,
2007-11-13T09:28:36+01:00 - Seite 36
Page 65 of 329
Anti-theft systems
62 Tow-away protection*
An audible and visual alarm is triggered if your
vehicle's angle of inclination is altered while
tow-away protection is primed. This happens
if the vehicle is jacked up on one side, for
example.
Priming tow-away protection X
Lock the vehicle using the key. On vehicles
with KEYLESS GO*, the locking button on
the door handle/boot lid can also be used.
Tow-away protection is primed after
approximately 30 seconds.
To deactivate tow-away protection When you unlock your vehicle using the key
or KEYLESS GO*, tow-away protection is
automatically deactivated.
Deactivate tow-away protection manually to
prevent a false alarm if your vehicle:
R
is being transported
R is being loaded, e.g. onto a ferry or car
transporter
R is being parked on a movable surface, e.g.
split-level garages 1
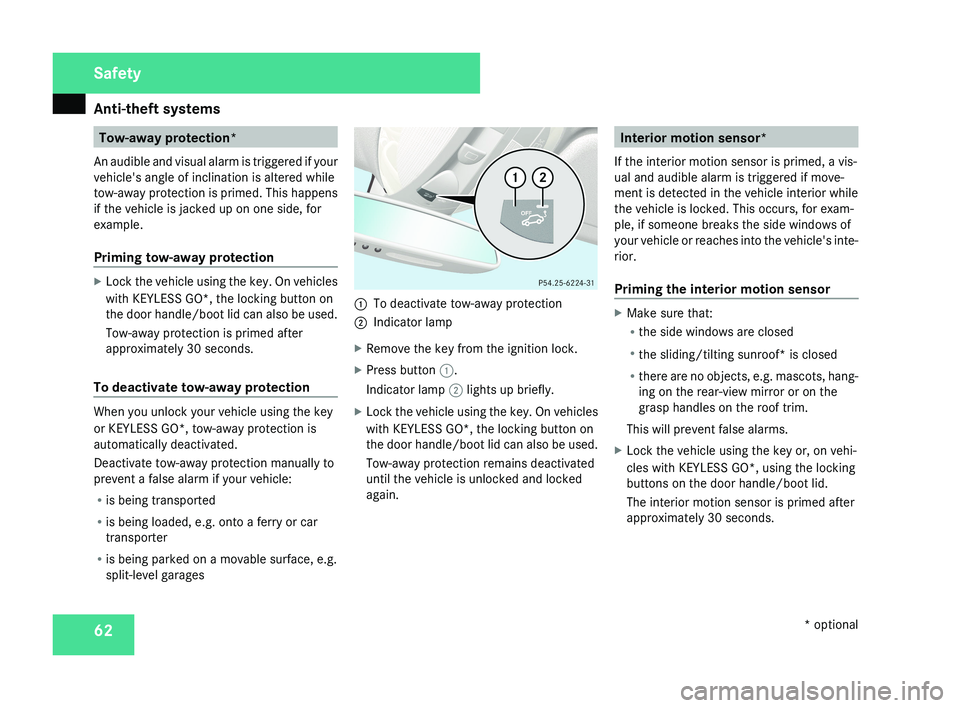
To deactivate tow-away protection
2 Indicator lamp
X Remove the key from the ignition lock.
X Press button 1.
Indicator lamp 2 lights up briefly.
X Lock the vehicle using the key. On vehicles
with KEYLESS GO*, the locking button on
the door handle/boot lid can also be used.
Tow-away protection remains deactivated
until the vehicle is unlocked and locked
again. Interior motion sensor*
If the interior motion sensor is primed, a vis-
ual and audible alarm is triggered if move-
ment is detected in the vehicle interior while
the vehicle is locked. This occurs, for exam-
ple, if someone breaks the side windows of
your vehicle or reaches into the vehicle's inte-
rior.
Priming the interior motion sensor X
Make sure that:
R
the side windows are closed
R the sliding/tilting sunroof* is closed
R there are no objects, e.g. mascots, hang-
ing on the rear-view mirror or on the
grasp handles on the roof trim.
This will prevent false alarms.
X Lock the vehicle using the key or, on vehi-
cles with KEYLESS GO*, using the locking
buttons on the door handle/boot lid.
The interior motion sensor is primed after
approximately 30 seconds. Safety
* optional
219_AKB; 2; 4, en-GB
mkalafa,
2007-11-13T09:28:36+01:00 - Seite 62
Page 70 of 329

Opening and closing
67
X
To change the setting: press the k
and j buttons simultaneously for
approximately six seconds until the battery
check lamp flashes twice.
The key now functions as follows:
X To unlock the driver's door: press the
k button once.
X To unlock centrally: press the k but-
ton twice.
X To lock centrally: press the j button.
Restoring the factory settings X
Press the k and j buttons simulta-
neously for approximately six seconds until
the battery check lamp flashes twice. KEYLESS GO*
If you are carrying the KEYLESS GO key on
your person, you can use the KEYLESS GO
functions of your vehicle. The KEYLESS GO
key should not be more than one metre away
from the vehicle. However, you can also use
the KEYLESS GO key like a normal key with
remote control.
When you pull the door handle, the following
unlock centrally if the factory settings have
not been changed:
R the doors
R the boot lid
R the fuel filler flap G
Risk of accident
Never leave children unsupervised in the
vehicle. They could open a door from the
inside at any time, even if it has been
locked. Or they could start the vehicle if a
valid KEYLESS GO key is in the vehicle and
they press the KEYLESS GO button on the
gear selector lever. They could endanger
themselves and others. Switch off the
engine and take the KEYLESS GO key with
you, even if you are only leaving the vehicle
for a short time. 1
j Locking button
2 i Unlocking button for the boot lid
3 k Unlocking button
4 Battery check lamp
i You can also use the KEYLESS GO key to
open and close the side windows and slid-
ing/tilting sunroof* . You can open them
using the summer opening feature
(Y page 100). You can close them using
the convenience closing feature
(Y page 100).
i If the vehicle has been parked for a long
time, you must pull the door handle to acti-
vate the KEYLESS GO functions. Controls
* optional
219_AKB; 2; 4, en-GB
mkalafa,
2007-11-13T09:28:36+01:00 - Seite 67
Page 71 of 329
Opening and closing
68
Important notes R
If the KEYLESS GO key is removed from the
vehicle (in luggage or an article of clothing,
for instance), it will no longer be possible
to lock or start the vehicle.
R If the KEYLESS GO key is removed from the
vehicle while the engine is running, e.g. if
the front passenger leaves the vehicle with
the KEYLESS GO key, the following mes-
sage will appear in the multi-function dis-
play as you pull away: Key not detec-
ted.
R If the KEYLESS GO key is in the vehicle, the
vehicle can be started at any time. If you
have left the KEYLESS GO key in the vehi-
cle, you will see the following message in
the multi-function display when you lock
the vehicle: Key still in vehicle.
Factory settings X
To unlock centrally: pull the door handle.
The turn signals flash once. The locking
knobs in the doors pop up. The anti-theft
alarm system* is deactivated.
When it is dark, the surround lighting also
comes on if it is activated in the on-board
computer. i
If you do not open either a door or the
boot lid after you have unlocked the vehi-
cle, it will automatically relock after approx-
imately 40 seconds.
i When a door is opened, the side window
on that side opens slightly. When the door
is closed, the side window closes again.
! The side windows will not open or close
if the battery is discharged or if the side
windows have iced up. It will not be possi-
ble to close the door. Do not attempt to
force the door closed. You could otherwise
damage the door or the window.
i There is a danger of the vehicle being
unlocked accidentally. This could happen if
the KEYLESS GO key is within one metre of
the vehicle and the door handle is splashed
by water. This could also happen when you
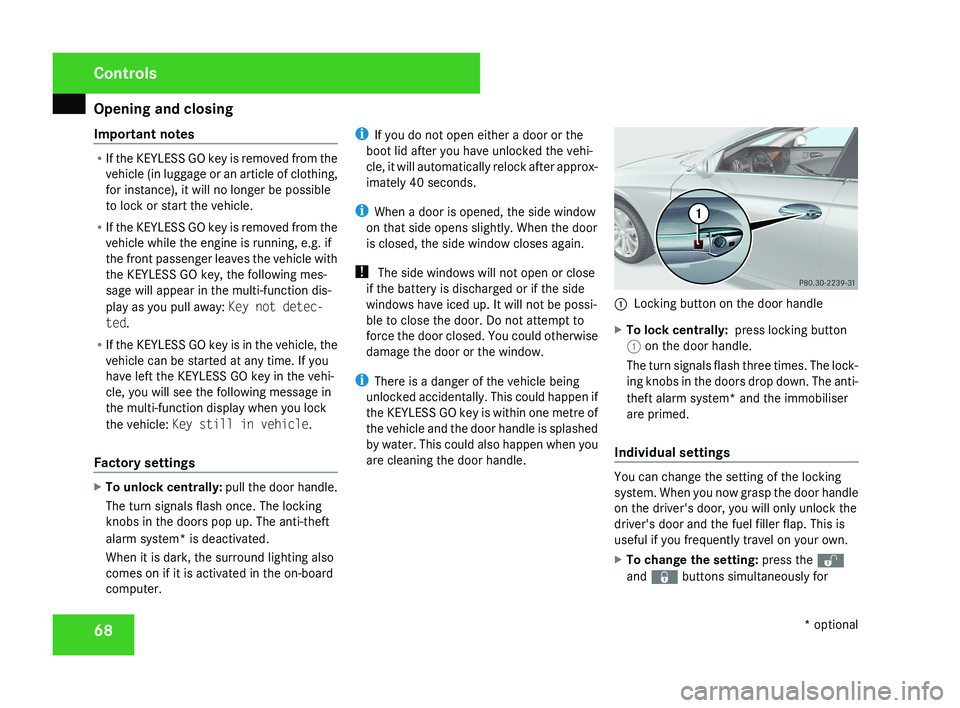
are cleaning the door handle. 1
Locking button on the door handle
X To lock centrally: press locking button
1 on the door handle.
The turn signals flash three times. The lock-
ing knobs in the doors drop down. The anti-
theft alarm system* and the immobiliser
are primed.
Individual settings You can change the setting of the locking
system. When you now grasp the door handle
on the driver's door, you will only unlock the
driver's door and the fuel filler flap. This is
useful if you frequently travel on your own.
X
To change the setting: press the k
and j buttons simultaneously for Controls
* optional
219_AKB; 2; 4, en-GB
mkalafa,
2007-11-13T09:28:36+01:00 - Seite 68
Page 72 of 329
Opening and closing
69
approximately six seconds until the battery
check lamp flashes twice.
The KEYLESS GO key will now function as fol-
lows:
X To unlock the driver's door: pull the door
handle on the driver's door.
X To unlock centrally: pull the door handle
on the front-passenger door or on the rear
doors.
X To lock centrally: press locking button
1 on the door handle.
Restoring the factory settings X
Press the k and j buttons simulta-
neously for approximately six seconds until
the battery check lamp flashes twice.
Locking from the boot* On vehicles with KEYLESS GO* and remote
boot lid closing*, you can close the boot lid
automatically and thereby centrally lock your
vehicle (
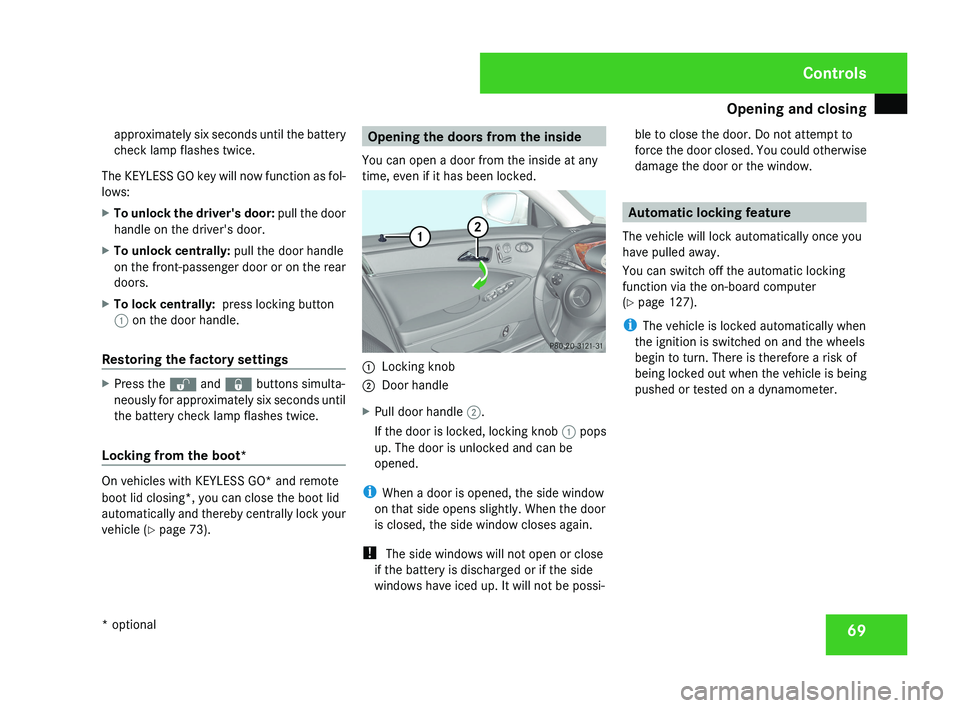
Y page 73). Opening the doors from the inside
You can open a door from the inside at any
time, even if it has been locked. 1
Locking knob
2 Door handle
X Pull door handle 2.
If the door is locked, locking knob 1 pops
up. The door is unlocked and can be
opened.
i When a door is opened, the side window
on that side opens slightly. When the door
is closed, the side window closes again.
! The side windows will not open or close
if the battery is discharged or if the side
windows have iced up. It will not be possi- ble to close the door. Do not attempt to
force the door closed. You could otherwise
damage the door or the window. Automatic locking feature
The vehicle will lock automatically once you
have pulled away.
You can switch off the automatic locking
function via the on-board computer
(Y page 127).
i The vehicle is locked automatically when
the ignition is switched on and the wheels
begin to turn. There is therefore a risk of
being locked out when the vehicle is being
pushed or tested on a dynamometer. Controls
* optional
219_AKB; 2; 4, en-GB
mkalafa,
2007-11-13T09:28:36+01:00 - Seite 69
Page 86 of 329
Mirrors
83Easy-entry/exit feature*
The Easy-entry/exit feature makes getting in
and out of your vehicle easier.
The steering wheel swings upwards when
you:
R remove the key from the ignition lock
R open the driver's door when the key is in
the ignition lock or in position 1
The steering wheel is moved automatically to
the position previously set when the key is
inserted into the ignition lock with the driver's
door closed. G
Risk of injury
Make sure that nobody can become trap-
ped when you activate the easy-entry/exit
feature.
If there is a risk of becoming trapped, stop
the adjustment procedure. To halt the pro-
cedure:
R press the steering-column adjustment
switch
R press one of the memory function posi-
tion buttons
The steering column stops moving immedi-
ately. Never leave children unsupervised in the
vehicle. They could open the driver's door
and thereby unintentionally activate the
easy-entry feature and become trapped.
The most recent position of the steering
wheel is stored when you switch off the igni-
tion or when you store a memory position
(Y page 86).
You can activate and deactivate the Easy-
entry/exit feature via the on-board computer
(Y page 128). Mirrors
Before starting off, adjust the mirrors in such
a way that you can get a good overview of
road and traffic conditions. Rear-view mirror
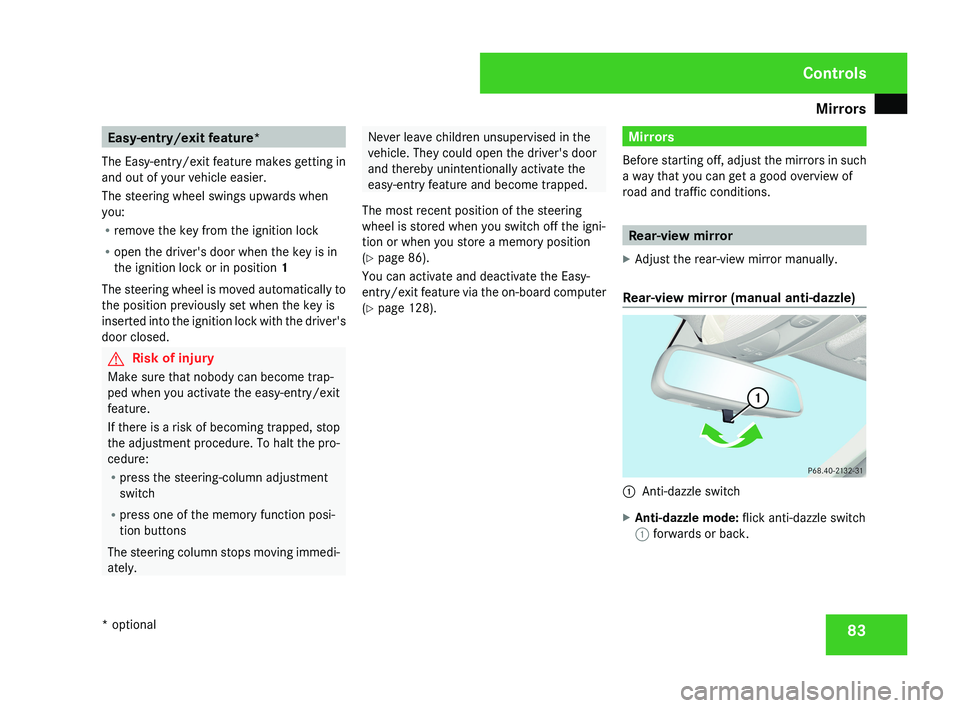
X Adjust the rear-view mirror manually.
Rear-view mirror (manual anti-dazzle) 1
Anti-dazzle switch
X Anti-dazzle mode: flick anti-dazzle switch
1 forwards or back. Controls
* optional
219_AKB; 2; 4, en-GB
mkalafa,
2007-11-13T09:28:36+01:00 - Seite 83
Page 114 of 329
On-board computer
111Rev counter
The red band in the rev counter indicates the
engine's overrevving range. The fuel supply is
interrupted to protect the engine when the
red band is reached.
! Do not drive in the overrevving range.
Doing so will damage the engine. H
Environmental note
Avoid driving at high engine speeds, as this
increases your vehicle's consumption
unnecessarily and pollutes the environ-
ment through increased emissions. Outside temperature display
G
Risk of accident
The road surface may be icy, especially in
wooded areas or on bridges, even if tem-
peratures are just above freezing point. The
vehicle could skid if you fail to adapt your
driving style. You should therefore always
adapt your driving style and speed to suit
the weather conditions.
There is a short delay before a change in out-
side temperature is displayed. On-board computer
Points to remember
The on-board computer is activated as soon
as the key is turned to position 1 in the igni-
tion lock. You can use the on-board computer
to call up information relating to your vehicle
and to make and adjust settings.
You can call up the next service due date,
select the display language for the instrument
cluster and set other functions. G
Risk of accident
Only use the on-board computer when road
and traffic conditions permit. You would
otherwise be distracted and unable to con-
centrate properly on driving, and could
cause an accident.
The on-board computer shows information in
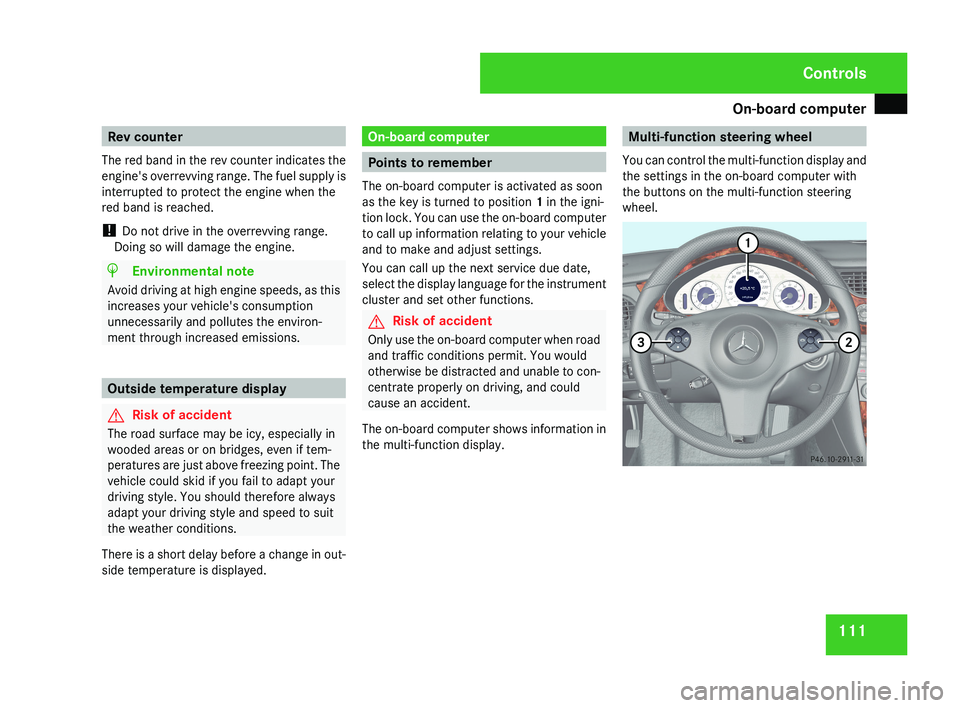
the multi-function display. Multi-function steering wheel
You can control the multi-function display and
the settings in the on-board computer with
the buttons on the multi-function steering
wheel.Controls
219_AKB; 2; 4, en-GB
mkalafa,
2007-11-13T09:28:36+01:00 - Seite 111