2008 MERCEDES-BENZ CLS COUPE steering wheel
[x] Cancel search: steering wheelPage 49 of 329
Occupant safety
46 tem on a suitable seat in the rear. If you
secure a forward-facing child restraint
system to the front-passenger seat, you
must move the front-passenger seat as
far back as possible.
R Make sure there are no heavy or sharp-
edged objects in pockets of clothing.
R Do
not lean forwards, e.g. over the cover
of the driver's front airbag, particularly
when the vehicle is in motion.
R Do not put your feet on the dashboard.
R Only hold the steering wheel by the rim.
This allows the airbag to inflate fully. You
could be injured if the airbag is deployed
and you are holding the inside of the
steering wheel.
R Do not lean on the doors from inside the
vehicle.
R Make sure that there are no people, ani-
mals or objects between the vehicle
occupants and the area of deployment of
the airbag.
R Do not place any objects between the
seat backrest and the door. R
Do not hang any hard objects, for exam-
ple
coat hangers, on the grab handles or
coat hooks.
R Do not attach accessories, e.g. cup hold-
ers, to the doors.
It is not possible to rule out the risk of inju-
ries caused by an airbag due to the high
speed at which the airbag is required to
deploy. G
Risk of injury
The airbag's functionality can only be guar-
anteed if the following parts are not cov-
ered and no badges or stickers are
attached to them:
R Padded steering wheel boss
R Front-passenger front airbag cover
R Outer side of front seats
R Rear door trims G
Risk of injury
When an airbag deploys, a small amount of
powder
is released. The powder may cause
short-term breathing difficulties to persons
suffering from asthma or other pulmonary
conditions. In order to prevent possible breathing dif-
ficulties you should leave the vehicle as
soon
as it is safe to do so. You can also open
the window to allow fresh air to enter the
interior. The powder does not constitute a
health hazard and does not indicate that
there is a fire in the vehicle. G
Risk of injury
The airbag parts are hot after the airbag has
been deployed. Do not touch them, other-
wise you may burn yourself.
Occupants
are not protected by the airbags
in the event of another accident. Have the
airbags checked at a qualified specialist
workshop.
Front airbags
The front airbags are designed to increase
protection for the driver's and front-
passenger head and chest. Safety
219_AKB; 2; 4, en-GB
mkalafa,
2007-11-13T09:28:36+01:00 - Seite 46
Page 50 of 329
Occupant safety
47
The driver's front airbag and front-passenger
front airbag are deployed:
R
at the start of an accident with a high rate
of vehicle acceleration or deceleration in a
longitudinal direction
R if the system determines that airbag
deployment can offer additional protection
to that provided by the seat belt
R if the seat belt is fastened
R independently of other airbags in the vehi-
cle
R if the vehicle overturns, but only if the sys-
tem detects high vehicle deceleration in a
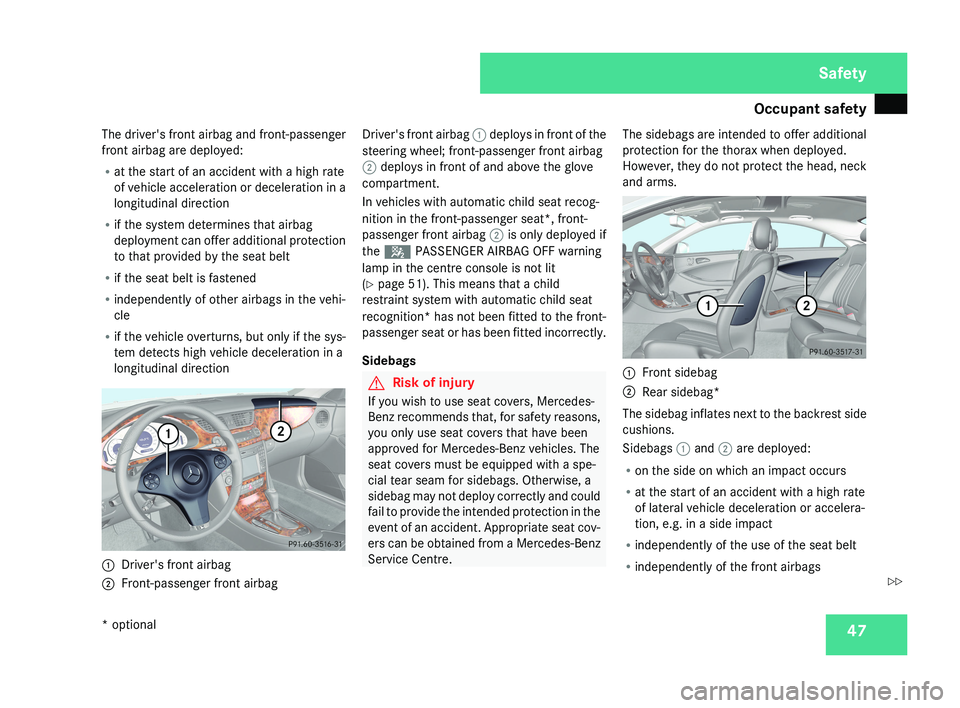
longitudinal direction1 Driver's front airbag
2 Front-passenger front airbag Driver's front airbag
1 deploys in front of the
steering wheel; front-passenger front airbag
2 deploys in front of and above the glove
compartment.
In vehicles with automatic child seat recog-
nition in the front-passenger seat*, front-
passenger front airbag 2 is only deployed if
the 5 PASSENGER AIRBAG OFF warning
lamp in the centre console is not lit
(Y page 51). This means that a child
restraint system with automatic child seat
recognition* has not been fitted to the front-
passenger seat or has been fitted incorrectly.
Sidebags
G Risk of injury
If you wish to use seat covers, Mercedes-
Benz recommends that, for safety reasons,
you only use seat covers that have been
approved for Mercedes-Benz vehicles. The
seat covers must be equipped with a spe-
cial tear seam for sidebags. Otherwise, a
sidebag may not deploy correctly and could
fail to provide the intended protection in the
event of an accident. Appropriate seat cov-
ers can be obtained from a Mercedes-Benz
Service Centre. The sidebags are intended to offer additional
protection for the thorax when deployed.
However, they do not protect the head, neck
and arms.1
Front sidebag
2 Rear sidebag*
The sidebag inflates next to the backrest side
cushions.
Sidebags 1 and 2 are deployed:
R on the side on which an impact occurs
R at the start of an accident with a high rate
of lateral vehicle deceleration or accelera-
tion, e.g. in a side impact
R independently of the use of the seat belt
R independently of the front airbags
Safety
* optional
219_AKB; 2; 4, en-GB
mkalafa,
2007-11-13T09:28:36+01:00 - Seite 47
Z
Page 60 of 329
Driving safety systems
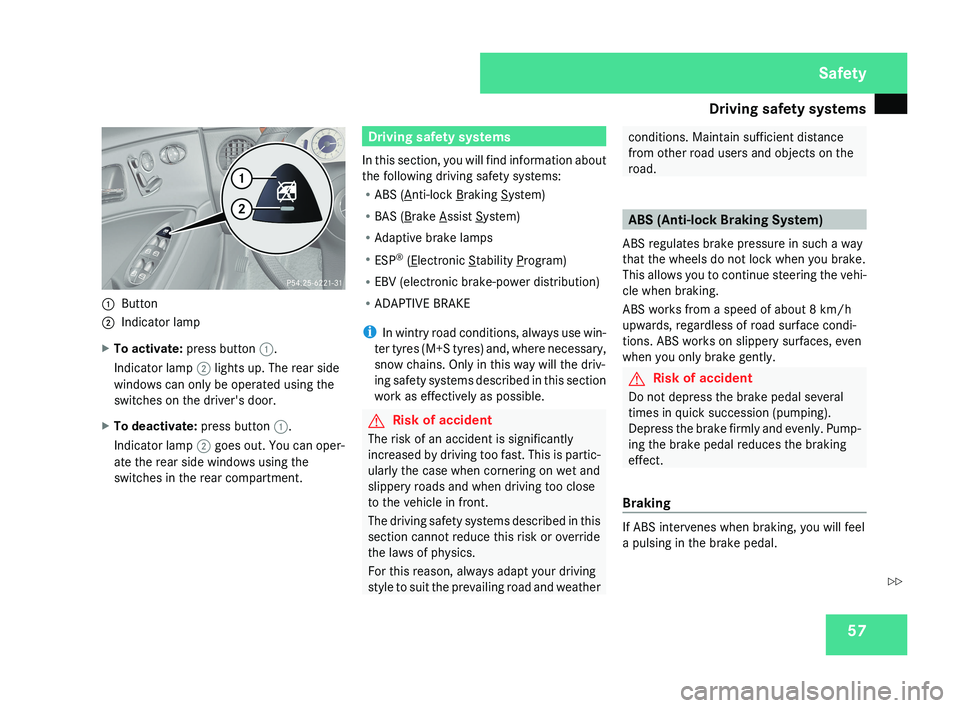
571
Button
2 Indicator lamp
X To activate: press button 1.
Indicator lamp 2 lights up. The rear side
windows can only be operated using the
switches on the driver's door.
X To deactivate: press button 1.
Indicator lamp 2 goes out. You can oper-
ate the rear side windows using the
switches in the rear compartment.
Driving safety systems
In this section, you will find information about
the following driving safety systems:
R ABS (
Anti-lock Braking System)
R BAS (
Brake Assist System)
R Adaptive brake lamps
R ESP ®
(
Electronic Stability Program)
R EBV (electronic brake-power distribution)
R ADAPTIVE BRAKE
i In wintry road conditions, always use win-
ter tyres (M+S tyres) and, where necessary,
snow chains. Only in this way will the driv-
ing safety systems described in this section
work as effectively as possible.
G Risk of accident
The risk of an accident is significantly
increased by driving too fast. This is partic-
ularly the case when cornering on wet and
slippery roads and when driving too close
to the vehicle in front.
The driving safety systems described in this
section cannot reduce this risk or override
the laws of physics.
For this reason, always adapt your driving
style to suit the prevailing road and weather
conditions. Maintain sufficient distance
from other road users and objects on the
road.
ABS (Anti-lock Braking System)
ABS regulates brake pressure in such a way
that the wheels do not lock when you brake.
This allows you to continue steering the vehi-
cle when braking.
ABS works from a speed of about 8 km/h
upwards, regardless of road surface condi-
tions. ABS works on slippery surfaces, even
when you only brake gently.
G Risk of accident
Do not depress the brake pedal several
times in quick succession (pumping).
Depress the brake firmly and evenly. Pump-
ing the brake pedal reduces the braking
effect.
Braking
If ABS intervenes when braking, you will feel
a pulsing in the brake pedal.
Safety
219_AKB; 2; 4, en-GB
mkalafa,
2007-11-13T09:28:36+01:00 - Seite 57
Z
Page 68 of 329

65
Opening and closing
...........................66
Key positions ....................................... 74
Seats .................................................... 75
Steering wheel .................................... 81
Mirrors ................................................. 83
Memory functions* ............................. 86
Seat belts ............................................. 88
Lights ................................................... 91
Windscreen wipers .............................97
Side windows ...................................... 98Driving and parking ..........................
101
Transmission ..................................... 104
Instrument cluster ............................109
On-board computer ..........................111
Driving systems ................................ 132
Air conditioning ................................. 151
Sliding sunroof .................................. 169
Loading and stowing ........................172
Features ............................................. 180 Controls
219_AKB; 2; 4, en-GB
mkalafa,
2007-11-13T09:28:36+01:00 - Seite 65
Page 84 of 329
Steering wheel
811
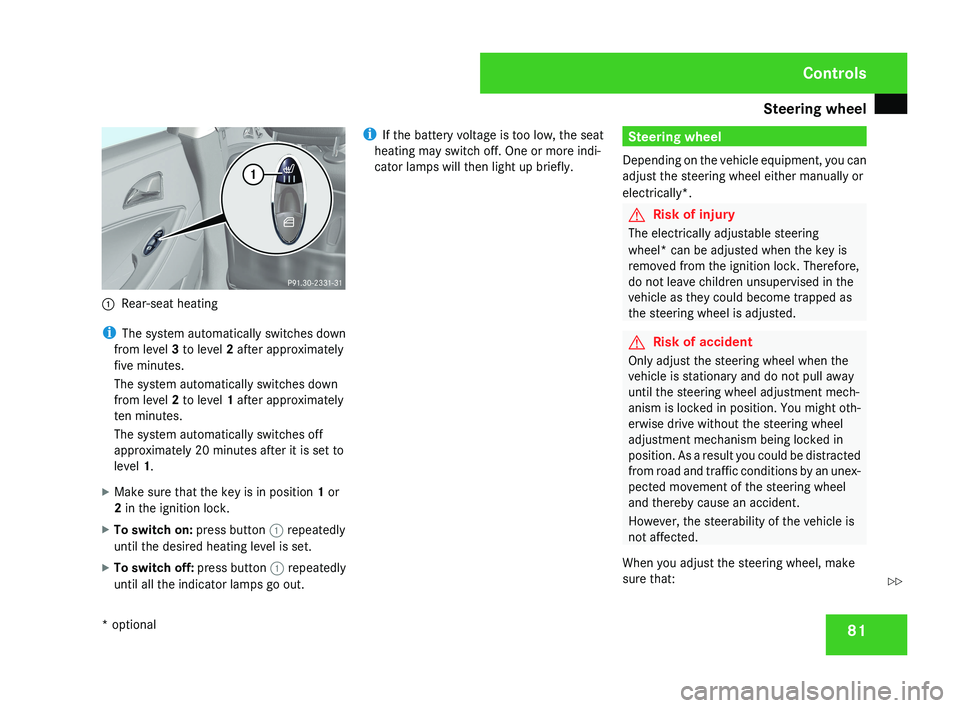
Rear-seat heating
i The system automatically switches down
from level 3 to level 2 after approximately
five minutes.
The system automatically switches down
from level 2 to level 1 after approximately
ten minutes.
The system automatically switches off
approximately 20 minutes after it is set to
level 1.
X Make sure that the key is in position 1 or
2 in the ignition lock.
X To switch on: press button 1 repeatedly
until the desired heating level is set.
X To switch off: press button 1 repeatedly
until all the indicator lamps go out. i
If the battery voltage is too low, the seat
heating may switch off. One or more indi-
cator lamps will then light up briefly.
Steering wheel
Depending on the vehicle equipment, you can
adjust the steering wheel either manually or
electrically*.
G Risk of injury
The electrically adjustable steering
wheel* can be adjusted when the key is
removed from the ignition lock. Therefore,
do not leave children unsupervised in the
vehicle as they could become trapped as
the steering wheel is adjusted.
G Risk of accident
Only adjust the steering wheel when the
vehicle is stationary and do not pull away
until the steering wheel adjustment mech-
anism is locked in position. You might oth-
erwise drive without the steering wheel
adjustment mechanism being locked in
position. As a result you could be distracted
from road and traffic conditions by an unex-
pected movement of the steering wheel
and thereby cause an accident.
However, the steerability of the vehicle is
not affected.
When you adjust the steering wheel, make
sure that:
Controls
* optional
219_AKB; 2; 4, en-GB
mkalafa,
2007-11-13T09:28:36+01:00 - Seite 81
Z
Page 85 of 329
Steering wheel
82
R
the steering wheel can be reached with
your arms slightly bent
R you can move your legs freely
R you can see all the displays in the instru-
ment cluster clearly Adjusting the steering wheel man-
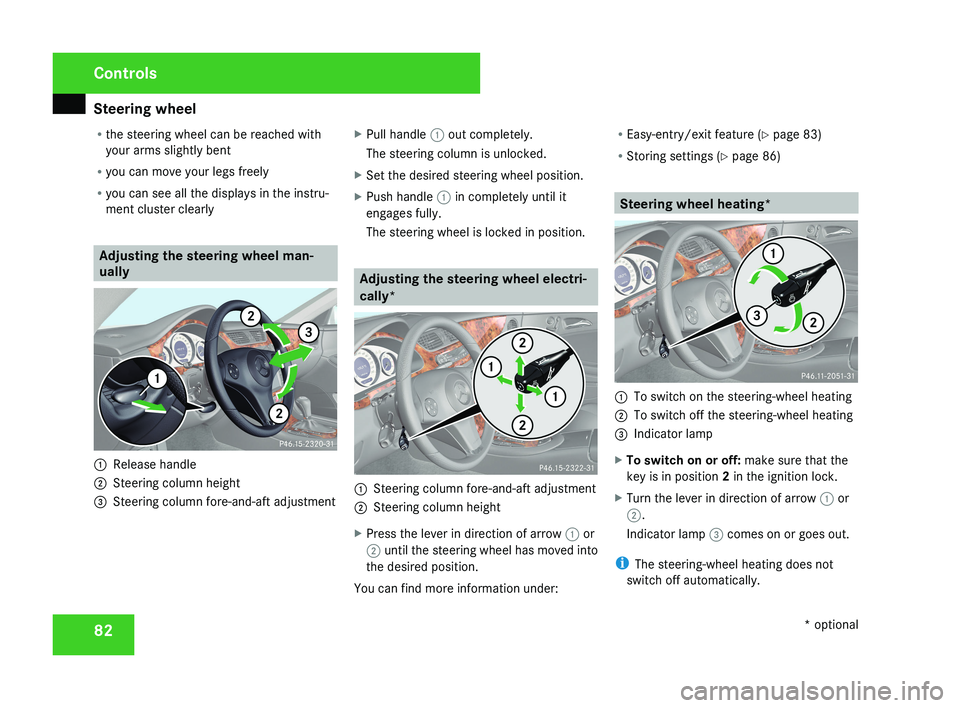
ually1
Release handle
2 Steering column height
3 Steering column fore-and-aft adjustment X
Pull handle 1 out completely.
The steering column is unlocked.
X Set the desired steering wheel position.
X Push handle 1 in completely until it
engages fully.
The steering wheel is locked in position.
Adjusting the steering wheel electri-
cally*
1 Steering column fore-and-aft adjustment
2 Steering column height
X Press the lever in direction of arrow 1 or
2 until the steering wheel has moved into
the desired position.
You can find more information under: R
Easy-entry/exit feature ( Y page 83)
R Storing settings ( Y page 86)
Steering wheel heating*
1
To switch on the steering-wheel heating
2 To switch off the steering-wheel heating
3 Indicator lamp
X To switch on or off: make sure that the
key is in position 2 in the ignition lock.
X Turn the lever in direction of arrow 1 or
2.
Indicator lamp 3 comes on or goes out.
i The steering-wheel heating does not
switch off automatically.
Controls
* optional
219_AKB; 2; 4, en-GB
mkalafa,
2007-11-13T09:28:36+01:00 - Seite 82
Page 86 of 329
Mirrors
83Easy-entry/exit feature*
The Easy-entry/exit feature makes getting in
and out of your vehicle easier.
The steering wheel swings upwards when
you:
R remove the key from the ignition lock
R open the driver's door when the key is in
the ignition lock or in position 1
The steering wheel is moved automatically to
the position previously set when the key is
inserted into the ignition lock with the driver's
door closed. G
Risk of injury
Make sure that nobody can become trap-
ped when you activate the easy-entry/exit
feature.
If there is a risk of becoming trapped, stop
the adjustment procedure. To halt the pro-
cedure:
R press the steering-column adjustment
switch
R press one of the memory function posi-
tion buttons
The steering column stops moving immedi-
ately. Never leave children unsupervised in the
vehicle. They could open the driver's door
and thereby unintentionally activate the
easy-entry feature and become trapped.
The most recent position of the steering
wheel is stored when you switch off the igni-
tion or when you store a memory position
(Y page 86).
You can activate and deactivate the Easy-
entry/exit feature via the on-board computer
(Y page 128). Mirrors
Before starting off, adjust the mirrors in such
a way that you can get a good overview of
road and traffic conditions. Rear-view mirror
X Adjust the rear-view mirror manually.
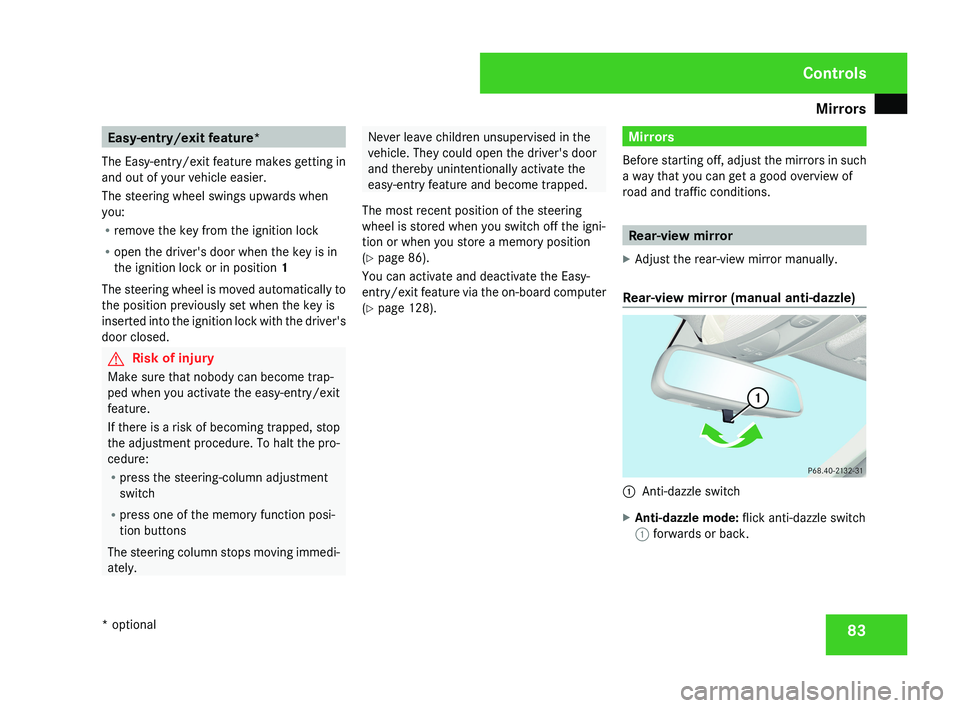
Rear-view mirror (manual anti-dazzle) 1
Anti-dazzle switch
X Anti-dazzle mode: flick anti-dazzle switch
1 forwards or back. Controls
* optional
219_AKB; 2; 4, en-GB
mkalafa,
2007-11-13T09:28:36+01:00 - Seite 83
Page 89 of 329
Memory functions*
86
X
Make sure that button 2 for the exterior
mirror on the front-passenger side is
pressed.
X Engage reverse gear.
The exterior mirror on the front-passenger
side moves to the stored parking position.
The exterior mirror on the front-passenger
side moves back to its original position:
R as soon as you exceed a speed of
10 km/h
R about ten seconds after you have disen-
gaged reverse gear
R if you press button 1 for the exterior mir-
ror on the driver's side Memory functions*
Storing settings
You can store up to three different settings
using the memory button.
The following settings are stored as a single
memory preset:
R Position of the seat, backrest and head
restraint
R Dynamic driving seat*: activated/deacti-
vated
R Driver's side: steering-wheel position
R Driver's side: position of the exterior mir-
rors on the driver's and front-passenger
sides G
Risk of injury
The memory function can also be used
when the key has been removed. For this
reason, children should never be left unsu-
pervised in the vehicle. They could other-
wise become trapped when moving the
seat or the steering wheel. G
Risk of accident
Only activate the memory function on the
driver’s side when the vehicle is stationary.
You could otherwise be distracted from the traffic conditions by the steering wheel and
seat moving of their own accord, and as a
result cause an accident.
! If PRE-SAFE ®
* has been activated, the
front-passenger seat is moved to a more
favourable position. When you move the
seat, make sure that there are no objects
in the footwell or behind the seats. Other-
wise, you could damage the seats and the
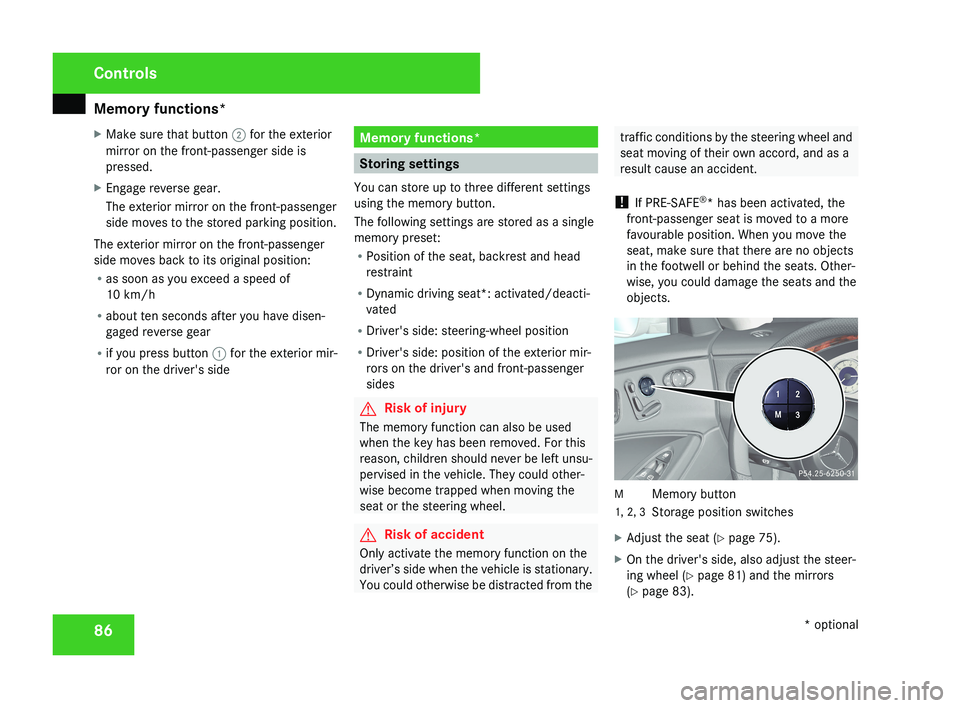
objects.M Memory button
1, 2, 3 Storage position switches
X Adjust the seat ( Y page 75).
X On the driver's side, also adjust the steer-
ing wheel ( Y page 81) and the mirrors
(Y page 83).
Controls
* optional
219_AKB; 2; 4, en-GB
mkalafa,
2007-11-13T09:28:36+01:00 - Seite 86