2007 TOYOTA SIENNA check engine
[x] Cancel search: check enginePage 821 of 3000
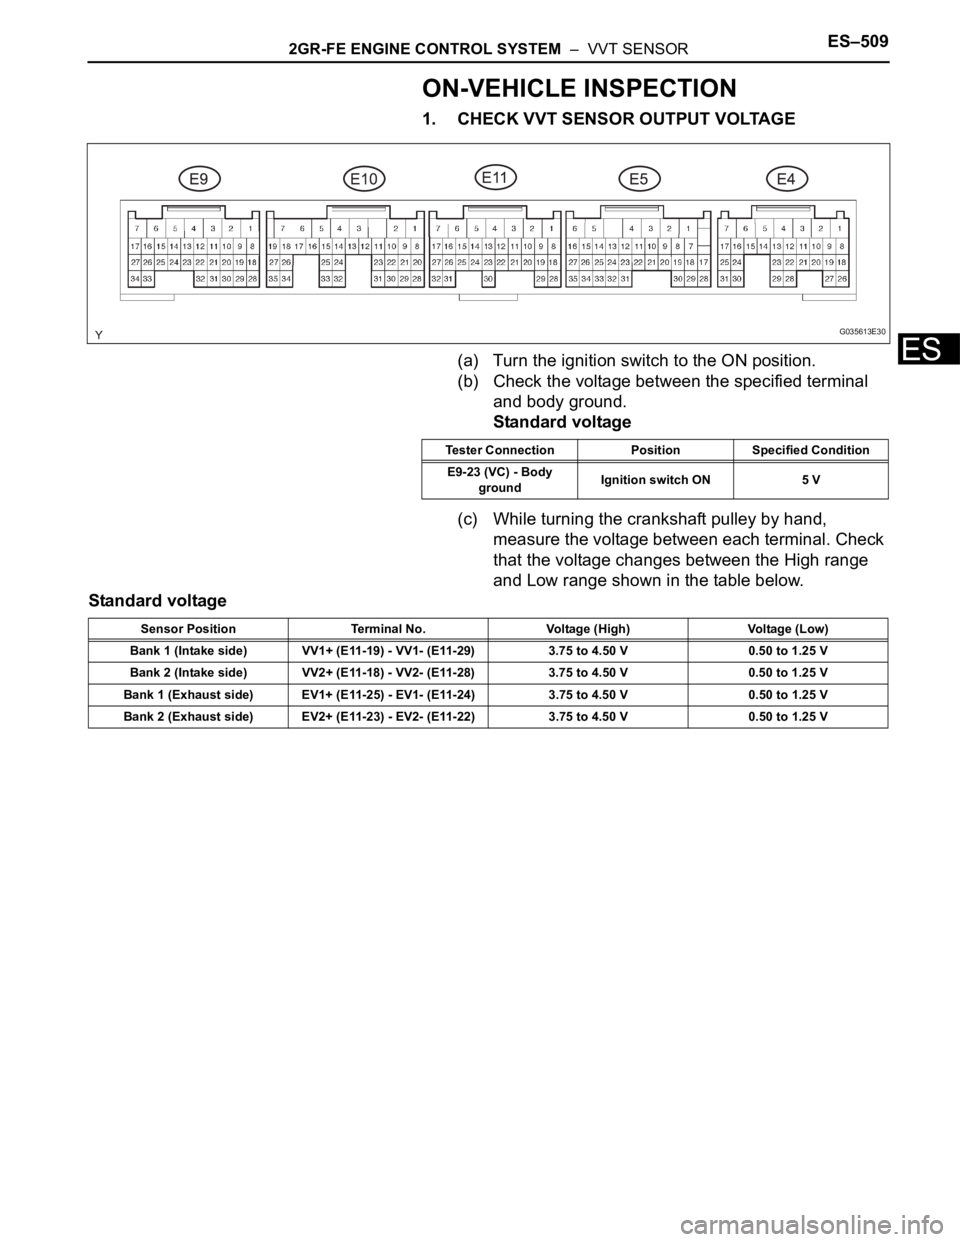
2GR-FE ENGINE CONTROL SYSTEM – VVT SENSORES–509
ES
ON-VEHICLE INSPECTION
1. CHECK VVT SENSOR OUTPUT VOLTAGE
(a) Turn the ignition switch to the ON position.
(b) Check the voltage between the specified terminal
and body ground.
Standard voltage
(c) While turning the crankshaft pulley by hand,
measure the voltage between each terminal. Check
that the voltage changes between the High range
and Low range shown in the table below.
Standard voltage
G035613E30
Tester Connection Position Specified Condition
E9-23 (VC) - Body
groundIgnition switch ON 5 V
Sensor Position Terminal No. Voltage (High) Voltage (Low)
Bank 1 (Intake side) VV1+ (E11-19) - VV1- (E11-29) 3.75 to 4.50 V0.50 to 1.25 V
Bank 2 (Intake side) VV2+ (E11-18) - VV2- (E11-28) 3.75 to 4.50 V0.50 to 1.25 V
Bank 1 (Exhaust side) EV1+ (E11-25) - EV1- (E11-24) 3.75 to 4.50 V 0.50 to 1.25 V
Bank 2 (Exhaust side) EV2+ (E11-23) - EV2- (E11-22) 3.75 to 4.50 V 0.50 to 1.25 V
Page 823 of 3000
2GR-FE ENGINE CONTROL SYSTEM – SFI SYSTEMES–41
ES
DIAGNOSIS SYSTEM
1. DESCRIPTION
(a) When troubleshooting OBD II (On-Board
Diagnostics) vehicles, an intelligent tester
(complying with SAE J1987) must be connected to
the DLC3 (Data Link Connector 3) of the vehicle.
Various data in the vehicle's ECM (Engine Control
Module) can be then read.
(b) OBD II regulations require that the vehicle's on-
board computer illuminates the MIL (Malfunction
Indicator Lamp) on the instrument panel when the
computer detects a malfunction in:
(1) The emission control systems and components
(2) The power train control components (which
affect vehicle emissions)
(3) The computer itself
In addition, the applicable DTCs (Diagnostic
Trouble Codes) prescribed by SAE J2012 are
recorded on 3 consecutive trips, the MIL turns
off automatically but the DTCs remain recorded
in the ECM memory.
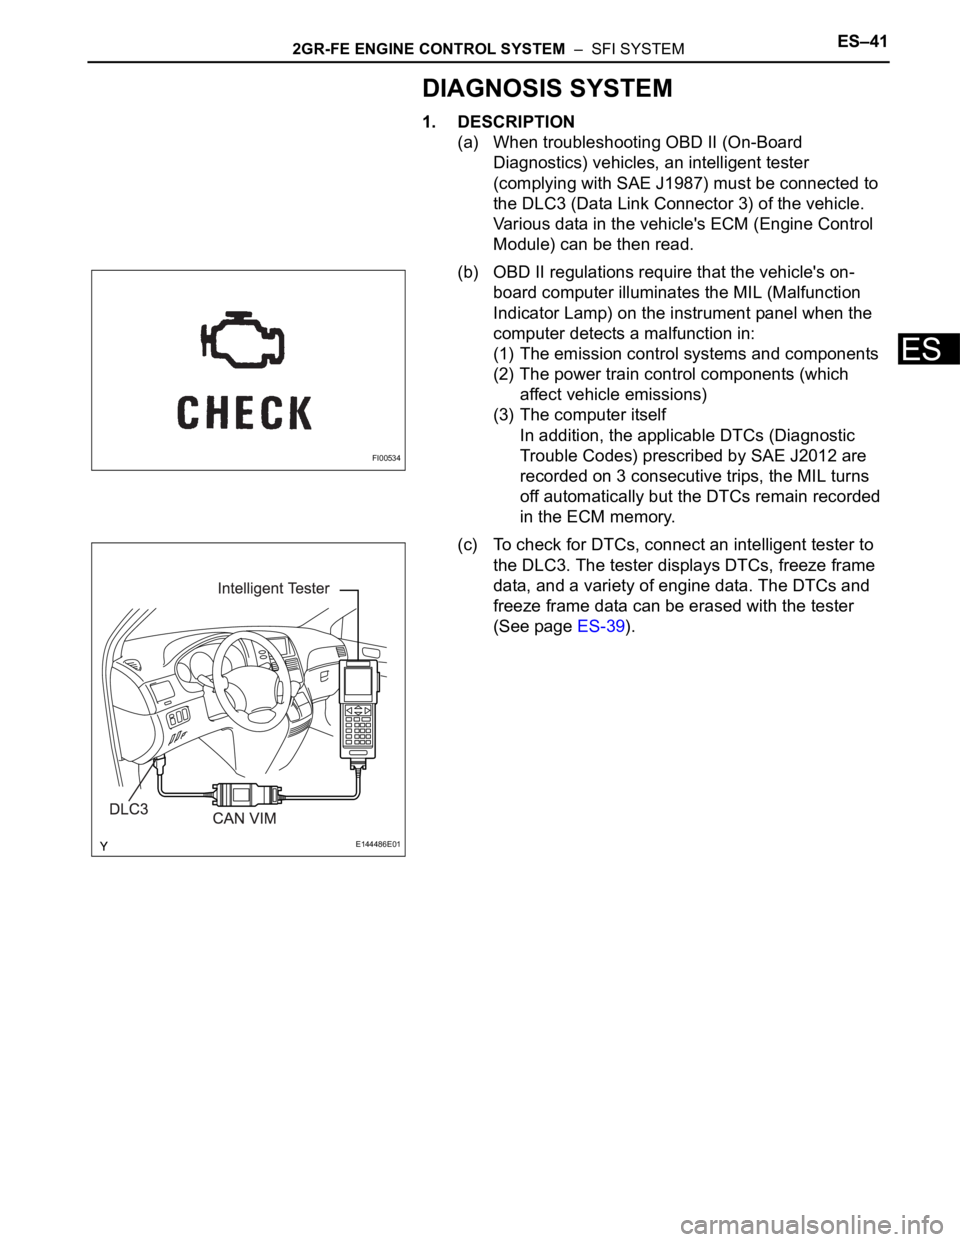
(c) To check for DTCs, connect an intelligent tester to
the DLC3. The tester displays DTCs, freeze frame
data, and a variety of engine data. The DTCs and
freeze frame data can be erased with the tester
(See page ES-39).
FI00534
E144486E01
Page 824 of 3000
ES–422GR-FE ENGINE CONTROL SYSTEM – SFI SYSTEM
ES
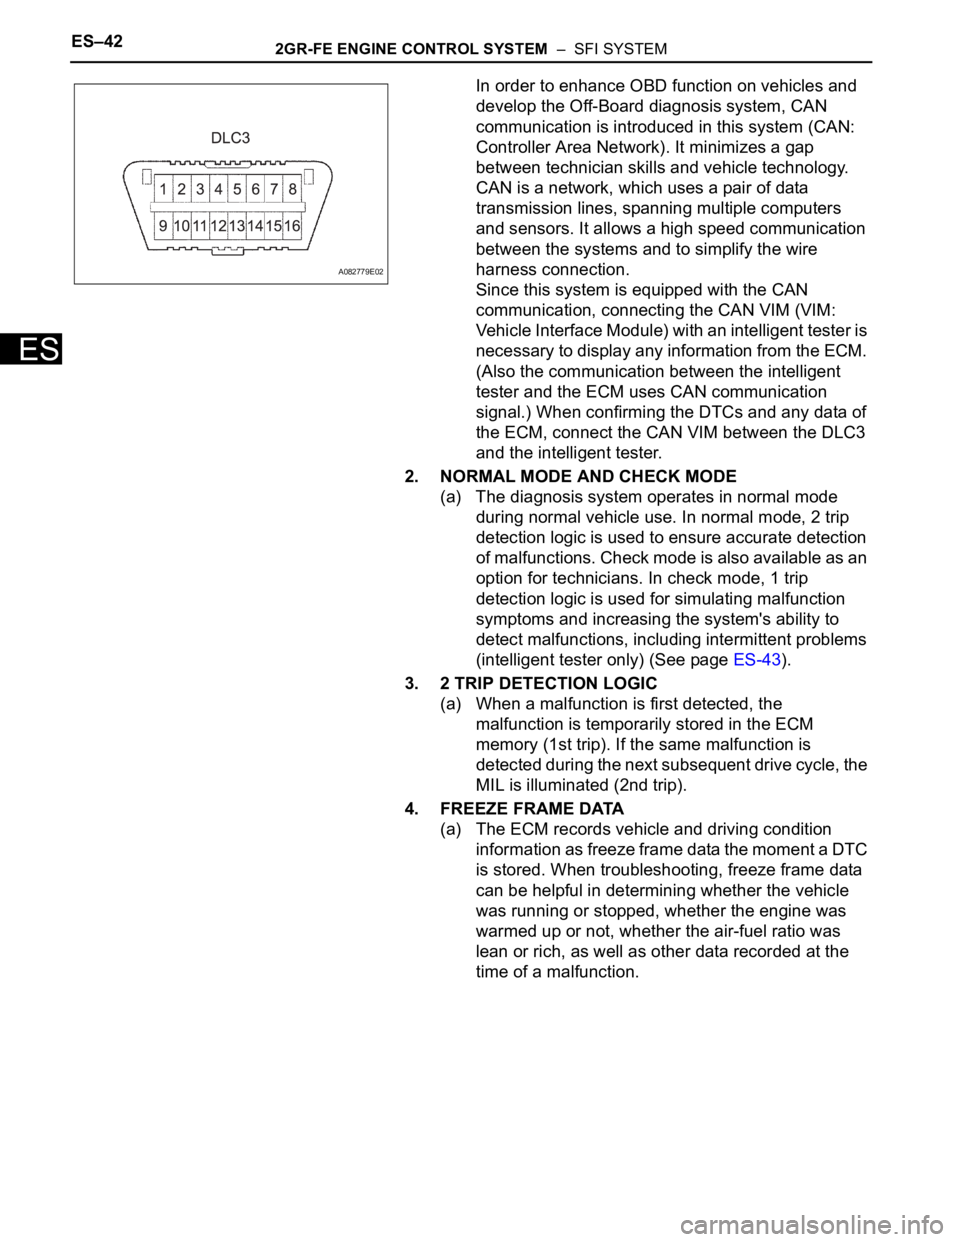
In order to enhance OBD function on vehicles and
develop the Off-Board diagnosis system, CAN
communication is introduced in this system (CAN:
Controller Area Network). It minimizes a gap
between technician skills and vehicle technology.
CAN is a network, which uses a pair of data
transmission lines, spanning multiple computers
and sensors. It allows a high speed communication
between the systems and to simplify the wire
harness connection.
Since this system is equipped with the CAN
communication, connecting the CAN VIM (VIM:
Vehicle Interface Module) with an intelligent tester is
necessary to display any information from the ECM.
(Also the communication between the intelligent
tester and the ECM uses CAN communication
signal.) When confirming the DTCs and any data of
the ECM, connect the CAN VIM between the DLC3
and the intelligent tester.
2. NORMAL MODE AND CHECK MODE
(a) The diagnosis system operates in normal mode
during normal vehicle use. In normal mode, 2 trip
detection logic is used to ensure accurate detection
of malfunctions. Check mode is also available as an
option for technicians. In check mode, 1 trip
detection logic is used for simulating malfunction
symptoms and increasing the system's ability to
detect malfunctions, including intermittent problems
(intelligent tester only) (See page ES-43).
3. 2 TRIP DETECTION LOGIC
(a) When a malfunction is first detected, the
malfunction is temporarily stored in the ECM
memory (1st trip). If the same malfunction is
detected during the next subsequent drive cycle, the
MIL is illuminated (2nd trip).
4. FREEZE FRAME DATA
(a) The ECM records vehicle and driving condition
information as freeze frame data the moment a DTC
is stored. When troubleshooting, freeze frame data
can be helpful in determining whether the vehicle
was running or stopped, whether the engine was
warmed up or not, whether the air-fuel ratio was
lean or rich, as well as other data recorded at the
time of a malfunction.
A082779E02
Page 826 of 3000

ES–442GR-FE ENGINE CONTROL SYSTEM – SFI SYSTEM
ES
(b) The MIL should turn off when the engine is started.
If the MIL remains illuminated, the diagnosis system
has detected a malfunction or abnormality in the
system.
HINT:
If the MIL is not illuminated when the ignition switch
is first turned to the ON position, check the MIL
circuit (See page ES-478).
Page 827 of 3000
2GR-FE ENGINE CONTROL SYSTEM – SFI SYSTEMES–45
ES
DTC CHECK / CLEAR
NOTICE:
All the stored DTCs and freeze frame data are erased if:
1) the ECM is changed from normal mode to check mode
or vice versa; or 2) the ignition switch is turned from ON
to ACC or off while in check mode.
Before changing modes, always check and make a note
of any DTCs and freeze frame data.
HINT:
• DTCs which are stored in the ECM can be displayed on an
intelligent tester. An intelligent tester can display current
and pending DTCs.
• Some DTCs are not set if the ECM does not detect the
same malfunction again during the second consecutive
driving cycle. However, such malfunctions, detected on
only one occasion, are stored as pending DTCs.
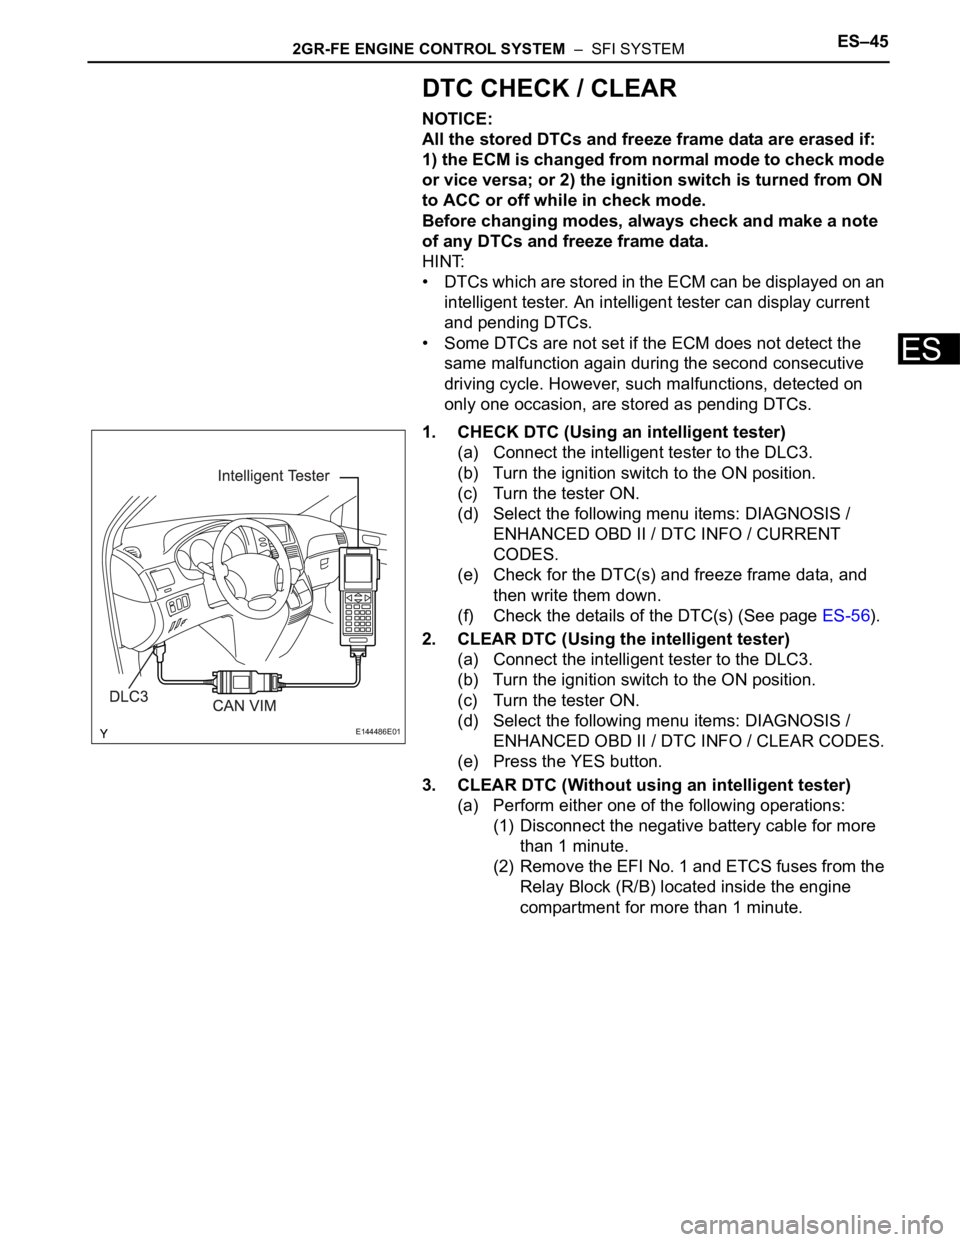
1. CHECK DTC (Using an intelligent tester)
(a) Connect the intelligent tester to the DLC3.
(b) Turn the ignition switch to the ON position.
(c) Turn the tester ON.
(d) Select the following menu items: DIAGNOSIS /
ENHANCED OBD II / DTC INFO / CURRENT
CODES.
(e) Check for the DTC(s) and freeze frame data, and
then write them down.
(f) Check the details of the DTC(s) (See page ES-56).
2. CLEAR DTC (Using the intelligent tester)
(a) Connect the intelligent tester to the DLC3.
(b) Turn the ignition switch to the ON position.
(c) Turn the tester ON.
(d) Select the following menu items: DIAGNOSIS /
ENHANCED OBD II / DTC INFO / CLEAR CODES.
(e) Press the YES button.
3. CLEAR DTC (Without using an intelligent tester)
(a) Perform either one of the following operations:
(1) Disconnect the negative battery cable for more
than 1 minute.
(2) Remove the EFI No. 1 and ETCS fuses from the
Relay Block (R/B) located inside the engine
compartment for more than 1 minute.
E144486E01
Page 830 of 3000
ES–462GR-FE ENGINE CONTROL SYSTEM – SFI SYSTEM
ES
FREEZE FRAME DATA
1. DESCRIPTION
(a) The ECM records vehicle and driving condition
information as freeze frame data the moment a DTC
is stored. When troubleshooting, freeze frame data
can be helpful in determining whether the vehicle
was running or stopped, whether the engine was
warmed up or not, whether the air-fuel ratio was
lean or rich, as well as other data recorded at the
time of a malfunction.
HINT:
If it is impossible to duplicate the problem even
though a DTC is detected, confirm the freeze frame
data.
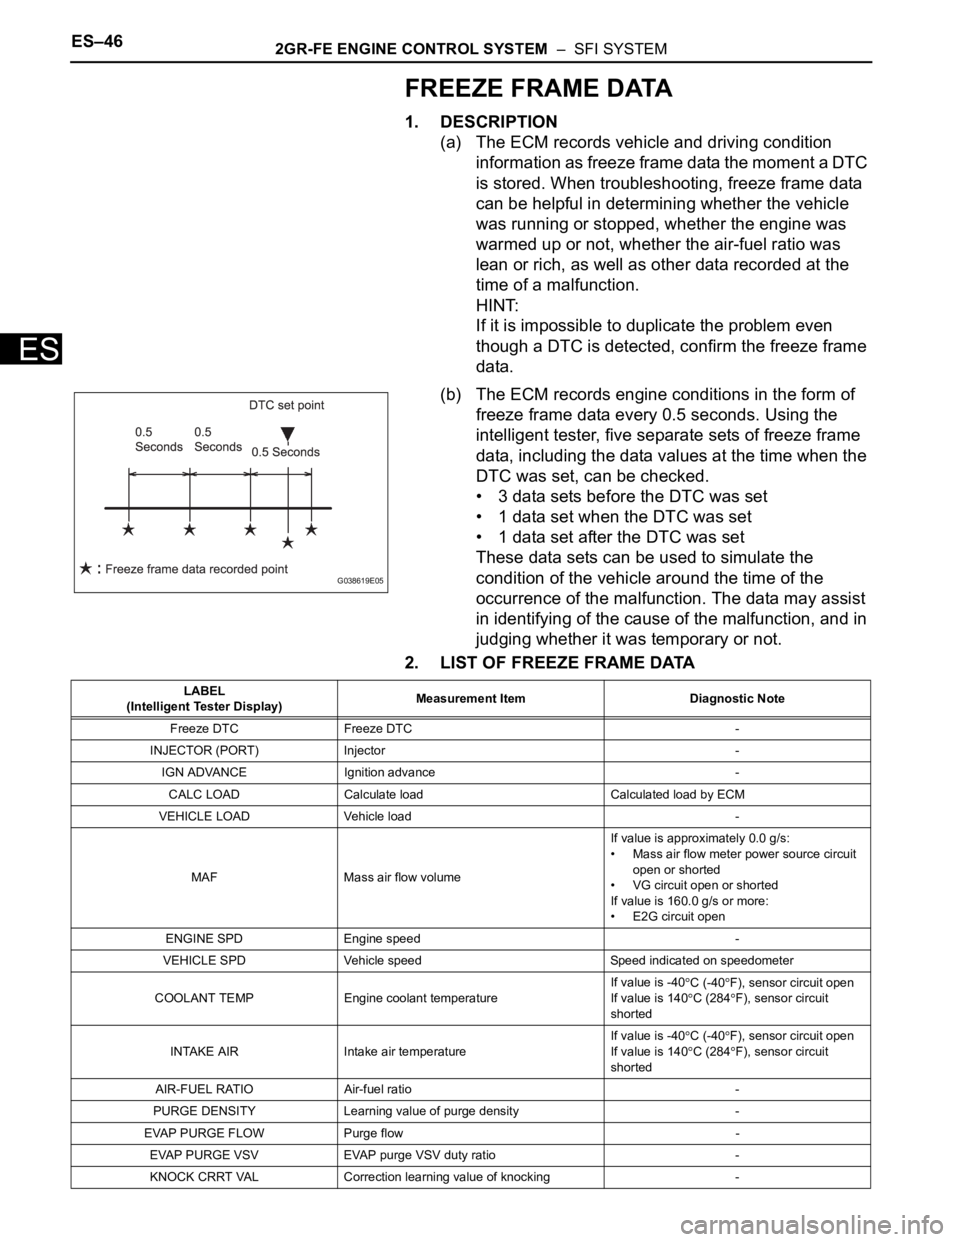
(b) The ECM records engine conditions in the form of
freeze frame data every 0.5 seconds. Using the
intelligent tester, five separate sets of freeze frame
data, including the data values at the time when the
DTC was set, can be checked.
• 3 data sets before the DTC was set
• 1 data set when the DTC was set
• 1 data set after the DTC was set
These data sets can be used to simulate the
condition of the vehicle around the time of the
occurrence of the malfunction. The data may assist
in identifying of the cause of the malfunction, and in
judging whether it was temporary or not.
2. LIST OF FREEZE FRAME DATA
G038619E05
LABEL
(Intelligent Tester Display)Measurement Item Diagnostic Note
Freeze DTC Freeze DTC -
INJECTOR (PORT) Injector -
IGN ADVANCE Ignition advance -
CALC LOAD Calculate load Calculated load by ECM
VEHICLE LOAD Vehicle load -
MAF Mass air flow volumeIf value is approximately 0.0 g/s:
• Mass air flow meter power source circuit
open or shorted
• VG circuit open or shorted
If value is 160.0 g/s or more:
• E2G circuit open
ENGINE SPD Engine speed -
VEHICLE SPD Vehicle speed Speed indicated on speedometer
COOLANT TEMP Engine coolant temperatureIf value is -40
C (-40F), sensor circuit open
If value is 140
C (284F), sensor circuit
shorted
INTAKE AIR Intake air temperatureIf value is -40
C (-40F), sensor circuit open
If value is 140C (284F), sensor circuit
shorted
AIR-FUEL RATIO Air-fuel ratio -
PURGE DENSITY Learning value of purge density -
EVAP PURGE FLOW Purge flow -
EVAP PURGE VSV EVAP purge VSV duty ratio -
KNOCK CRRT VAL Correction learning value of knocking -
Page 831 of 3000

2GR-FE ENGINE CONTROL SYSTEM – SFI SYSTEMES–47
ES
KNOCK FB VAL Feedback value of knocking -
ACCEL POS #1Absolute Accelerator Pedal Position (APP)
No. 1-
ACCEL POS #2 Absolute APP No. 2 -
THROTTLE POS Throttle positionRead value with ignition switch on (Do not
start engine)
THROTTLE POS Throttle sensor positioningRead value with ignition switch on (Do not
start engine)
THROTTLE POS#2 Throttle sensor positioning #2Read value with ignition switch on (Do not
start engine)
THROTTLE MOT Throttle motor -
O2S B1 S2 Heated oxygen sensor outputPerforming INJ VOL or A/F CONTROL
function of ACTIVE TEST enables technician
to check voltage output of sensor
O2S B2 S2 Heated oxygen sensor outputPerforming INJ VOL or A/F CONTROL
function of ACTIVE TEST enables technician
to check voltage output of sensor
AFS B1 S1 A/F sensor outputPerforming INJ VOL or A/F CONTROL
function of ACTIVE TEST enables technician
to check voltage output of sensor
AFS B2 S1 A/F sensor outputPerforming INJ VOL or A/F CONTROL
function of ACTIVE TEST enables technician
to check voltage output of sensor
TOTAL FT #1 Total fuel trim of bank 1 -
TOTAL FT #2 Total fuel trim of bank 2 -
SHORT FT #1 Short-term fuel trim of bank 1Short-term fuel compensation used to
maintain air-fuel ratio at stoichiometric air-fuel
ratio
LONG FT #1 Long-term fuel trim of bank 1Overall fuel compensation carried out in long-
term to compensate for a continual deviation
of short-term fuel trim from central valve
SHORT FT #2 Short-term fuel trim of bank 2Short-term fuel compensation used to
maintain air-fuel ratio at stoichiometric air-fuel
ratio
LONG FT #2 Long-term fuel trim of bank 2Overall fuel compensation carried out in long-
term to compensate for a continual deviation
of short-term fuel trim from central valve
FUEL SYS #1 Fuel system status (bank 1)• OL (Open Loop): Has not yet satisfied
conditions to go closed loop
• CL (Closed Loop): Using heated oxygen
sensor as feedback for fuel control
• OL DRIVE: Open loop due to driving
conditions (fuel enrichment)
• OL FAULT: Open loop due to detected
system fault
• CL FAULT: Closed loop but heated
oxygen sensor, which used for fuel control
malfunctioning
FUEL SYS #2 Fuel system status (bank 2)• OL (Open Loop): Has not yet satisfied
conditions to go closed loop
• CL (Closed Loop): Using heated oxygen
sensor as feedback for fuel control
• OL DRIVE: Open loop due to driving
conditions (fuel enrichment)
• OL FAULT: Open loop due to detected
system fault
• CL FAULT: Closed loop but heated
oxygen sensor, which used for fuel control
malfunctioning
O2FT B1 S2 Fuel trim at heated oxygen sensor Same as SHORT FT #1LABEL
(Intelligent Tester Display)Measurement Item Diagnostic Note
Page 835 of 3000
ES–5162GR-FE ENGINE CONTROL SYSTEM – ENGINE COOLANT TEMPERATURE SENSOR
ES
REMOVAL
1. DRAIN ENGINE COOLANT (See page CO-6)
2. REMOVE V-BANK COVER SUB-ASSEMBLY (See
page EM-28)
3. REMOVE NO. 2 AIR CLEANER INLET (See page EM-
28)
4. REMOVE NO. 1 AIR CLEANER INLET (See page EM-
28)
5. REMOVE AIR CLEANER CAP SUB-ASSEMBLY (See
page ES-493)
6. REMOVE AIR CLEANER CASE SUB-ASSEMBLY (See
page EM-28)
7. REMOVE ENGINE COOLANT TEMPERATURE
SENSOR
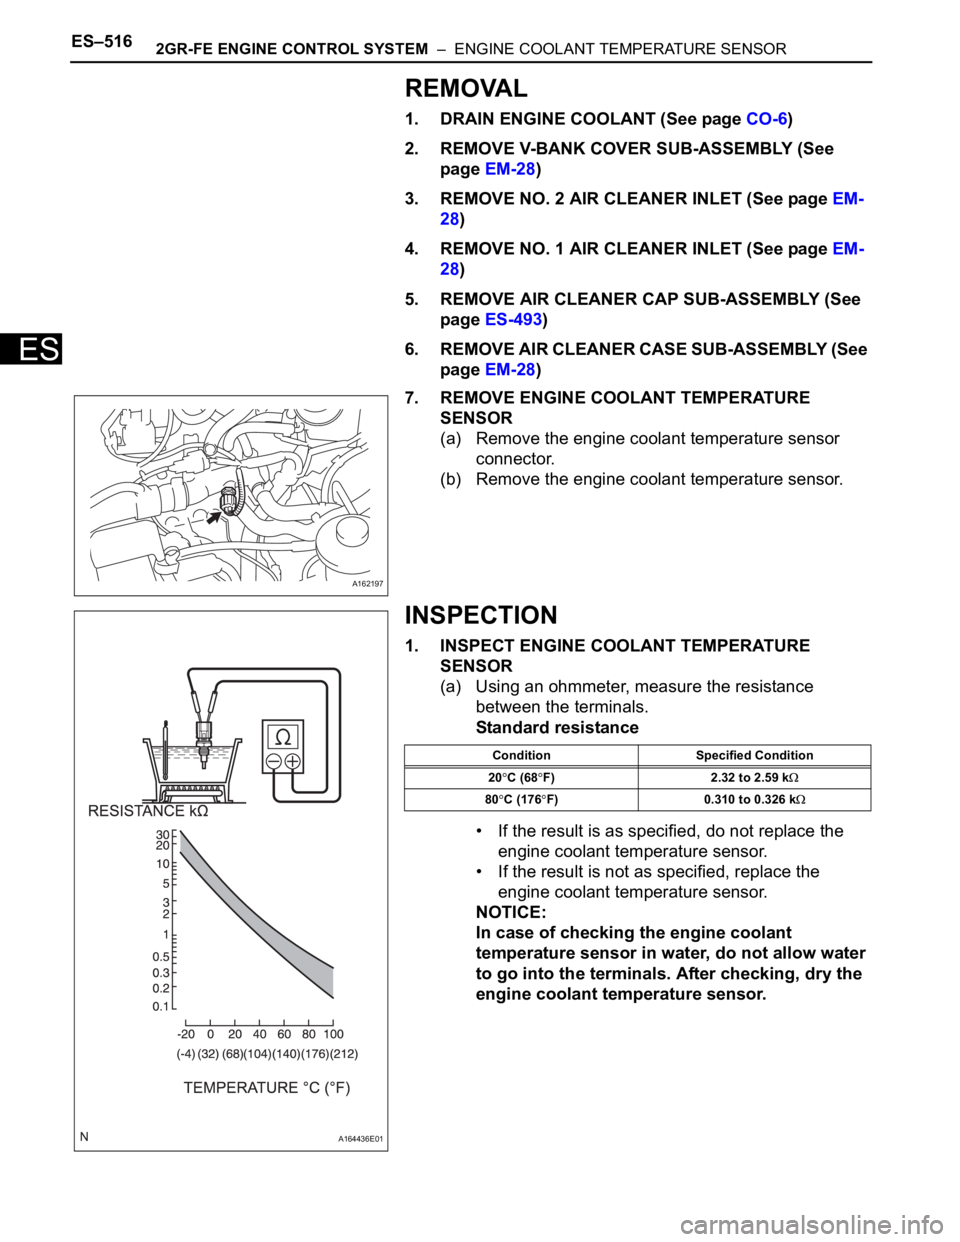
(a) Remove the engine coolant temperature sensor
connector.
(b) Remove the engine coolant temperature sensor.
INSPECTION
1. INSPECT ENGINE COOLANT TEMPERATURE
SENSOR
(a) Using an ohmmeter, measure the resistance
between the terminals.
Standard resistance
• If the result is as specified, do not replace the
engine coolant temperature sensor.
• If the result is not as specified, replace the
engine coolant temperature sensor.
NOTICE:
In case of checking the engine coolant
temperature sensor in water, do not allow water
to go into the terminals. After checking, dry the
engine coolant temperature sensor.
A162197
A164436E01
Condition Specified Condition
20
C (68F) 2.32 to 2.59 k
80C (176F) 0.310 to 0.326 k