Page 49 of 203
xxxix
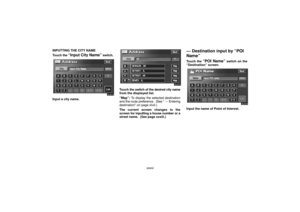
Touch the switch of the desired city name
from the displayed list.
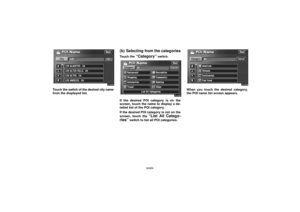
(b) Selecting from the categories
Touch the “Category” switch.
If the desired POI category is on the
screen, touch the name to display a de-
tailed list of the POI category.
If the desired POI category is not on the
screen, touch the
“List All Catego-
ries”
switch to list all POI categories.
When you touch the desired category,
the POI name list screen appears.
Page 50 of 203
xl
— Destination input by “POI
Category”
The destination can be set by selecting
the POI category and the search point.
Touch the
“POI Category” switch on
the “Destination” screen.
(a) Selecting the POI category
If the desired POI category is on the
screen, touch the name to display a de-
tailed list of the POI category.
If the desired POI category is not on the
screen, touch the
“List All Catego-
ries”
switch to list all POI categories.
Touch the desired POI category from the
list.
The selected category icon appears on the
top left of the screen.
If you wish to delete the selected category,
touch the
“Delete” switch.
If you wish to select another category, touch
the
“OK” switch to return the previous
screen.If you wish to select a destination from the
category displayed by the icon, touch the
“List” switch.
Page 51 of 203
xli
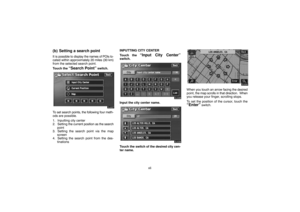
(b) Setting a search point
It is possible to display the names of POIs lo-
cated within approximately 20 miles (30 km)
from the selected search point.
Touch the
“Search Point” switch.
To set search points, the following four meth-
ods are possible.
1. Inputting city center
2. Setting the current position as the search
point
3. Setting the search point via the map
screen
4. Setting the search point from the des-
tinationsINPUTTING CITY CENTER
Touch the
“Input City Center”switch.
Input the city center name.
Touch the switch of the desired city cen-
ter name.
When you touch an arrow facing the desired
point, the map scrolls in that direction. When
you release your finger, scrolling stops.
To set the position of the cursor, touch the
“Enter” switch.
Page 52 of 203
xlii SETTING THE CURRENT POSITION AS
THE SEARCH POINT
Touch the
“Current Position” switch.
When you touch an arrow facing the desired
point, the map scrolls in that direction. When
you release your finger, scrolling stops.
To set the position of the cursor, touch the
“Enter” switch.SETTING THE SEARCH POINT VIA THE
MAP SCREEN
Touch the
“Map” switch.
When you touch an arrow facing the desired
point, the map scrolls in that direction. When
you release your finger, scrolling stops.
To set the position of the cursor, touch the
“Enter” switch.SETTING THE SEARCH POINT FROM
THE DESTINATIONS
Touch the destination switches at the
bottom of the screen.
When you touch an arrow facing the desired
point, the map scrolls in that direction. When
you release your finger, scrolling stops.
To set the position of the cursor, touch the
“Enter” switch.
Page 53 of 203

xliii
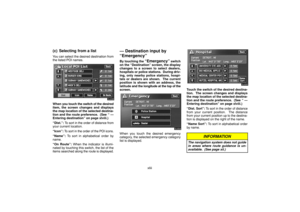
(c) Selecting from a list
You can select the desired destination from
the listed POI names.
When you touch the switch of the desired
item, the screen changes and displays
the map location of the selected destina-
tion and the route preference. (See
“ —
Entering destination” on page xlviii.)
“Dist.”: To sort in the order of distance from
your current location.
“Icon”: To sort in the order of the POI icons.
“Name”: To sort in alphabetical order by
name.
“On Route”: When the indicator is illumi-
nated by touching this switch, the list of the
items searched along the route is displayed.
— Destination input by
“Emergency”
By touching the “Emergency” switch
on the “Destination” screen, the display
changes to a screen to select dealers,
hospitals or police stations. During driv-
ing, only nearby police stations, hospi-
tals or dealers are shown. The current
position is shown with an address, the
latitude and the longitude at the top of the
screen.
When you touch the desired emergency
category, the selected emergency category
list is displayed.
Touch the switch of the desired destina-
tion. The screen changes and displays
the map location of the selected destina-
tion and the route preference. (See
“ —
Entering destination” on page xlviii.)
“Dist. Sort”: To sort in the order of distance
from your current position. The distance
from your current position up to the destina-
tion is displayed on the right of the name.
“Name Sort”: To sort in alphabetical order
by name.
INFORMATION
The navigation system does not guide
in areas where route guidance is un-
available. (See page xii.)
Page 54 of 203

xliv
— Destination input by
“Memory”
Touching the “Memory” switch on the
“Destination” screen displays your list of
registered memory points. See page
lxxvii for registering and editing memory
points.
When you touch the switch of your de-
sired memory point, the screen changes
and displays the map location of the se-
lected destination and the route prefer-
ence. (See “ — Entering destination” on
page xlviii.)There are 4 ways to list the memory point
by touching switches on the bottom of
the screen.
“Date”: To list the memory points in order of
registered date.
“Icon”: To list the memory points by the reg-
istered icon.
“Name”: To list the memory points in alpha-
betical order.
“Attribute”: To list the memory points by the
registered attribute.
— Destination input by
“Previous”
Touch the “Previous” switch on the
“Destination” screen.
The previous starting point and up to 99 pre-
viously set destinations are displayed on the
screen.
Touch the switch of the desired destina-
tion. The screen changes and displays
the map location of the selected destina-
tion and the route preference. (See “ —
Entering destination” on page xlviii.)
“Date”: To list the previous destinations in
order of registered date.
“Name”: To list the previous destinations in
alphabetical order.
Page 55 of 203
xlv
INFORMATION
You can delete the list of previous des-
tinations while your vehicle is stopped,
if you no longer need them. (See page
ciii.)
— Destination input by “Map”
Touch the “Map” switch on the “Des-
tination” screen.
The screen changes and displays the
map location that was previously dis-
played just before the destination input
operation and the route preference. (See
“ — Entering destination” on page xlviii.)
INFORMATION
Guidance starts if you touch the “En-
ter” switch even while driving. How-
ever, the cursor cannot be moved.
— Destination input by
“Intersection”
Touch the “Intersection” switch on
the “Destination” screen.
Input the name of the two intersecting
streets which are located near the des-
tination to be set.
Page 56 of 203
xlvi
Touch the switch of the desired item. Af-
ter inputting the two intersecting streets,
the screen changes and displays the
map location of the selected destination
and the route preference. (See “ — Enter-
ing destination” on page xlviii.)
If the same two streets cross at more than
one intersection, the screen changes and
displays the menu to select the city name
where the streets intersect. Select the city,
and the map location of the selected des-
tination and the route preference. (See “ —
Entering destination” on page xlviii.)
— Destination input by
“Freeway Ent./Exit”
To input a freeway entrance or exit, touch
the
“Freeway Ent./Exit” switch on
the “Destination” screen.
Be sure to use the complete name of the
freeway or highway, including the hyphen,
when entering the destination. Freeways
and interstates use an “I” (I−405). US high-
ways use the state designation before the
number (CA−118).