Page 3700 of 5883
BODY SIDE TRIM
INT-21
< ON-VEHICLE REPAIR >
C
D
E
F
G
H
I
K
L
MA
B
INT
N
O
P
FRONT PILLAR GARNISH
Removal
Release the clips, then remove front pillar garnish.
Installation
Installation is in the reverse order of removal.
FRONT KICKING PLATE INNER
Removal
Release the clips, then remove front kicking plate inner.
Installation
Installation is in the reverse order of removal.
FRONT KICKING PLATE OUTER
Removal
Release the clips, then remove front kicking plate outer.
Installation
PIIB2600J
PIIB2569J
PIIB2570J
PIIB2571J
Page 3701 of 5883
INT-22
< ON-VEHICLE REPAIR >
BODY SIDE TRIM
Installation is in the reverse order of removal.
REAR KICKING PLATE INNER
Removal
Release the clips, then remove rear kicking plate inner.
Installation
Installation is in the reverse order of removal.
REAR KICKING PLATE OUTER
Removal
Release the clips, then remove rear kicking plate outer.
Installation
Installation is in the reverse order of removal.
CENTER PILLAR LOWER GARNISH
Removal
1. Remove front kicking plate inner. Refer to "FRONT KICKING PLATE INNER".
2. Remove rear kicking plate inner. Refer to "REAR KICKING PLATE INNER".
3. Remove front and rear body side welts.
4. Release the clips, then remove center pillar lower garnish.
Installation
Installation is in the reverse order of removal.
CENTER PILLAR UPPER GARNISH
Removal
WARNING:
PIIB2573J
PIIB2572J
PIIB2574J
Page 3702 of 5883
BODY SIDE TRIM
INT-23
< ON-VEHICLE REPAIR >
C
D
E
F
G
H
I
K
L
MA
B
INT
N
O
P
Do not reuse center pillar upper garnish if removed.
1. Remove center pillar lower garnish. Refer to "CENTER PILLAR LOWER GARNISH".
2. Remove front seat belt shoulder anchor. Refer to SB-6,
"Removal and Installation of Front Seat Belt".
3. Remove front and rear body side welts.
4. Release the resin clips, then remove center pillar upper garnish.
Installation
Installation is in the reverse order of removal.
REAR PILLAR FINISHER
Removal
1. Remove rear seat cushion, rear seatback, and seatback side cushions. Refer to SE-18, "Removal and
Installation".
2. Remove rear body side welt.
3. Release the clips, then remove rear pillar finisher.
Installation
Installation is in the reverse order of removal.
PIIB2575J
Page 3704 of 5883

LUGGAGE FLOOR TRIM
INT-25
< ON-VEHICLE REPAIR >
C
D
E
F
G
H
I
K
L
MA
B
INT
N
O
P
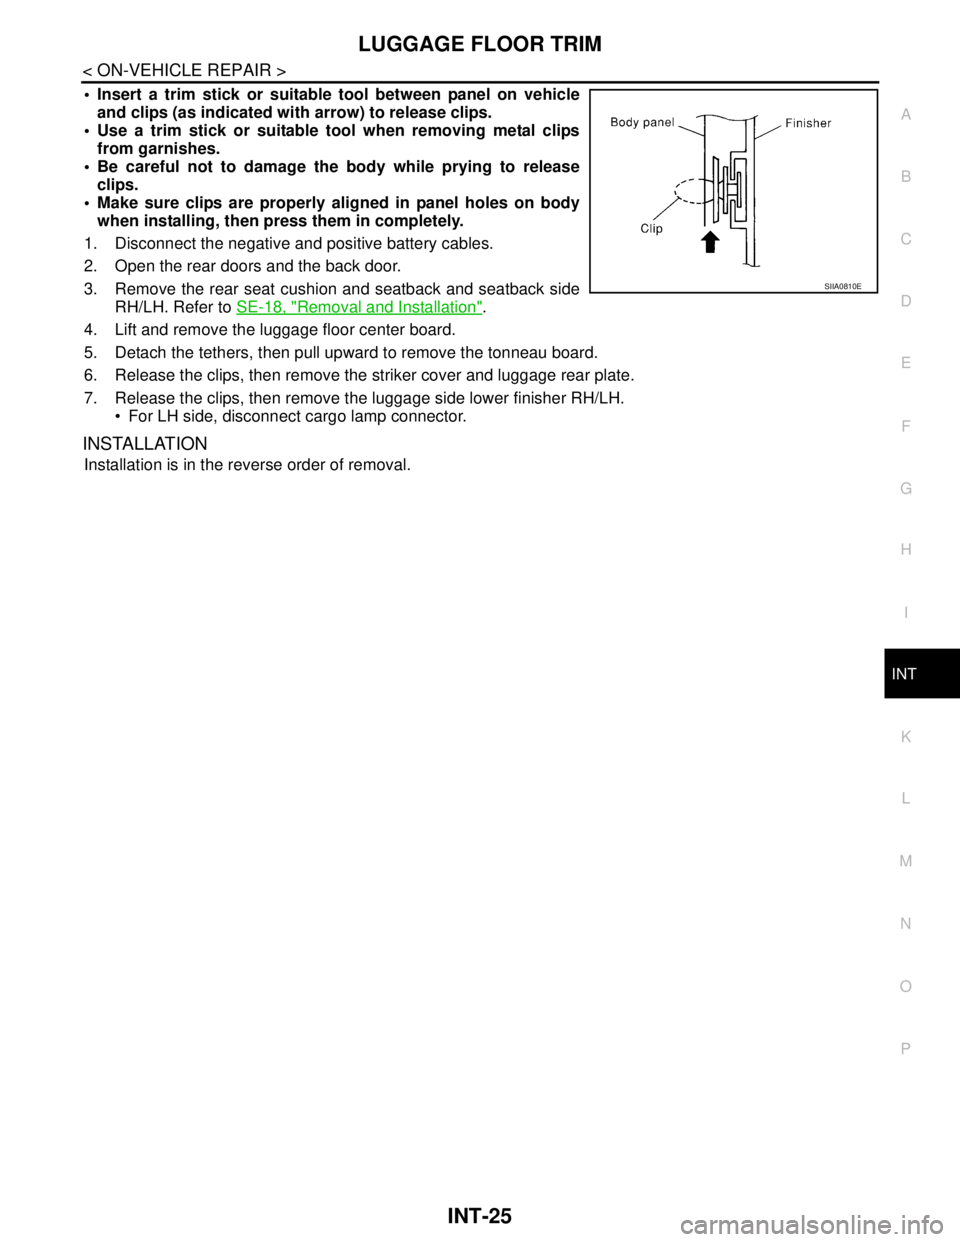
Insert a trim stick or suitable tool between panel on vehicle
and clips (as indicated with arrow) to release clips.
Use a trim stick or suitable tool when removing metal clips
from garnishes.
Be careful not to damage the body while prying to release
clips.
Make sure clips are properly aligned in panel holes on body
when installing, then press them in completely.
1. Disconnect the negative and positive battery cables.
2. Open the rear doors and the back door.
3. Remove the rear seat cushion and seatback and seatback side
RH/LH. Refer to SE-18, "
Removal and Installation".
4. Lift and remove the luggage floor center board.
5. Detach the tethers, then pull upward to remove the tonneau board.
6. Release the clips, then remove the striker cover and luggage rear plate.
7. Release the clips, then remove the luggage side lower finisher RH/LH.
For LH side, disconnect cargo lamp connector.
INSTALLATION
Installation is in the reverse order of removal.
SIIA0810E
Page 3705 of 5883
INT-26
< ON-VEHICLE REPAIR >
REAR PARCEL SHELF FINISHER
REAR PARCEL SHELF FINISHER
Removal and InstallationINFOID:0000000001329053
REMOVAL
1. Remove rear seat. Refer to SE-18, "Removal and Installation".
2. Remove rear pillar finisher. Refer to INT-20, "
Removal and Installation".
3. Remove high mounted stop lamp and disconnect connector.
4. Remove rear parcel shelf finisher.
INSTALLATION
Installation is in the reverse order of removal.
LIIA2923E
1. Rear seat belt shoulder anchor cover 2. Child anchor cover 3. Child anchor cover base
4. High mounted stop lamp 5. Rear parcel shelf finisher⇐Vehicle front
Page 3707 of 5883
INT-28
< ON-VEHICLE REPAIR >
FLOOR TRIM
6. Disconnect floor harness connector.
7. Remove diagnosis sensor unit. Refer to SR-15, "
Removal and
Installation".
8. Remove key interlock cable. Refer to TM-206, "
Removal and
Installation".
9. Remove floor carpet hook.
10. Cut floor trim using a blade knife first between openings (1),
then at front edge (2) as shown.
NOTE:
LHD shown, RHD similar
11. Release floor trim metal clips after cutting, then pull out floor trim through door opening.
12. Remove floor spacer RH/LH.
INSTALLATION
Installation is in the reverse order of removal.
CAUTION:
When replacing the floor trim with a new one, prepare for installation by cutting it like the old one.
Make sure there is a quality fit between floor trim and instrument lower cover by tucking the cut edge
completely.
PIIB6046E
PIIB2580J
PIIB6047E
Page 3711 of 5883

INT-32
< ON-VEHICLE REPAIR >
HEADLINING
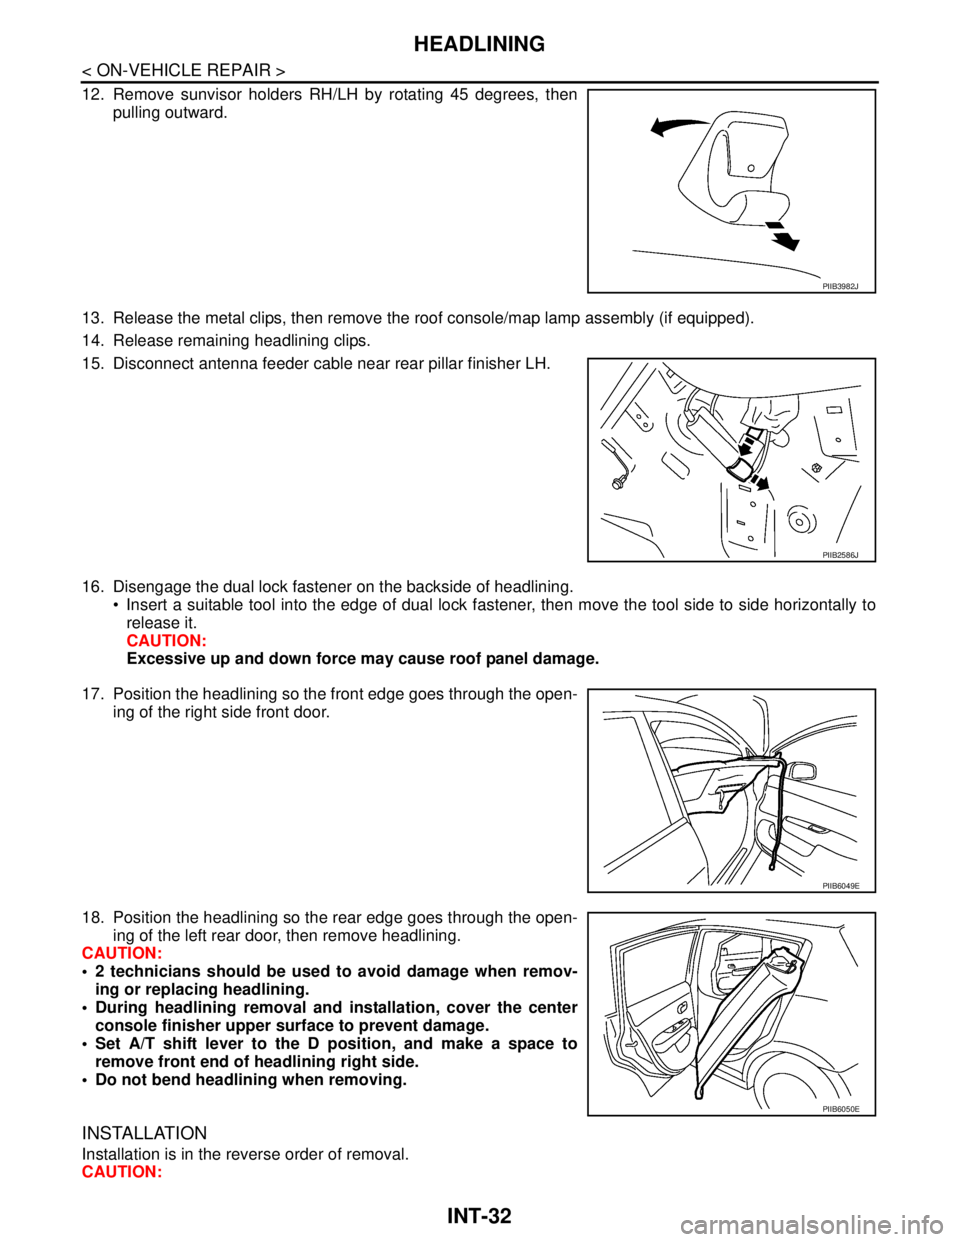
12. Remove sunvisor holders RH/LH by rotating 45 degrees, then
pulling outward.
13. Release the metal clips, then remove the roof console/map lamp assembly (if equipped).
14. Release remaining headlining clips.
15. Disconnect antenna feeder cable near rear pillar finisher LH.
16. Disengage the dual lock fastener on the backside of headlining.
Insert a suitable tool into the edge of dual lock fastener, then move the tool side to side horizontally to
release it.
CAUTION:
Excessive up and down force may cause roof panel damage.
17. Position the headlining so the front edge goes through the open-
ing of the right side front door.
18. Position the headlining so the rear edge goes through the open-
ing of the left rear door, then remove headlining.
CAUTION:
2 technicians should be used to avoid damage when remov-
ing or replacing headlining.
During headlining removal and installation, cover the center
console finisher upper surface to prevent damage.
Set A/T shift lever to the D position, and make a space to
remove front end of headlining right side.
Do not bend headlining when removing.
INSTALLATION
Installation is in the reverse order of removal.
CAUTION:
PIIB3982J
PIIB2586J
PIIB6049E
PIIB6050E
Page 3713 of 5883

INT-34
< ON-VEHICLE REPAIR >
HEADLINING
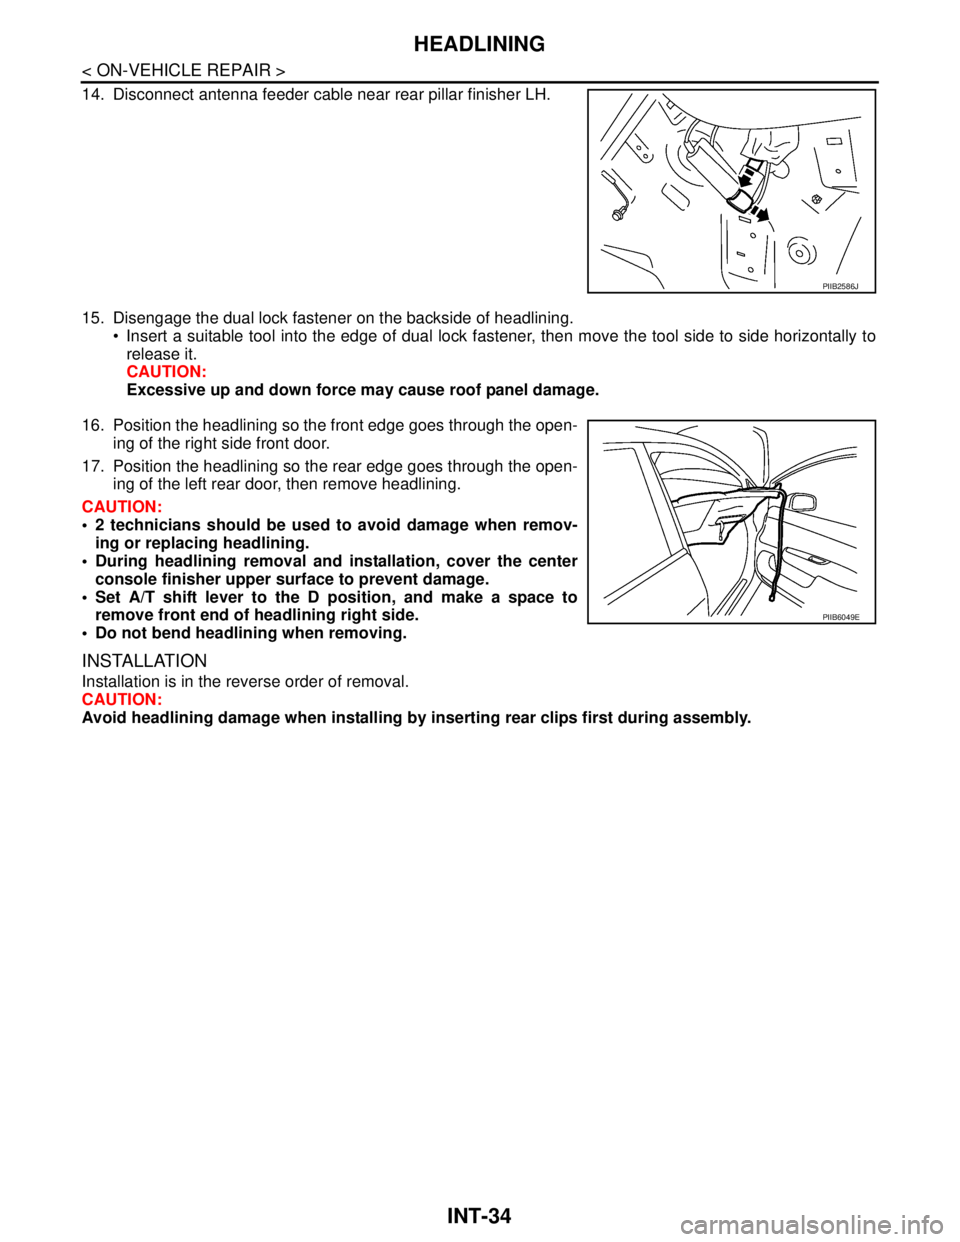
14. Disconnect antenna feeder cable near rear pillar finisher LH.
15. Disengage the dual lock fastener on the backside of headlining.
Insert a suitable tool into the edge of dual lock fastener, then move the tool side to side horizontally to
release it.
CAUTION:
Excessive up and down force may cause roof panel damage.
16. Position the headlining so the front edge goes through the open-
ing of the right side front door.
17. Position the headlining so the rear edge goes through the open-
ing of the left rear door, then remove headlining.
CAUTION:
2 technicians should be used to avoid damage when remov-
ing or replacing headlining.
During headlining removal and installation, cover the center
console finisher upper surface to prevent damage.
Set A/T shift lever to the D position, and make a space to
remove front end of headlining right side.
Do not bend headlining when removing.
INSTALLATION
Installation is in the reverse order of removal.
CAUTION:
Avoid headlining damage when installing by inserting rear clips first during assembly.
PIIB2586J
PIIB6049E