Page 131 of 148

CYLINDER BLOCK
EM-131
C
D
E
F
G
H
I
J
K
L
MA
EM
Revision: 2006 November2007 350Z
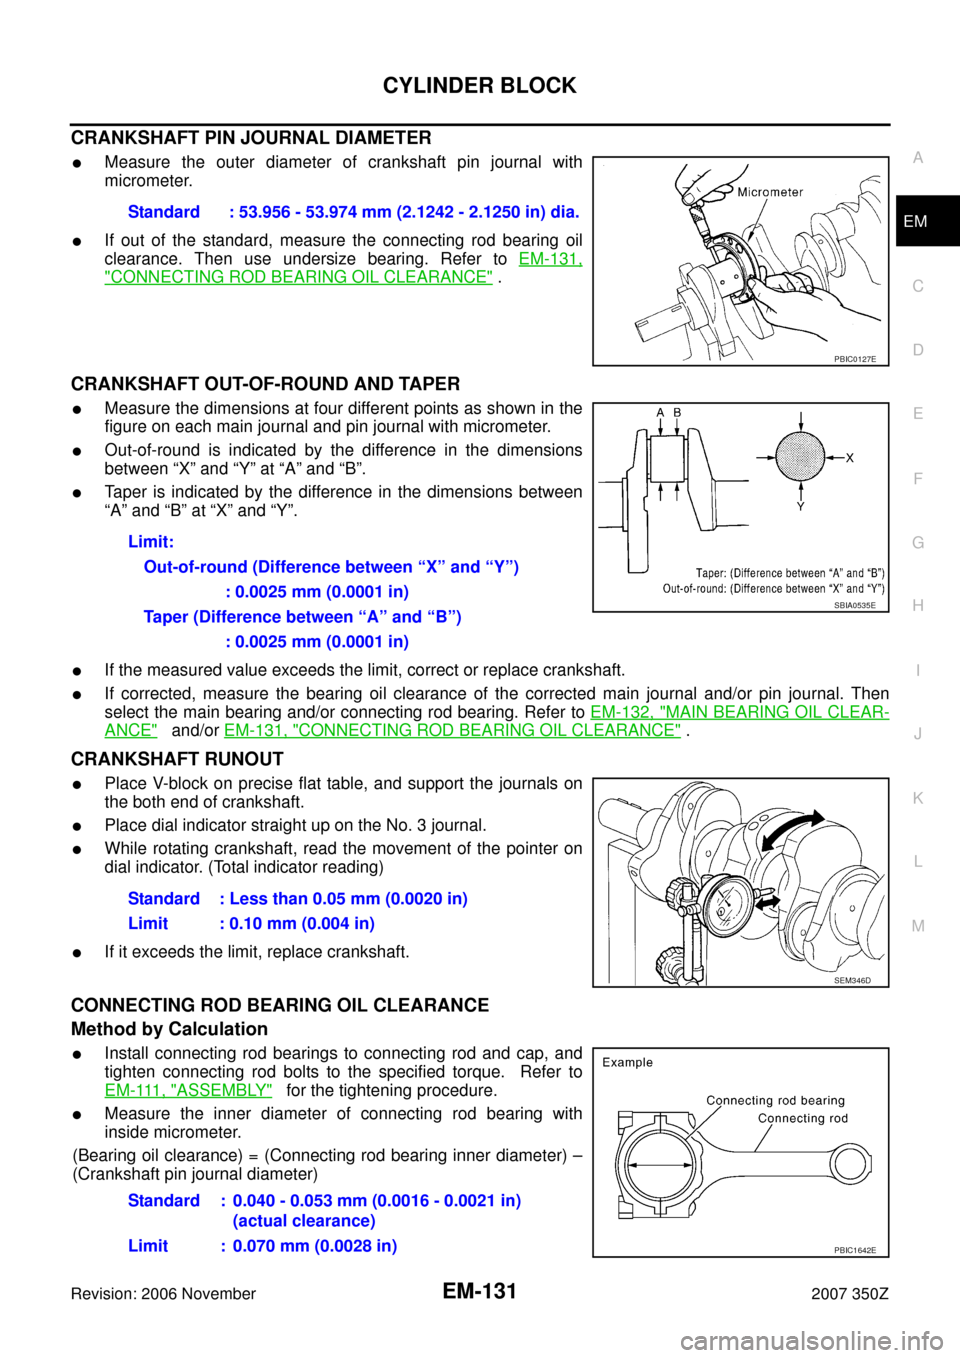
CRANKSHAFT PIN JOURNAL DIAMETER
�Measure the outer diameter of crankshaft pin journal with
micrometer.
�If out of the standard, measure the connecting rod bearing oil
clearance. Then use undersize bearing. Refer to EM-131,
"CONNECTING ROD BEARING OIL CLEARANCE" .
CRANKSHAFT OUT-OF-ROUND AND TAPER
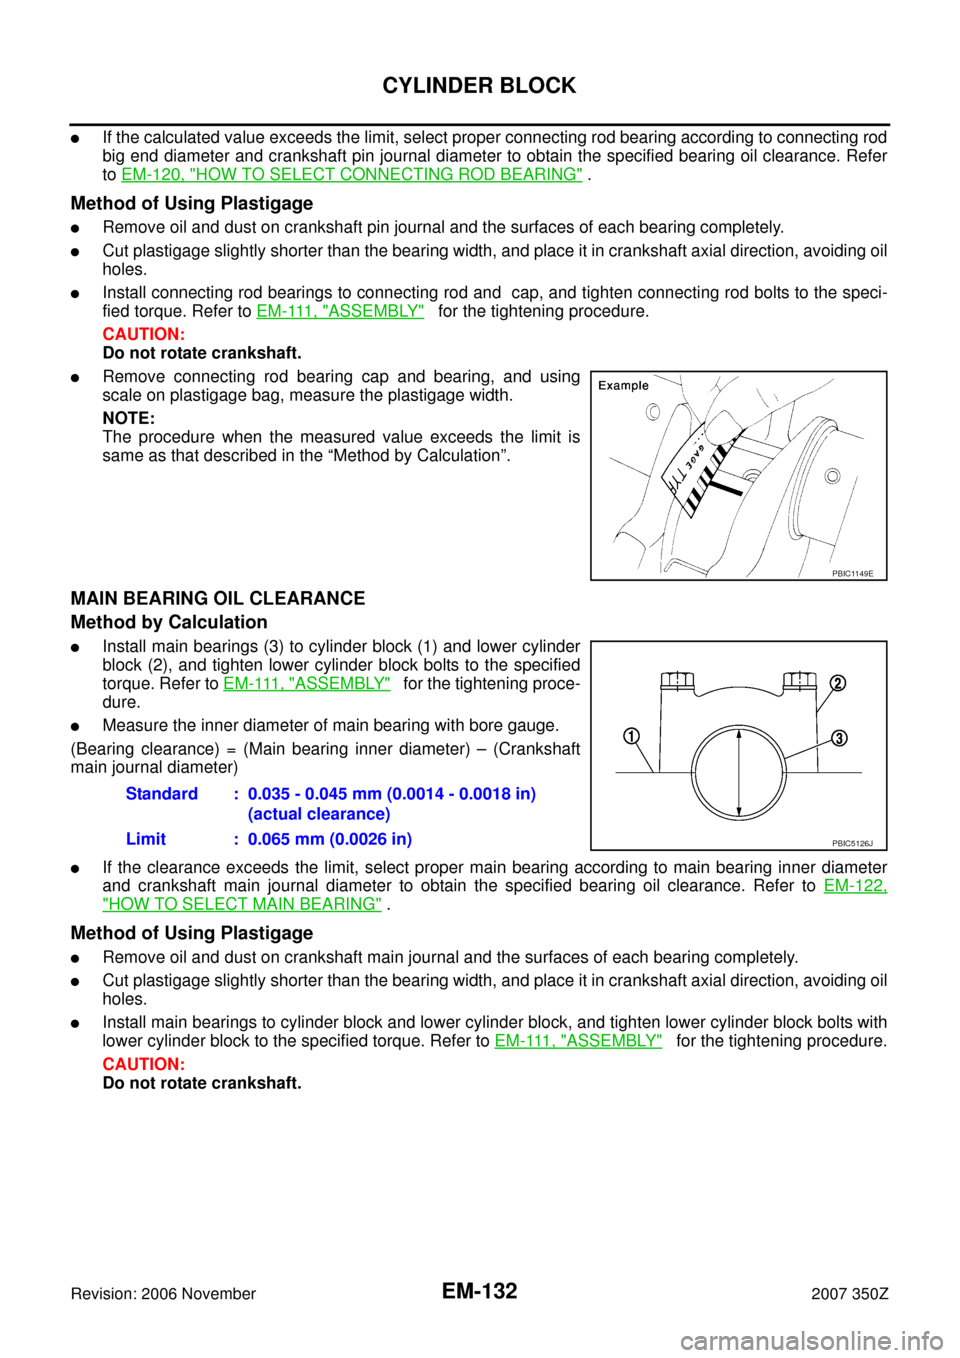
�Measure the dimensions at four different points as shown in the
figure on each main journal and pin journal with micrometer.
�Out-of-round is indicated by the difference in the dimensions
between “X” and “Y” at “A” and “B”.
�Taper is indicated by the difference in the dimensions between
“A” and “B” at “X” and “Y”.
�If the measured value exceeds the limit, correct or replace crankshaft.
�If corrected, measure the bearing oil clearance of the corrected main journal and/or pin journal. Then
select the main bearing and/or connecting rod bearing. Refer to EM-132, "
MAIN BEARING OIL CLEAR-
ANCE" and/or EM-131, "CONNECTING ROD BEARING OIL CLEARANCE" .
CRANKSHAFT RUNOUT
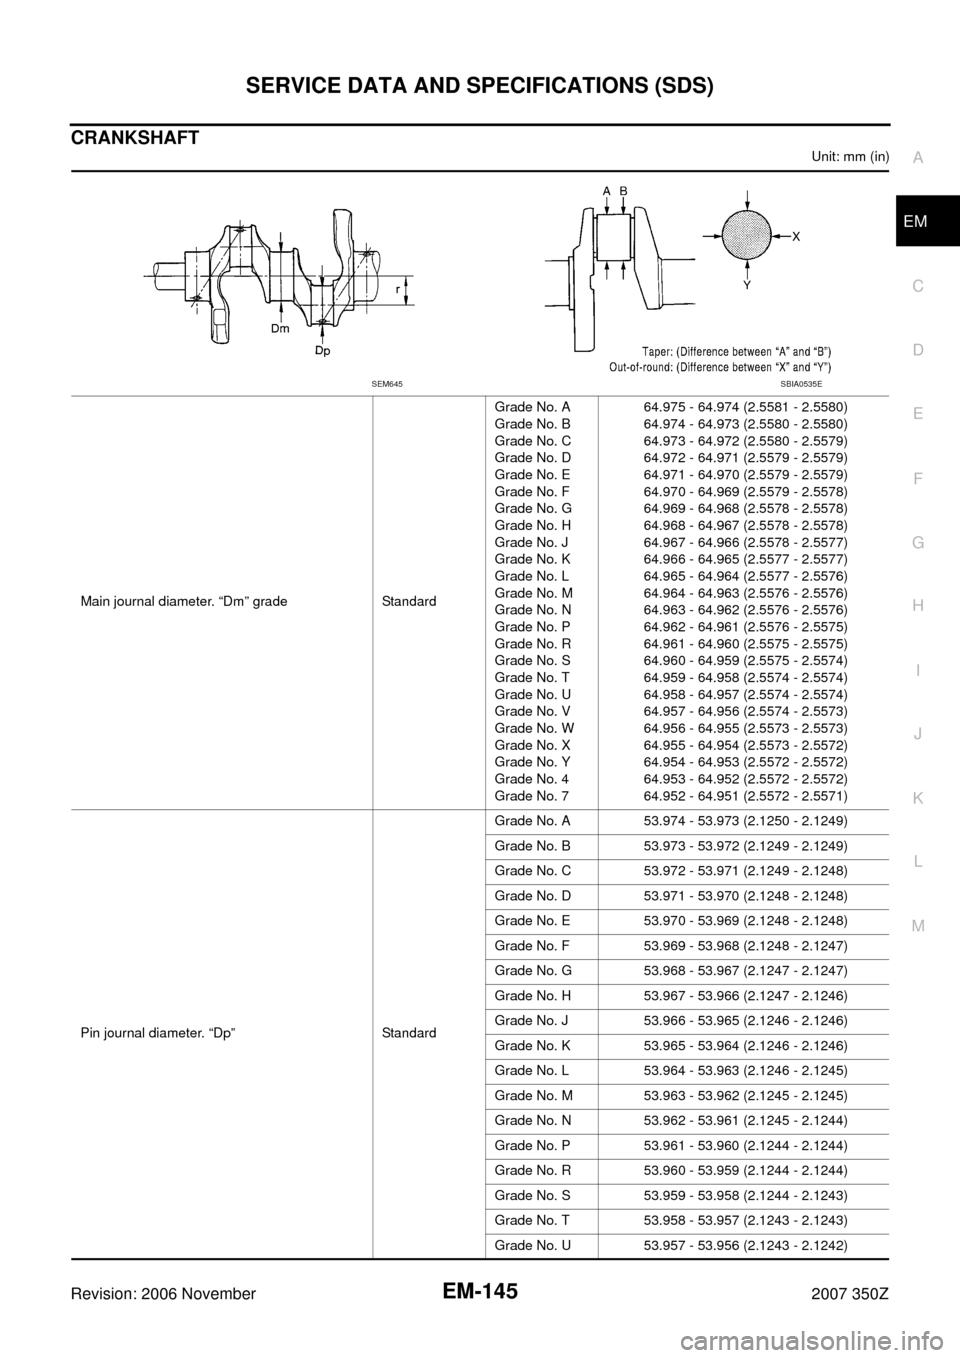
�Place V-block on precise flat table, and support the journals on
the both end of crankshaft.
�Place dial indicator straight up on the No. 3 journal.
�While rotating crankshaft, read the movement of the pointer on
dial indicator. (Total indicator reading)
�If it exceeds the limit, replace crankshaft.
CONNECTING ROD BEARING OIL CLEARANCE
Method by Calculation
�Install connecting rod bearings to connecting rod and cap, and
tighten connecting rod bolts to the specified torque. Refer to
E M - 111 , "
ASSEMBLY" for the tightening procedure.
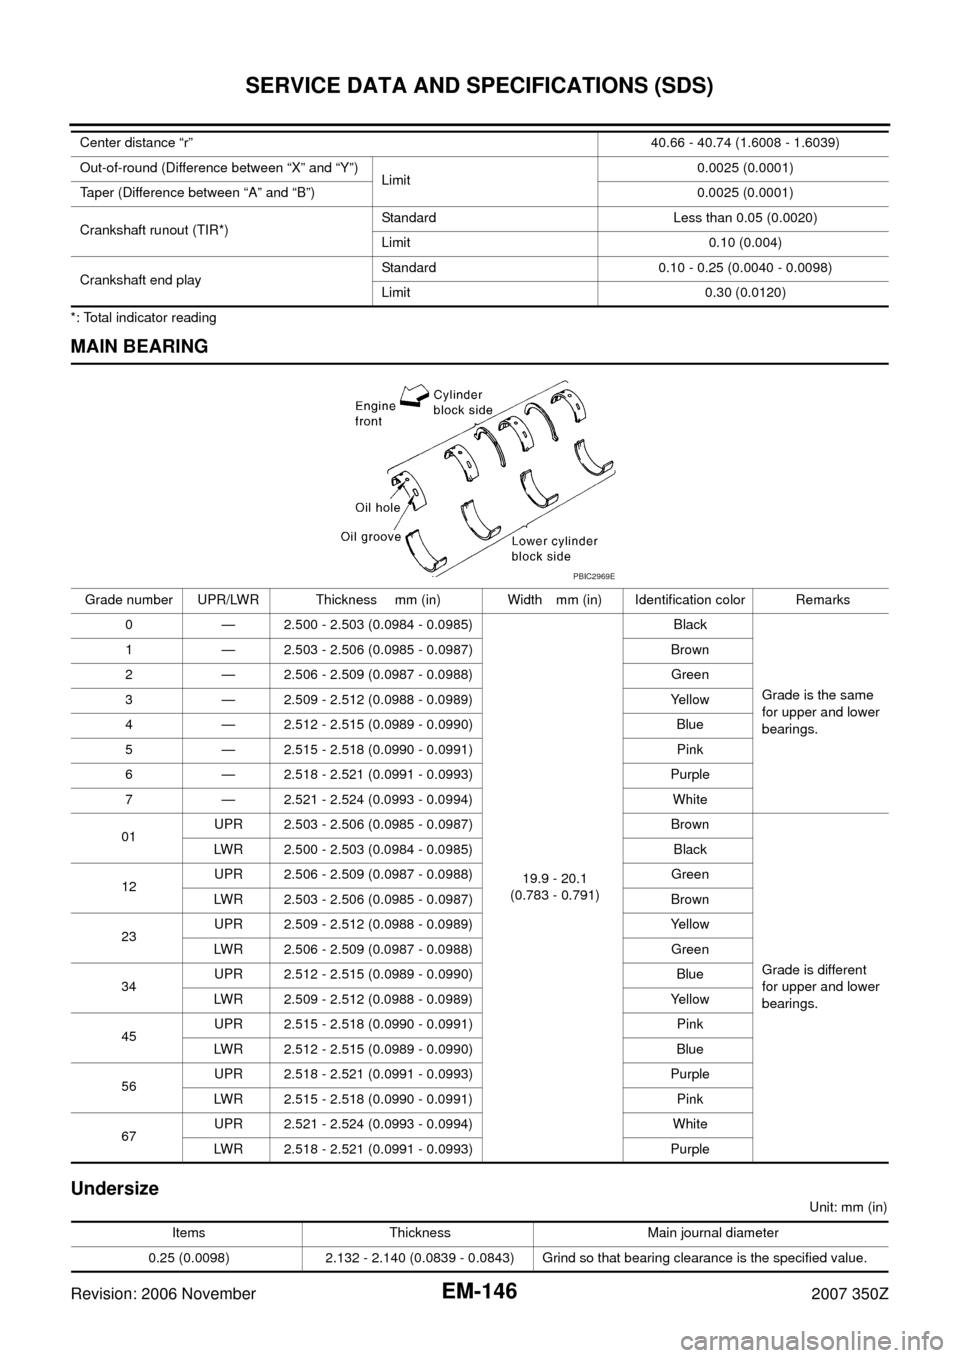
�Measure the inner diameter of connecting rod bearing with
inside micrometer.
(Bearing oil clearance) = (Connecting rod bearing inner diameter) –
(Crankshaft pin journal diameter)Standard : 53.956 - 53.974 mm (2.1242 - 2.1250 in) dia.
PBIC0127E
Limit:
Out-of-round (Difference between “X” and “Y”)
: 0.0025 mm (0.0001 in)
Taper (Difference between “A” and “B”)
: 0.0025 mm (0.0001 in)
SBIA0535E
Standard : Less than 0.05 mm (0.0020 in)
Limit : 0.10 mm (0.004 in)
SEM346D
Standard : 0.040 - 0.053 mm (0.0016 - 0.0021 in)
(actual clearance)
Limit : 0.070 mm (0.0028 in)
PBIC1642E
Page 132 of 148

EM-132
CYLINDER BLOCK
Revision: 2006 November2007 350Z
�If the calculated value exceeds the limit, select proper connecting rod bearing according to connecting rod
big end diameter and crankshaft pin journal diameter to obtain the specified bearing oil clearance. Refer
to EM-120, "
HOW TO SELECT CONNECTING ROD BEARING" .
Method of Using Plastigage
�Remove oil and dust on crankshaft pin journal and the surfaces of each bearing completely.
�Cut plastigage slightly shorter than the bearing width, and place it in crankshaft axial direction, avoiding oil
holes.
�Install connecting rod bearings to connecting rod and cap, and tighten connecting rod bolts to the speci-
fied torque. Refer to E M - 111 , "
ASSEMBLY" for the tightening procedure.
CAUTION:
Do not rotate crankshaft.
�Remove connecting rod bearing cap and bearing, and using
scale on plastigage bag, measure the plastigage width.
NOTE:
The procedure when the measured value exceeds the limit is
same as that described in the “Method by Calculation”.
MAIN BEARING OIL CLEARANCE
Method by Calculation
�Install main bearings (3) to cylinder block (1) and lower cylinder
block (2), and tighten lower cylinder block bolts to the specified
torque. Refer to EM-111, "
ASSEMBLY" for the tightening proce-
dure.
�Measure the inner diameter of main bearing with bore gauge.
(Bearing clearance) = (Main bearing inner diameter) – (Crankshaft
main journal diameter)
�If the clearance exceeds the limit, select proper main bearing according to main bearing inner diameter
and crankshaft main journal diameter to obtain the specified bearing oil clearance. Refer to EM-122,
"HOW TO SELECT MAIN BEARING" .
Method of Using Plastigage
�Remove oil and dust on crankshaft main journal and the surfaces of each bearing completely.
�Cut plastigage slightly shorter than the bearing width, and place it in crankshaft axial direction, avoiding oil
holes.
�Install main bearings to cylinder block and lower cylinder block, and tighten lower cylinder block bolts with
lower cylinder block to the specified torque. Refer to E M - 111 , "
ASSEMBLY" for the tightening procedure.
CAUTION:
Do not rotate crankshaft.
PBIC1149E
Standard : 0.035 - 0.045 mm (0.0014 - 0.0018 in)
(actual clearance)
Limit : 0.065 mm (0.0026 in)
PBIC5126J
Page 145 of 148

SERVICE DATA AND SPECIFICATIONS (SDS)
EM-145
C
D
E
F
G
H
I
J
K
L
MA
EM
Revision: 2006 November2007 350Z
CRANKSHAFT
Unit: mm (in)
Main journal diameter. “Dm” grade StandardGrade No. A
Grade No. B
Grade No. C
Grade No. D
Grade No. E
Grade No. F
Grade No. G
Grade No. H
Grade No. J
Grade No. K
Grade No. L
Grade No. M
Grade No. N
Grade No. P
Grade No. R
Grade No. S
Grade No. T
Grade No. U
Grade No. V
Grade No. W
Grade No. X
Grade No. Y
Grade No. 4
Grade No. 764.975 - 64.974 (2.5581 - 2.5580)
64.974 - 64.973 (2.5580 - 2.5580)
64.973 - 64.972 (2.5580 - 2.5579)
64.972 - 64.971 (2.5579 - 2.5579)
64.971 - 64.970 (2.5579 - 2.5579)
64.970 - 64.969 (2.5579 - 2.5578)
64.969 - 64.968 (2.5578 - 2.5578)
64.968 - 64.967 (2.5578 - 2.5578)
64.967 - 64.966 (2.5578 - 2.5577)
64.966 - 64.965 (2.5577 - 2.5577)
64.965 - 64.964 (2.5577 - 2.5576)
64.964 - 64.963 (2.5576 - 2.5576)
64.963 - 64.962 (2.5576 - 2.5576)
64.962 - 64.961 (2.5576 - 2.5575)
64.961 - 64.960 (2.5575 - 2.5575)
64.960 - 64.959 (2.5575 - 2.5574)
64.959 - 64.958 (2.5574 - 2.5574)
64.958 - 64.957 (2.5574 - 2.5574)
64.957 - 64.956 (2.5574 - 2.5573)
64.956 - 64.955 (2.5573 - 2.5573)
64.955 - 64.954 (2.5573 - 2.5572)
64.954 - 64.953 (2.5572 - 2.5572)
64.953 - 64.952 (2.5572 - 2.5572)
64.952 - 64.951 (2.5572 - 2.5571)
Pin journal diameter. “Dp” StandardGrade No. A 53.974 - 53.973 (2.1250 - 2.1249)
Grade No. B 53.973 - 53.972 (2.1249 - 2.1249)
Grade No. C 53.972 - 53.971 (2.1249 - 2.1248)
Grade No. D 53.971 - 53.970 (2.1248 - 2.1248)
Grade No. E 53.970 - 53.969 (2.1248 - 2.1248)
Grade No. F 53.969 - 53.968 (2.1248 - 2.1247)
Grade No. G 53.968 - 53.967 (2.1247 - 2.1247)
Grade No. H 53.967 - 53.966 (2.1247 - 2.1246)
Grade No. J 53.966 - 53.965 (2.1246 - 2.1246)
Grade No. K 53.965 - 53.964 (2.1246 - 2.1246)
Grade No. L 53.964 - 53.963 (2.1246 - 2.1245)
Grade No. M 53.963 - 53.962 (2.1245 - 2.1245)
Grade No. N 53.962 - 53.961 (2.1245 - 2.1244)
Grade No. P 53.961 - 53.960 (2.1244 - 2.1244)
Grade No. R 53.960 - 53.959 (2.1244 - 2.1244)
Grade No. S 53.959 - 53.958 (2.1244 - 2.1243)
Grade No. T 53.958 - 53.957 (2.1243 - 2.1243)
Grade No. U 53.957 - 53.956 (2.1243 - 2.1242)
SEM645SBIA0535E
Page 146 of 148

EM-146
SERVICE DATA AND SPECIFICATIONS (SDS)
Revision: 2006 November2007 350Z
*: Total indicator reading
MAIN BEARING
Undersize
Unit: mm (in) Center distance “r”40.66 - 40.74 (1.6008 - 1.6039)
Out-of-round (Difference between “X” and “Y”)
Limit0.0025 (0.0001)
Taper (Difference between “A” and “B”) 0.0025 (0.0001)
Crankshaft runout (TIR*)Standard Less than 0.05 (0.0020)
Limit 0.10 (0.004)
Crankshaft end playStandard 0.10 - 0.25 (0.0040 - 0.0098)
Limit 0.30 (0.0120)
Grade number UPR/LWR Thickness mm (in) Width mm (in) Identification color Remarks
0 — 2.500 - 2.503 (0.0984 - 0.0985)
19.9 - 20.1
(0.783 - 0.791)Black
Grade is the same
for upper and lower
bearings. 1 — 2.503 - 2.506 (0.0985 - 0.0987) Brown
2 — 2.506 - 2.509 (0.0987 - 0.0988) Green
3 — 2.509 - 2.512 (0.0988 - 0.0989) Yellow
4 — 2.512 - 2.515 (0.0989 - 0.0990) Blue
5 — 2.515 - 2.518 (0.0990 - 0.0991) Pink
6 — 2.518 - 2.521 (0.0991 - 0.0993) Purple
7 — 2.521 - 2.524 (0.0993 - 0.0994) White
01UPR 2.503 - 2.506 (0.0985 - 0.0987) Brown
Grade is different
for upper and lower
bearings. LWR 2.500 - 2.503 (0.0984 - 0.0985) Black
12UPR 2.506 - 2.509 (0.0987 - 0.0988) Green
LWR 2.503 - 2.506 (0.0985 - 0.0987) Brown
23UPR 2.509 - 2.512 (0.0988 - 0.0989) Yellow
LWR 2.506 - 2.509 (0.0987 - 0.0988) Green
34UPR 2.512 - 2.515 (0.0989 - 0.0990) Blue
LWR 2.509 - 2.512 (0.0988 - 0.0989) Yellow
45UPR 2.515 - 2.518 (0.0990 - 0.0991) Pink
LWR 2.512 - 2.515 (0.0989 - 0.0990) Blue
56UPR 2.518 - 2.521 (0.0991 - 0.0993) Purple
LWR 2.515 - 2.518 (0.0990 - 0.0991) Pink
67UPR 2.521 - 2.524 (0.0993 - 0.0994) White
LWR 2.518 - 2.521 (0.0991 - 0.0993) Purple
PBIC2969E
Items Thickness Main journal diameter
0.25 (0.0098) 2.132 - 2.140 (0.0839 - 0.0843) Grind so that bearing clearance is the specified value.