Page 985 of 1575
Page 986 of 1575

2007 > 2.7L V6 GASOLINE >
DESCRIPTION
GENERAL DATA
The steering angle speed sensor detects the angle of the steering wheel in order to which direction a user chooses.
MEASUREING PRINCIPLE
A non contact, analog angle sensor carrying out absolute measuring by the use of the Anisotropic - Magneto- Resistive
effect (AMR).Measuring of the absolute angle by means of a toothed measuring gear with magnetic properties in
combination with different ratios. Corresponding AMR elements that change their electrical resistance according to the
magnetic field direction detect the angle position of the measuring gears.A micro- controller decodes the measured
voltage signals after A/D converting with the help of a mathematical function. Output of the digital angle value and
velocity via CAN- interface.
SPECIFICATION
Description Specification
Operating voltage 8~16 V
Operating temperature - 40 ~ 85 °C
Current consumption Max.150 mA
Steering angle velocity Max. ±2000 °/sec
Connection delay time t < 200 ms
Reverse voltage - 13.5 V
Measuring range Angle
- 780 ° ~ 779 °
Angular velocity 0~ 1016 °/s
Nonlinearity angle - 2.5 ° ~ +2.5 °
Hysteresis angle 0 ° ~ 5 °
Rotational friction torque measuring 10 °/s
CIRCUIT DIAGRAM( STEERING WHEEL SPEED ANGLE SENSOR)
STEERING ANGLE SENSOR (SAS) calibration
1.PURPOSE OF calibration
a. On vehicle control, an ESP analyzes the intention of the driver.
b. An ESP recognizes a steering angle which a driver rotates through the steering angle sensor.
Page 987 of 1575
c.A steering angle sensor used in ESP adjusts 0° setting of steering wheel through K- line or CAN
communication.
2. STEERING ANGLE SENSOR (SAS) CALIBRATION METHOD
(1) Align the wheel to the straight line. (steering wheel < ± 5° )
ex) Perform the wheel alignment first.
Align the wheel to the straight line.
A driver moves the vehicle to the front and back about 5 meters twice or three times.
(2) Connect Scan tool to the vehicle.
(3) Select Brake system.
(4) Select Steering angle sensor(SAS) calibration.
(5)Perform the Steering angle sensor(SAS) calibration.
(6)Perform the procedure continuously.
Page 988 of 1575
(7)The procedure is finished. Push the "ESC" key.
(8)Scanner OFF.
(9) Remove the scanner from the vehicle.
(10) Confirm the Steering angle sensor(SAS) calibration as driving the vehicle.(turn left once, turn right once)
Page 1075 of 1575
9.Installation is the reverse of removal.
CRASH PAD REPLACEMENT
a.When prying with a flat- tipped screwdriver, wrap itwith protective tape, and apply protective tapearound the
related parts, to prevent damage.
b. Put on gloves to protect your hands.
1. Remove the following items.
a. Front seat.
b. Cluster facia panel, cluster.
c. Audio assembly.
d. Glove box.
e. Side cover, center under cover.
f. Front pillar trim.
2. Remove the photo sensor (C), speaker connector (B).
3. Disconnect the passenger`s air bag connector (A).
Loosen the bolt and nut, then remove the crash pad (D).
4. Installation is the reverse of removal.
a.Make sure the crash pad fits onto the guide pins correctly.
b. Before tightening the bolts, make sure the crash pad wire harnesses are not pinched.
c. Make sure the connectors are plugged in properly, and the antenna lead is connected properly.
d. Enter the anti- theft code for the radio, then enter.
[LHD]
Page 1211 of 1575

2007 > 2.7L V6 GASOLINE >
DESCRIPTION
All modules are linked a low speed CAN network.
The input information for the modules is coming from both the CAN network and the hardware components
(actuatorsand sensors).
a. FAM (Front Area Module)
a. Headlamp low/high beam control (with DRL)
b. Park lamp control
c. Front fog lamp control
d. Front turn signal lamp control
e. Windshield wiper control
f. Windshield deicer
g. Diagnostics
b. IPM (In - Panel Module)
a. RKE (Remote Keyless Control)
b. VAS (Voice Alarm System)
c. Ignition key hole illumination
d. Switch indicators control
e. Panel light control
f. Seat belt warning
g. Auto light/DRL control (Logic)
h. Windshield/Rear wiper control (Logic)
i. Turn and Hazard lamp control (Logic)
j. Central door lock (Logic)
k. Windshield deicer timer
l. Rear glass defog timer
m. Gateway for ISO- 9141 (K- Line)
c. RAM (Rear Area Module)
a. Tail lamp control
b. Turn and Hazard lamp control
c. Back up lamp control
d. Rea fog lamp control
e. Stop lamp outage detection
f. Sliding door power window/Quarter glass control
g. Room lamp control
h. Rear wiper control
i. Rear glass defog
j. Fuel filler door open solenoid control
d. ADM (Assist Drive Module)
e. DDM (Driver Drive Module)
MODULE INTRODUCTION
FAM/IPM/RAM consists of a power board and an electronic board. The power board contains circuit protection devices
and switching devices. The electronic board uses Intelligent Power Switching (IPS) for HS/LS load control, logic
functions and CAN/K- Line communication. The power board and electronic board are connected with pin blocks for
the Front Area Module (FAM) and VCD (Variable Connection Displacement) for the In- Panel Module (IPM) and the
Rear Area Module (RAM).
Page 1212 of 1575
Functions
Exterior Lighting Functions
The exterior lighting function has to provide the lighting and signalling of the vehicle; it monitors different available
lights in front or at the back of the vehicle: a. Park and Tail lamps (with Side marker lamps),
b. License plate lamps,
c. Head lamps Low Beam,
d. Head lamps High Beam,
e. Front and Rear fog lamps (with the Rear fog lamp switch indicator),
f. Stop lamps,
g. Backup lamps,
h. Turn signal and side repeater lamps.
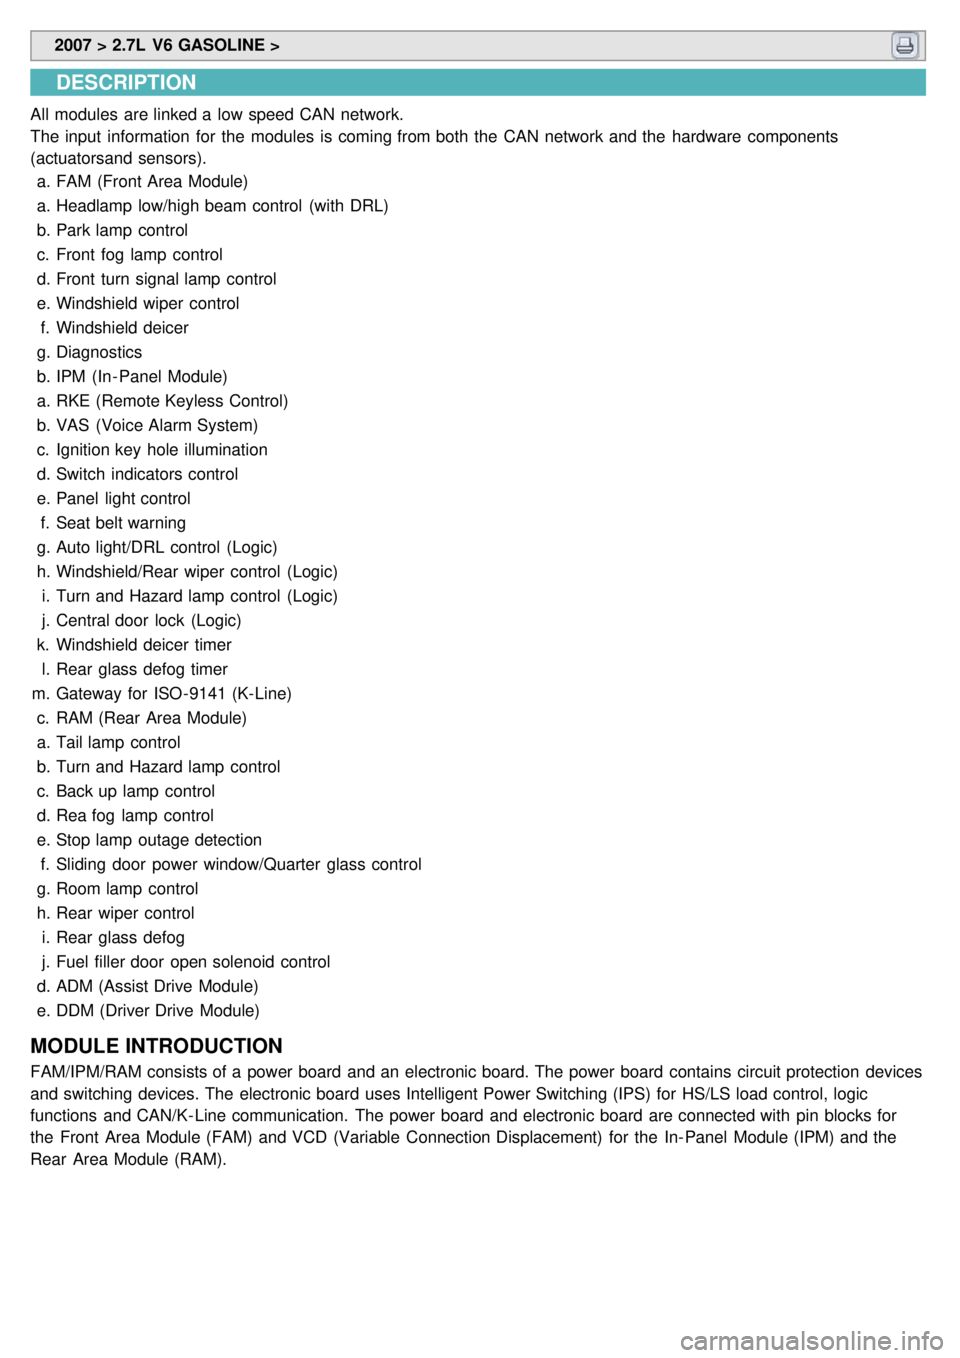
Park/tail Lamps Function
1.Necessary conditions to switch ON :
a. By putting the Head lamp switch in position 'Park and Tail lamp' or 'Head lamp Low Beam' or Auto light
activation or DRL activation
2. Necessary conditions to switch OFF :
a. If they are released by the Head lamp switch (Auto light function deactivated) and if DRL function is deactivated
b. If the Auto light function is active but the Auto light Sensor signal status is OFF or Battery Saver function is
active.
3. Functional diagram
Page 1213 of 1575

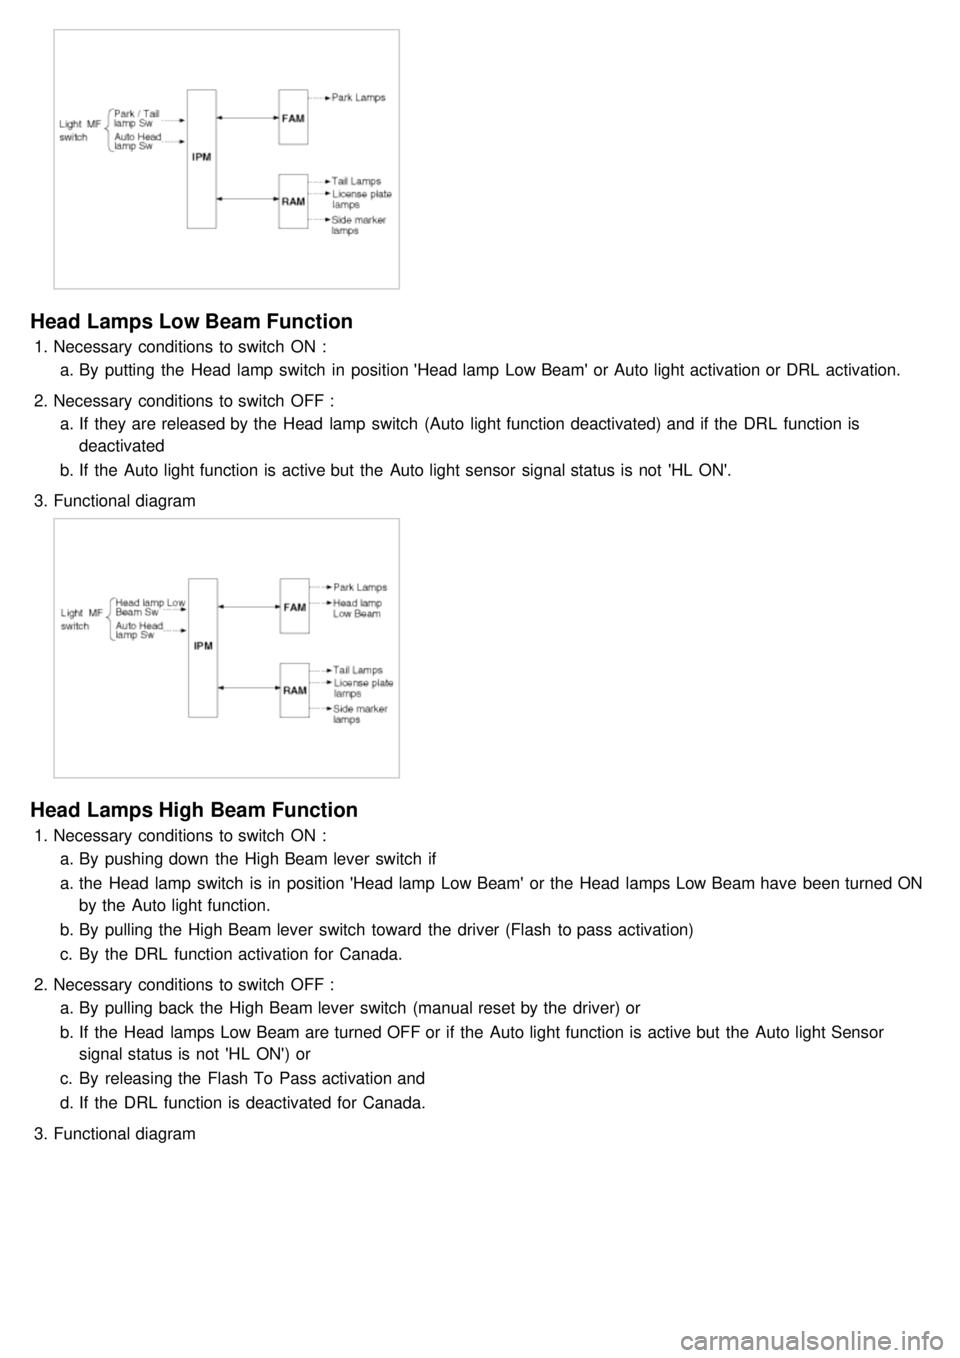
Head Lamps Low Beam Function
1.Necessary conditions to switch ON :
a. By putting the Head lamp switch in position 'Head lamp Low Beam' or Auto light activation or DRL activation.
2. Necessary conditions to switch OFF :
a. If they are released by the Head lamp switch (Auto light function deactivated) and if the DRL function is
deactivated
b. If the Auto light function is active but the Auto light sensor signal status is not 'HL ON'.
3. Functional diagram
Head Lamps High Beam Function
1.Necessary conditions to switch ON :
a. By pushing down the High Beam lever switch if
a. the Head lamp switch is in position 'Head lamp Low Beam' or the Head lamps Low Beam have been turned ON
by the Auto light function.
b. By pulling the High Beam lever switch toward the driver (Flash to pass activation)
c. By the DRL function activation for Canada.
2. Necessary conditions to switch OFF :
a. By pulling back the High Beam lever switch (manual reset by the driver) or
b. If the Head lamps Low Beam are turned OFF or if the Auto light function is active but the Auto light Sensor
signal status is not 'HL ON') or
c. By releasing the Flash To Pass activation and
d. If the DRL function is deactivated for Canada.
3. Functional diagram