Page 224 of 1575

during testing. An example would be if a problem appears only when the vehicle is cold but has not appeared when
warm. In this case, the technician should thoroughly make out a "CUSTOMER PROBLEM ANALYSIS SHEET" and
recreate (simulate) the environment and condition which occurred when the vehicle was having the issue.1. Clear Diagnostic Trouble Code (DTC).
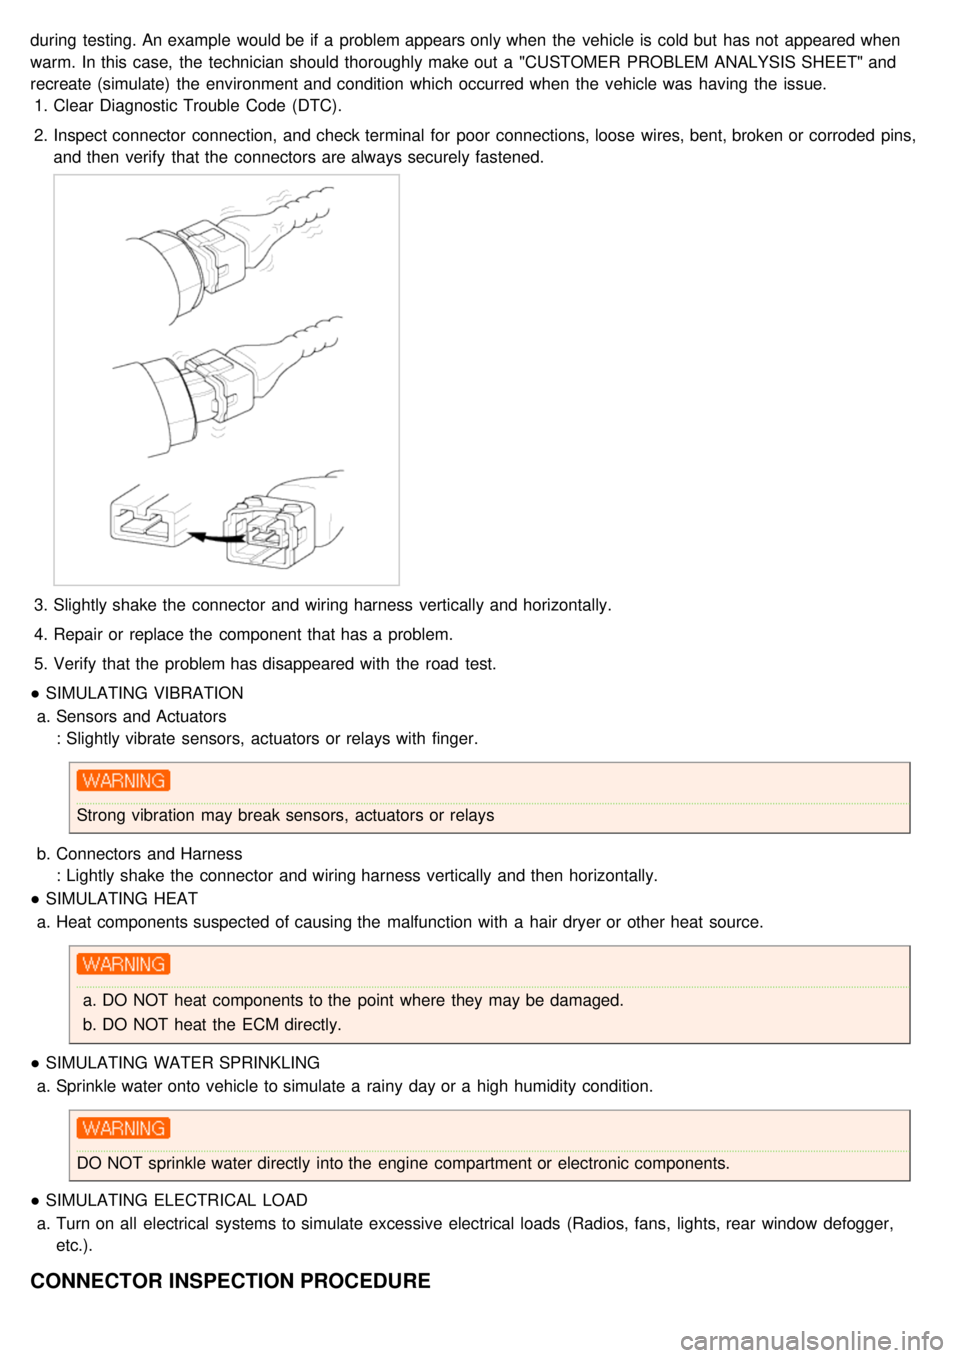
2. Inspect connector connection, and check terminal for poor connections, loose wires, bent, broken or corroded pins,
and then verify that the connectors are always securely fastened.
3.Slightly shake the connector and wiring harness vertically and horizontally.
4. Repair or replace the component that has a problem.
5. Verify that the problem has disappeared with the road test.
● SIMULATING VIBRATION
a. Sensors and Actuators
: Slightly vibrate sensors, actuators or relays with finger.
Strong vibration may break sensors, actuators or relays
b. Connectors and Harness
: Lightly shake the connector and wiring harness vertically and then horizontally.
● SIMULATING HEAT
a. Heat components suspected of causing the malfunction with a hair dryer or other heat source.
a.DO NOT heat components to the point where they may be damaged.
b. DO NOT heat the ECM directly.
● SIMULATING WATER SPRINKLING
a. Sprinkle water onto vehicle to simulate a rainy day or a high humidity condition.
DO NOT sprinkle water directly into the engine compartment or electronic components.
● SIMULATING ELECTRICAL LOAD
a. Turn on all electrical systems to simulate excessive electrical loads (Radios, fans, lights, rear window defogger,
etc.).
CONNECTOR INSPECTION PROCEDURE
Page 1159 of 1575
2007 > 2.7L V6 GASOLINE >
CUSTOMER COMPLAINT ANALYSIS CHECK SHEET
TROUBLESHOOTING
There are six areas where a problem can occur: wiring harness, the radio, the cassette tape deck, the CD player, and
speaker. Troubleshooting enables you to confine the problem to a particular area.
Page 1182 of 1575
2007 > 2.7L V6 GASOLINE >
REPLACEMENT
1.Remove the right C filler trim(A) and luggage side trim. (Refer to Body group - Interior trim).
2.Remove the diversity(C) after removing 1P connector (A) and radio feeder cable (B).
3.Remove the glass antenna radio amplifier (A) - Left/Right each 1 ea- after removing radio feeder cable (B) and
amplifier wiring (C) from the glass antenna radio amplifier (A).
4.Installation is the reverse of removal.
INSPECTION
GLASS ANTENNA TEST
1. Wrap aluminum foil (A) around the tip of the tester probe (B) as shown.
Page 1538 of 1575

(3)If a vehicle stays under extremely hot or cold environment, the detection range may be reduced. It will be
restored at the normal temperature.
(4) When heavy cargo is loaded in rear cargo area, it changes the vehicle balance, which reduces the detection
range.
(5) When other vehicle's horn, motor cycle engine noise, or other ultra - sonic wave sources are near.
(6) Under heavy rain.
(7) When reversing towards a vertical wall and the gap between the vehicle and the wall is 15cm. (Alarm may
sound despite the absence of a barrier)
(8) If radio antenna is installed at the rear.
(9) If the vehicle rear wiring is re- routed or electrical component is added at the rear part.
(10) Vehicle balance is changed due to the replacement of the rear spring.
(11) The unit will operate normally when the vehicle speed is 5km/h or less.
Above this speed, the unit may not operate normally
8. Check the rear bumper for installation condition and deformation. If installed improperly or the sensor orientation is
deviated, it may cause malfunction.
9. Be careful not to apply shock during sensor installation on the transmission or reception unit.
10. When adding electrical devices or modifying harness at the rear body of the vehicle, ensure not to change the
transmission and reception unit wiring.
Tagging the transmission side and reception side, it may cause malfunction.
11. High power radio transmitter (above 10W) may cause malfunction. Do not install it on the vehicle.
12. Be careful that excessive heat or sharp objects shall not touch ultrasonic sensor surface.
Do not cover the sensor opening or press the sensor.