2007 INFINITI QX56 ESP
[x] Cancel search: ESPPage 1141 of 3061
EC-58
< SERVICE INFORMATION >
ON BOARD DIAGNOSTIC (OBD) SYSTEM
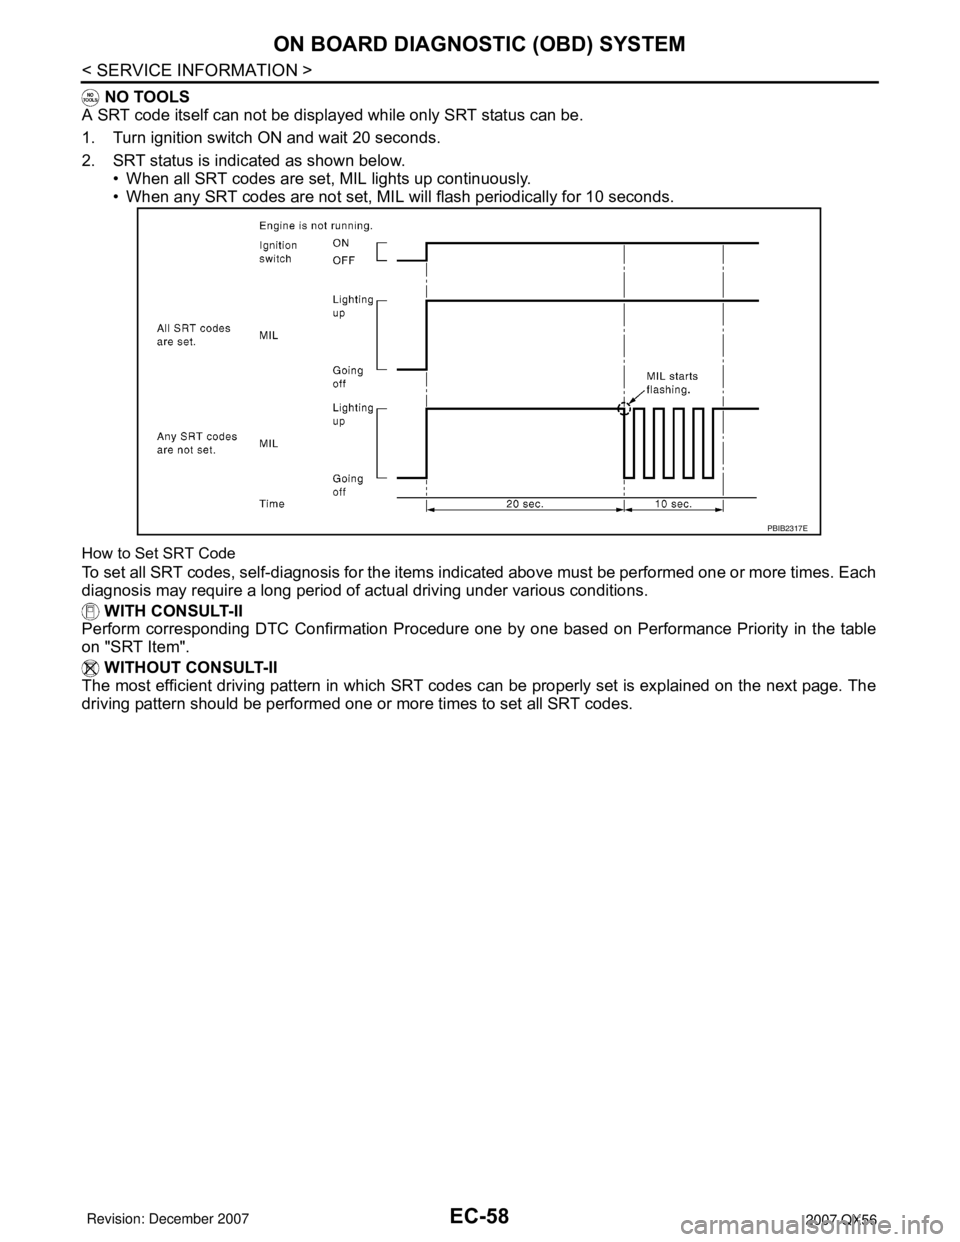
NO TOOLS
A SRT code itself can not be displayed while only SRT status can be.
1. Turn ignition switch ON and wait 20 seconds.
2. SRT status is indicated as shown below.
• When all SRT codes are set, MIL lights up continuously.
• When any SRT codes are not set, MIL will flash periodically for 10 seconds.
How to Set SRT Code
To set all SRT codes, self-diagnosis for the items indicated above must be performed one or more times. Each
diagnosis may require a long period of actual driving under various conditions.
WITH CONSULT-II
Perform corresponding DTC Confirmation Procedure one by one based on Performance Priority in the table
on "SRT Item".
WITHOUT CONSULT-II
The most efficient driving pattern in which SRT codes can be properly set is explained on the next page. The
driving pattern should be performed one or more times to set all SRT codes.
PBIB2317E
Page 1154 of 3061
BASIC SERVICE PROCEDURE
EC-71
< SERVICE INFORMATION >
C
D
E
F
G
H
I
J
K
L
MA
EC
N
P O
BASIC SERVICE PROCEDURE
Basic InspectionINFOID:0000000003531609
1.INSPECTION START
1. Check service records for any recent repairs that may indicate a related malfunction, or a current need for
scheduled maintenance.
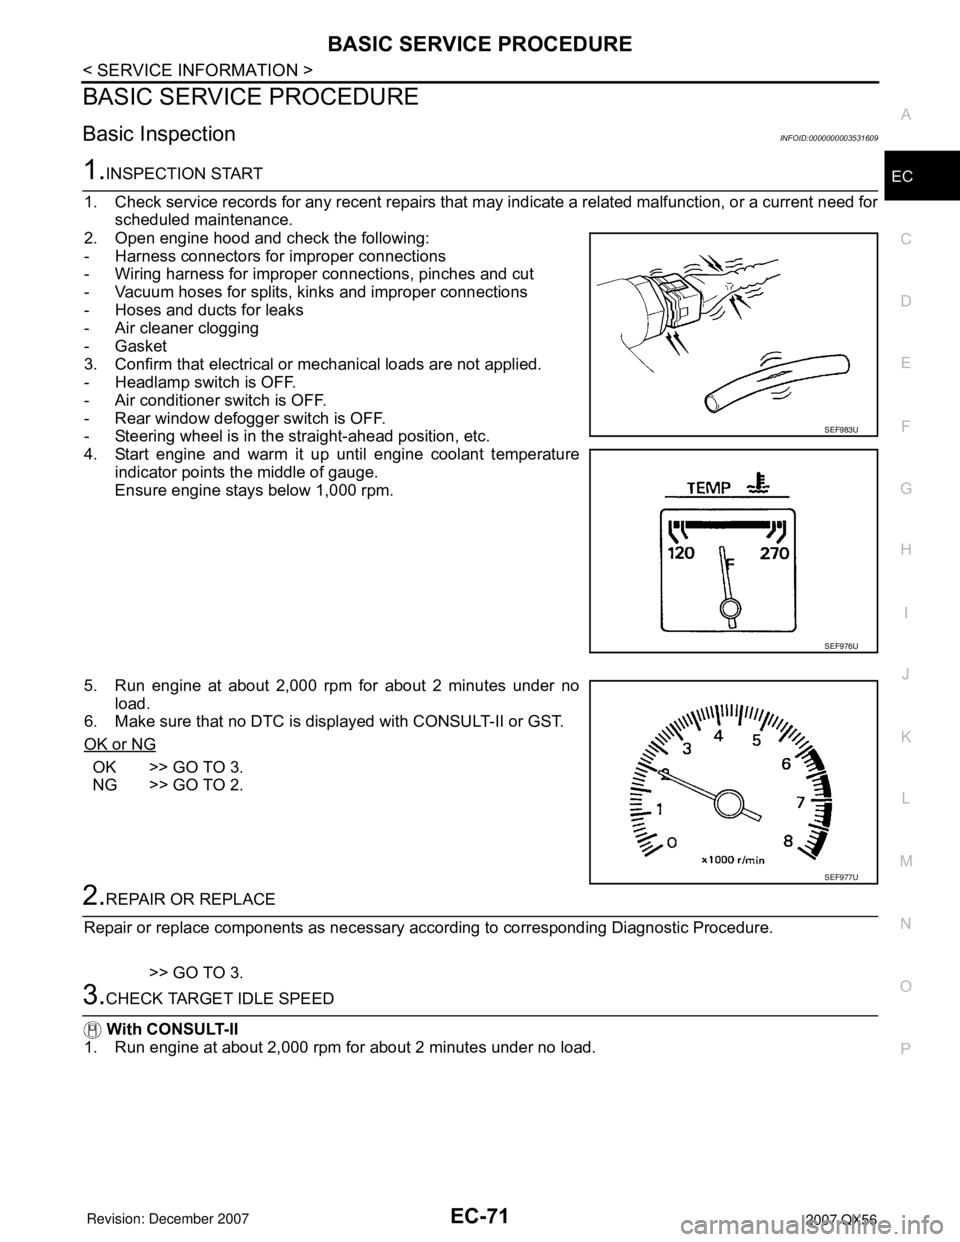
2. Open engine hood and check the following:
- Harness connectors for improper connections
- Wiring harness for improper connections, pinches and cut
- Vacuum hoses for splits, kinks and improper connections
- Hoses and ducts for leaks
- Air cleaner clogging
- Gasket
3. Confirm that electrical or mechanical loads are not applied.
- Headlamp switch is OFF.
- Air conditioner switch is OFF.
- Rear window defogger switch is OFF.
- Steering wheel is in the straight-ahead position, etc.
4. Start engine and warm it up until engine coolant temperature
indicator points the middle of gauge.
Ensure engine stays below 1,000 rpm.
5. Run engine at about 2,000 rpm for about 2 minutes under no
load.
6. Make sure that no DTC is displayed with CONSULT-II or GST.
OK or NG
OK >> GO TO 3.
NG >> GO TO 2.
2.REPAIR OR REPLACE
Repair or replace components as necessary according to corresponding Diagnostic Procedure.
>> GO TO 3.
3.CHECK TARGET IDLE SPEED
With CONSULT-II
1. Run engine at about 2,000 rpm for about 2 minutes under no load.
SEF983U
SEF976U
SEF977U
Page 1165 of 3061
EC-82
< SERVICE INFORMATION >
TROUBLE DIAGNOSIS
TROUBLE DIAGNOSIS
Trouble Diagnosis IntroductionINFOID:0000000003531617
INTRODUCTION
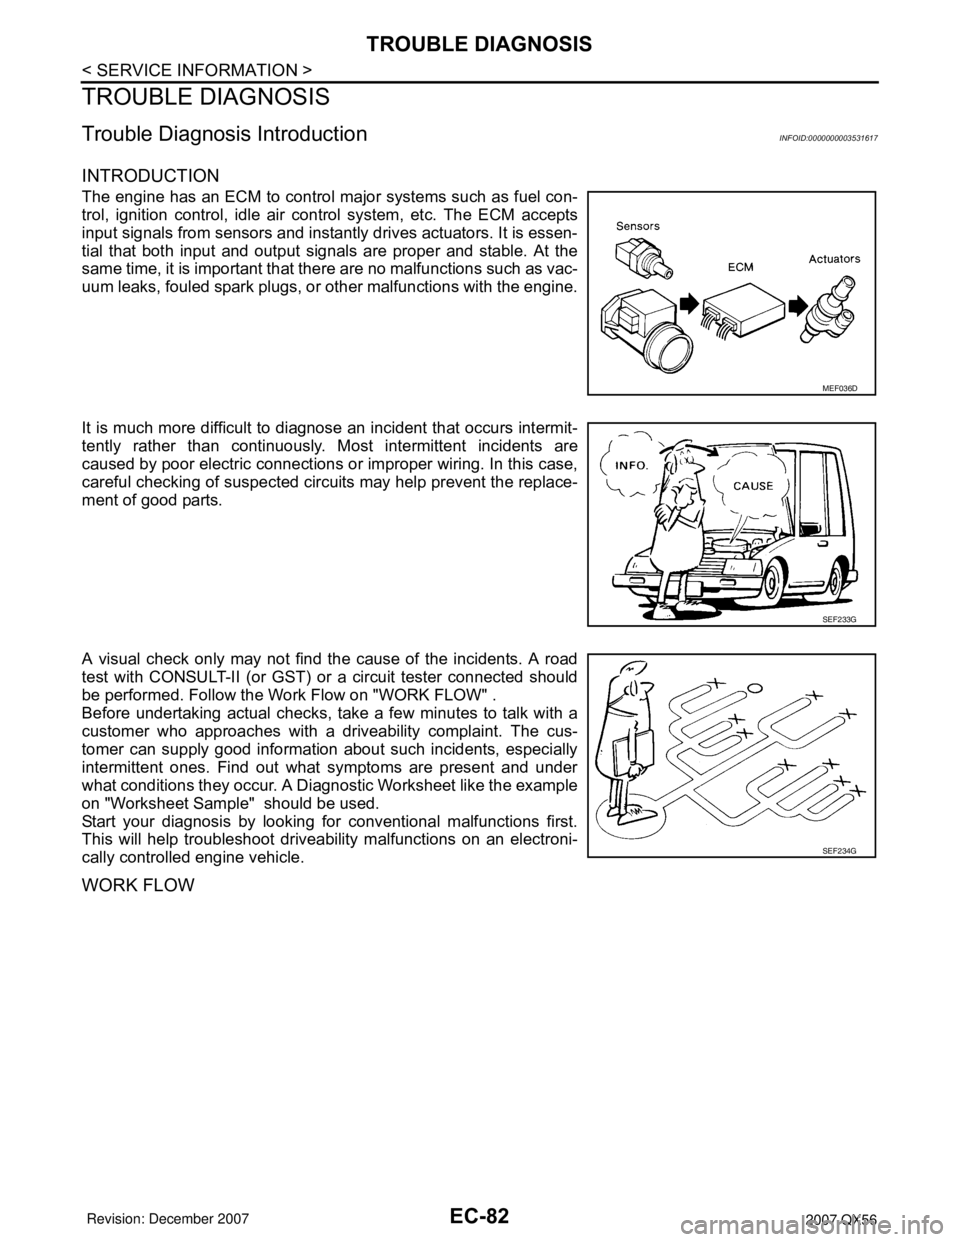
The engine has an ECM to control major systems such as fuel con-
trol, ignition control, idle air control system, etc. The ECM accepts
input signals from sensors and instantly drives actuators. It is essen-
tial that both input and output signals are proper and stable. At the
same time, it is important that there are no malfunctions such as vac-
uum leaks, fouled spark plugs, or other malfunctions with the engine.
It is much more difficult to diagnose an incident that occurs intermit-
tently rather than continuously. Most intermittent incidents are
caused by poor electric connections or improper wiring. In this case,
careful checking of suspected circuits may help prevent the replace-
ment of good parts.
A visual check only may not find the cause of the incidents. A road
test with CONSULT-II (or GST) or a circuit tester connected should
be performed. Follow the Work Flow on "WORK FLOW" .
Before undertaking actual checks, take a few minutes to talk with a
customer who approaches with a driveability complaint. The cus-
tomer can supply good information about such incidents, especially
intermittent ones. Find out what symptoms are present and under
what conditions they occur. A Diagnostic Worksheet like the example
on "Worksheet Sample" should be used.
Start your diagnosis by looking for conventional malfunctions first.
This will help troubleshoot driveability malfunctions on an electroni-
cally controlled engine vehicle.
WORK FLOW
MEF036D
SEF233G
SEF234G
Page 1204 of 3061
TROUBLE DIAGNOSIS
EC-121
< SERVICE INFORMATION >
C
D
E
F
G
H
I
J
K
L
MA
EC
N
P O
*: DTC P1442 and P1456 does not apply to JA60 models but appears in DTC Work Support Mode screens.
REAL TIME DIAGNOSIS IN DATA MONITOR MODE (RECORDING VEHICLE DATA)
Description
CONSULT-II has two kinds of triggers and they can be selected by touching “SETTING” in “DATA MONITOR”
mode.
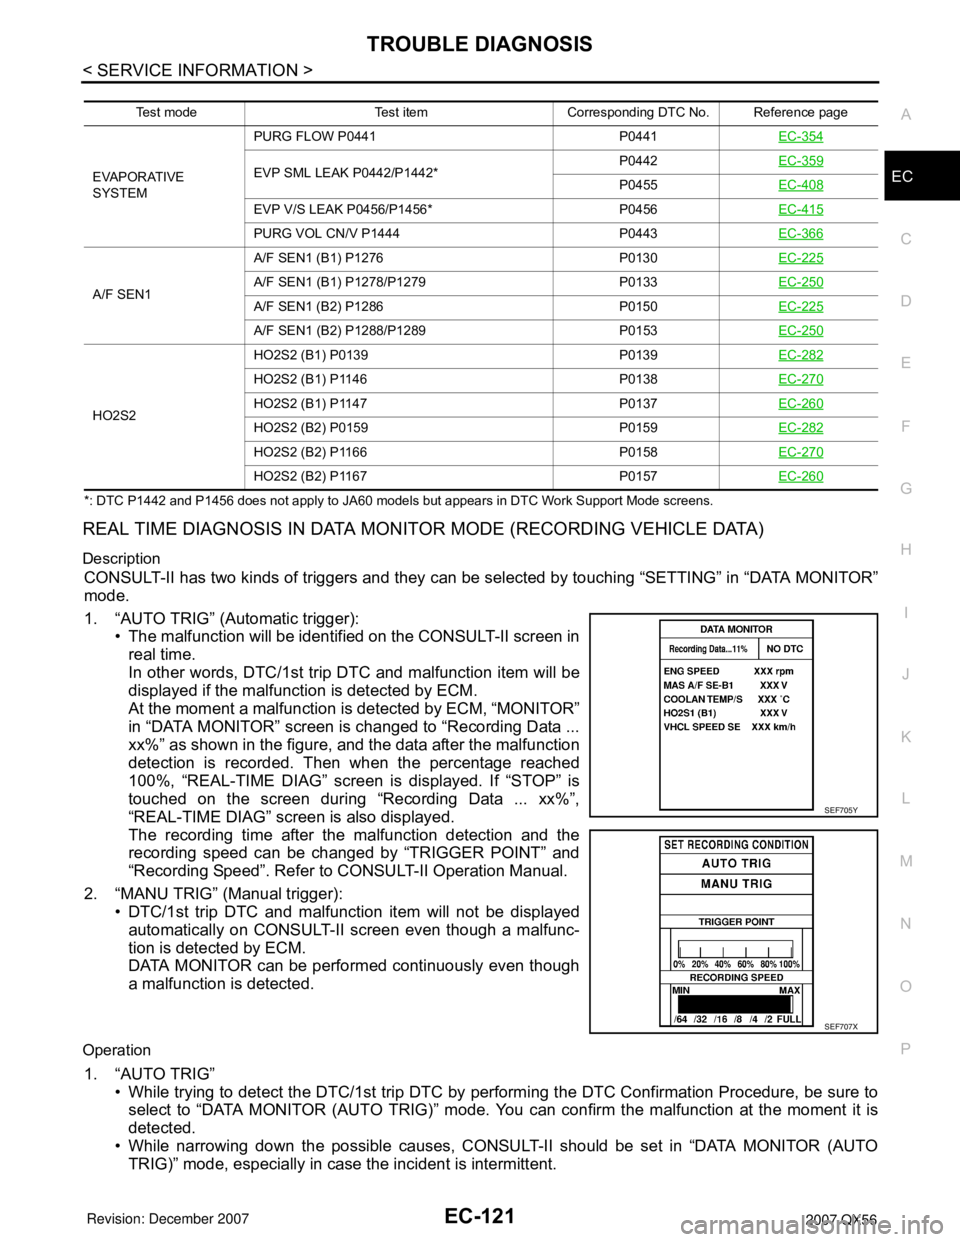
1. “AUTO TRIG” (Automatic trigger):
• The malfunction will be identified on the CONSULT-II screen in
real time.
In other words, DTC/1st trip DTC and malfunction item will be
displayed if the malfunction is detected by ECM.
At the moment a malfunction is detected by ECM, “MONITOR”
in “DATA MONITOR” screen is changed to “Recording Data ...
xx%” as shown in the figure, and the data after the malfunction
detection is recorded. Then when the percentage reached
100%, “REAL-TIME DIAG” screen is displayed. If “STOP” is
touched on the screen during “Recording Data ... xx%”,
“REAL-TIME DIAG” screen is also displayed.
The recording time after the malfunction detection and the
recording speed can be changed by “TRIGGER POINT” and
“Recording Speed”. Refer to CONSULT-II Operation Manual.
2. “MANU TRIG” (Manual trigger):
• DTC/1st trip DTC and malfunction item will not be displayed
automatically on CONSULT-II screen even though a malfunc-
tion is detected by ECM.
DATA MONITOR can be performed continuously even though
a malfunction is detected.
Operation
1. “AUTO TRIG”
• While trying to detect the DTC/1st trip DTC by performing the DTC Confirmation Procedure, be sure to
select to “DATA MONITOR (AUTO TRIG)” mode. You can confirm the malfunction at the moment it is
detected.
• While narrowing down the possible causes, CONSULT-II should be set in “DATA MONITOR (AUTO
TRIG)” mode, especially in case the incident is intermittent.
Test mode Test item Corresponding DTC No. Reference page
EVAPORATIVE
SYSTEMPURG FLOW P0441 P0441EC-354
EVP SML LEAK P0442/P1442*P0442EC-359P0455EC-408
EVP V/S LEAK P0456/P1456* P0456EC-415
PURG VOL CN/V P1444 P0443EC-366
A/F SEN1A/F SEN1 (B1) P1276 P0130EC-225A/F SEN1 (B1) P1278/P1279 P0133EC-250
A/F SEN1 (B2) P1286 P0150EC-225
A/F SEN1 (B2) P1288/P1289 P0153EC-250
HO2S2HO2S2 (B1) P0139 P0139EC-282
HO2S2 (B1) P1146 P0138EC-270
HO2S2 (B1) P1147 P0137EC-260
HO2S2 (B2) P0159 P0159EC-282
HO2S2 (B2) P1166 P0158EC-270
HO2S2 (B2) P1167 P0157EC-260
SEF705Y
SEF707X
Page 1217 of 3061
EC-134
< SERVICE INFORMATION >
TROUBLE DIAGNOSIS - SPECIFICATION VALUE
12.CHECK A/F SENSOR 1 FUNCTION
Perform all DTC Confirmation Procedure related with A/F sensor 1.
• For DTC P0130, P0150, refer to EC-225, "
DTC Confirmation Procedure" .
• For DTC P0131, P0151, refer to EC-234, "
DTC Confirmation Procedure" .
• For DTC P0132, P0132, refer to EC-242, "
DTC Confirmation Procedure" .
• For DTC P0133, P0153, refer to EC-250, "
DTC Confirmation Procedure" .
• For DTC P2A00, P2A03, refer to EC-588, "
DTC Confirmation Procedure" .
OK or NG
OK >> GO TO 15.
NG >> GO TO 13.
13.CHECK A/F SENSOR 1 CIRCUIT
Perform Diagnostic Procedure according to corresponding DTC.
>> GO TO 14.
14.CHECK “A/F ALPHA-B1”, “A/F ALPHA-B2”
1. Start engine.
2. Select “A/F ALPHA-B1”, “A/F ALPHA-B2” in “DATA MONITOR (SPEC)” mode, and make sure that the
each indication is within the SP value.
OK or NG
OK >>INSPECTION END
NG >> GO TO 15.
15.DISCONNECT AND RECONNECT ECM HARNESS CONNECTOR
1. Stop the engine.
2. Disconnect ECM harness connector. Check pin terminal and connector for damage, and then reconnect it.
>> GO TO 16.
16.CHECK “A/F ALPHA-B1”, “A/F ALPHA-B2”
1. Start engine.
2. Select “A/F ALPHA-B1”, “A/F ALPHA-B2” in “DATA MONITOR (SPEC)” mode, and make sure that the
each indication is within the SP value.
OK or NG
OK >>INSPECTION END
NG >> Detect malfunctioning part according to EC-90, "
Symptom Matrix Chart" .
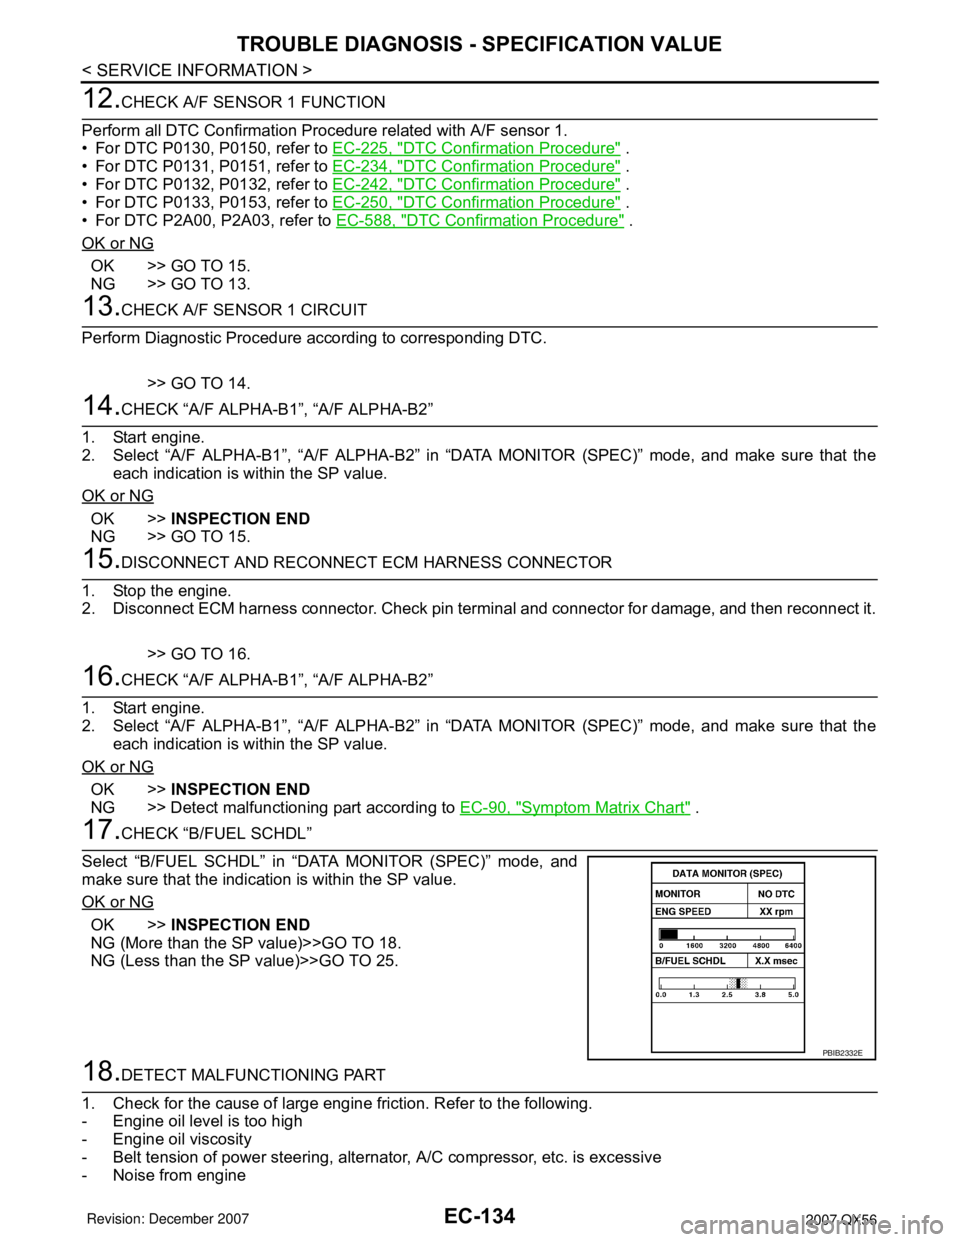
17.CHECK “B/FUEL SCHDL”
Select “B/FUEL SCHDL” in “DATA MONITOR (SPEC)” mode, and
make sure that the indication is within the SP value.
OK or NG
OK >>INSPECTION END
NG (More than the SP value)>>GO TO 18.
NG (Less than the SP value)>>GO TO 25.
18.DETECT MALFUNCTIONING PART
1. Check for the cause of large engine friction. Refer to the following.
- Engine oil level is too high
- Engine oil viscosity
- Belt tension of power steering, alternator, A/C compressor, etc. is excessive
- Noise from engine
PBIB2332E
Page 1246 of 3061

DTC P0031, P0032, P0051, P0052 A/F SENSOR 1 HEATER
EC-163
< SERVICE INFORMATION >
C
D
E
F
G
H
I
J
K
L
MA
EC
N
P O
DTC P0031, P0032, P0051, P0052 A/F SENSOR 1 HEATER
DescriptionINFOID:0000000003531656
SYSTEM DESCRIPTION
The ECM performs ON/OFF duty control of the A/F sensor 1 heater corresponding to the engine operating
condition to keep the temperature of A/F sensor 1 element at the specified range.
CONSULT-II Reference Value in Data Monitor ModeINFOID:0000000003531657
Specification data are reference values.
On Board Diagnosis LogicINFOID:0000000003531658
DTC Confirmation ProcedureINFOID:0000000003531659
NOTE:
If DTC Confirmation Procedure has been previously conducted, always turn ignition switch OFF and wait at
least 10 seconds before conducting the next test.
TESTING CONDITION:
Before performing the following procedure, confirm that battery voltage is between 10.5V and 16V at
idle.
WITH CONSULT-II
1. Turn ignition switch ON and select “DATA MONITOR” mode with
CONSULT-II.
2. Start engine and let it idle for at least 10 seconds.
3. If 1st trip DTC is detected, go to EC-167, "
Diagnosis Procedure".
Sensor Input Signal to ECM ECM function Actuator
Camshaft position sensor (PHASE)
Crankshaft position sensor (POS)Engine speed
Air fuel ratio (A/F) sensor 1
heater controlAir fuel ratio (A/F) sensor 1
heater
Mass air flow sensor Amount of intake air
MONITOR ITEM CONDITION SPECIFICATION
A/F S1 HTR (B1)
A/F S1 HTR (B2)• Engine: After warming up, idle the engine 4 - 100%
DTC No. Trouble diagnosis name DTC detecting condition Possible cause
P0031
0031
(Bank 1)
Air fuel ratio (A/F) sensor
1 heater control circuit lowThe current amperage in the air fuel ratio (A/F) sen-
sor 1 heater circuit is out of the normal range.
(An excessively low voltage signal is sent to ECM
through the air fuel ratio (A/F) sensor 1 heater.)• Harness or connectors
(The A/F sensor 1 heater circuit is
open or shorted.)
• A/F sensor 1 heater P0051
0051
(Bank 2)
P0032
0032
(Bank 1)Air fuel ratio (A/F) sensor
1 heater control circuit
highThe current amperage in the air fuel ratio (A/F) sen-
sor 1 heater circuit is out of the normal range.
(An excessively high voltage signal is sent to ECM
through the air fuel ratio (A/F) sensor 1 heater.)• Harness or connectors
(The A/F sensor 1 heater circuit is
shorted.)
• A/F sensor 1 heater P0052
0052
(Bank 2)
SEF058Y
Page 1253 of 3061

EC-170
< SERVICE INFORMATION >
DTC P0037, P0038, P0057, P0058 HO2S2 HEATER
DTC P0037, P0038, P0057, P0058 HO2S2 HEATER
DescriptionINFOID:0000000003531664
SYSTEM DESCRIPTION
The ECM performs ON/OFF control of the heated oxygen sensor 2 heater corresponding to the engine speed,
amount of intake air and engine coolant temperature.
OPERATION
CONSULT-II Reference Value in Data Monitor ModeINFOID:0000000003531665
Specification data are reference values.
On Board Diagnosis LogicINFOID:0000000003531666
DTC Confirmation ProcedureINFOID:0000000003531667
NOTE:
If DTC Confirmation Procedure has been previously conducted, always turn ignition switch OFF and wait at
least 10 seconds before conducting the next test.
TESTING CONDITION:
Sensor Input signal to ECM ECM function Actuator
Camshaft position sensor (PHASE)
Crankshaft position sensor (POS)Engine speed
Heated oxygen sensor 2
heater controlHeated oxygen sensor 2 heater
Engine coolant temperature sensor Engine coolant temperature
Mass air flow sensor Amount of intake air
Engine speed rpm Heated oxygen sensor 2 heater
Above 3,600OFF
Below 3,600 rpm after the following conditions are met.
• Engine: After warming up
• Keeping the engine speed between 3,500 and 4,000 rpm for 1
minute and at idle for 1 minute under no loadON
MONITOR ITEM CONDITION SPECIFICATION
HO2S2 HTR (B1)
HO2S2 HTR (B2)• Engine speed: Below 3,600 rpm after the following conditions are met.
- Engine: After warming up
- Keeping the engine speed between 3,500 and 4,000 rpm for 1 minute and
at idle for 1 minute under no loadON
• Engine speed: Above 3,600 rpm OFF
DTC No. Trouble diagnosis name DTC detecting condition Possible cause
P0037
0037
(Bank 1)
Heated oxygen sensor 2
heater control circuit lowThe current amperage in the heated oxygen sen-
sor 2 heater circuit is out of the normal range.
(An excessively low voltage signal is sent to ECM
through the heated oxygen sensor 2 heater.)• Harness or connectors
(The heated oxygen sensor 2 heater
circuit is open or shorted.)
• Heated oxygen sensor 2 heater P0057
0057
(Bank 2)
P0038
0038
(Bank 1)
Heated oxygen sensor 2
heater control circuit highThe current amperage in the heated oxygen sen-
sor 2 heater circuit is out of the normal range.
(An excessively high voltage signal is sent to ECM
through the heated oxygen sensor 2 heater.)• Harness or connectors
(The heated oxygen sensor 2 heater
circuit is shorted.)
• Heated oxygen sensor 2 heater P0058
0058
(Bank 2)
Page 1270 of 3061
DTC P0101 MAF SENSOR
EC-187
< SERVICE INFORMATION >
C
D
E
F
G
H
I
J
K
L
MA
EC
N
P O
If engine will not start or stops soon, wait at least 10 seconds with engine stopped (Ignition switch ON) instead
of running engine at idle speed.
With CONSULT-II
1. Turn ignition switch ON.
2. Select “DATA MONITOR” mode with CONSULT-II.
3. Start engine and warm it up to normal operating temperature.
4. Run engine for at least 10 seconds at idle speed.
5. If 1st trip DTC is detected, go to EC-190, "
Diagnosis Procedure".
With GST
Follow the procedure “With CONSULT-II” above.
PROCEDURE FOR MALFUNCTION B
CAUTION:
Always drive vehicle at a safe speed.
With CONSULT-II
1. Turn ignition switch ON.
2. Start engine and warm it up to normal operating temperature.
If engine cannot be started, go to EC-190, "
Diagnosis Procedure".
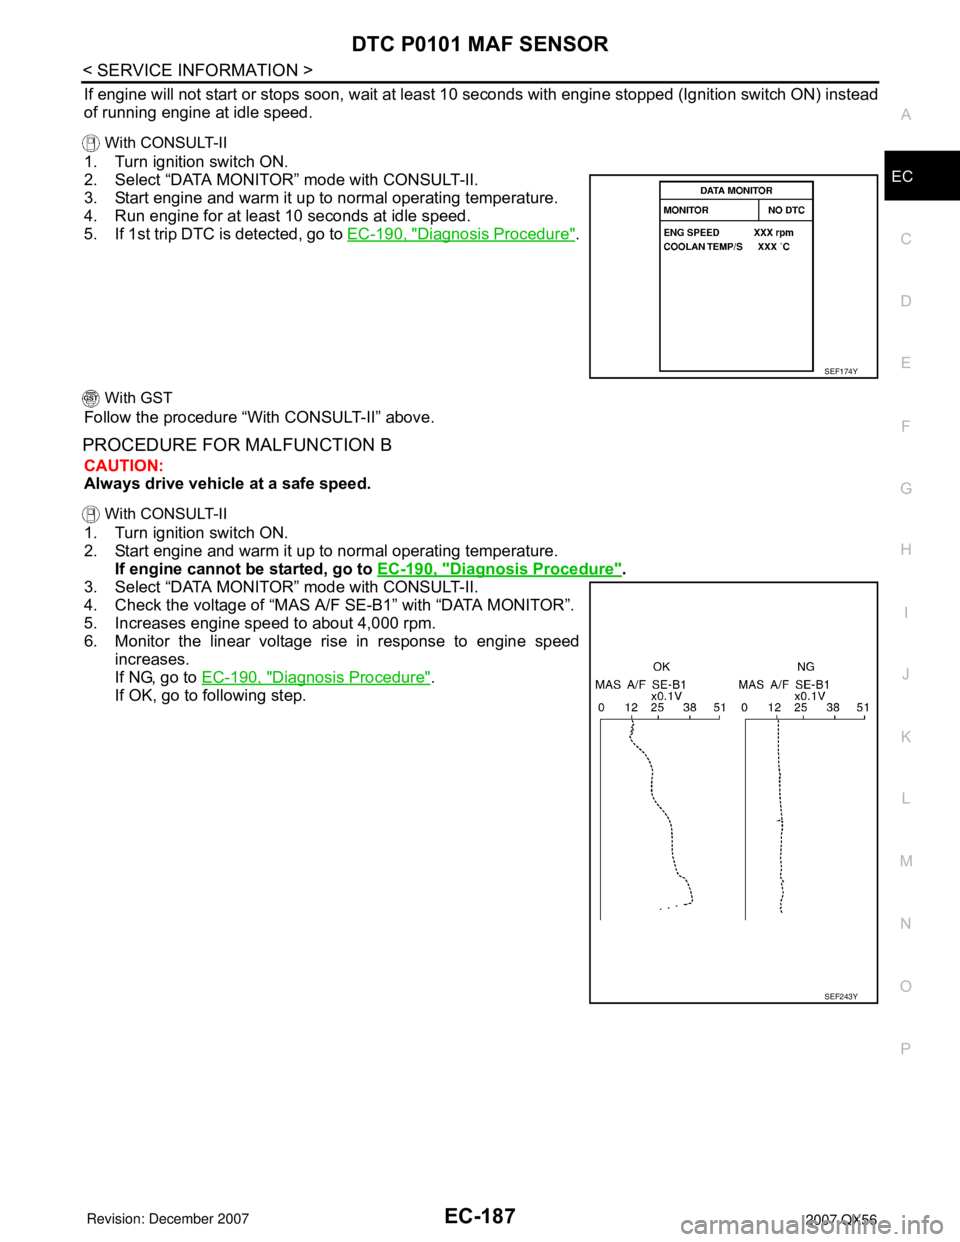
3. Select “DATA MONITOR” mode with CONSULT-II.
4. Check the voltage of “MAS A/F SE-B1” with “DATA MONITOR”.
5. Increases engine speed to about 4,000 rpm.
6. Monitor the linear voltage rise in response to engine speed
increases.
If NG, go to EC-190, "
Diagnosis Procedure".
If OK, go to following step.
SEF174Y
SEF243Y