Page 249 of 319

Timing Belt, Brake Fluid
246
Always use Honda Heavy Duty
Brake Fluid DOT 3. If it is not
available, you should use only DOT 3
or DOT 4 f luid, f rom a sealed
container, as a temporary
replacement.
Using any non-Honda brake f luid can
cause corrosion and decrease the lif e
of the system. Have the brake
system f lushed and ref illed with
Honda Heavy Duty Brake Fluid
DOT 3 as soon as possible.
Brake f luid marked DOT 5 is not
compatible with your vehicle’s
braking system and can cause
extensive damage.
Check the brake f luid level in the
reservoir monthly.
Replace the brake f luid according to
the time recommendation in the
maintenance minder schedule.
µµ
In very high temperatures
(over 110°F, 43°C).
In very low temperatures
(under 20°F, 29°C).
Frequently tow a trailer.
The timing belt should be replaced
according to the maintenance
message shown on the inf ormation
display. Replace the belt at 60,000
miles (100,000 km) if you regularly
drive your vehicle in one or more of
these conditions: Timing Belt
Brake Fluid
Page 250 of 319

Check the level on the side of the
reservoir when the engine is cold.
The f luid should be between the
UPPER LEVEL and LOWER LEVEL.
If not add power steering f luid to the
UPPER LEVEL mark.A
low power steering
f
luid level can
indicate a leak in the system. Check
the f luid level f requently, and have
the system inspected as soon as
possible.
Brake Fluid, Power Steering Fluid
Maint enance
247
UPPER LEVEL
LOWER LEVEL
Turning the steering wheel to f ull lef t
or right lock and holding it there can
damage the power steering pump.
Always use Honda Power Steering
F
luid. You may use a
not
her power
steering f luid as an emergency
replacement, but have the power
steering system f lushed and ref illed
with Honda PSF as soon as possible. Pour the f luid slowly and caref ully so
you do not spill any. Clean up any
spill immediately; it could damage
components in the engine
compartment.
The f luid level should be between
theMINandMAXmarksontheside
of the reservoir. If the level is at or
below the MIN mark, your brake
system needs attention. Have the
brake system inspected f or leaks or
worn brake pads.
MIN
MAX
Power Steering Fluid
Page 251 of 319

Open the hood.
Remove the electrical connector
f rom the bulb by squeezing the
connector to unlock the tab, then
slide the connector of f the bulb.
Remove the bulb by turning it
approximately one-quarter turn
counterclockwise.Insert the new bulb into the hole,
and turn it one-quarter turn
clockwise to lock it in place.
Push the electrical connector onto
the new bulb.
Turn on the headlights to test the
new bulb.
Theheadlightswereproperlyaimed
when your vehicle was new. If you
regularly carry heavy items in the
trunk, readjustment may be required.
Adjustment should be done by your
dealer or other qualif ied mechanic.
Your vehicle has halogen headlight
bulbs. When replacing a bulb, handle
it by its base, and protect the glass
f rom contact with your skin or hard
objects. If you touch the glass, clean
it with denatured alcohol and a clean
cloth.
1.
2.
3.4.
5.
6.
Headlight A iming
Replacing a Headlight Bulb
Lights
248
TAB
BULB CONNECTOR
Halogen headlight bulbs get very hot
when lit. Oil, perspiration, or a scratch
on the glass can cause the bulb to
overheat and shatter.
Page 252 of 319
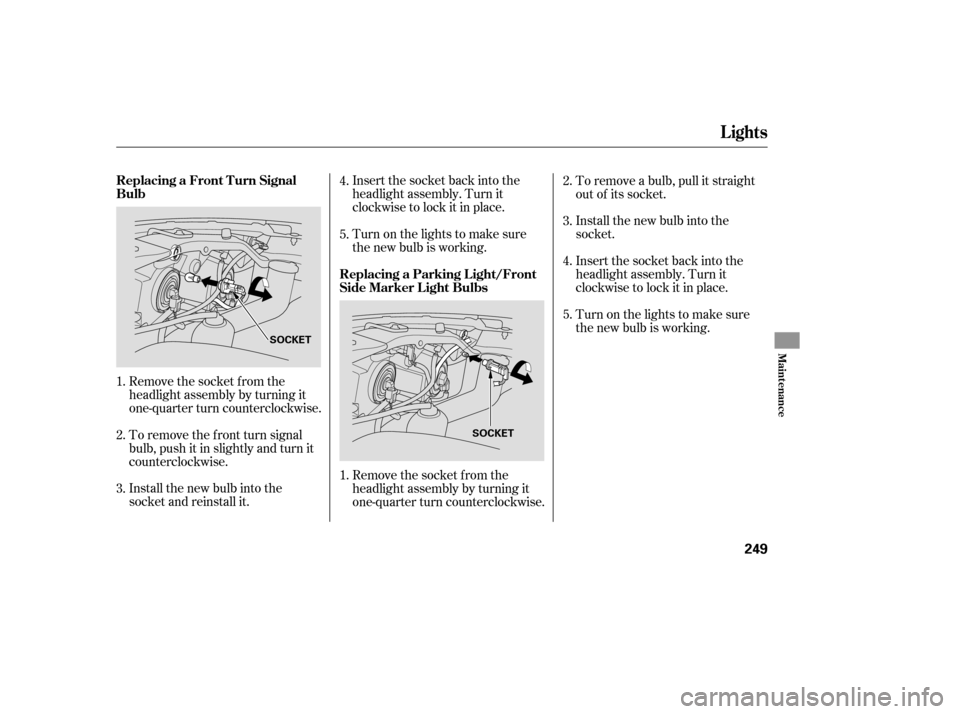
To remove the f ront turn signal
bulb, push it in slightly and turn it
counterclockwise.
Install the new bulb into the
socket and reinstall it.Insert the socket back into the
headlight assembly. Turn it
clockwise to lock it in place.
Turn on the lights to make sure
the new bulb is working.
Remove the socket from the
headlight assembly by turning it
one-quarter turn counterclockwise. To remove a bulb, pull it straight
out of its socket.
Install the new bulb into the
socket.
Remove the socket from the
headlight assembly by turning it
one-quarter turn counterclockwise. Insert the socket back into the
headlight assembly. Turn it
clockwise to lock it in place.
Turn on the lights to make sure
the new bulb is working.
1. 4.
5.
3. 2. 1.2.
3.
4.
5.
Lights
Replacing a Front T urn Signal
Bulb
Replacing a Parking L ight/Front
Side Marker L ight Bulbs
Maint enance
249
SOCKET
SOCKET
Page 253 of 319
If you are changing the bulb on
the driver’s side, start the engine,
turn the steering wheel all the way
to the left, and turn off the engine.
If you are changing the bulb on
the passenger’s side, turn the
steering wheel to the right.
Use a f lat-tipped screwdriver to
remove the three holding clips
f rom the inner f ender.Pull the inner f ender cover away
f rom the f ender.
Remove the socket from the turn
signal assembly by turning it one-
quarter turn counterclockwise.Pull the burned out bulb straight
out of its socket.
Push the new bulb straight into
the socket until it bottoms.
Insert the socket back into the
turn signal assembly. Turn it
clockwise to lock it in place.
Turn on the lights to make sure
the new bulb is working.
Put the inner f ender cover in place.
Install the three holding clips.
Lock each clip in place by pushing
on the center.
1.
4.5.
3.
2. 6.
7.
8.
Lights
Replacing a Side Turn Signal Bulb
250
SOCKET
BULB
Page 254 of 319
If equipped
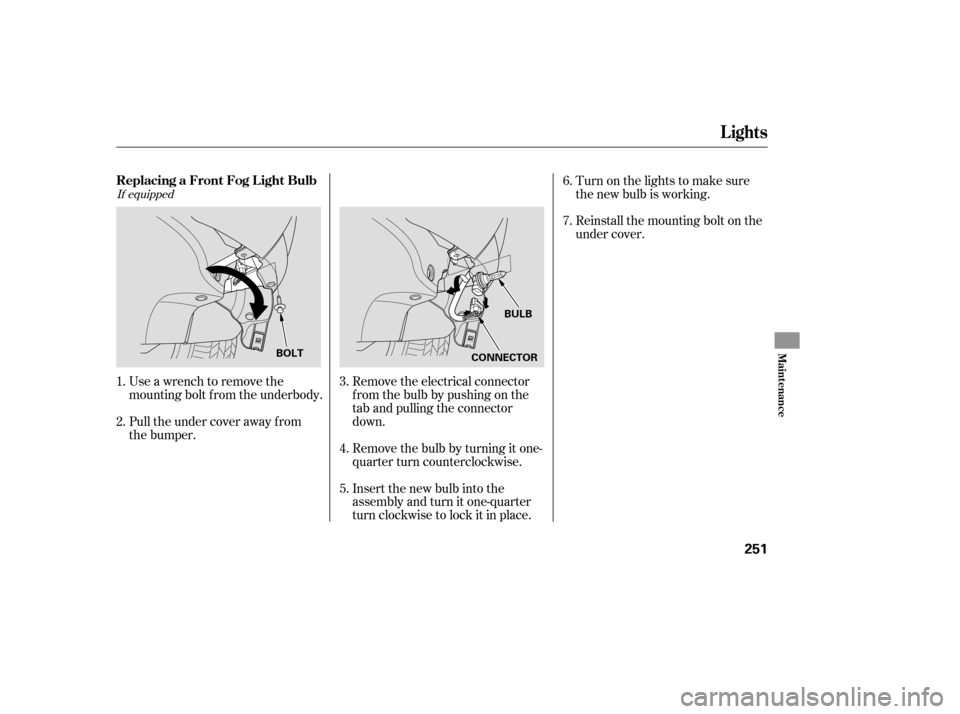
Use a wrench to remove the
mounting bolt f rom the underbody.
Pull the under cover away f rom
the bumper.Remove the electrical connector
f rom the bulb by pushing on the
tab and pulling the connector
down.
Remove the bulb by turning it one-
quarter turn counterclockwise.
Insert the new bulb into the
assembly and turn it one-quarter
turn clockwise to lock it in place.Turn on the lights to make sure
the new bulb is working.
Reinstall the mounting bolt on the
under cover.
1. 4.
5. 3.
2. 6.
7.
Lights
Replacing a Front Fog L ight Bulb
Maint enance
251
BOLT
BULB
CONNECTOR
Page 255 of 319
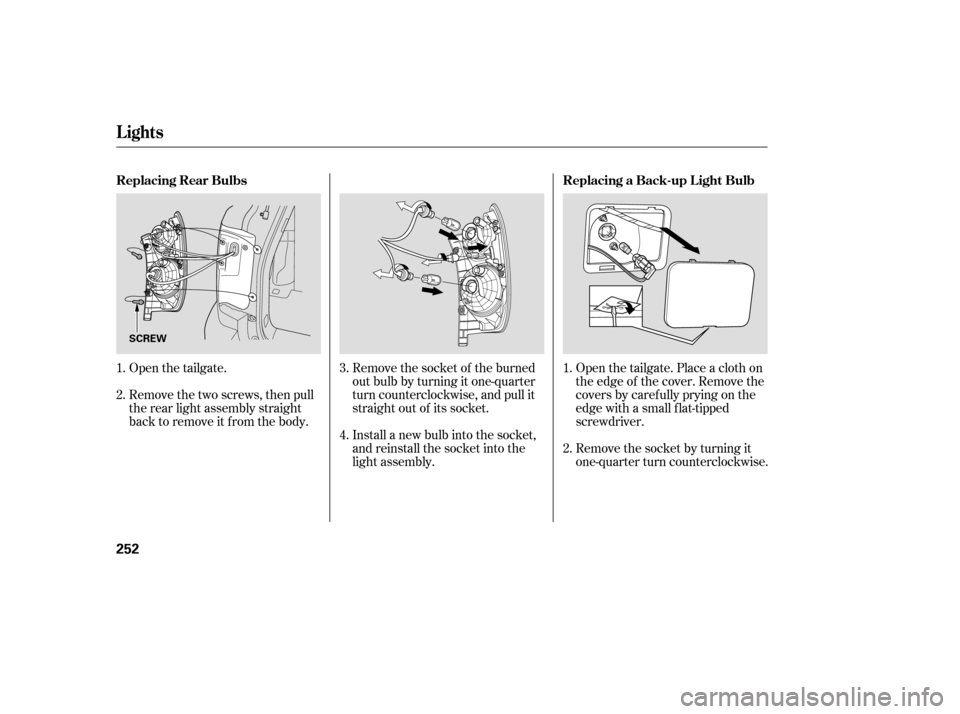
Open the tailgate.
Remove the two screws, then pull
the rear light assembly straight
back to remove it from the body.Open the tailgate. Place a cloth on
the edge of the cover. Remove the
covers by caref ully prying on the
edge with a small f lat-tipped
screwdriver.
Remove the socket by turning it
one-quarter turn counterclockwise.
Remove the socket of the burned
out bulb by turning it one-quarter
turn counterclockwise, and pull it
straight out of its socket.
Install a new bulb into the socket,
and reinstall the socket into the
light assembly. 1.
1.
2. 3.
2.
4.
Lights
Replacing Rear Bulbs
Replacing a Back-up L ight Bulb
252
SCREW
Page 256 of 319
Use a Phillips-head screwdriver to
remove the screw under the lens. Place a cloth on the middle edge
of a part of the lens on the
passenger’s side. Remove a part of
the lens by caref ully prying on its
edge with a small f lip tipped
screwdriver.
Reinstall the back-up light cover. Pull the burned out bulb straight
out of its socket.
Push the new bulb straight into
the socket until it bottoms.
Insert the socket back into the
light assembly. Turn it clockwise
to lock it in place.
Pull the light assembly out of the
tailgate.
Pull the bulb straight out of its
socket. Push a new bulb into the
socket until it bottoms. Reinstall
the assembly. Remove the socket f rom the light
assembly by turning it one-quarter
turn counterclockwise.
Turn on the lights to make sure
the new bulb is working.
1. 4.
5. 3.
2.
4.
5.
6. 3.
Lights
Replacing the High-mount Brake
Light
Maint enance
253
SCREWS