2006 SUBARU IMPREZA lock
[x] Cancel search: lockPage 171 of 365

5-8 Audio
(11) to skip to the beginning of the next
track. Each time this side of the button is
pressed, the indicated track number will
increase.
Backward direction
Briefly press the side of the button
(11) to skip to the beginning of the current
track. Each time this side of the button is
pressed, the indicated track number will
decrease.
Fast-forwarding and fast-reversing
Fast-forwarding
Press the side of the button (11)
continuously to fast-forward the disc.
Release the button to stop fast-forward-
ing.
Fast-reversing
Press the side of the button (11)
continuously to fast-reverse the disc.
Release the button to stop fast-reversing.
Repeat playback
Press the RPT/RDM button (10) and re-
lease it in less than 2 seconds while a
song is playing to play the song repeated-
ly. The RPT indicator will come on and
the song will be played continuously. To
cancel the repeat mode, press the button
again. Then the RPT indicator goes out, and normal playback mode is restored.
Random playback
Press the RPT/RDM button (10) and
hold it in for more than 2 seconds while a
disc is being played back to play all songs
on the disc in a random order. The RDM
indicator will come on and all songs on the
disc will be played in a random order.
To cancel the random mode, press the
button again. Then the RDM indicator
goes out, and normal playback mode is
restored.
To eject a disc from the player
When a disc is being played back or when
a disc is in the player, press the Eject
button (7). The disc will be ejected.
The disc may be removed even when the
ignition switch is in the LOCK position.
NOTE
Avoid driving the vehicle with a CD
sticking out, because vibration might
make it fall out.
Page 175 of 365
5-12 Audio
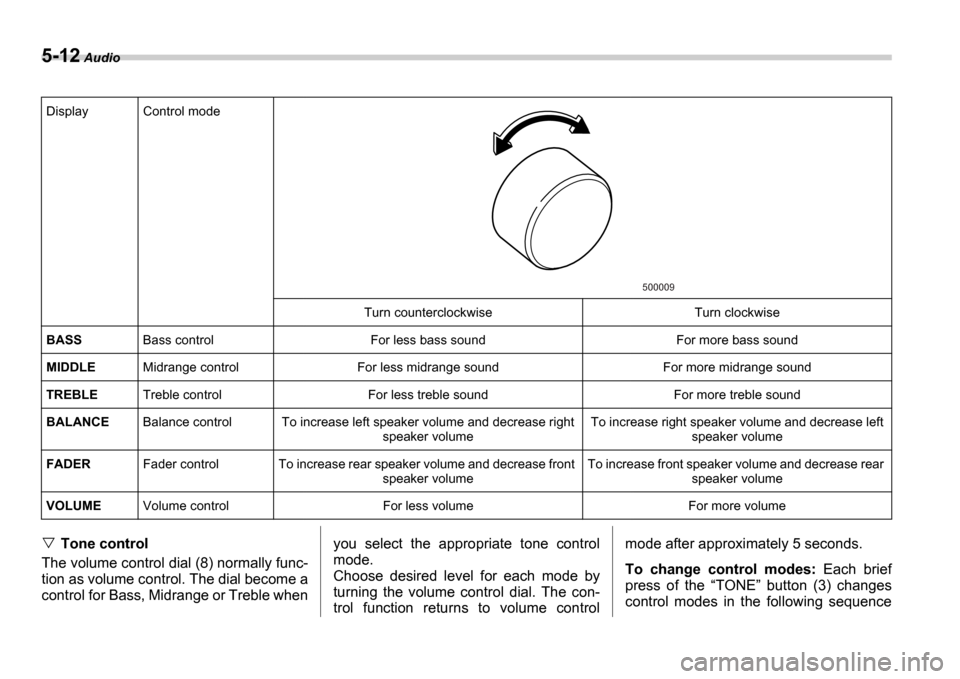
Tone control
The volume control dial (8) normally func-
tion as volume control. The dial become a
control for Bass, Midrange or Treble when you select the appropriate tone control
mode.
Choose desired level for each mode by
turning the volume control dial. The con-
trol function returns to volume controlmode after approximately 5 seconds.
To change control modes:
Each brief
press of the TONE button (3) changes
control modes in the following sequence
Display Control mode
Turn counterclockwise Turn clockwise
BASS Bass control For less bass sound For more bass sound
MIDDLE Midrange control For less midrange sound For more mid range sound
TREBLE Treble control For less treble sound For more treble sound
BALANCE Balance control To increase left speaker volume and decrease right
speaker volume To increase right speaker volume and decrease left
speaker volume
FADER Fader control To increase rear speaker volume and de crease front
speaker volume To increase front speaker volume and decrease rear
speaker volume
VOLUME Volume control For less volume For more volume
500009
Page 176 of 365
Audio 5-13
CONTINUED
starting from bass control mode. (When
the radio is first turned on, the control
mode is in the volume control.)
Fader and balance control
The volume control dial (8) normally func-
tion as volume control. The dial become
the controls for Fader or Balance when
you select the appropriate fader and bal-
ance control mode.
Choose desired setting for each mode by
turning the volume control dial. The con-
trol function returns to volume control
mode after approximately 5 seconds.
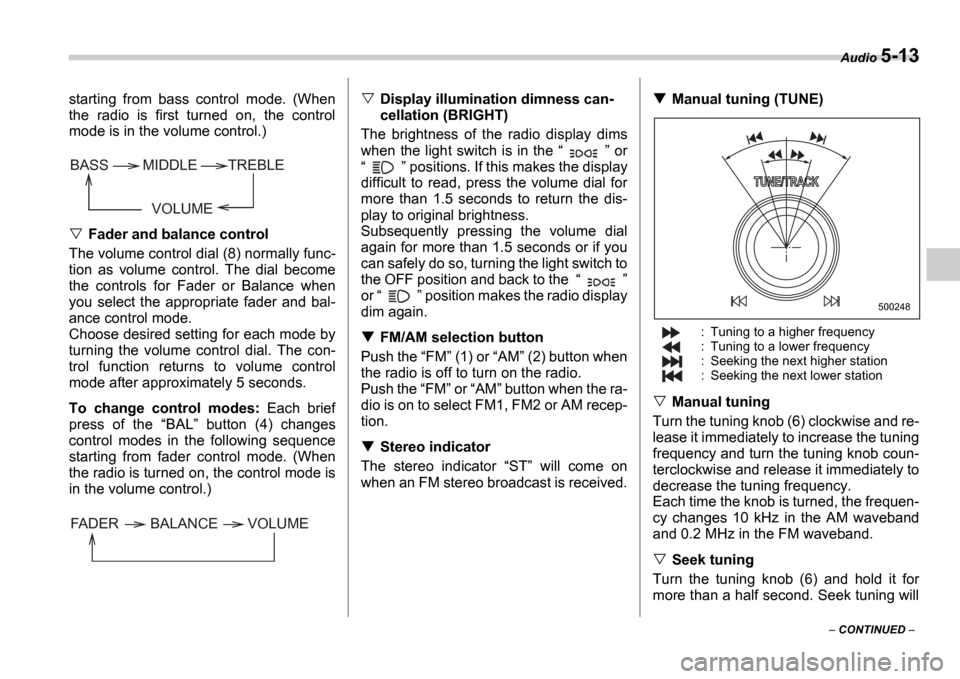
To change control modes: Each brief
press of the BAL button (4) changes
control modes in the following sequence
starting from fader control mode. (When
the radio is turned on, the control mode is
in the volume control.)
Display illumination dimness can-
cellation (BRIGHT)
The brightness of the radio display dims
when the light switch is in the or
positions. If this makes the display
difficult to read, press the volume dial for
more than 1.5 seconds to return the dis-
play to original brightness.
Subsequently pressing the volume dial
again for more than 1.5 seconds or if you
can safely do so, turning the light switch to
the OFF position and back to the
or position makes the radio display
dim again.
FM/AM selection button
Push the FM (1) or AM (2) button when
the radio is off to turn on the radio.
Push the FM or AM button when the ra-
dio is on to select FM1, FM2 or AM recep-
tion.
Stereo indicator
The stereo indicator ST will come on
when an FM stereo broadcast is received.
Manual tuning (TUNE)
: Tuning to a higher frequency
: Tuning to a lower frequency
: Seeking the next higher station
: Seeking the next lower station
Manual tuning
Turn the tuning knob (6) clockwise and re-
lease it immediately to increase the tuning
frequency and turn the tuning knob coun-
terclockwise and release it immediately to
decrease the tuning frequency.
Each time the knob is turned, the frequen-
cy changes 10 kHz in the AM waveband
and 0.2 MHz in the FM waveband.
Seek tuning
Turn the tuning knob (6) and hold it for
more than a half second. Seek tuning will
VOLUME
BASS TREBLE
MIDDLE
FADER BALANCE VOLUME
500248
Page 180 of 365

Audio 5-17
CONTINUED
Selecting a desired track (TRACK)
: Skipping forward
: Skipping backward
: Fast-forwarding
: Fast-reversing
Skipping forward
Turn the TRACK knob (16) clockwise
and release it immediately to skip to the
beginning of the next track. Each time the
knob is turned and released, the indicated
track number will increase.
Skipping backward
Turn the TRACK knob (16) counter-
clockwise and release it immediately to
skip to the beginning of the current track.
If you continue to turn and release the
knob, the indicated track number will de- crease.
Fast-forwarding
Turn the TRACK knob (16) clockwise
and hold it continuously to fast-forward the
disc.
Release the knob to stop fast-forwarding.
Fast-reversing
Turn the TRACK knob (16) counter-
clockwise and hold it continuously to fast-
reverse the disc.
Release the knob to stop fast-reversing.
Repeat playback
Press the RPT button (11) while a song
is playing to play the song repeatedly. The RPT indicator will come on and the song
will be played continuously. To cancel the
repeat mode, press the button again.
Then the RPT indicator goes out, and
normal playback mode is restored.
Random playback
Press the RDM button (12) while a disc
is being played back to play all songs on
the disc in a random order. The RDM in-
dicator will come on and all songs on the
disc will be played in a random order.
To cancel the random mode, press the
button again. Then the RDM indicator
goes out, and normal playback mode is
restored.
Scan
When the SCAN button (13) is pressed
while the disc is being played back, you
can hear the first 10 seconds of each track
to search for the desired program. To con-
tinue listening to the program, press the SCAN button again. After all tracks on
the disc have been scanned, normal play-
back mode is restored.
How to unload CDs from the player
Ejecting a CD from the player
Of the discs loaded, you can select and re-
move only one disc.
1. Press the Disc select button (17) of
the disc whose DISC indicator is ON.
2. Press the Eject button (15). Then the
DISC indicator associated with the disc
you have selected will blink, and the disc
will be ejected.
To remove more discs in succession, re-
peat Steps 1 and 2.
Ejecting all discs from the player
(All disc ejection mode)
1. If you continue to press the Eject but-
ton (15), the player will produce beep
sound and will enter the all disc ejection
mode.
2. Remove the disc that has been eject-
ed. The other discs loaded will then be
ejected one after another. If you do not re-
500248
Page 183 of 365
5-20 Audio
To insert a disc
1. Press one of the Disc select buttons
(3) (numbered from 1 to 6) for which the
disc indicator light (2) is OFF .
The disc indicator lights are located direct-
ly above the corresponding Disc select
buttons.
2. The indicator will begin blinking. The
blinking will last for 15 seconds.
During this period, insert a desired disc,
and the disc will begin to play. (If any disc
is not inserted during this period, the Disc
slot (1) door will close. Repeat Step 1.)
Be sure to hold a disc with the label side
(the side where titles are printed) up.
3. To insert another disc, repeat Steps 1
and 2 choosing a different disc select but-
ton.
To insert six discs at a time
1. Press and hold the Disc select button
number 1 until all disc indicators begin
blinking (approximately 1.5 seconds). 2. The indicators will blink for 15 seconds.
During this period, insert desired six discs.
3. When all discs are loaded, the first disc
will begin to play. (If no disc is inserted
within this 15 seconds, the entire disc load
sequence will be canceled.)
To remove a disc
1. Press the desired one of the Disc se-
lect buttons (3) (numbered from 1 to 6) for
which the disc indicator light is on.
2. Press the Eject button (4). The select-
ed disc will be ejected and the indicator
light will begin blinking.
3. To remove another disc, repeat Steps
1 and 2 choosing a different Disc select
button.
(To remove discs when the ignition switch
is in the Lock position, press the Eject
button, and the first disc will be ejected.
Press the Eject button again, and the
next disc will be ejected and so on. At this
time, the Disc select buttons are dis-
abled.)
To remove all discs at one time
1. Press and hold the Eject button (4)
until all Disc indicators begin blinking
(approximately 1.5 seconds), and the first
disc will be ejected.
2. When the disc is removed, the next
one will be ejected, and so on.
To replace a playing disc with an-
other
Simply press the desired one of Disc se-
lect buttons (3) (numbered from 1 to 6) or
press the Disc select button on the radio
unit to select the desired disc, and the disc
will begin to play.
Disc indicators
Lit: when the corresponding storage tray
is occupied by a disc.
Blinking: Disc player is either in loading,
eject or changing mode.
OFF: No disc is loaded or the ignition
switch is in the LOCK position.
Open/Closed disc slot indicator
When the disc slot is open, the disc indica-
tors on both sides of the slot illuminate.
Function control
Refer to CD changer control operating in-
structions described in the Type B audio
set (if equipped) section.
Do not insert or remove any disc
when the automatic transmission
selector lever is in the park posi-
tion; the selector lever in that po-
sition can interfere with disc in-
sertion or removal, causing
scratches on the disc surface (for
AT vehicles).
Page 188 of 365
Interior equipment 6-3
To turn on the map light, push the switch.
To turn it off, push the switch again.
When leaving the vehicle, make sure the
light is turned off to avoid battery dis-
charge.Sun visors
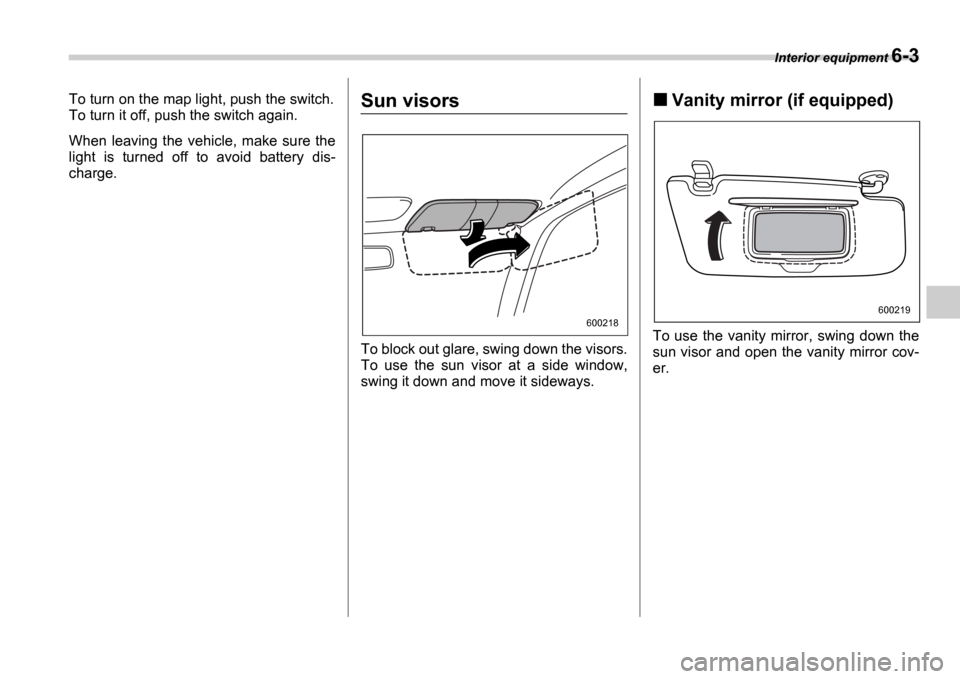
To block out glare, swing down the visors.
To use the sun visor at a side window,
swing it down and move it sideways.
Vanity mirror (if equipped)
To use the vanity mirror, swing down the
sun visor and open the vanity mirror cov-
er.
600218
600219
Page 189 of 365
6-4 Interior equipment
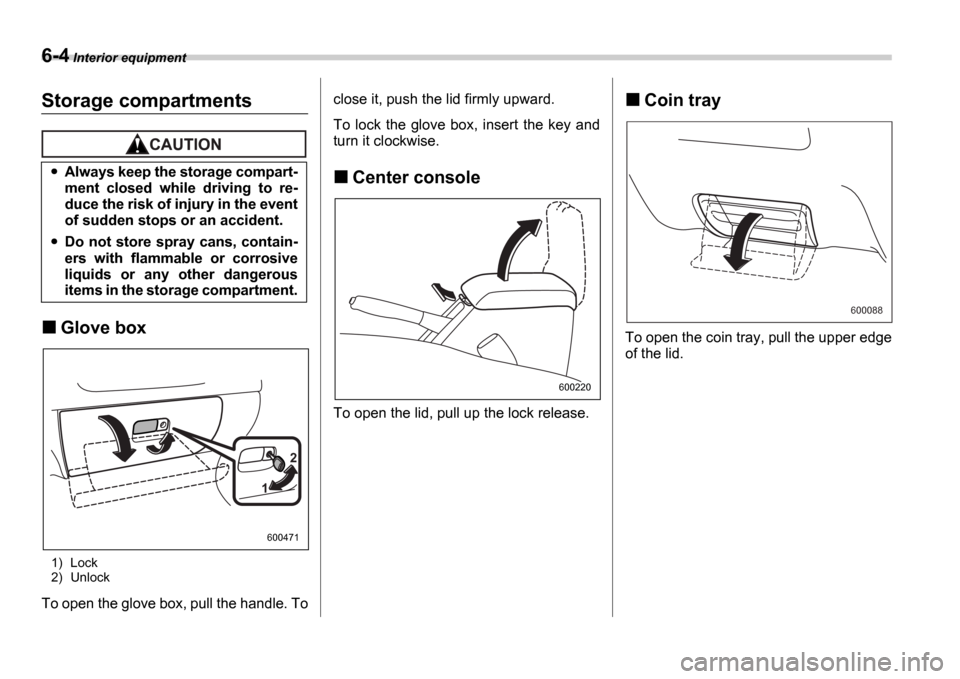
Storage compartments
Glove box
1) Lock
2) Unlock
To open the glove box, pull the handle. To close it, push the lid firmly upward.
To lock the glove box, insert the key and
turn it clockwise.
Center console
To open the lid, pull up the lock release.
Coin tray
To open the coin tray, pull the upper edge
of the lid.
Always keep the storage compart-
ment closed while driving to re-
duce the risk of injury in the event
of sudden stops or an accident.
Do not store spray cans, contain-
ers with flammable or corrosive
liquids or any other dangerous
items in the storage compartment.
1
2
600471
600220
600088
Page 198 of 365
7
Starting and operating
Fuel ...................................................................... 7-2
Fuel requirements ................................. ................. 7-2
Fuel filler lid and cap ........................... ................... 7-4
State emission testing (U.S. only) ................ .... 7-5
Preparing to drive ................................ .............. 7-6
Starting the engine ............................... .............. 7-7
Manual transmission vehicle ....................... .......... 7-7
Automatic transmission vehicle .................... ........ 7-7
Stopping the engine ............................... ............ 7-8
Manual transmission 6 speeds (WRX-STI) ... 7-9
Selecting reverse gear ............................ ............... 7-9
Shifting speeds ................................... .................... 7-9
Driving tips ...................................... ........................ 7-10
Manual transmission 5 speeds (except
WRX-STI) .......................................... ................ 7-11
Shifting speeds ................................... .................... 7-11
Driving tips ...................................... ........................ 7-12
Driver s Control Center Differential (DCCD)
(WRX-STI) ......................................... ............... 7-12
Auto mode ......................................... ...................... 7-13
Manual mode ....................................... .................... 7-13
Temporary release ................................. ................. 7-15
Automatic transmission ............................ ........ 7-16
Selector lever for automatic transmission ......... .. 7-16
Shift lock release ................................ .................... 7-19
Limited slip differential (LSD) (if equipped) ..... 7-20
Power steering .................................... ............... 7-21Braking ...........................................
..................... 7-21
Braking tips ...................................... ....................... 7-21
Brake system ...................................... .................... 7-21
Disc brake pad wear warning indicators ............ .. 7-22
ABS (Anti-lock Brake System) ...................... .... 7-22
ABS system self-check ............................. ............. 7-22
ABS warning light ................................. .................. 7-23
Electronic Brake Force Distribution (EBD) system ............................................ .................. 7-24
Steps to take if EBD system fails ................. ......... 7-24
Parking your vehicle .............................. ............ 7-25
Parking brake ..................................... ..................... 7-25
Parking tips ...................................... ....................... 7-25
Cruise control .................................... ................. 7-27
To set cruise control ............................. ................. 7-27
To temporarily cancel the cruise control .......... ... 7-28
To turn off the cruise control .................... ............. 7-28
To change the cruising speed ...................... ......... 7-28