2006 SUBARU IMPREZA lock
[x] Cancel search: lockPage 124 of 365
Instruments and controls 3-11
CONTINUED
the vehicle is moving.
The set engine speed may differ from
the engine speed shown by the ta-
chometer. Use the engine speed
shown by the tachometer as a rough
guide.
Deactivating the REV alarm
system
To deactivate the REV alarm system s
REV indicator light and buzzer functions,
set the alarm-level engine speed to 0 (ze-
ro) rpm.
Meters and gauges (Except
WRX-STI)
Speedometer
The speedometer shows the vehicle
speed.
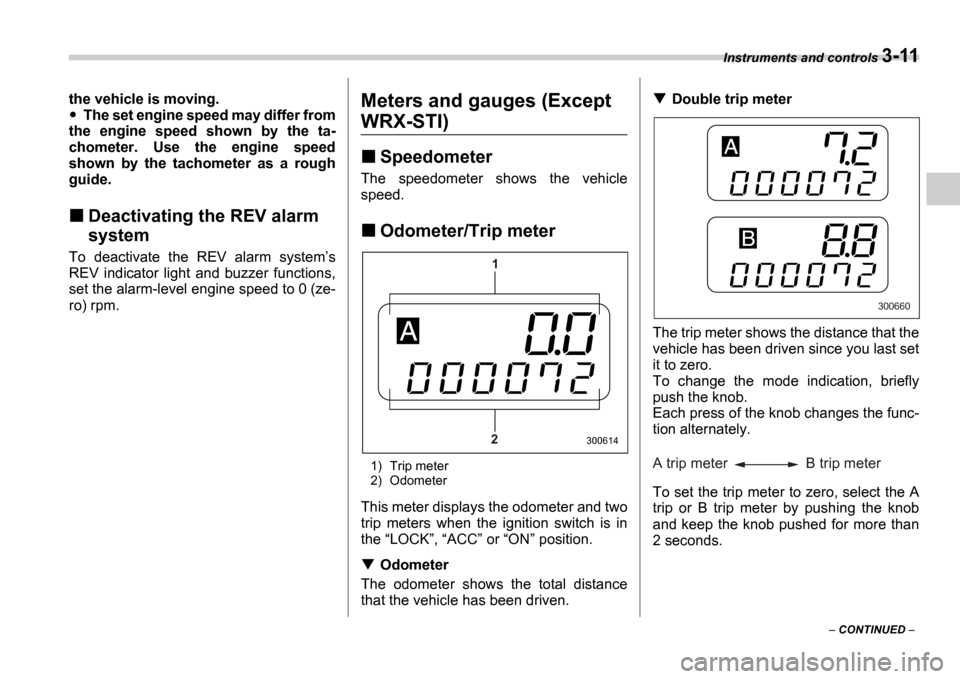
Odometer/Trip meter
1) Trip meter
2) Odometer
This meter displays the odometer and two
trip meters when the ignition switch is in
the LOCK , ACC or ON position.
Odometer
The odometer shows the total distance
that the vehicle has been driven.
Double trip meter
The trip meter shows the distance that the
vehicle has been driven since you last set
it to zero.
To change the mode indication, briefly
push the knob.
Each press of the knob changes the func-
tion alternately.
To set the trip meter to zero, select the A
trip or B trip meter by pushing the knob
and keep the knob pushed for more than
2 seconds.
1
2
300614
300660
A trip meter B trip meter
Page 125 of 365
3-12 Instruments and controls
NOTE
If the connection between the combi-
nation meter and battery is broken for
any reason such as vehicle mainte-
nance or fuse replacement, the data re-
corded on the trip meter will be lost.
Tachometer
The tachometer shows the engine speed
in thousands of revolutions per minute.
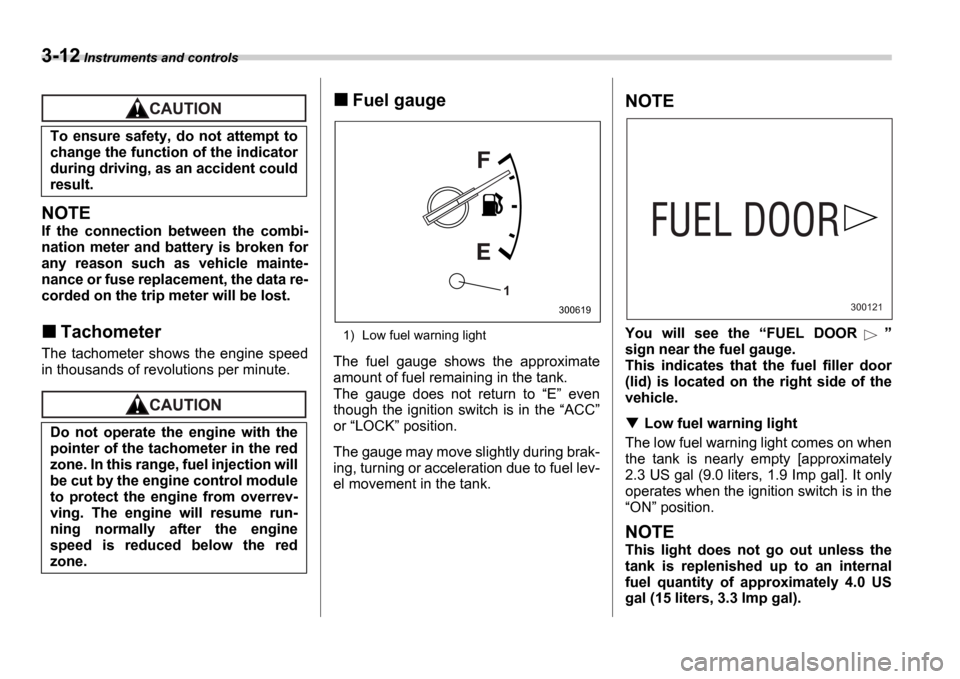
Fuel gauge
1) Low fuel warning light
The fuel gauge shows the approximate
amount of fuel remaining in the tank.
The gauge does not return to E even
though the ignition switch is in the ACC
or LOCK position.
The gauge may move slightly during brak-
ing, turning or acceleration due to fuel lev-
el movement in the tank.
NOTE
You will see the FUEL DOOR
sign near the fuel gauge.
This indicates that the fuel filler door
(lid) is located on the right side of the
vehicle.
Low fuel warning light
The low fuel warning light comes on when
the tank is nearly empty [approximately
2.3 US gal (9.0 liters, 1.9 Imp gal]. It only
operates when the ignition switch is in the ON position.
NOTE
This light does not go out unless the
tank is replenished up to an internal
fuel quantity of approximately 4.0 US
gal (15 liters, 3.3 Imp gal).
To ensure safety, do not attempt to
change the function of the indicator
during driving, as an accident could
result.
Do not operate the engine with the
pointer of the tachometer in the red
zone. In this range, fuel injection will
be cut by the engine control module
to protect the engine from overrev-
ving. The engine will resume run-
ning normally after the engine
speed is reduced below the red
zone.
1
300619300121
Page 128 of 365
Instruments and controls 3-15
CONTINUED
SRS airbag system
warning light
When the ignition switch is turned to the ON position, the SRS airbag system
warning light will come on for approxi-
mately six seconds and go out. This
shows the SRS airbag and SRS side air-
bag (if equipped) and seatbelt pretension-
ers are in normal operation.
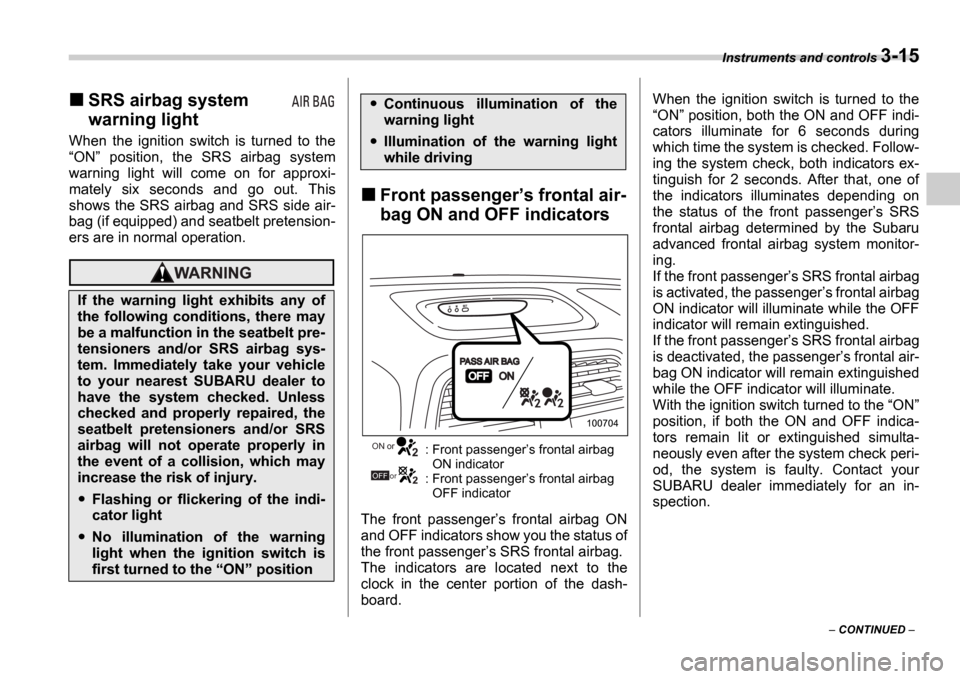
Front passenger s frontal air-
bag ON and OFF indicators
: Front passenger s frontal airbag
ON indicator
: Front passenger s frontal airbag
OFF indicator
The front passenger s frontal airbag ON
and OFF indicators show you the status of
the front passenger s SRS frontal airbag.
The indicators are located next to the
clock in the center portion of the dash-
board. When the ignition switch is turned to the
ON position, both the ON and OFF indi-
cators illuminate for 6 seconds during
which time the system is checked. Follow-
ing the system check, both indicators ex-
tinguish for 2 seconds. After that, one of
the indicators illuminates depending on
the status of the front passenger s SRS
frontal airbag determined by the Subaru
advanced frontal airbag system monitor-
ing.
If the front passenger s SRS frontal airbag
is activated, the passenger s frontal airbag
ON indicator will illuminate while the OFF
indicator will remain extinguished.
If the front passenger s SRS frontal airbag
is deactivated, the passenger s frontal air-
bag ON indicator will remain extinguished
while the OFF indicator will illuminate.
With the ignition switch turned to the ON
position, if both the ON and OFF indica-
tors remain lit or extinguished simulta-
neously even after the system check peri-
od, the system is faulty. Contact your
SUBARU dealer immediately for an in-
spection.
If the warning light exhibits any of
the following conditions, there may
be a malfunction in the seatbelt pre-
tensioners and/or SRS airbag sys-
tem. Immediately take your vehicle
to your nearest SUBARU dealer to
have the system checked. Unless
checked and properly repaired, the
seatbelt pretensioners and/or SRS
airbag will not operate properly in
the event of a collision, which may
increase the risk of injury.
Flashing or flickering of the indi-
cator light
No illumination of the warning
light when the ignition switch is
first turned to the ON position
Continuous illumination of the
warning light
Illumination of the warning light
while driving
100704
ON or
OFF or
Page 132 of 365
Instruments and controls 3-19
CONTINUED
minates if a malfunction occurs in the EBD
system. In that event, it comes on together
with the ABS warning light.
The EBD system may be malfunctioning if
the brake system warning light and ABS
warning light illuminate simultaneously
during driving.
Even if the EBD system fails, the conven-
tional braking system will still function.
However, the rear wheels will be more
prone to locking when the brakes are ap-
plied harder than usual and the vehicle
s
motion may therefore become somewhat
harder to control.
If the brake system warning light and ABS
warning light illuminate simultaneously,
take the following steps:
1. Stop the vehicle in the nearest safe, flat
place.
2. Shut down the engine, then restart it.
3. Release the parking brake. If both
warning lights go out, the EBD system
may be faulty. Drive carefully to the near-
est SUBARU dealer and have the system
inspected.
4. If both warning lights come on again
and stay illuminated after the engine has
been restarted, shut down the engine
again, apply the parking brake, and check
the brake fluid level.
5. If the brake fluid level is not below the MIN mark, the EBD system may be faulty. Drive carefully to the nearest
SUBARU dealer and have the system in-
spected.
6. If the brake fluid level is below the
MIN mark, DO NOT drive the vehicle. In-
stead, have the vehicle towed to the near-
est SUBARU dealer for repair.
Door open warning light
The door open warning light comes on if
any door or the rear gate is not fully
closed.
Always make sure this light is out before
you start to drive.
All-Wheel Drive warn-
ing light (AWD AT vehi-
cles if equipped)
The All-Wheel Drive warning light comes
on when the ignition switch is turned to the ON position and goes out after approxi-
mately two seconds.
This light comes on when All-Wheel Drive
is disengaged and the drive mechanism is
switched to Front Wheel Drive for mainte-
nance or similar purposes (Non-turbo ve-
hicles).
It flashes if the vehicle is driven with tires
of differing diameters fitted on the wheels
or with an excessively low air pressure in any of the tires.
Intercooler water
spray warning light
(WRX-STI)
This light comes on when the water level
in the intercooler water spray tank falls to
the lower limit (approximately 0.4 US qt,
0.4 liter, 0.4 Imp qt).
Continuing to drive with the AWD
warning light flashing can damage
the powertrain. If the AWD warning
light starts to flash, promptly park in
a safe place and check whether the
tires have differing diameters and
whether any of the tires has an ex-
cessively low inflation pressure.
Page 133 of 365
3-20 Instruments and controls
Selector lever position indi-
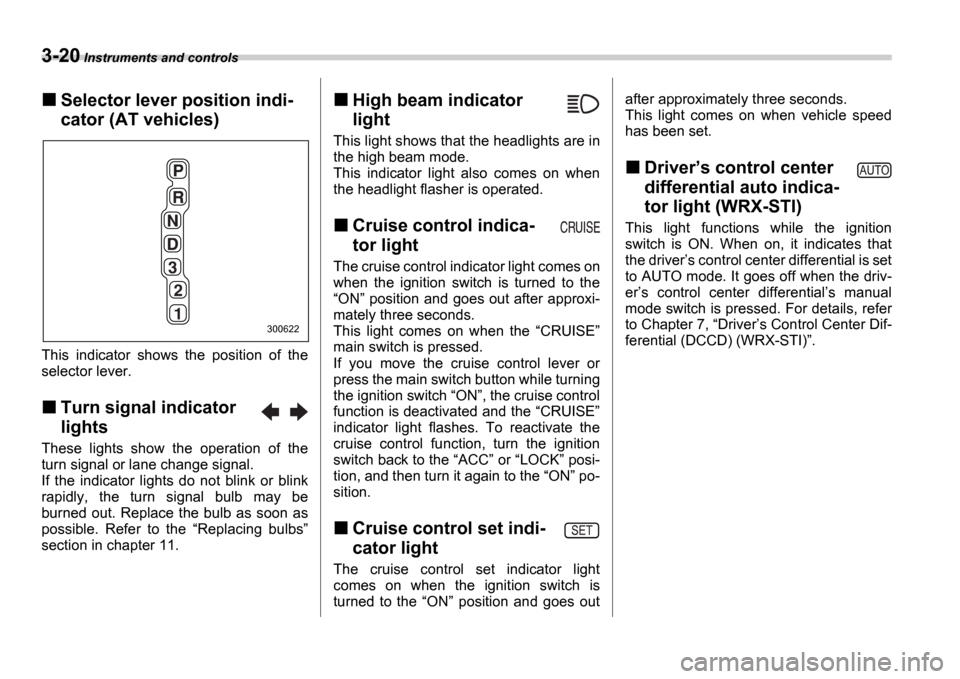
cator (AT vehicles)
This indicator shows the position of the
selector lever.
Turn signal indicator
lights
These lights show the operation of the
turn signal or lane change signal.
If the indicator lights do not blink or blink
rapidly, the turn signal bulb may be
burned out. Replace the bulb as soon as
possible. Refer to the Replacing bulbs
section in chapter 11.
High beam indicator
light
This light shows that the headlights are in
the high beam mode.
This indicator light also comes on when
the headlight flasher is operated.
Cruise control indica-
tor light
The cruise control indicator light comes on
when the ignition switch is turned to the ON position and goes out after approxi-
mately three seconds.
This light comes on when the CRUISE
main switch is pressed.
If you move the cruise control lever or
press the main switch button while turning
the ignition switch ON , the cruise control
function is deactivated and the CRUISE
indicator light flashes. To reactivate the
cruise control function, turn the ignition
switch back to the ACC or LOCK posi-
tion, and then turn it again to the ON po-
sition.
Cruise control set indi-
cator light
The cruise control set indicator light
comes on when the ignition switch is
turned to the ON position and goes out after approximately three seconds.
This light comes on when vehicle speed
has been set.
Driver
s control center
differential auto indica-
tor light (WRX-STI)
This light functions while the ignition
switch is ON. When on, it indicates that
the driver s control center differential is set
to AUTO mode. It goes off when the driv-
er s control center differential s manual
mode switch is pressed. For details, refer
to Chapter 7, Driver s Control Center Dif-
ferential (DCCD) (WRX-STI) .
300622
Page 135 of 365
3-22 Instruments and controls
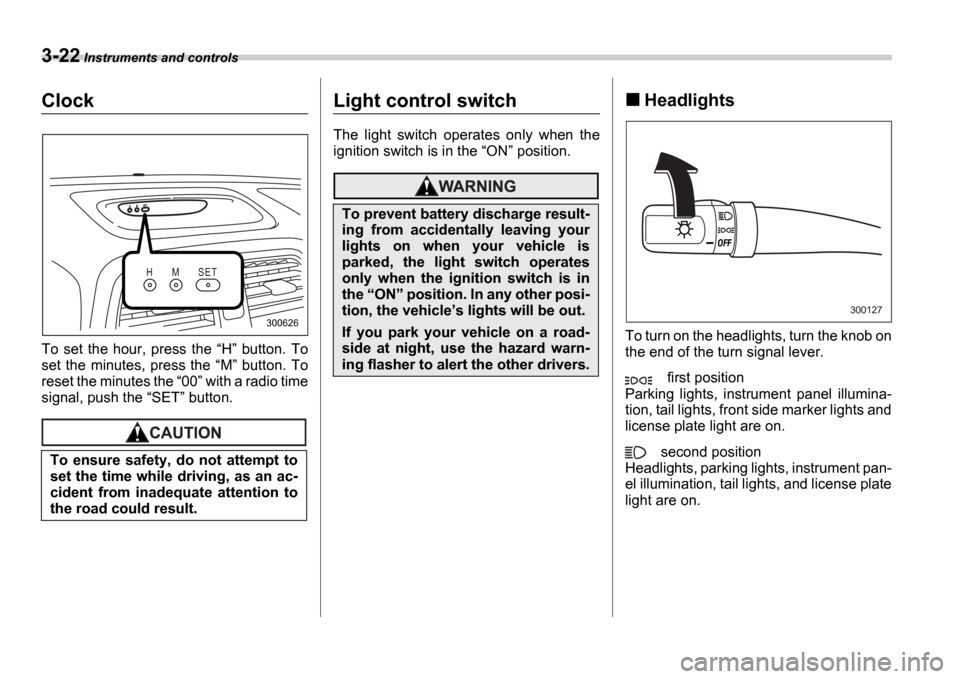
Clock
To set the hour, press the H button. To
set the minutes, press the M button. To
reset the minutes the 00 with a radio time
signal, push the SET button.
Light control switch
The light switch operates only when the
ignition switch is in the ON position.
Headlights
To turn on the headlights, turn the knob on
the end of the turn signal lever.
first position
Parking lights, instrument panel illumina-
tion, tail lights, front side marker lights and
license plate light are on.
second position
Headlights, parking lights, instrument pan-
el illumination, tail lights, and license plate
light are on.
To ensure safety, do not attempt to
set the time while driving, as an ac-
cident from inadequate attention to
the road could result.
H M S E T
300626
To prevent battery discharge result-
ing from accidentally leaving your
lights on when your vehicle is
parked, the light switch operates
only when the ignition switch is in
the
ON position. In any other posi-
tion, the vehicle s lights will be out.
If you park your vehicle on a road-
side at night, use the hazard warn-
ing flasher to alert the other drivers.
300127
Page 139 of 365
3-26 Instruments and controls
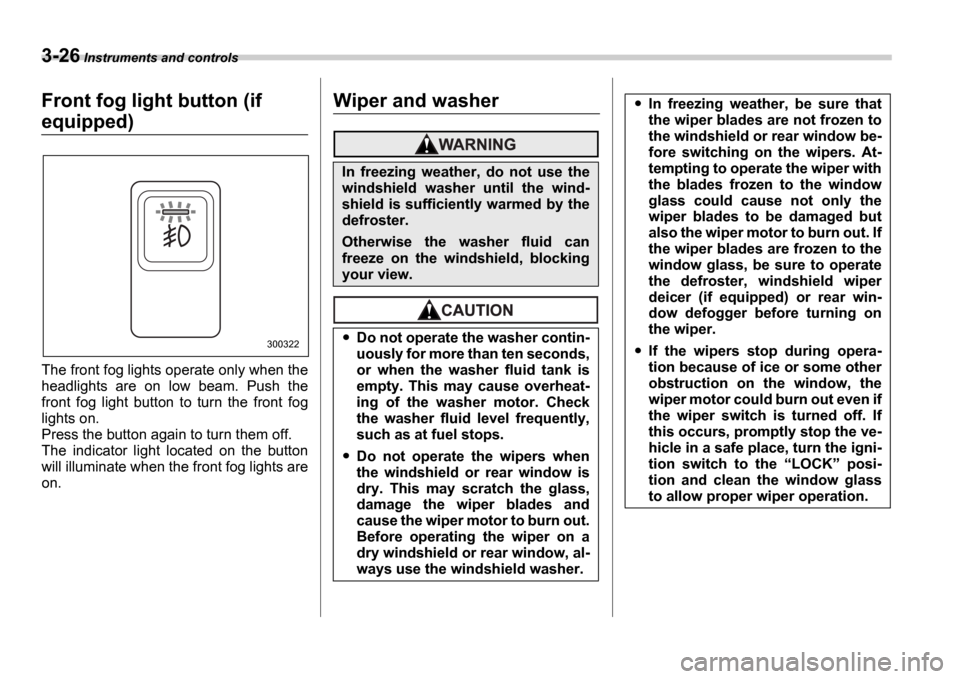
Front fog light button (if
equipped)
The front fog lights operate only when the
headlights are on low beam. Push the
front fog light button to turn the front fog
lights on.
Press the button again to turn them off.
The indicator light located on the button
will illuminate when the front fog lights are
on.
Wiper and washer
300322
In freezing weather, do not use the
windshield washer until the wind-
shield is sufficiently warmed by the
defroster.
Otherwise the washer fluid can
freeze on the windshield, blocking
your view.
Do not operate the washer contin-
uously for more than ten seconds,
or when the washer fluid tank is
empty. This may cause overheat-
ing of the washer motor. Check
the washer fluid level frequently,
such as at fuel stops.
Do not operate the wipers when
the windshield or rear window is
dry. This may scratch the glass,
damage the wiper blades and
cause the wiper motor to burn out.
Before operating the wiper on a
dry windshield or rear window, al-
ways use the windshield washer.
In freezing weather, be sure that
the wiper blades are not frozen to
the windshield or rear window be-
fore switching on the wipers. At-
tempting to operate the wiper with
the blades frozen to the window
glass could cause not only the
wiper blades to be damaged but
also the wiper motor to burn out. If
the wiper blades are frozen to the
window glass, be sure to operate
the defroster, windshield wiper
deicer (if equipped) or rear win-
dow defogger before turning on
the wiper.
If the wipers stop during opera-
tion because of ice or some other
obstruction on the window, the
wiper motor could burn out even if
the wiper switch is turned off. If
this occurs, promptly stop the ve-
hicle in a safe place, turn the igni-
tion switch to the LOCK posi-
tion and clean the window glass
to allow proper wiper operation.
Page 142 of 365
Instruments and controls 3-29
CONTINUED
ON position.
To turn the wiper off, return the knob on
the end of the lever to the OFF position.
Washer
To wash the rear window while the rear
wiper is operating, turn the knob on the
end of the wiper control lever counter-
clockwise to the position. The
washer fluid sprays until you release the
knob.
To wash the rear window when the rear
wiper is not in use, turn the knob on the
end of the wiper control lever clockwise to
the position. The washer fluid
sprays and the wiper operates until you
release the knob.
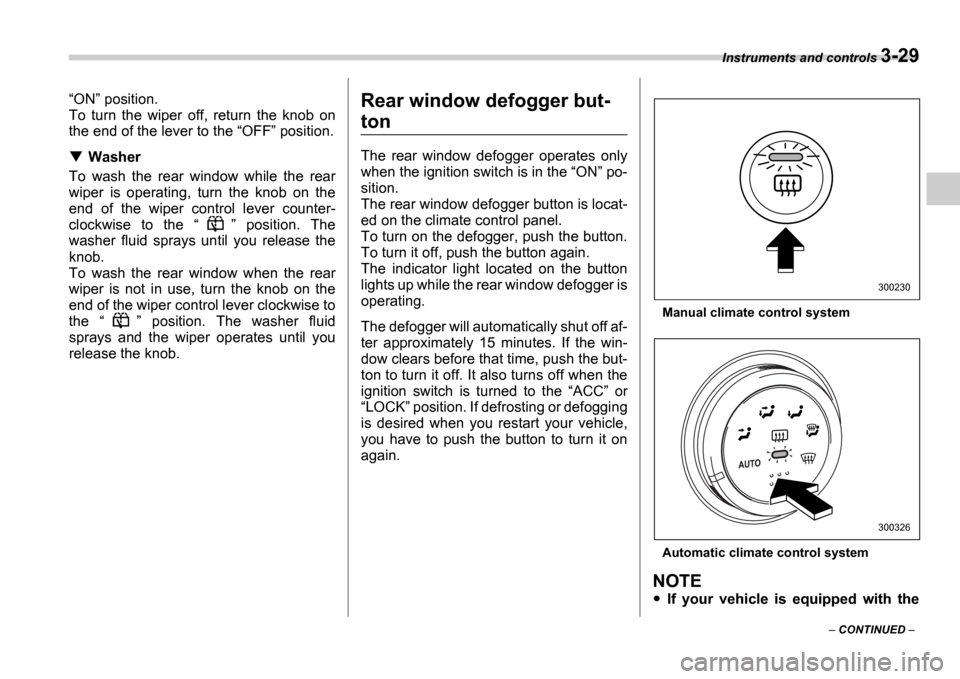
Rear window defogger but-
ton
The rear window defogger operates only
when the ignition switch is in the ON po-
sition.
The rear window defogger button is locat-
ed on the climate control panel.
To turn on the defogger, push the button.
To turn it off, push the button again.
The indicator light located on the button
lights up while the rear window defogger is
operating.
The defogger will automatically shut off af-
ter approximately 15 minutes. If the win-
dow clears before that time, push the but-
ton to turn it off. It also turns off when the
ignition switch is turned to the ACC or
LOCK position. If defrosting or defogging
is desired when you restart your vehicle,
you have to push the button to turn it on
again.
Manual climate control system
Automatic climate control system
NOTE
If your vehicle is equipped with the
300230
300326