Page 143 of 365
3-30 Instruments and controls
outside mirror defogger, the outside
mirror defogger operates while the rear
window defogger is operating.
Turn on the rear window defogger if
the wiper is frozen to the glass.
Windshield wiper deicer (if
equipped)
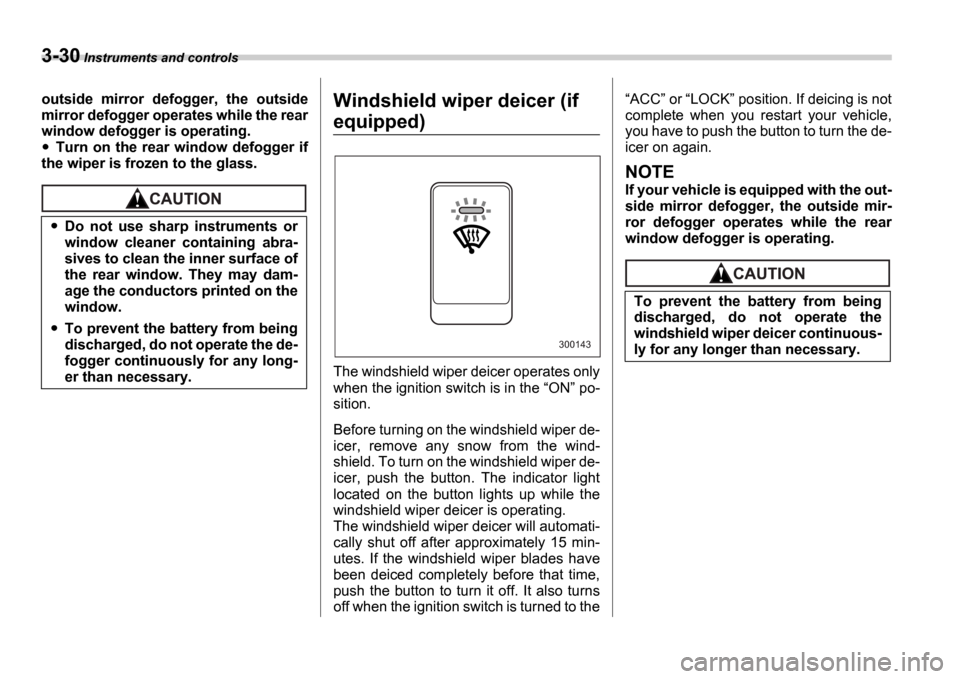
The windshield wiper deicer operates only
when the ignition switch is in the ON po-
sition.
Before turning on the windshield wiper de-
icer, remove any snow from the wind-
shield. To turn on the windshield wiper de-
icer, push the button. The indicator light
located on the button lights up while the
windshield wiper deicer is operating.
The windshield wiper deicer will automati-
cally shut off after approximately 15 min-
utes. If the windshield wiper blades have
been deiced completely before that time,
push the button to turn it off. It also turns
off when the ignition switch is turned to the
ACC or LOCK position. If deicing is not
complete when you restart your vehicle,
you have to push the button to turn the de-
icer on again.
NOTE
If your vehicle is equipped with the out-
side mirror defogger, the outside mir-
ror defogger operates while the rear
window defogger is operating.
Do not use sharp instruments or
window cleaner containing abra-
sives to clean the inner surface of
the rear window. They may dam-
age the conductors printed on the
window.
To prevent the battery from being
discharged, do not operate the de-
fogger continuously for any long-
er than necessary.
300143
To prevent the battery from being
discharged, do not operate the
windshield wiper deicer continuous-
ly for any longer than necessary.
Page 147 of 365
3-34 Instruments and controls
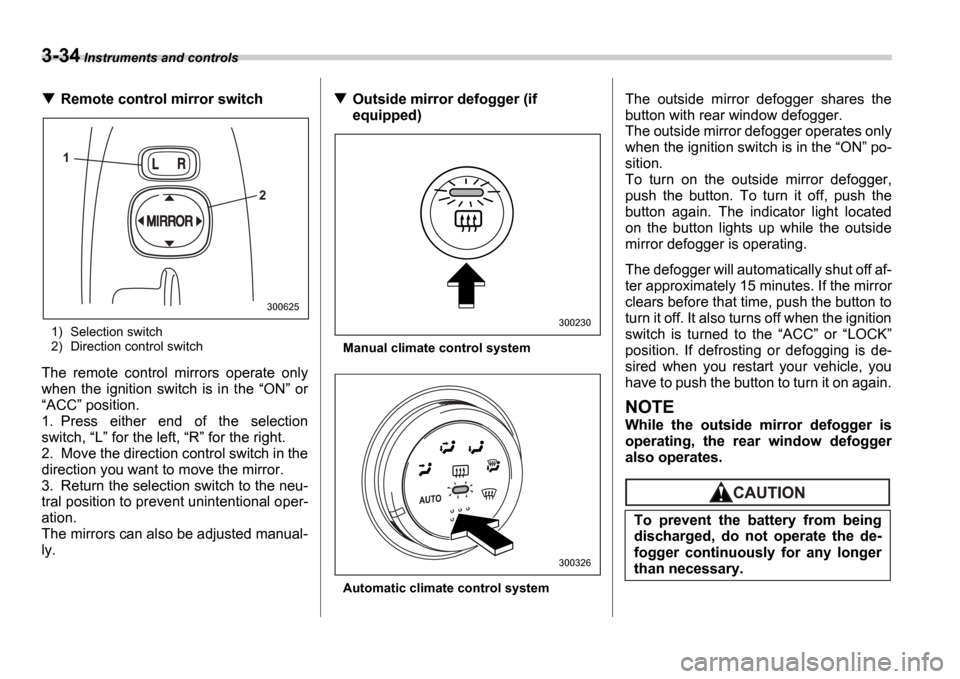
Remote control mirror switch
1) Selection switch
2) Direction control switch
The remote control mirrors operate only
when the ignition switch is in the ON or
ACC position.
1. Press either end of the selection
switch, L for the left, R for the right.
2. Move the direction control switch in the
direction you want to move the mirror.
3. Return the selection switch to the neu-
tral position to prevent unintentional oper-
ation.
The mirrors can also be adjusted manual-
ly.
Outside mirror defogger (if
equipped)
Manual climate control system
Automatic climate control system
The outside mirror defogger shares the
button with rear window defogger.
The outside mirror defogger operates only
when the ignition switch is in the ON po-
sition.
To turn on the outside mirror defogger,
push the button. To turn it off, push the
button again. The indicator light located
on the button lights up while the outside
mirror defogger is operating.
The defogger will automatically shut off af-
ter approximately 15 minutes. If the mirror
clears before that time, push the button to
turn it off. It also turns off when the ignition
switch is turned to the ACC or LOCK
position. If defrosting or defogging is de-
sired when you restart your vehicle, you
have to push the button to turn it on again.
NOTE
While the outside mirror defogger is
operating, the rear window defogger
also operates.
1
2
300625
300230
300326
To prevent the battery from being
discharged, do not operate the de-
fogger continuously for any longer
than necessary.
Page 148 of 365
Instruments and controls 3-35
Tilt steering wheel
1. Adjust the seat position. Refer to the Front seats section (chapter 1).
2. Push the tilt lock lever down.
3. Move the steering wheel to the desired
level.
4. Pull the lever up to lock the steering
wheel in place.
5. Make sure that the steering wheel is
securely locked by moving it up and down.
Horn
To sound the horn, push the horn pad.
Do not adjust the steering wheel tilt
position while driving. This may
cause loss of vehicle control and re-
sult in personal injury.
300149300150
Page 152 of 365
Climate control 4-3
CONTINUED
Center and side ventilators
Center ventilators
Move the tab up and down or right and left
to adjust the flow direction.
Side ventilators
1) Open
2) Close
Move the knob in any direction you prefer
to adjust the flow direction.
To open the ventilator, turn the knob coun-
terclockwise.
To close the ventilator, turn the knob
clockwise.
Manual climate control sys-
tem (if equipped)
Control panel
1) Air inlet selection lever
2) Air conditioner button
3) Rear window defogger button (Refer to the Rear window defogger button sec-
tion in chapter 3.)
4) Air flow control dial
5) Fan speed control dial
6) Temperature control dial
Temperature control dial
This dial regulates the temperature of air
flow from the air outlets over a range from
the blue side (cool) to red side (warm).
400376
1 2
400597
6 2 5 3 4
1
400598
Page 154 of 365
Climate control 4-5
CONTINUED
Heater operation
Defrosting or defogging the wind-
shield
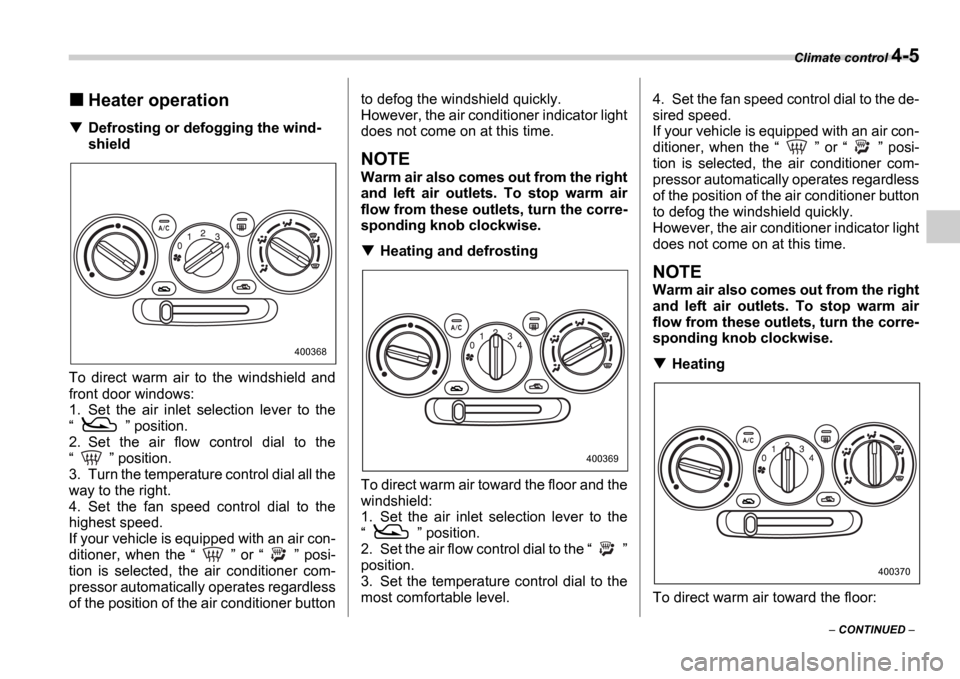
To direct warm air to the windshield and
front door windows:
1. Set the air inlet selection lever to the
position.
2. Set the air flow control dial to the
position.
3. Turn the temperature control dial all the
way to the right.
4. Set the fan speed control dial to the
highest speed.
If your vehicle is equipped with an air con-
ditioner, when the or posi-
tion is selected, the air conditioner com-
pressor automatically operates regardless
of the position of the air conditioner button to defog the windshield quickly.
However, the air conditioner indicator light
does not come on at this time.
NOTE
Warm air also comes out from the right
and left air outlets. To stop warm air
flow from these outlets, turn the corre-
sponding knob clockwise.
Heating and defrosting
To direct warm air toward the floor and the
windshield:
1. Set the air inlet selection lever to the
position.
2. Set the air flow control dial to the
position.
3. Set the temperature control dial to the
most comfortable level. 4. Set the fan speed control dial to the de-
sired speed.
If your vehicle is equipped with an air con-
ditioner, when the
or posi-
tion is selected, the air conditioner com-
pressor automatically operates regardless
of the position of the air conditioner button
to defog the windshield quickly.
However, the air conditioner indicator light
does not come on at this time.
NOTE
Warm air also comes out from the right
and left air outlets. To stop warm air
flow from these outlets, turn the corre-
sponding knob clockwise.
Heating
To direct warm air toward the floor:
400368
400369
400370
Page 155 of 365
4-6 Climate control
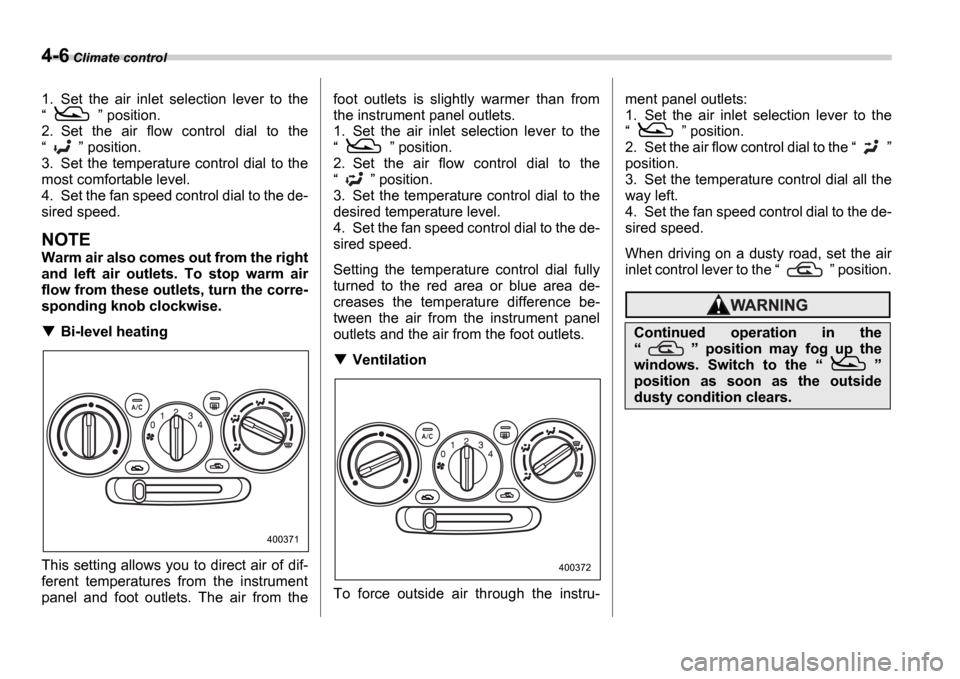
1. Set the air inlet selection lever to the
position.
2. Set the air flow control dial to the
position.
3. Set the temperature control dial to the
most comfortable level.
4. Set the fan speed control dial to the de-
sired speed.
NOTE
Warm air also comes out from the right
and left air outlets. To stop warm air
flow from these outlets, turn the corre-
sponding knob clockwise.
Bi-level heating
This setting allows you to direct air of dif-
ferent temperatures from the instrument
panel and foot outlets. The air from the foot outlets is slightly warmer than from
the instrument panel outlets.
1. Set the air inlet selection lever to the
position.
2. Set the air flow control dial to the
position.
3. Set the temperature control dial to the
desired temperature level.
4. Set the fan speed control dial to the de-
sired speed.
Setting the temperature control dial fully
turned to the red area or blue area de-
creases the temperature difference be-
tween the air from the instrument panel
outlets and the air from the foot outlets.
Ventilation
To force outside air through the instru- ment panel outlets:
1. Set the air inlet selection lever to the
position.
2. Set the air flow control dial to the
position.
3. Set the temperature control dial all the
way left.
4. Set the fan speed control dial to the de-
sired speed.
When driving on a dusty road, set the air
inlet control lever to the position.
400371
400372
Continued operation in the
position may fog up the
windows. Switch to the
position as soon as the outside
dusty condition clears.
Page 158 of 365
Climate control 4-9
CONTINUED
AUTO position and the air flow control
dial in the
, , or po-
sition, the fan does not operate during
engine warmup until the engine cool-
ant temperature exceeds approx. 122 F
(50 C).
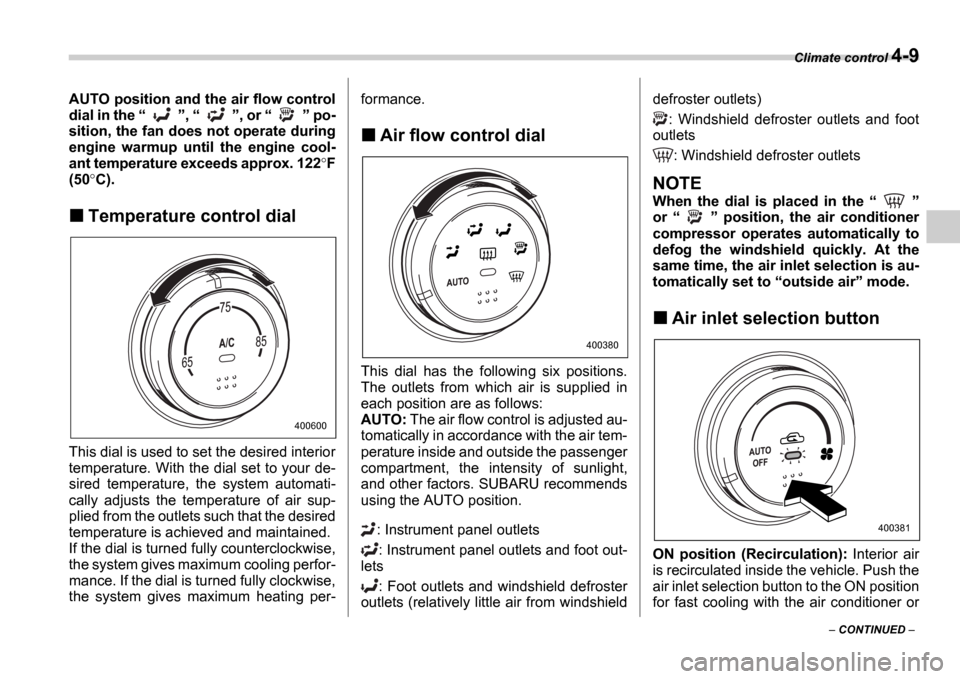
Temperature control dial
This dial is used to set the desired interior
temperature. With the dial set to your de-
sired temperature, the system automati-
cally adjusts the temperature of air sup-
plied from the outlets such that the desired
temperature is achieved and maintained.
If the dial is turned fully counterclockwise,
the system gives maximum cooling perfor-
mance. If the dial is turned fully clockwise,
the system gives maximum heating per- formance.
Air flow control dial
This dial has the following six positions.
The outlets from which air is supplied in
each position are as follows:
AUTO:
The air flow control is adjusted au-
tomatically in accordance with the air tem-
perature inside and outside the passenger
compartment, the intensity of sunlight,
and other factors. SUBARU recommends
using the AUTO position.
: Instrument panel outlets: Instrument panel outlets and foot out-
lets
: Foot outlets and windshield defroster
outlets (relatively little air from windshield defroster outlets)
: Windshield defroster outlets and foot
outlets
: Windshield defroster outlets
NOTE
When the dial is placed in the
or position, the air conditioner
compressor operates automatically to
defog the windshield quickly. At the
same time, the air inlet selection is au-
tomatically set to outside air mode.
Air inlet selection button
ON position (Recirculation): Interior air
is recirculated inside the vehicle. Push the
air inlet selection button to the ON position
for fast cooling with the air conditioner or
400600
400380
400381
Page 168 of 365
Audio 5-5
CONTINUED
FM/AM selection button (FM/AM)
Push the FM/AM button (4) when the ra-
dio is off to turn on the radio.
Push the FM/AM button when the radio
is on to select FM1, FM2 or AM reception.
Each time this button is pressed, the band will change in the following order:
The display indicates which one is cur-rently selected.
Stereo indicator
The stereo indicator ST will come on
when an FM stereo broadcast is received.
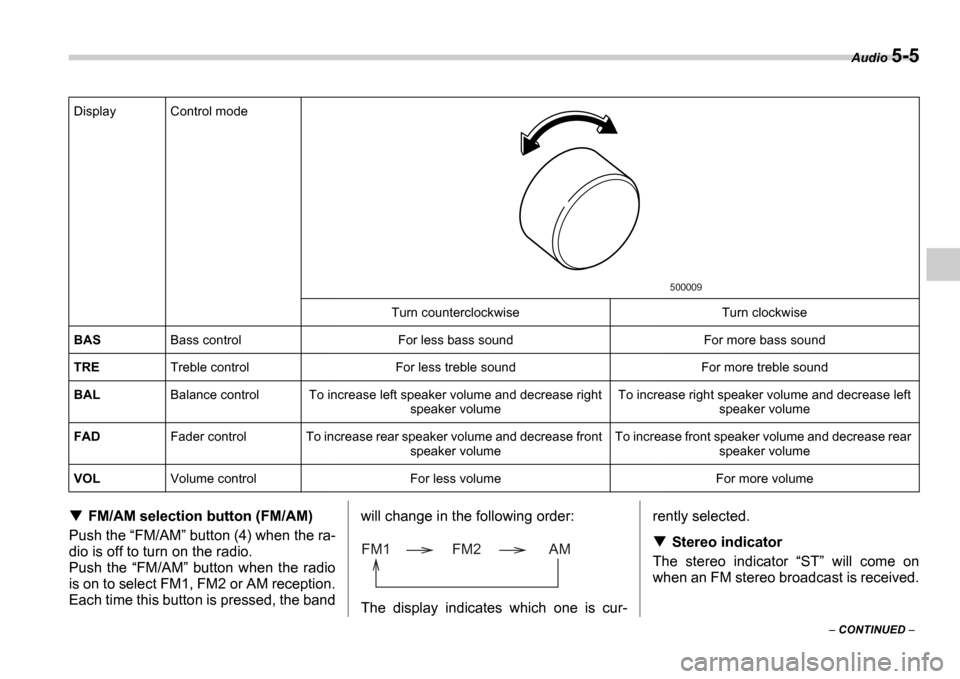
Display Control mode
Turn counterclockwise Turn clockwise
BAS Bass control For less bass sound For more bass sound
TRE Treble control For less treble sound For more treble sound
BAL Balance control To increase left speaker volume and decrease right
speaker volume To increase right speaker volume and decrease left
speaker volume
FAD Fader control To increase rear speaker volume and de crease front
speaker volume To increase front speaker volume and decrease rear
speaker volume
VOL Volume control For less volume For more volume
500009
FM1 FM2 AM