2006 SUBARU IMPREZA oil
[x] Cancel search: oilPage 7 of 365
4
Safety precautions when
driving
Seatbelt and SRS airbag
Carefully read the sections Seatbelts
and *SRS airbag (Supplemental Re-
straint System airbag) in chapter 1 of this
owner s manual for instructions and pre-
cautions concerning the seatbelt system
and SRS airbag system.
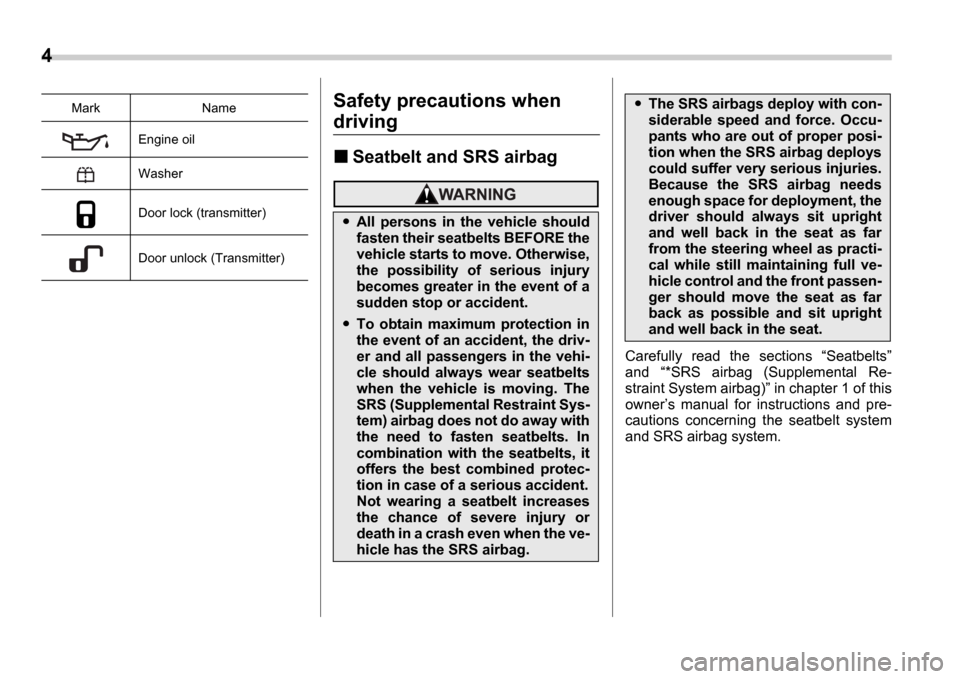
Engine oil
Washer
Door lock (transmitter)
Door unlock (Transmitter)
Mark Name
All persons in the vehicle should
fasten their seatbelts BEFORE the
vehicle starts to move. Otherwise,
the possibility of serious injury
becomes greater in the event of a
sudden stop or accident.
To obtain maximum protection in
the event of an accident, the driv-
er and all passengers in the vehi-
cle should always wear seatbelts
when the vehicle is moving. The
SRS (Supplemental Restraint Sys-
tem) airbag does not do away with
the need to fasten seatbelts. In
combination with the seatbelts, it
offers the best combined protec-
tion in case of a serious accident.
Not wearing a seatbelt increases
the chance of severe injury or
death in a crash even when the ve-
hicle has the SRS airbag.
The SRS airbags deploy with con-
siderable speed and force. Occu-
pants who are out of proper posi-
tion when the SRS airbag deploys
could suffer very serious injuries.
Because the SRS airbag needs
enough space for deployment, the
driver should always sit upright
and well back in the seat as far
from the steering wheel as practi-
cal while still maintaining full ve-
hicle control and the front passen-
ger should move the seat as far
back as possible and sit upright
and well back in the seat.
Page 25 of 365
22
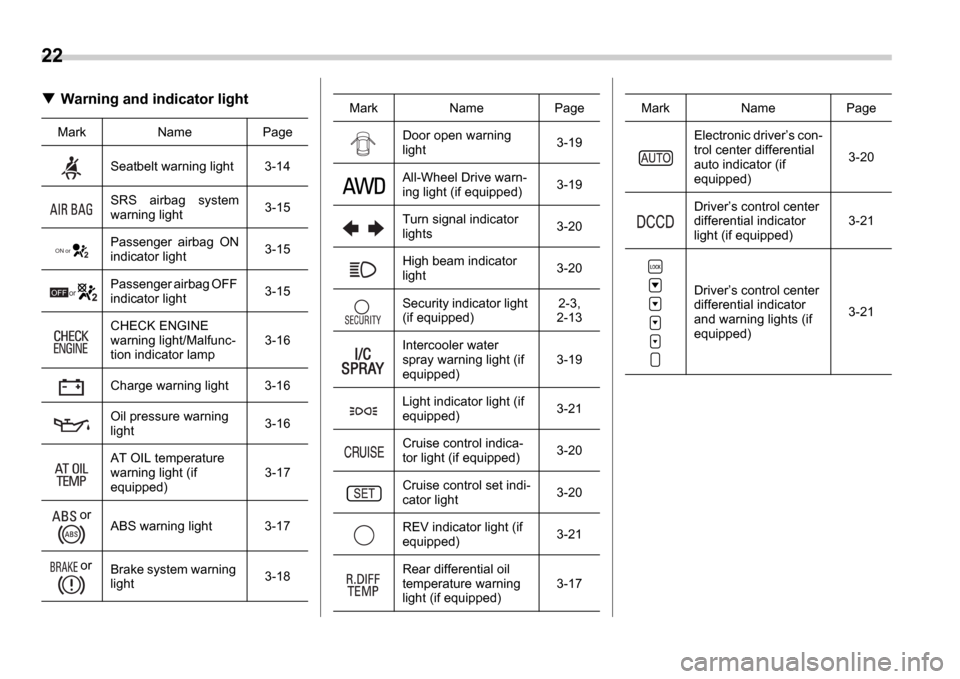
Warning and indicator light
Mark Name PageSeatbelt warning light 3-14
SRS airbag system
warning light 3-15
Passenger airbag ON
indicator light 3-15
Passenger airbag OFF
indicator light 3-15
CHECK ENGINE
warning light/Malfunc-
tion indicator lamp 3-16
Charge warning light 3-16
Oil pressure warning
light 3-16
AT OIL temperature
warning light (if
equipped) 3-17
or ABS warning light 3-17
or Brake system warning
light 3-18
ON or
OFF or
Door open warning
light
3-19
All-Wheel Drive warn-
ing light (if equipped) 3-19
Turn signal indicator
lights 3-20
High beam indicator
light 3-20
Security indicator light
(if equipped) 2-3,
2-13
Intercooler water
spray warning light (if
equipped) 3-19
Light indicator light (if
equipped) 3-21
Cruise control indica-
tor light (if equipped) 3-20
Cruise control set indi-
cator light 3-20
REV indicator light (if
equipped) 3-21
Rear differential oil
temperature warning
light (if equipped) 3-17
Mark Name PageElectronic driver
s con-
trol center differential
auto indicator (if
equipped) 3-20
Driver s control center
differential indicator
light (if equipped) 3-21
Driver s control center
differential indicator
and warning lights (if
equipped) 3-21
Mark Name Page
Page 45 of 365
1-18 Seat, seatbelt and SRS airbags
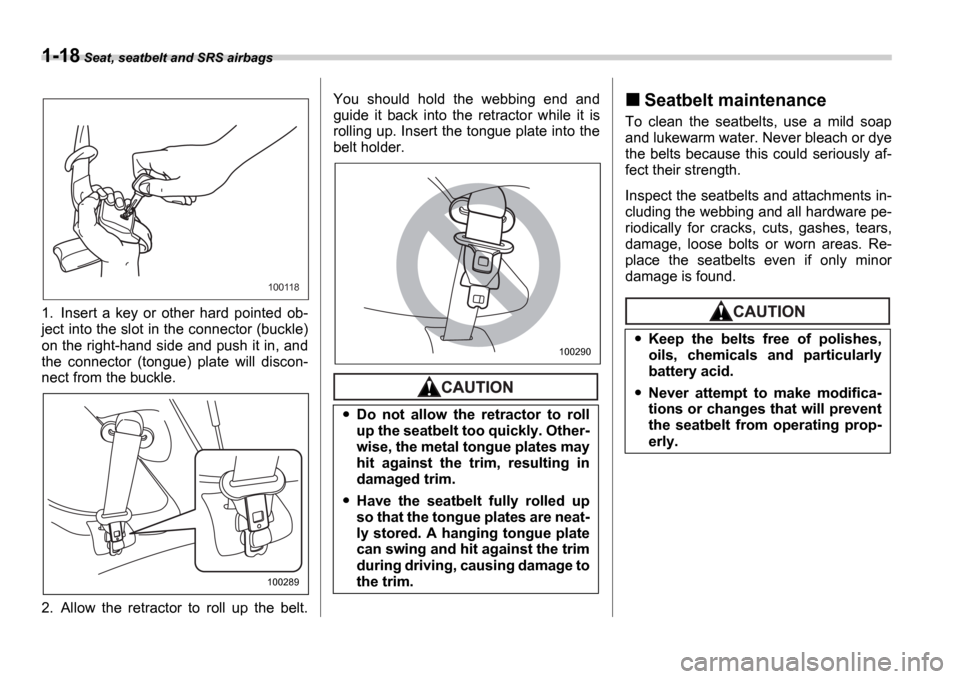
1. Insert a key or other hard pointed ob-
ject into the slot in the connector (buckle)
on the right-hand side and push it in, and
the connector (tongue) plate will discon-
nect from the buckle.
2. Allow the retractor to roll up the belt. You should hold the webbing end and
guide it back into the retractor while it is
rolling up. Insert the tongue plate into the
belt holder.
Seatbelt maintenance
To clean the seatbelts, use a mild soap
and lukewarm water. Never bleach or dye
the belts because this could seriously af-
fect their strength.
Inspect the seatbelts and attachments in-
cluding the webbing and all hardware pe-
riodically for cracks, cuts, gashes, tears,
damage, loose bolts or worn areas. Re-
place the seatbelts even if only minor
damage is found.
100118
100289
Do not allow the retractor to roll
up the seatbelt too quickly. Other-
wise, the metal tongue plates may
hit against the trim, resulting in
damaged trim.
Have the seatbelt fully rolled up
so that the tongue plates are neat-
ly stored. A hanging tongue plate
can swing and hit against the trim
during driving, causing damage to
the trim.
100290Keep the belts free of polishes,
oils, chemicals and particularly
battery acid.
Never attempt to make modifica-
tions or changes that will prevent
the seatbelt from operating prop-
erly.
Page 96 of 365
Keys and doors 2-9
CONTINUED
seconds after Step 3.
5. While still holding down the
UNLOCK
side of the power door locking switch,
close the driver s door once within 10 sec-
onds after Step 4.
6. The turn signal lights flashes 3 times to
indicate completion of the setting.
NOTE
If you do not close the driver s door
within 10 seconds after Step 4, a flash
of the turn signal lights will signal time-
out. If this happens, repeat the whole
procedure from Step 1.
You may have the above settings done by
your SUBARU dealer.
Replacing the battery
When the transmitter battery begins to get
weak, transmitter range will begin to de-
crease. Replace the battery as soon as
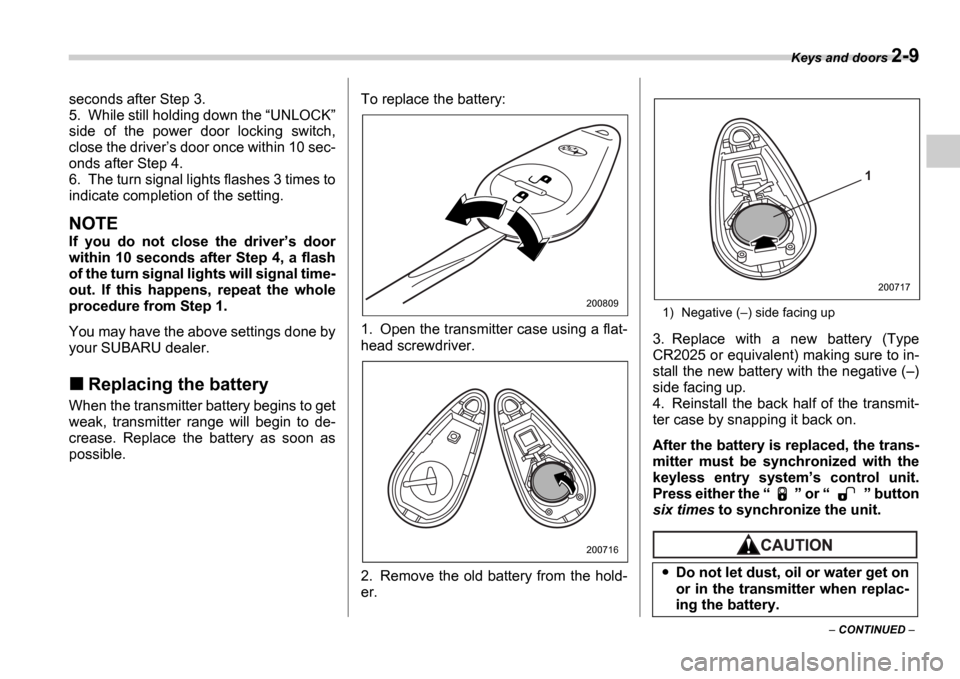
possible. To replace the battery:
0
1. Open the transmitter case using a flat-
head screwdriver.
2. Remove the old battery from the hold-
er.
1) Negative (
) side facing up
3. Replace with a new battery (Type
CR2025 or equivalent) making sure to in-
stall the new battery with the negative ( )
side facing up.
4. Reinstall the back half of the transmit-
ter case by snapping it back on.
After the battery is replaced, the trans-
mitter must be synchronized with the
keyless entry system s control unit.
Press either the or button
six times to synchronize the unit.
200809
200716
Do not let dust, oil or water get on
or in the transmitter when replac-
ing the battery.
1
200717
Page 114 of 365

3
Instruments and controls
Ignition switch .................................................... 3-3
LOCK .............................................. ......................... 3-3
ACC ............................................... ........................... 3-4
ON ................................................ ............................ 3-4
START ............................................. ......................... 3-4
Key reminder chime ................................ ............... 3-5
Ignition switch light ............................. ................... 3-5
Key interlock release (AT vehicles only) .......... .... 3-5
Hazard warning flasher ............................ .......... 3-6
Meters and gauges (WRX-STI) ....................... ... 3-6
Combination meter illumination .................... ........ 3-6
Cancelling sequential illumination of the combination meter ................................. .............. 3-6
Speedometer ....................................... .................... 3-6
Odometer/Trip meter ............................... ............... 3-7
Tachometer ........................................ ..................... 3-7
Fuel gauge ........................................ ....................... 3-8
Temperature gauge ................................. ............... 3-8
Outside temperature indicator ..................... ......... 3-9
REV indicator light and buzzer (WRX-STI) ....... 3-9 Setting the alarm-level engine speed .............. ..... 3-10
Deactivating the REV alarm system ................. ..... 3-11
Meters and gauges (Except WRX-STI) ............. 3-1 1
Speedometer ....................................... .................... 3-11
Odometer/Trip meter ............................... ............... 3-11
Tachometer ........................................ ..................... 3-12
Fuel gauge ........................................ ....................... 3-12
Temperature gauge ................................. ............... 3-13
Outside temperature indicator ..................... ......... 3-13Warning and indicator lights ......................
....... 3-14
Seatbelt warning light and chime .................. ........ 3-14
SRS airbag system warning light ................... ....... 3-15
Front passenger s frontal airbag ON and OFF
indicators ........................................ ...................... 3-15
CHECK ENGINE warning light/Malfunction indicator lamp .................................... ................... 3-16
Charge warning light .............................. ................ 3-16
Oil pressure warning light ........................ ............. 3-16
AT OIL TEMPerature warning light (AT vehicles) ..................................... .................... 3-17
Rear differential oil temperature warning light (WRX-STI) ......................................... ..................... 3-17
ABS warning light ................................. .................. 3-17
Brake system warning light ........................ ........... 3-18
Door open warning light ........................... ............. 3-19
All-Wheel Drive warning light (AWD AT vehicles
if equipped) ..................................... ................... 3-19
Intercooler water spray warning light (WRX-STI) ......................................... ..................... 3-19
Selector lever position indicator (AT vehicles) ... . 3-20
Turn signal indicator lights ...................... .............. 3-20
High beam indicator light ......................... .............. 3-20
Cruise control indicator light .................... ............. 3-20
Cruise control set indicator light ................ .......... 3-20
Driver s control center differential auto indicator
light (WRX-STI) ................................... .................. 3-20
Driver s control center differential indicator and
warning lights (WRX-STI) .......................... .......... 3-21
Headlight indicator light (WRX-STI) ............... ....... 3-21
REV indicator light (WRX-STI) ..................... .......... 3-21
Page 127 of 365
3-14 Instruments and controls
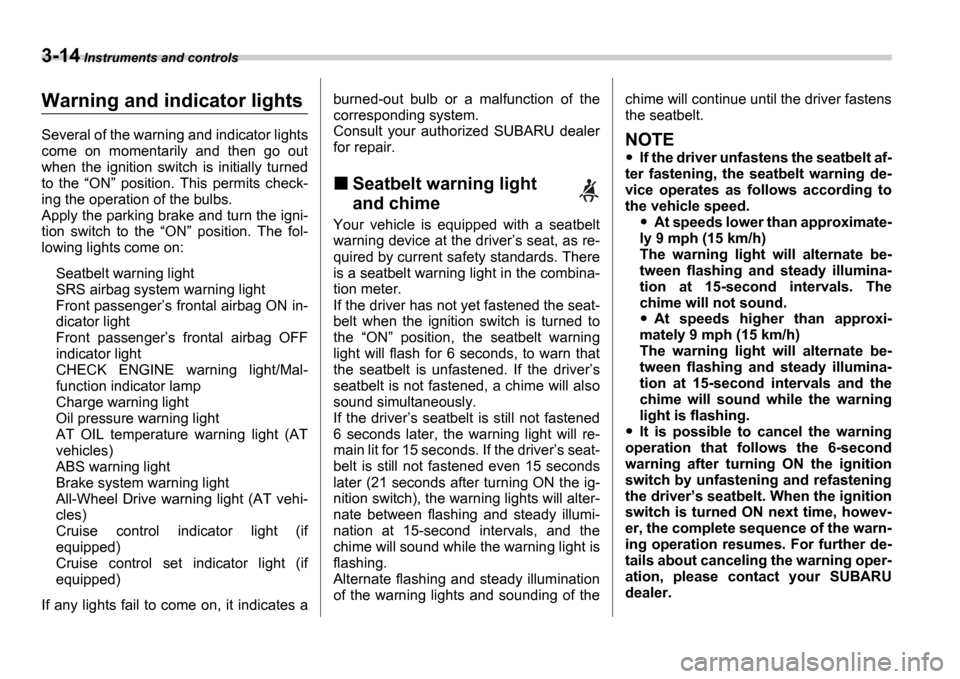
Warning and indicator lights
Several of the warning and indicator lights
come on momentarily and then go out
when the ignition switch is initially turned
to the ON position. This permits check-
ing the operation of the bulbs.
Apply the parking brake and turn the igni-
tion switch to the ON position. The fol-
lowing lights come on:
Seatbelt warning light
SRS airbag system warning light
Front passenger s frontal airbag ON in-
dicator light
Front passenger s frontal airbag OFF
indicator light
CHECK ENGINE warning light/Mal-
function indicator lamp
Charge warning light
Oil pressure warning light
AT OIL temperature warning light (AT
vehicles)
ABS warning light
Brake system warning light
All-Wheel Drive warning light (AT vehi-
cles)
Cruise control indicator light (if
equipped)
Cruise control set indicator light (if
equipped)
If any lights fail to come on, it indicates a burned-out bulb or a malfunction of the
corresponding system.
Consult your authorized SUBARU dealer
for repair.
Seatbelt warning light
and chime
Your vehicle is equipped with a seatbelt
warning device at the driver
s seat, as re-
quired by current safety standards. There
is a seatbelt warning light in the combina-
tion meter.
If the driver has not yet fastened the seat-
belt when the ignition switch is turned to
the ON position, the seatbelt warning
light will flash for 6 seconds, to warn that
the seatbelt is unfastened. If the driver s
seatbelt is not fastened, a chime will also
sound simultaneously.
If the driver s seatbelt is still not fastened
6 seconds later, the warning light will re-
main lit for 15 seconds. If the driver s seat-
belt is still not fastened even 15 seconds
later (21 seconds after turning ON the ig-
nition switch), the warning lights will alter-
nate between flashing and steady illumi-
nation at 15-second intervals, and the
chime will sound while the warning light is
flashing.
Alternate flashing and steady illumination
of the warning lights and sounding of the chime will continue until the driver fastens
the seatbelt.
NOTE
If the driver unfastens the seatbelt af-
ter fastening, the seatbelt warning de-
vice operates as follows according to
the vehicle speed.
At speeds lower than approximate-
ly 9 mph (15 km/h)
The warning light will alternate be-
tween flashing and steady illumina-
tion at 15-second intervals. The
chime will not sound.
At speeds higher than approxi-
mately 9 mph (15 km/h)
The warning light will alternate be-
tween flashing and steady illumina-
tion at 15-second intervals and the
chime will sound while the warning
light is flashing.
It is possible to cancel the warning
operation that follows the 6-second
warning after turning ON the ignition
switch by unfastening and refastening
the driver s seatbelt. When the ignition
switch is turned ON next time, howev-
er, the complete sequence of the warn-
ing operation resumes. For further de-
tails about canceling the warning oper-
ation, please contact your SUBARU
dealer.
Page 129 of 365
3-16 Instruments and controls
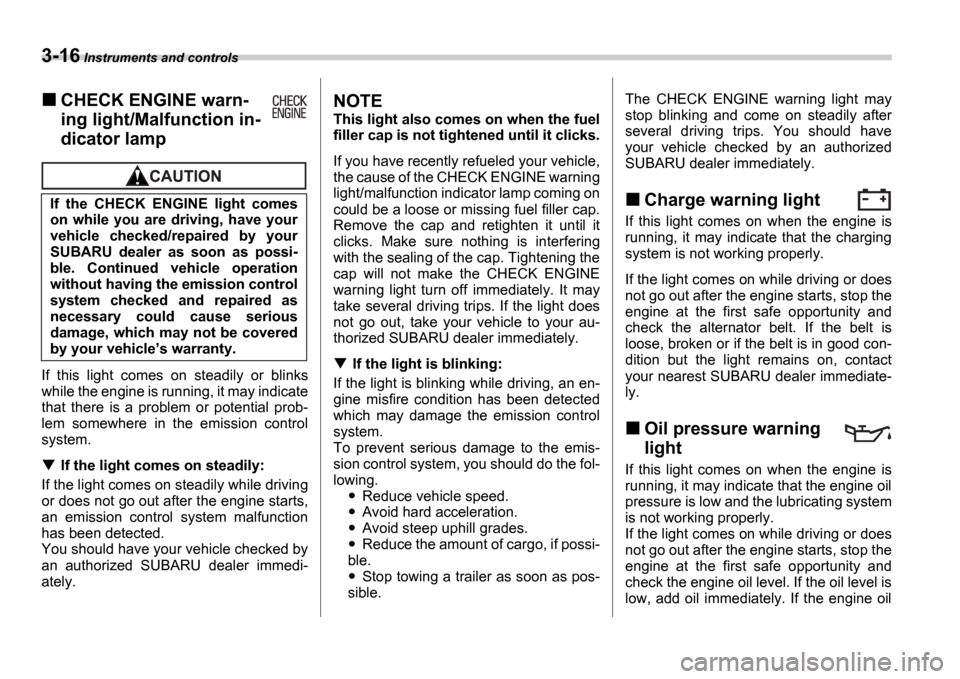
CHECK ENGINE warn-
ing light/Malfunction in-
dicator lamp
If this light comes on steadily or blinks
while the engine is running, it may indicate
that there is a problem or potential prob-
lem somewhere in the emission control
system.
If the light comes on steadily:
If the light comes on steadily while driving
or does not go out after the engine starts,
an emission control system malfunction
has been detected.
You should have your vehicle checked by
an authorized SUBARU dealer immedi-
ately.
NOTE
This light also comes on when the fuel
filler cap is not tightened until it clicks.
If you have recently refueled your vehicle,
the cause of the CHECK ENGINE warning
light/malfunction indicator lamp coming on
could be a loose or missing fuel filler cap.
Remove the cap and retighten it until it
clicks. Make sure nothing is interfering
with the sealing of the cap. Tightening the
cap will not make the CHECK ENGINE
warning light turn off immediately. It may
take several driving trips. If the light does
not go out, take your vehicle to your au-
thorized SUBARU dealer immediately.
If the light is blinking:
If the light is blinking while driving, an en-
gine misfire condition has been detected
which may damage the emission control
system.
To prevent serious damage to the emis-
sion control system, you should do the fol-
lowing.
Reduce vehicle speed.
Avoid hard acceleration.
Avoid steep uphill grades.
Reduce the amount of cargo, if possi-
ble.
Stop towing a trailer as soon as pos-
sible. The CHECK ENGINE warning light may
stop blinking and come on steadily after
several driving trips. You should have
your vehicle checked by an authorized
SUBARU dealer immediately.
Charge warning light
If this light comes on when the engine is
running, it may indicate that the charging
system is not working properly.
If the light comes on while driving or does
not go out after the engine starts, stop the
engine at the first safe opportunity and
check the alternator belt. If the belt is
loose, broken or if the belt is in good con-
dition but the light remains on, contact
your nearest SUBARU dealer immediate-
ly.
Oil pressure warning
light
If this light comes on when the engine is
running, it may indicate that the engine oil
pressure is low and the lubricating system
is not working properly.
If the light comes on while driving or does
not go out after the engine starts, stop the
engine at the first safe opportunity and
check the engine oil level. If the oil level is
low, add oil immediately. If the engine oil
If the CHECK ENGINE light comes
on while you are driving, have your
vehicle checked/repaired by your
SUBARU dealer as soon as possi-
ble. Continued vehicle operation
without having the emission control
system checked and repaired as
necessary could cause serious
damage, which may not be covered
by your vehicle
s warranty.
Page 130 of 365
Instruments and controls 3-17
CONTINUED
is at the proper level but the light remains
on, contact your nearest SUBARU dealer
immediately.
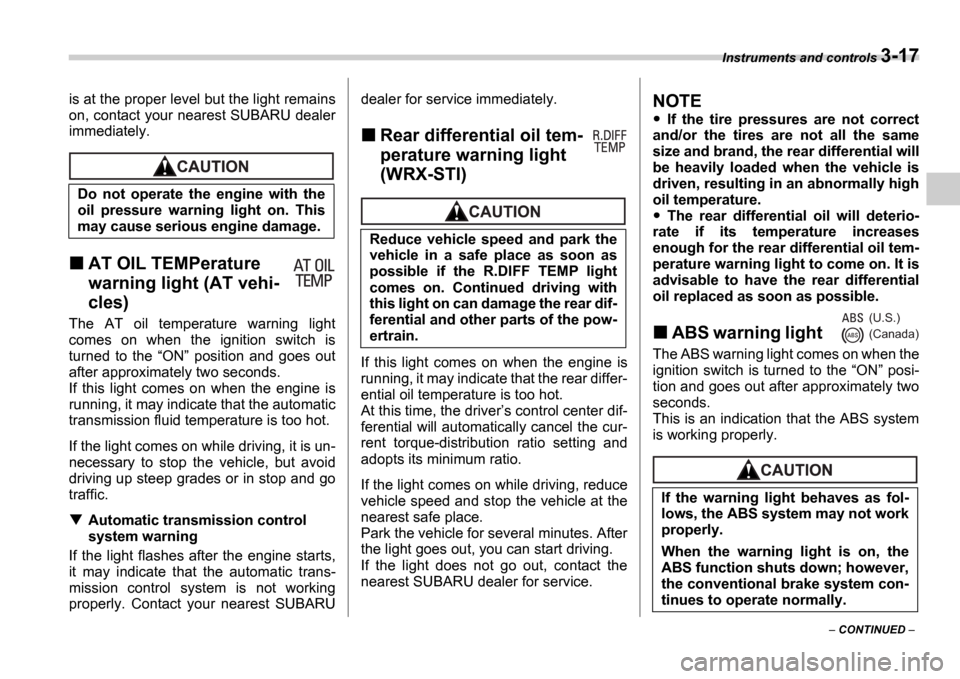
AT OIL TEMPerature
warning light (AT vehi-
cles)
The AT oil temperature warning light
comes on when the ignition switch is
turned to the
ON position and goes out
after approximately two seconds.
If this light comes on when the engine is
running, it may indicate that the automatic
transmission fluid temperature is too hot.
If the light comes on while driving, it is un-
necessary to stop the vehicle, but avoid
driving up steep grades or in stop and go
traffic.
Automatic transmission control
system warning
If the light flashes after the engine starts,
it may indicate that the automatic trans-
mission control system is not working
properly. Contact your nearest SUBARU dealer for service immediately.
Rear differential oil tem-
perature warning light
(WRX-STI)
If this light comes on when the engine is
running, it may indicate that the rear differ-
ential oil temperature is too hot.
At this time, the driver
s control center dif-
ferential will automatically cancel the cur-
rent torque-distribution ratio setting and
adopts its minimum ratio.
If the light comes on while driving, reduce
vehicle speed and stop the vehicle at the
nearest safe place.
Park the vehicle for several minutes. After
the light goes out, you can start driving.
If the light does not go out, contact the
nearest SUBARU dealer for service.
NOTE
If the tire pressures are not correct
and/or the tires are not all the same
size and brand, the rear differential will
be heavily loaded when the vehicle is
driven, resulting in an abnormally high
oil temperature.
The rear differential oil will deterio-
rate if its temperature increases
enough for the rear differential oil tem-
perature warning light to come on. It is
advisable to have the rear differential
oil replaced as soon as possible.
ABS warning light
The ABS warning light comes on when the
ignition switch is turned to the ON posi-
tion and goes out after approximately two
seconds.
This is an indication that the ABS system
is working properly.
Do not operate the engine with the
oil pressure warning light on. This
may cause serious engine damage.
Reduce vehicle speed and park the
vehicle in a safe place as soon as
possible if the R.DIFF TEMP light
comes on. Continued driving with
this light on can damage the rear dif-
ferential and other parts of the pow-
ertrain.
If the warning light behaves as fol-
lows, the ABS system may not work
properly.
When the warning light is on, the
ABS function shuts down; however,
the conventional brake system con-
tinues to operate normally.
(U.S.)
(Canada)