2006 SUBARU IMPREZA tire type
[x] Cancel search: tire typePage 183 of 365

5-20 Audio
To insert a disc
1. Press one of the Disc select buttons
(3) (numbered from 1 to 6) for which the
disc indicator light (2) is OFF .
The disc indicator lights are located direct-
ly above the corresponding Disc select
buttons.
2. The indicator will begin blinking. The
blinking will last for 15 seconds.
During this period, insert a desired disc,
and the disc will begin to play. (If any disc
is not inserted during this period, the Disc
slot (1) door will close. Repeat Step 1.)
Be sure to hold a disc with the label side
(the side where titles are printed) up.
3. To insert another disc, repeat Steps 1
and 2 choosing a different disc select but-
ton.
To insert six discs at a time
1. Press and hold the Disc select button
number 1 until all disc indicators begin
blinking (approximately 1.5 seconds). 2. The indicators will blink for 15 seconds.
During this period, insert desired six discs.
3. When all discs are loaded, the first disc
will begin to play. (If no disc is inserted
within this 15 seconds, the entire disc load
sequence will be canceled.)
To remove a disc
1. Press the desired one of the Disc se-
lect buttons (3) (numbered from 1 to 6) for
which the disc indicator light is on.
2. Press the Eject button (4). The select-
ed disc will be ejected and the indicator
light will begin blinking.
3. To remove another disc, repeat Steps
1 and 2 choosing a different Disc select
button.
(To remove discs when the ignition switch
is in the Lock position, press the Eject
button, and the first disc will be ejected.
Press the Eject button again, and the
next disc will be ejected and so on. At this
time, the Disc select buttons are dis-
abled.)
To remove all discs at one time
1. Press and hold the Eject button (4)
until all Disc indicators begin blinking
(approximately 1.5 seconds), and the first
disc will be ejected.
2. When the disc is removed, the next
one will be ejected, and so on.
To replace a playing disc with an-
other
Simply press the desired one of Disc se-
lect buttons (3) (numbered from 1 to 6) or
press the Disc select button on the radio
unit to select the desired disc, and the disc
will begin to play.
Disc indicators
Lit: when the corresponding storage tray
is occupied by a disc.
Blinking: Disc player is either in loading,
eject or changing mode.
OFF: No disc is loaded or the ignition
switch is in the LOCK position.
Open/Closed disc slot indicator
When the disc slot is open, the disc indica-
tors on both sides of the slot illuminate.
Function control
Refer to CD changer control operating in-
structions described in the Type B audio
set (if equipped) section.
Do not insert or remove any disc
when the automatic transmission
selector lever is in the park posi-
tion; the selector lever in that po-
sition can interfere with disc in-
sertion or removal, causing
scratches on the disc surface (for
AT vehicles).
Page 237 of 365
8-10 Driving tips
Wiper operation when snowing
Before driving in cold weather, make sure
the wiper blades are not frozen to the
windshield or rear window. If the wiper
blades are frozen to the windshield or rear
window, use the defroster with the airflow
control dial in the position and the
temperature control dial set for maximum
warmth until the wiper blades are com-
pletely thawed out. If your vehicle is
equipped with a wiper deicer, it is helpful
to thaw the windshield wiper blades. To
thaw out the rear wiper blade, use the rear
window defogger.
When driving in snow, if frozen snow
starts to stick on the surface of the wind-
shield despite wiper operation, use the de-
froster with the airflow control dial in
and the temperature control dial
set for maximum warmth. After the wind-
shield gets warmed enough to melt the
frozen snow on it, wash it away using the windshield washer.
Snow stuck on the wiper arm prevents the
wiper from working effectively. If snow is
stuck on the wiper arm, pull off the road to
a safe place, then remove it. If you stop
the vehicle at road side, use the hazard
warning flasher to alert other drivers.
We recommend use of non-freezing type
wiper blades (winter blades) during the
seasons you could have snow and sub-
zero temperatures. Blades of this type
give superior wiping performance in
snowy conditions. Be sure to use blades
that are suitable for your vehicle.
NOTE
When the season requiring non-freez-
ing type wiper blades is over, replace
them with standard wiper blades.
Corrosion protection
Refer to the
Corrosion protection section
(chapter 10).
Snow tires
All models except WRX-STIAvoid prolonged continuous driving
in snowstorms. Snow will enter the
engine s intake system and may
hinder the air flow, which could re-
sult in engine shutdown or even
breakdown.
During high-speed driving, non-
freezing type wiper blades may not
perform as well as standard wiper
blades. If this happens, reduce the
vehicle speed.
When replacing original tires with
winter (snow) tires, make sure you
use only the same size, construc-
tion and load range as the original
tires listed on the tire placard. Us-
ing other sizes and construction
may affect speedometer/odome-
ter calibration and clearance be-
tween the body and tires. It also
may be dangerous and lead to
loss of vehicle control.
You must install four winter tires
that are of the same size, con-
struction, brand, and load range.
Mixing other sizes or construc-
tions may result in severe me-
chanical damage to the drive train
of your vehicle and may affect
ride, handling, braking and speed-
ometer/odometer calibration. It
also may be dangerous and lead
to loss of vehicle control.
Page 238 of 365
Driving tips 8-11
CONTINUED
Your vehicle is equipped with
all season
tires as original equipment, which are de-
signed to provide an adequate measure of
traction, handling and braking perfor-
mance in year-round driving. In winter, it
may be possible to enhance performance
through use of tires designed specifically
for winter driving conditions.
When you choose to install winter tires on
your vehicle, be sure to use the correct tire
size and type. You must install four winter
tires that are of the same size, construc-
tion, brand and load range and you should
never mix radial, belted bias or bias tires
since this may result in dangerous han-
dling characteristics. When you choose a
tire, make sure that there is enough clear-
ance between the tire and vehicle body.
Remember to drive with care at all times
regardless of the type of tires on your ve-
hicle.
WRX-STIYour vehicle is equipped with summer
tires as original equipment, which are in-
adequate for driving on slippery roads
such as on snow-covered or icy roads.
Compared with winter and all-season
tires, summer tires give significantly less
grip on snowy and icy road surfaces.
Therefore, use of winter tires is strongly
recommended when driving with such
road conditions.
When you choose to install winter tires on
your vehicle, be sure to use the correct tire
size and type. You must install four winter
tires that are of the same size, construc-
tion, brand and load range and you should
never mix radial, belted bias or bias tires
since this may result in dangerous han-
dling characteristics. When you choose a
tire, make sure that there is enough clear-
ance between the tire and vehicle body.
Remember to drive with care at all times
regardless of the type of tires on your ve-
hicle.
Tire chains
Driving on snowy grades or icy roads may
require the use of tire chains, in which
case put the chains on the front wheels
only. Use only SAE class S type chains
that are of the correct size for your tires so
as not to damage the vehicle body or sus-
Do not use a combination of radi-
al, belted bias or bias tires since it
may cause dangerous handling
characteristics and lead to an ac-
cident.
When replacing original tires with
winter (snow) tires, make sure you
use only the same size, construc-
tion and load range as the original
tires listed on the tire placard. Us-
ing other sizes and construction
may affect speedometer/odome-
ter calibration and clearance be-
tween the body and tires. It also
may be dangerous and lead to
loss of vehicle control.
You must install four winter tires
that are of the same size, con-
struction, brand, and load range.
Mixing other sizes or construc-
tions may result in severe me-
chanical damage to the drive train
of your vehicle and may affect
ride, handling, braking and speed-
ometer/odometer calibration. It
also may be dangerous and lead
to loss of vehicle control.
Do not use a combination of radi-
al, belted bias or bias tires since it
may cause dangerous handling
characteristics and lead to an ac-
cident.
Page 281 of 365

Maintenance and service
Tires and wheels ................................................ 11-30
Types of tires .................................... ...................... 11-30
Tire inspection ................................... ..................... 11-30
Tire pressures and wear ........................... ............. 11-30
Wheel balance ..................................... ................... 11-32
Wear indicators ................................... .................... 11-33
Tire rotation ..................................... ........................ 11-33
Tire replacement .................................. ................... 11-33
Wheel replacement ................................. ................ 11-34
Aluminum wheels ................................... ............ 11-35
Intercooler water spray (WRX-STI) ................. .. 11-35
Windshield washer fluid ........................... ......... 11-36
Replacement of wiper blades ....................... ..... 11-37
Windshield wiper blades assembly .................. .... 11-37
Windshield wiper blade rubber ..................... ........ 11-38
Rear window wiper blade assembly .................. ... 11-38
Rear window wiper blade rubber .................... ...... 11-39
Battery ........................................... ...................... 11-40
Fuses ............................................. ...................... 11-41
Main fuse ......................................... .................... 11-43
Installation of accessories ....................... ......... 11-43
Replacing bulbs ................................... ............... 11-44
Headlights (WRX-STI) .............................. ............... 11-45
Headlights (Except WRX-STI) ....................... ......... 11-46
Front turn signal light bulbs ..................... ............. 11-48
Parking light ..................................... ....................... 11-48
Front fog light ................................... ...................... 11-48
Rear combination lights ........................... .............. 11-48
License plate light ............................... ................... 11-50
Dome light, map light and cargo area light ........ .. 11-50Trunk light .......................................
........................ 11-51
High mount stop light ............................. ............... 11-51
Page 309 of 365
11-30 Maintenance and service
Tires and wheels
Types of tires
You should be familiar with type of tires
present on your vehicle.
The factory-fitted 17-inch tires on the
WRX-STI are summer tires. The factory-
fitted tires on other versions are all-sea-
son tires.
All season tires
All season tires are designed to provide
an adequate measure of traction, handling
and braking performance in year-round
driving including snowy and icy road con-
ditions. However all season tires do not of-
fer as much traction performance as win-
ter (snow) tires in heavy or loose snow or
on icy roads.
All season tires are identified by ALL
SEASON and/or M+S (Mud & Snow) on
the tire sidewall.
Summer tires
Summer tires are high-speed capability
tires best suited for highway driving under
dry conditions.
Summer tires are inadequate for driving
on slippery roads such as on snow-cov-
ered or icy roads.
If you drive your vehicle on snow-covered
or icy roads, we strongly recommend the use of winter (snow) tires.
When installing winter tires, be sure to re-
place all four tires.
Winter (snow) tires
Winter tires are best suited for driving on
snow-covered and icy roads. However
winter tires do not perform as well as sum-
mer tires and all season tires on roads oth-
er than snow-covered and icy roads.
Tire inspection
Check on a daily basis that the tires are
free from serious damage, nails, and
stones. At the same time, check the tires
for abnormal wear.
Contact your SUBARU dealer immediate-
ly if you find any problem.
NOTE
When the wheels and tires strike
curbs or are subjected to harsh treat-
ment as when the vehicle is driven on a
rough surface, they can suffer damage
that cannot be seen with the naked eye.
This type of damage does not become
evident until time has passed. Try not
to drive over curbs, potholes or on oth-
er rough surfaces. If doing so is un-
avoidable, keep the vehicle s speed
down to a walking pace or less, and ap-
proach the curbs as squarely as possi- ble. Also, make sure the tires are not
pressed against the curb when you
park the vehicle.
If you feel unusual vibration while
driving or find it difficult to steer the ve-
hicle in a straight line, one of the tires
and/or wheels may be damaged. Drive
slowly to the nearest authorized
SUBARU dealer and have the vehicle
inspected.
Tire pressures and wear
Maintaining the correct tire pressures
helps to maximize the tires service lives
and is essential for good running perfor-
mance. Check and, if necessary, adjust
the pressure of each tire (including the
spare) at least once a month (for example,
during a fuel stop) and before any long
journey.
Page 313 of 365

11-34 Maintenance and service
placard and to have a speed symbol and
load index matching those shown on the
tire placard.
Using tires of a non-specified size detracts
from controllability, ride comfort, braking
performance, speedometer accuracy and
odometer accuracy. It also creates incor-
rect body-to-tire clearances and inappro-
priately changes the vehicle s ground
clearance.
All four tires must be the same in terms of
manufacturer, brand (tread pattern), con-
struction, and size. You are advised to re-
place the tires with new ones that are
identical to those fitted as standard equip-
ment.
For safe vehicle operation, SUBARU rec-
ommends replacing all four tires at the
same time.
Wheel replacement
When replacing wheels due, for example,
to damage, make sure the replacement
wheels match the specifications of the
wheels that are fitted as standard equip-
ment. Replacement wheels are available
from SUBARU dealers.
NOTE
When any of the wheels is removed
and replaced for tire rotation or to
change a flat tire, always check the
tightness of the wheel nuts after driv-
ing approximately 600 miles (1,000
km). If any nut is loose, tighten it to the
specified torque.
All four tires must be the same in
terms of manufacturer, brand
(tread pattern), construction, de-
gree of wear, speed symbol, load
index and size. Mixing tires of dif-
ferent types, sizes or degrees of
wear can result in damage to vehi-
cle s power train. Use of different
types or sizes of tires can also
dangerously reduce controllabili-
ty and braking performance and
can lead to an accident.
Use only radial tires. Do not use
radial tires together with belted
bias tires and/or bias-ply tires. Do-
ing so can dangerously reduce
controllability, resulting in an ac-
cident.
Use only those wheels that are
specified for your vehicle. Wheels
not meeting specifications could in-
terfere with brake caliper operation
and may cause the tires to rub
against the wheel well housing dur-
ing turns. The resulting loss of vehi-
cle control could lead to an acci-
dent.
Page 343 of 365
13-2 Consumer information and Reporting safety defects
Consumer information and Reporting safety defectsFor U.S.A.
The following information has been com-
piled according to Code of Federal Regu-
lations Title 49, Part 575 .Tire information
Tire labeling
Many markings (e.g. Tire size, Tire
Identification Number or TIN) are
placed on the sidewall of a tire by tire
manufacturers. These marking can
provide you with useful information on
the tire.
Tire size
Your vehicle comes equipped with P-
Metric tire size. It is important to un-
derstand the sizing system in select-
ing the proper tire for your vehicles.
Here is a brief review of the tire sizing
system with a breakdown of its indi-
vidual elements.
P Metric
With the P-Metric system, Section
Width is measured in millimeters. To
convert millimeters into inches, divide
by 25.4. The Aspect Ratio (Section
Height divided by Section Width)
helps provide more dimensional infor-
mation about the tire size. Example:
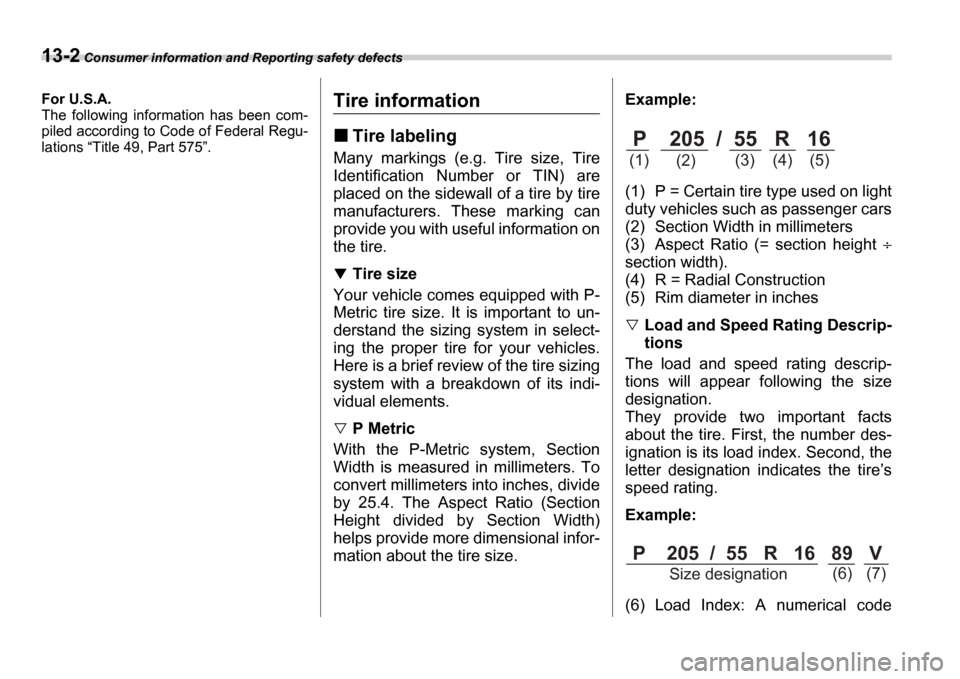
(1) P = Certain tire type used on light
duty vehicles such as passenger cars
(2) Section Width in millimeters
(3) Aspect Ratio (= section height
section width).
(4) R = Radial Construction
(5) Rim diameter in inches
Load and Speed Rating Descrip-
tions
The load and speed rating descrip-
tions will appear following the size
designation.
They provide two important facts
about the tire. First, the number des-
ignation is its load index. Second, the
letter designation indicates the tire s
speed rating.
Example:
(6) Load Index: A numerical code
P 205 / 55 R 16
(1) (2) (3) (4) (5)
P 205 / 55 R 16 89 V
Size designation (6) (7)
Page 344 of 365
Consumer information and Reporting safety defects 13-3
CONTINUED
which specifies the maximum load a
tire can carry at the speed indicated
by its speed symbol, at maximum in-
flation pressure.
For example,
90 means 1,323 lbs
(600 kg), 89 means 1,278 lbs (580
kg).
(7) Speed Rating: An alphabetical
system describing a tire s capability to
travel at established and predeter-
mined speeds.
For example, V means 149 mph
(240 km/h)
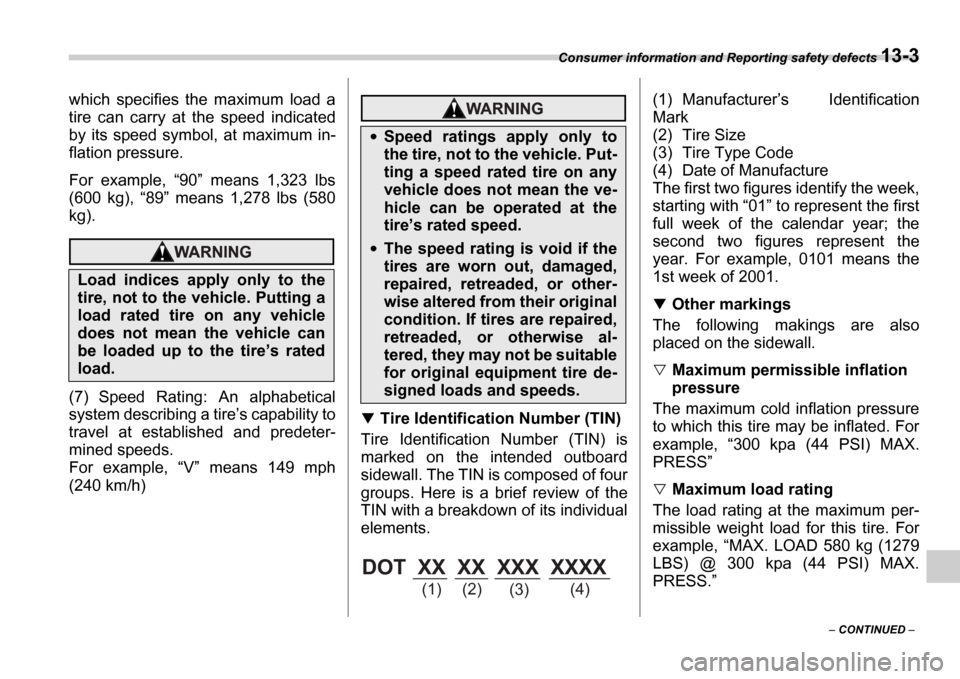
Tire Identification Number (TIN)
Tire Identification Number (TIN) is
marked on the intended outboard
sidewall. The TIN is composed of four
groups. Here is a brief review of the
TIN with a breakdown of its individual
elements. (1) Manufacturer
s Identification
Mark
(2) Tire Size
(3) Tire Type Code
(4) Date of Manufacture
The first two figures identify the week,
starting with 01 to represent the first
full week of the calendar year; the
second two figures represent the
year. For example, 0101 means the
1st week of 2001.
Other markings
The following makings are also
placed on the sidewall.
Maximum permissible inflation
pressure
The maximum cold inflation pressure
to which this tire may be inflated. For
example, 300 kpa (44 PSI) MAX.
PRESS
Maximum load rating
The load rating at the maximum per-
missible weight load for this tire. For
example, MAX. LOAD 580 kg (1279
LBS) @ 300 kpa (44 PSI) MAX.
PRESS.
Load indices apply only to the
tire, not to the vehicle. Putting a
load rated tire on any vehicle
does not mean the vehicle can
be loaded up to the tire s rated
load.
Speed ratings apply only to
the tire, not to the vehicle. Put-
ting a speed rated tire on any
vehicle does not mean the ve-
hicle can be operated at the
tire s rated speed.
The speed rating is void if the
tires are worn out, damaged,
repaired, retreaded, or other-
wise altered from their original
condition. If tires are repaired,
retreaded, or otherwise al-
tered, they may not be suitable
for original equipment tire de-
signed loads and speeds.
DOT XX XX XXX XXXX
(1) (2) (3)(4)