2006 SUBARU IMPREZA maintenance
[x] Cancel search: maintenancePage 4 of 365
1
CONTINUED
Warranties
Warranties for U.S.A.
All SUBARU vehicles distributed by
Subaru of America, Inc. and sold at retail
by an authorized SUBARU dealer in the
United States come with the following
warranties:
SUBARU Limited Warranty
Emission Control Systems Warranty
Emissions Performance Warranty
All warranty information, including details
of coverage and exclusions, is in the Warranty and Maintenance Booklet .
Please read these warranties carefully.
Warranties for Canada
All SUBARU vehicles distributed by
Subaru Canada, Inc. and sold at retail by
an authorized SUBARU dealer in Canada
come with the following warranties:
SUBARU Limited Warranty
Anti-Corrosion Warranty
Emission Control Warranty
All warranty information, including details
of coverage and exclusions, is in the War-
ranty and Service Booklet. Please read
these warranties carefully.
WRX-STI
All models except WRX-STI
How to use this owner s man-
ual
Using your Owner s manual
Before you operate your vehicle, carefully
read this manual. To protect yourself and
extend the service life of your vehicle, fol-
low the instructions in this manual. Failure
to observe these instructions may result in
serious injury and damage to your vehicle.
This manual is composed of fourteen
chapters. Each chapter begins with a brief
table of contents, so you can usually tell at
a glance if that chapter contains the infor-
mation you want.
Chapter 1: Seat, seatbelt and SRS air-
bags
This chapter informs you how to use the
seat and seatbelt and contains precau-
tions for the SRS airbags.
Chapter 2: Keys and doors
This chapter informs you how to operate
the keys, locks and windows.
Chapter 3: Instruments and controls
This chapter informs you about the opera-
tion of instrument panel indicators and
how to use the instruments and other
switches.
Chapter 4: Climate Control
This chapter informs you how to operate
WRX-STI models are equipped with
High Intensity Discharge (HID) head-
lights that contain mercury. For that
reason, it is necessary to remove
HID headlights before vehicle dis-
posal. Once removed, please reuse,
recycle or dispose of the HID head-
lights as hazardous waste.
This vehicle does not contain mer-
cury devices or parts.
Page 5 of 365
2
the climate control.
Chapter 5: Audio
This chapter informs you how to operate
your audio system.
Chapter 6: Interior equipment
This chapter informs you how to operate
interior equipment.
Chapter 7: Starting and operating
This chapter informs you how to start and
operate your SUBARU.
Chapter 8: Driving tips
This chapter informs you how to drive your
SUBARU in various conditions and ex-
plains some safety tips on driving.
Chapter 9: In case of emergency
This chapter informs you what to do if you
have a problem while driving, such as a
flat tire or engine overheating.
Chapter 10: Appearance care
This chapter informs you how to keep your
SUBARU looking good.
Chapter 11: Maintenance and service
This chapter informs you when you need
to take your SUBARU to the dealer for
scheduled maintenance and informs you
how to keep your SUBARU running prop-
erly.
Chapter 12: Specifications
This chapter informs you about dimension
and capacities of your SUBARU.
Chapter 13: Consumer information and
Reporting safety defectsThis chapter informs you about Uniform
tire quality grading standards and Report-
ing safety defects.
Chapter 14: Index
This is an alphabetical listing of all that
s in
this manual. You can use it to quickly find
something you want to read.
Safety warnings
You will find a number of WARNINGs,
CAUTIONs and NOTEs in this manual.
These safety warnings alert you to poten-
tial hazards that could result in injury to
you or others.
Please read these safety warnings as well
as all other portions of this manual careful-
ly in order to gain a better understanding
of how to use your SUBARU vehicle safe-
ly.
NOTE
A NOTE gives information or sugges-
tions how to make better use of your
vehicle.
Safety symbol
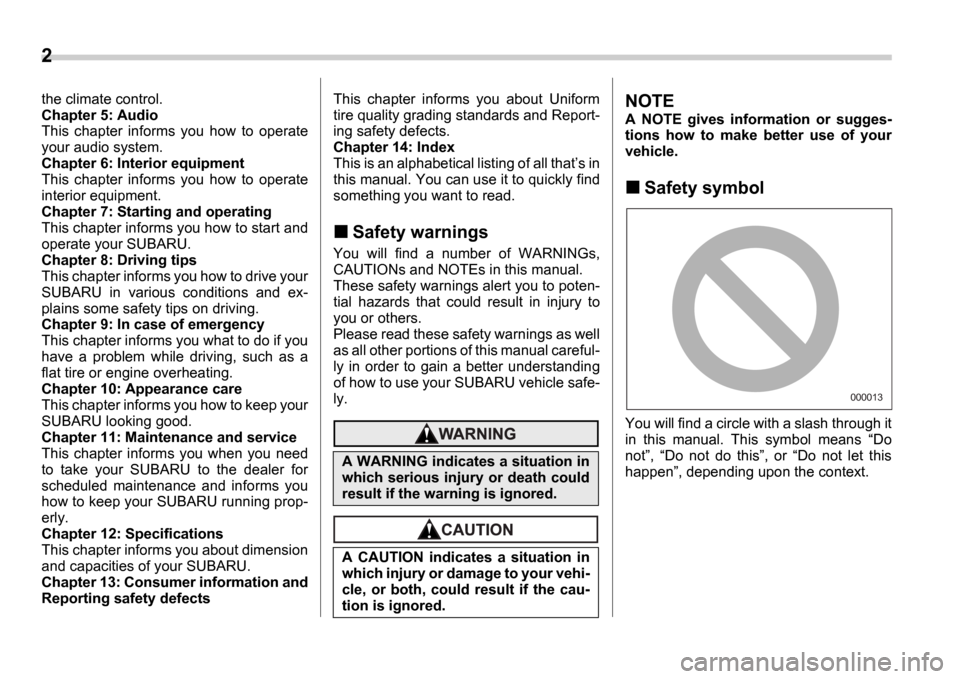
You will find a circle with a slash through it
in this manual. This symbol means Do
not , Do not do this , or Do not let this
happen , depending upon the context.
A WARNING indicates a situation in
which serious injury or death could
result if the warning is ignored.
A CAUTION indicates a situation in
which injury or damage to your vehi-
cle, or both, could result if the cau-
tion is ignored.
000013
Page 12 of 365

1
2
3
4
5
6
7
8
9
10
11
12
13
14
Table of contentsSeat, seatbelt and SRS airbags
Keys and doors
Instruments and controls
Climate control
Audio
Interior equipment
Starting and operating
Driving tips
In case of emergency
Appearance care
Maintenance and service
Specifications
Consumer information and Reporting safety defects
Index
Page 28 of 365

1
Seat, seatbelt and SRS airbags
Front seats .......................................................... 1-2
Fore and aft adjustment ........................... .............. 1-3
Reclining the seatback ............................ ............... 1-3
Seat cushion height adjustment (driver s seat) ... 1-4
Head restraint adjustment (if equipped) ........... .... 1-4
Active head restraint (if equipped) ............... ......... 1-4
Seat heater (if equipped) ......................... .......... 1-5
Rear seats ........................................ ................... 1-6
Armrest (if equipped) ............................. ................ 1-7
Head restraint adjustment Wagon ..................... 1-7
Folding down the rear seat Wagon .................... 1-8
Seatbelts ......................................... .................... 1-9
Seatbelt safety tips .............................. ................... 1-9
Emergency Locking Retractor (ELR) ................. ... 1-11
Automatic/Emergency Locking Retractor
(A/ELR) ........................................... ....................... 1-11
Seatbelt warning light and chime .................. ........ 1-11
Fastening the seatbelt ............................ ................ 1-12
Seatbelt maintenance .............................. ............... 1-18
Seatbelt extender ................................. .............. 1-19
Front seatbelt pretensioners ...................... ....... 1-20
System monitors ................................... ................. 1-21
System servicing .................................. .................. 1-22
Precautions against vehicle modification .......... .. 1-22
Child restraint systems ........................... .......... 1-23
Where to place a child restraint system ........... .... 1-24
Choosing a child restraint system ................. ....... 1-25
Installing child restraint systems with A/ELR seatbelt .......................................... ........................ 1-26Installing a booster seat .........................
................ 1-29
Installation of child restraint systems by use of lower and tether anchorages (LATCH) ............... 1-30
Top tether anchorages ............................. .............. 1-33
*SRS airbag (Supplemental Restraint System airbag) ........................................... ................... 1-35
Vehicle with driver s and front passenger s SRS
airbags and lap/shoulder restraints ............... .... 1-35
Subaru advanced frontal airbag system ............. . 1-39
SRS side airbag ................................... ................... 1-51
SRS airbag system monitors ........................ ......... 1-56
SRS airbag system servicing ....................... ......... 1-57
Precautions against vehicle modification .......... .. 1-58
Page 45 of 365
1-18 Seat, seatbelt and SRS airbags
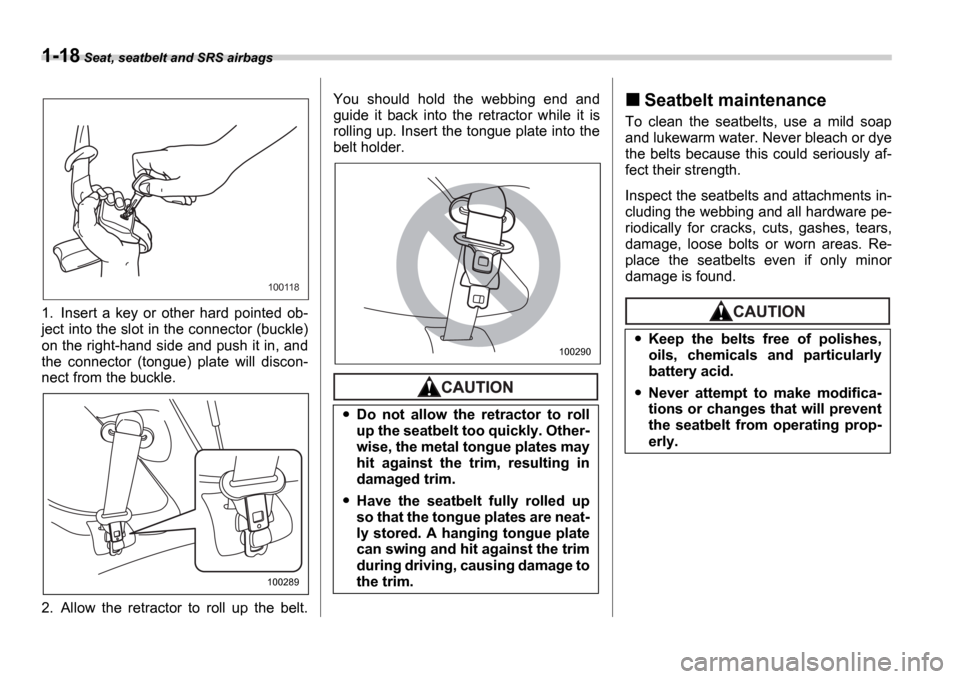
1. Insert a key or other hard pointed ob-
ject into the slot in the connector (buckle)
on the right-hand side and push it in, and
the connector (tongue) plate will discon-
nect from the buckle.
2. Allow the retractor to roll up the belt. You should hold the webbing end and
guide it back into the retractor while it is
rolling up. Insert the tongue plate into the
belt holder.
Seatbelt maintenance
To clean the seatbelts, use a mild soap
and lukewarm water. Never bleach or dye
the belts because this could seriously af-
fect their strength.
Inspect the seatbelts and attachments in-
cluding the webbing and all hardware pe-
riodically for cracks, cuts, gashes, tears,
damage, loose bolts or worn areas. Re-
place the seatbelts even if only minor
damage is found.
100118
100289
Do not allow the retractor to roll
up the seatbelt too quickly. Other-
wise, the metal tongue plates may
hit against the trim, resulting in
damaged trim.
Have the seatbelt fully rolled up
so that the tongue plates are neat-
ly stored. A hanging tongue plate
can swing and hit against the trim
during driving, causing damage to
the trim.
100290Keep the belts free of polishes,
oils, chemicals and particularly
battery acid.
Never attempt to make modifica-
tions or changes that will prevent
the seatbelt from operating prop-
erly.
Page 169 of 365
5-6 Audio
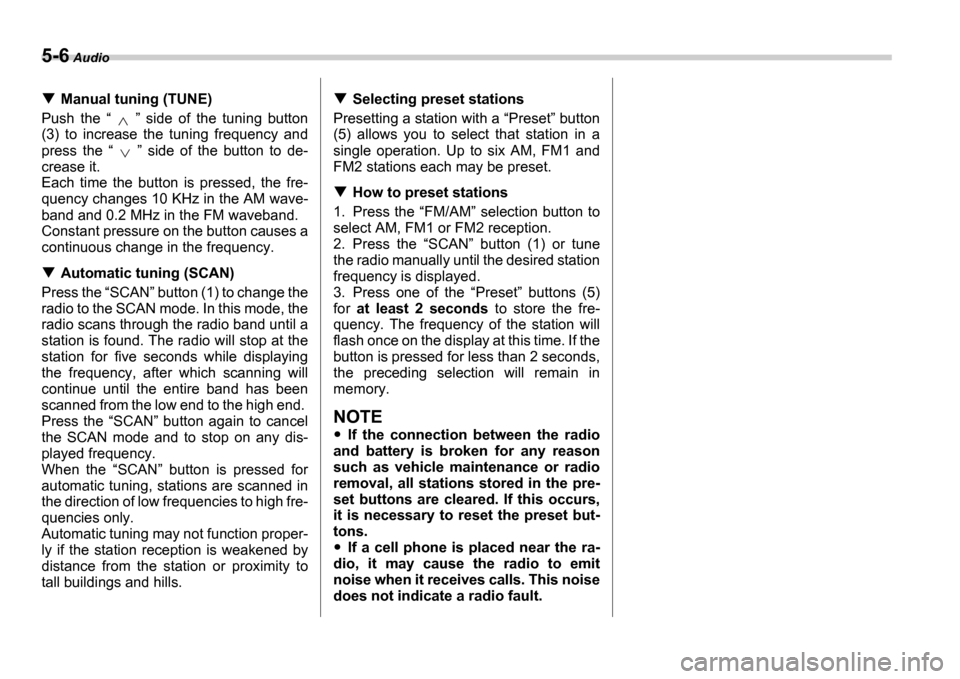
Manual tuning (TUNE)
Push the side of the tuning button
(3) to increase the tuning frequency and
press the side of the button to de-
crease it.
Each time the button is pressed, the fre-
quency changes 10 KHz in the AM wave-
band and 0.2 MHz in the FM waveband.
Constant pressure on the button causes a
continuous change in the frequency.
Automatic tuning (SCAN)
Press the SCAN button (1) to change the
radio to the SCAN mode. In this mode, the
radio scans through the radio band until a
station is found. The radio will stop at the
station for five seconds while displaying
the frequency, after which scanning will
continue until the entire band has been
scanned from the low end to the high end.
Press the SCAN button again to cancel
the SCAN mode and to stop on any dis-
played frequency.
When the SCAN button is pressed for
automatic tuning, stations are scanned in
the direction of low frequencies to high fre-
quencies only.
Automatic tuning may not function proper-
ly if the station reception is weakened by
distance from the station or proximity to
tall buildings and hills.
Selecting preset stations
Presetting a station with a Preset button
(5) allows you to select that station in a
single operation. Up to six AM, FM1 and
FM2 stations each may be preset.
How to preset stations
1. Press the FM/AM selection button to
select AM, FM1 or FM2 reception.
2. Press the SCAN button (1) or tune
the radio manually until the desired station
frequency is displayed.
3. Press one of the Preset buttons (5)
for at least 2 seconds to store the fre-
quency. The frequency of the station will
flash once on the display at this time. If the
button is pressed for less than 2 seconds,
the preceding selection will remain in
memory.
NOTE
If the connection between the radio
and battery is broken for any reason
such as vehicle maintenance or radio
removal, all stations stored in the pre-
set buttons are cleared. If this occurs,
it is necessary to reset the preset but-
tons.
If a cell phone is placed near the ra-
dio, it may cause the radio to emit
noise when it receives calls. This noise
does not indicate a radio fault.
Page 177 of 365
5-14 Audio
operate and stop automatically on the
next station.
Continue this operation until you find the
desired station.
Automatic tuning (SCAN)
Press the SCAN button (5) to change the
radio to the SCAN mode. In this mode, the
radio scans through the radio band until a
station is found. The radio will stop at the
station for five seconds while displaying
the frequency, after which scanning will
continue until the entire band has been
scanned from the low end to the high end.
Press the SCAN button again to cancel
the SCAN mode and to stop on any dis-
played frequency.
When the SCAN button is pressed for
automatic tuning, stations are scanned in
the direction of low frequencies to high fre-
quencies only.
Automatic tuning may not function proper-
ly if the station reception is weakened by
distance from the station or proximity to
tall buildings and hills.
Selecting preset stations
Presetting a station with a Preset button
(7) allows you to select that station in a
single operation. Up to six AM, FM1 and
FM2 stations each may be preset.
How to preset stations
1. Press the FM/AM selection button to
select AM, FM1 or FM2 reception.
2. Press the SCAN button (5) or tune
the radio manually until the desired station
frequency is displayed.
3. Press one of the Preset buttons (7)
for at least 1.5 seconds to store the fre-
quency. The frequency of the station will
flash once on the display at this time. If the
button is pressed for less than 1.5 sec-
onds, the preceding selection will remain
in memory.
NOTE
If the connection between the radio
and battery is broken for any reason
such as vehicle maintenance or radio
removal, all stations stored in the pre-
set buttons are cleared. If this occurs,
it is necessary to reset the preset but-
tons.
If a cell phone is placed near the ra-
dio, it may cause the radio to emit
noise when it receives calls. This noise
does not indicate a radio fault.
Page 204 of 365
Starting and operating 7-7
CONTINUED
Starting the engine
Manual transmission vehicle
1. Apply the parking brake.
2. Turn off unnecessary lights and acces-
sories.
3. Press the clutch pedal to the floor and
shift the shift lever into neutral. Hold the
clutch pedal to the floor while starting the
engine.
The starter motor will only operate when
the clutch pedal is pressed fully to the
floor.
4. Turn the ignition switch to the ON po-
sition and check the operation of the warn-
ing and indicator lights. Refer to the Warning and indicator lights section
(chapter 3).
5. Turn the ignition switch to the START
position without depressing the accelera-
tor pedal. Release the key immediately af-
ter the engine has started. If the engine does not start, try the follow-
ing.
1) Turn the ignition switch to the OFF
position and wait for at least 10 sec-
onds. After checking that the parking
brake is firmly set, turn the ignition
switch to the START position while de-
pressing the accelerator pedal slightly
(approximately a quarter of the full
stroke). Release the accelerator pedal
as soon as the engine starts.
2) If this fails to start the engine, turn the
ignition switch back to the OFF posi-
tion and wait for at least 10 seconds.
Then fully depress the accelerator ped-
al and turn the ignition switch to the START position. If the engine starts,
quickly release the accelerator pedal.
3) If this fails to start the engine, turn the
ignition switch again to the OFF posi-
tion. After waiting for 10 seconds or
longer, turn the ignition switch to the START position without depressing
the accelerator pedal.
4) If the engine still refuses to start, con-
tact your nearest SUBARU dealer for
assistance.
6. Confirm that all warning and indicator
lights have gone off after the engine has
started. The fuel injection system auto-
matically lowers the idle speed as the en-
gine warms up.
NOTE
The engine may be difficult to start
when the battery has been disconnect-
ed and reconnected (for maintenance
or other purposes). This difficulty is
caused by the electronically controlled
throttle s self-diagnosis function. To
overcome it, keep the ignition switch in
the ON position for approximately 10
seconds before starting the engine.
Automatic transmission vehi-
cle
1. Apply the parking brake.
2. Turn off unnecessary lights and acces-
sories.
3. Shift the selector lever to the P or N
position (preferably P position).
The starter motor will only operate when
the select lever is at the P or N position.
4. Turn the ignition switch to the ON po-
sition and check the operation of the warn-
ing and indicator lights. Refer to the Warning and indicator lights section
(chapter 3).
5. Turn the ignition switch to the START
position without depressing the accelera-
tor pedal. Release the key immediately af-
ter the engine has started.
If the engine does not start, try the follow-
Do not operate the starter motor
continuously for more than ten sec-
onds. If the engine fails to start after
operating the starter for five to ten
seconds, wait for ten seconds or
more before trying again.