Page 169 of 218

Battery cover
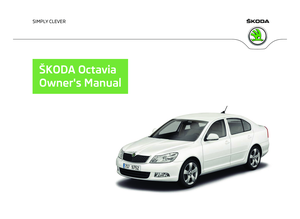
Fig. 138
Engine compartment: Polyester cover of the vehicle battery/plastic
cover of the vehicle battery
First read and observe the introductory information and safety warn-
ings on page 165.
The battery is located in the engine compartment in a polyester cover
1
» Fig. 138 or in a plastic cover 2
.
› Open the battery cover in the direction of the arrow 1
or press the interlock on
the side of the battery cover in the direction of the arrow 2
, fold the cover up
and remove.
› The battery cover is installed in reverse order.
When working on the battery, the edge of the polyester battery cover 1
is inser-
ted between the battery and the side wall of the battery cover. ÐChecking the battery electrolyte level
Fig. 139
Vehicle battery: Electrolyte level
indicator
ä First read and observe the introductory information and safety warn-
ings on page 165.
We recommend you have the electrolyte level checked by a ŠKODA specialist ga-
rage from time to time, especially in the following cases.
› High outside temperatures.
› Long daily drives
› After each charge
» page 168.
On vehicles with a vehicle battery fitted with a colour indicator, the so-called
magic eye » Fig. 139, the electrolyte level can be determined by looking at the
change in colour.
Air bubbles can influence the colour of the indicator. For this reason carefully
knock on the indicator before carrying out the check.
› Black colour - electrolyte level is correct.
› Colourless or light yellow colour - electrolyte level too low, the battery must be
replaced. Note
■ The battery electrolyte level is periodically checked by a ŠKODA Service Partner
as part of the Inspection Service. ■ For technical reasons, on vehicles with the description “AGM”, the electrolyte
level cannot be checked. ■ Vehicles with a START-STOP system are fitted with a battery control unit for
checking the energy level for the recurring engine start. Ð Operation in winter
First read and observe the introductory information and safety warn-
ings on page 165.
At low temperatures, the vehicle battery only has part of the initial power output
that it has at normal temperatures.
A discharged vehicle battery may already freeze at temperatures just below 0
°C.
We therefore recommend that you have the battery checked and, if necessary, re-
charged by a ŠKODA Service Partner before the start of the winter.
Ð
ä
ä
167
Inspecting and replenishing
Page 170 of 218

Charging a vehicle battery
First read and observe the introductory information and safety warn-
ings on page 165.
A properly charged vehicle battery is essential for reliably starting the engine.
›
Switch off the ignition and all of the electrical components.
› Only for “quick-charging”: Disconnect both battery cables (first of all “negative”,
then “positive”).
› Attach the terminal clamps of the charger to the battery terminals (red =
“posi-
tive
”, black = “negative”).
› Only now plug the mains cable of the charger into the power socket and switch
on the device.
› When charging is completed: Switch off the charger and remove the mains ca-
ble from the power socket.
› Only then disconnect the charger's terminal clamps.
› Reconnect the cables to the battery, if necessary (first of all
“positive”, then
“negative
”).
It is not normally necessary to disconnect the cables of the battery if you re-
charge the vehicle battery using low amperages (as for example from a mini-
charger). Refer to the instructions of the charger manufacturer.
A charging current of 0.1 multiple of the total vehicle battery capacity (or lower)
must be used until full charging is achieved.
It is, however, necessary to disconnect both cables before charging the battery
with high amperages, so-called “ quick-charging”.
“Quick-charging” the vehicle battery is dangerous and requires a special charger
and specialist knowledge. We therefore recommend having the quick charging of
vehicle batteries undertaken by a ŠKODA specialist garage.
The vent plugs of the vehicle battery should not be opened for charging. CAUTION
On vehicles with the START/STOP system, the pole terminal of the charger must
not be connected directly to the negative terminal of the vehicle battery, but only
to the engine earth » page 186, Jump-starting in vehicles with the
START-STOP
system . Ð
ä Disconnecting and reconnecting the vehicle battery
First read and observe the introductory information and safety warn-
ings on page 165.
On disconnecting and reconnecting the vehicle battery the following functions
are initially deactivated or are no longer able to operate fault-free.
Operation Operating measure
Electrical power window (operational faults) » page 37
Enter the radio/navigation system code num-
ber » User manual of the radio
or »
user manual of the navigation
system
Setting the clock » page 11
Data in the multifunction display are deleted. » page 12 Note
We recommend having the vehicle checked by a ŠKODA Service Partner to ensure
the full functionality of all electrical systems. Ð Replacing the vehicle battery
First read and observe the introductory information and safety warn-
ings on page 165.
When replacing a battery, the new vehicle battery must have the same capacity,
voltage, amperage and be the same size. Suitable types of vehicle batteries can
be purchased from a
ŠKODA Service Partner.
We recommend that the battery is replaced by a ŠKODA Service Partner, where
the new vehicle battery will be installed properly and the original battery will be
disposed of in accordance with national regulations. Ð
ä
ä
168 General Maintenance
Page 171 of 218

Automatic load deactivation
First read and observe the introductory information and safety warn-
ings on page 165.
An intelligent vehicle power management system automatically takes various
measures at high loads on the vehicle battery to prevent discharging of the bat-
tery: This manifests itself by the following:
› The idling speed is raised to allow the generator to deliver more electricity to
the electrical system.
› Where appropriate large consumers of power, e.g. seat heaters, rear window
heaters, voltage supply to the 12V power socket, have their power limited or in
case of emergency shut off completely. Note
Despite such intervention by the vehicle electric system management, the vehicle
battery may be drained. For example, when the ignition is switched on a long time
with the engine turned off or the side or parking lights are turned on during lon-
ger parking. Driving comfort is not put at risk by any shutting off of consumers.
Often the driver is not aware of it having taken place. Ðä
169
Inspecting and replenishing
Page 172 of 218

Wheels and Tyres
Tyres
ä
Introduction
This chapter contains information on the following subjects:
Service life of tyres 171
Handling wheels and tyres 172
New wheels and tyres 172
Unidirectional tyres 173
Spare wheel 173
Full wheel trim 174
Wheel bolts 174
Wheel trim caps 174
Tyre control display 175
Wheel bolts 176
Winter tyres 176
Snow chains 176
WARNING
■ During the first 500 km, new tyres do not offer optimum grip and appropri-
ate care should therefore be taken when driving - risk of accident!
■ Never drive with damaged tyres - risk of accident!
■ Only use those tyres or wheel rims which have been approved by ŠKODA for
your model of vehicle. Failure to observe this instruction will adversely affect
the road safety of your vehicle - risk of accident!
■ The maximum permissible speed for your tyres must not be exceeded under
any circumstances - risk of an accident resulting from tyre damage and loss of
control of the vehicle.
■ If the inflation pressure is too low, the tyre must perform a higher rolling re-
sistance. At higher speeds the tyre will warm up as a result of this. This can
result in tread separation and a tyre blowout. WARNING (Continued)
■ Do not, where possible, replace individual tyres but at least replace them on
both wheels of a given axle at the same time. Always fit the tyres with the
deeper tread depth to the front wheels.
■ Never use tyres if you do not know anything about the condition and age.
■ You must have your tyres replaced with new ones at the latest when the
wear indicators have been worn down.
■ Worn tyres do not provide the necessary adhesion to the road surface at
high speeds on wet roads. One could experience
“aquaplaning” (uncontrolled
movements of the vehicle - “swimming” on a wet road surface).
■ Immediately replace damaged wheel rims or tyres.
■ Do not use summer or winter tyres that are older than 6 years or 4 years re-
spectively.
■ The wheel bolts must be clean and must turn easily. However, they must
never be treated with grease or oil.
■ If the wheel bolts are tightened to a too low tightening torque, the rim can
come loose when the car is moving - risk of accident! A tightening torque
which is too high can damage the bolts and threads and this can result in per-
manent deformation of the contact surfaces on the rim.
■ In case of incorrect treatment of the wheel bolts, the wheel can loosen
when the car is moving - risk of accident!
■ Observe the national legal regulations relating to the use of tyres and snow
chains. CAUTION
■ If a spare wheel is used that is not identical to the fitted tyres, the following
must be observed » page 173, Spare wheel.
■ The prescribed tightening torque of the wheel bolts for steel and light alloy
wheels is 120 Nm.
■ Protect the tyres from contact with oil, grease and fuel.
■ Replace any lost valve caps immediately. For the sake of the environment
Tyres which are insufficiently inflated increase your fuel consumption. £
170 General Maintenance
Page 173 of 218

Note
■ We recommend that any work on the wheels or tyres is carried out by a ŠKODA
Service Partner. ■ We recommend that you use wheel rims, tyres, full wheel trims and snow chains
from
ŠKODA Original Accessories. ÐService life of tyres
Fig. 140
Tyre tread with wear indicators/Open fuel filler flap with a table
detailing the tyre size and tyre inflation pressure
First read and observe the introductory information and safety warn-
ings on page 170.
Wear indicators
The base of the tread of the tyres has 1.6 mm high wear indicators installed.
These wear indicators are located multiple times depending on the make and are
evenly spaced around the circumference of the tyre » Fig. 140 - . Markings on
the walls of the tyres through the letters
“TWI”, triangular symbols or other sym-
bols identify the position of the wear indicators.
The life of your tyres very much depends on the following points:
Tyre pressure
The working life of tyres will be shortened considerably if the tyres are insuffi-
ciently or over-inflated and this will have an adverse effect on the handling of
your vehicle. Therefore check the tyre pressure, including that of the spare wheel,
at least once a month and also before setting off on a long journey.
ä The tyre inflation pressures for
summer tyres are indicated on the inside of the
fuel filler flap » Fig. 140 - . The inflation pressures for winter tyres are 20 kPa
(0.2
bar) higher than those for summer tyres.
The tyre inflation pressure for tyres of the tyre size 205/50 R17 that are designed
to be used with snow chains, is identical to the tyre inflation pressure for tyres of
the tyre size 225/45 R17.
The tyre pressure should be at the highest pressure specified for your vehicle at
all times. The tyre inflation pressure of the spare wheel R 18 is 420 kPa.
Always check the inflation pressure when the tyres are cold. Do not reduce the
higher pressure of warm tyres. If the load varies greatly, adjust the tyre inflation
pressure accordingly.
Driving style
Fast cornering, sharp acceleration and braking increase the wear of your tyres.
Balancing wheels
The wheels of a new vehicle are balanced. There are a wide range of influences
when driving which may result in an imbalance and which makes themselves felt
through vibration in the steering.
Have the wheels rebalanced after replacing the tyres.
Wheel alignment errors
Incorrect wheel alignment at the front and rear will not only increase wear-and-
tear on the tyres but will also has an adverse effect on vehicle safety. In the
event of any unusual tyre wear, seek assistance from a ŠKODA specialist garage.
Tyre damage
Drive over curbs on the side of the road and other such obstacles slowly and,
where possible, at a right angle in order to avoid damage to tyres and wheel
trims.
We recommend checking your tyres and wheel rims for damage (punctures, cuts,
splits and bulges, etc.) on a regular basis. Remove foreign bodies from the tyre
profile.
Unusual vibrations or pulling of the vehicle to one side could be a sign of tyre
damage. If there is any doubt that a wheel is damaged, immediately reduce your
speed and stop! Check the tyres for signs of damage (bulges, splits, etc.). If no ex-
ternal damage is evident, drive slowly and carefully to the nearest ŠKODA special-
ist garage to have the vehicle checked. Ð
171
Wheels and Tyres
Page 174 of 218

Handling wheels and tyres
Fig. 141
Changing wheels around
First read and observe the introductory information and safety warn-
ings on page 170.
Changing wheels around
If significantly greater wear is present on the front tyres, we recommend chang-
ing the front wheels around with the rear wheels as shown in the dia-
gram » Fig. 141. You will then obtain approximately the same life for all the tyres.
We recommend that you change the wheels around every 10
000 km in order to
achieve even wear on all wheels and to obtain optimal tyre life.
Storing tyres
Mark wheels before removing them so that their previous direction of running can
be maintained when mounted them again.
Always store wheels or tyres which been removed in a cool, dry and, where possi-
ble, dark place. Tyres which are not fixed to a wheel trim should be stored up-
right. ÐNew wheels and tyres
First read and observe the introductory information and safety warn-
ings on page 170.
Only fit tyres of the same type, size (rolling circumference) and the same tread
pattern on one axle on all 4
wheels.
The tyre/wheel combinations which are approved for your vehicle are indicated in
your vehicle documents.
ä
ä Proper knowledge of the tyre data makes it easier for you to select the correct
type of tyre. Tyres, for example, have the following inscription on their walls.
195/65 R
15 91 T
What this means is:
195 Tyre width in mm
65 Height/width ratio in %
R Code letter for the type of tyre - Radial
15 Diameter of wheel in inches
91 Load index
T Speed symbol The following speed restrictions apply to tyres.
Speed symbol Permissible maximum speed
S 180 km/h
T 190 km/h
U 200 km/h
H 210 km/h
V 240 km/h
W 270 km/h
Y 300 km/h The date of manufacture
is also stated on the tyre wall (possibly only on the in-
side of wheel ): e.g.
DOT ... 20 12...
means, for example, that the tyre was manufactured in the 20th week of 2012.
The following must be observed if only one temporary spare wheel is availa-
ble » page 173 . Ð
172 General Maintenance
Page 175 of 218

Unidirectional tyres
First read and observe the introductory information and safety warn-
ings on page 170.
The direction of rotation of the tyres is marked by arrows on the wall of the tyre
.
The so specified running direction must absolutely be complied with. Only then
are the tyres able to provide the optimal properties in terms of grip, low noise,
wear-and-tear and aquaplaning.
If, in the event of a puncture, it is necessary to fit a spare wheel with a tyre with-
out a dedicated running direction or the opposite running direction, drive carefully
as the optimum characteristics of the tyre are no longer applicable in this situa-
tion. ÐSpare wheel
Fig. 142
Boot: Spare wheel
First read and observe the introductory information and safety warn-
ings on page 170.
The spare wheel is located in a well under the floor covering in the boot and is
fixed in place with a special bolt
» Fig. 142.
Before removing the spare wheel, the box containing the vehicle tool kit must be
removed.
It is important to check the inflation pressure in the spare wheel (preferably every
time the tyre air pressure is checked - see sticker on the fuel filler flap »
page 171)
to ensure it is always ready to use.
ä
ä
If the dimensions or design of the spare wheel differ from the tyres fitted to the
vehicle (e.g. winter tyres or low-profile tyres), it must only be used briefly in the
event of a puncture and if an appropriately cautious style of driving is adop-
ted » .
Replace it with a wheel having the appropriate mode and dimensions as soon as
possible
Temporary spare wheel
A warning label is displayed on the wheel rim of the spare wheel to indicate that
your vehicle is equipped with a temporary spare wheel.
Please observe the following when driving with a temporary spare wheel.
› The warning label must not be covered after installing the wheel.
› Do not drive faster than 80
km/h with the temporary spare wheel and pay par-
ticular attention while driving. Avoid accelerating at full throttle, sharp braking
and fast cornering.
› The inflation pressure for this spare wheel is identical to the maximum inflation
pressure of the standard tyres. The temporary spare wheel R 18 must have an
inflation pressure of 420 kPa!
› Only use this temporary spare wheel to reach the nearest ŠKODA specialist ga-
rage as it is not intended for continuous use.
› No other summer or winter tyres must be mounted on the rim of the temporary
spare wheel R 18. WARNING
■ Never use the temporary spare wheel if it is damaged.
■ If the dimensions or design of the temporary spare wheel differ from the fit-
ted tyres, never drive faster than 80
km/h (or 50 mph). Avoid accelerating at
full throttle, sharp braking and fast cornering. CAUTION
Observe the instructions on the sticker on the temporary spare wheel. Note
The tyre pressure should be at the highest pressure specified for your vehicle at
all times. Ð
173
Wheels and Tyres
Page 176 of 218

Full wheel trim
First read and observe the introductory information and safety warn-
ings on page 170.
Pulling off
›
Hook the clamp found in the vehicle tool kit into the reinforced edge of the
wheel trim.
› Push the wheel wrench through the clamp, support on the tyre and pull off the
wheel trim.
Install
› First press the full wheel trim onto the wheel rim at the valve opening provided.
Then press the full wheel trim into the wheel rim until its entire circumference
locks correctly in place. CAUTION
■ Use the pressure of your hand, do not knock the full wheel trim! Heavy knocks
mainly on the points where the full wheel trim has not been inserted into the
wheel, can result in damage to the guide and centring elements of the full wheel
trim.
■ First of all check that the theft-deterrent wheel bolt is located in the hole near
the valve before fitting the full wheel trim onto a steel wheel which is attached
with a theft-deterrent wheel bolt » page 182, Securing wheels against theft .
■ If wheel trims are retrofitted it must be ensured that an adequate flow of air is
assured to cool the brake system. ÐWheel bolts
Fig. 143
Remove the cap
ä
First read and observe the introductory information and safety warn-
ings on page 170.
Pulling off
›
Push the plastic clip sufficiently far onto the cap until the inner catches of the
clip are positioned at the collar of the cap and detach the cap » Fig. 143.
Install
› Push the caps onto the wheel bolts up to the stop.
The wheel bolt caps are housed in a plastic box in the spare wheel or in the stor-
age space for the spare wheel. Ð Wheel trim caps
Fig. 144
Pull off the wheel trim cap on
light alloy wheels
First read and observe the introductory information and safety warn-
ings on page 170.
Pulling off
›
Carefully remove the wheel trim cap using the wire clamp from the vehicle tool
kit » Fig. 144. Ð
ä
ä
174 General Maintenance
 1
1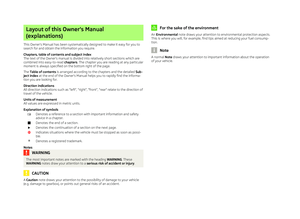 2
2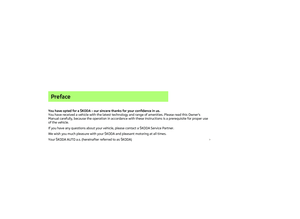 3
3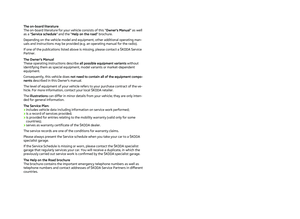 4
4 5
5 6
6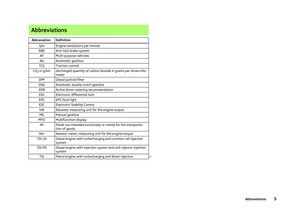 7
7 8
8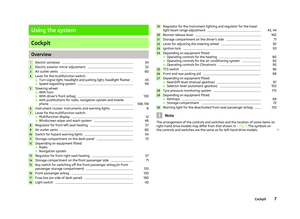 9
9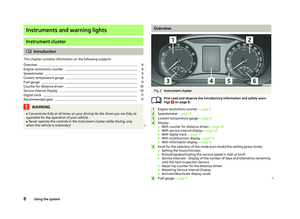 10
10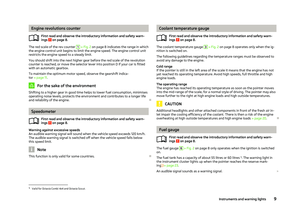 11
11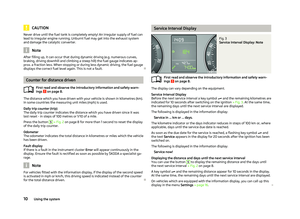 12
12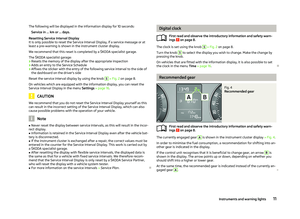 13
13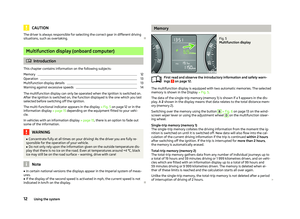 14
14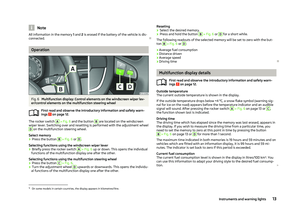 15
15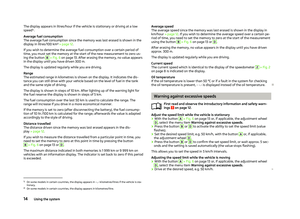 16
16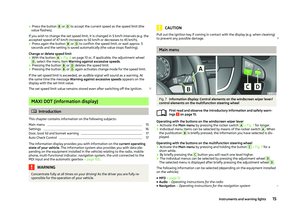 17
17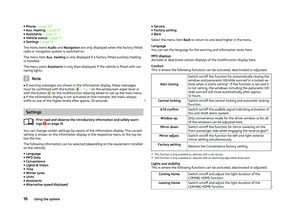 18
18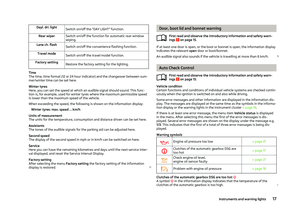 19
19 20
20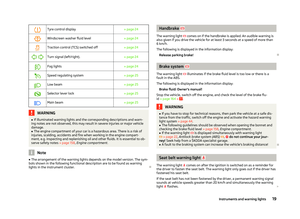 21
21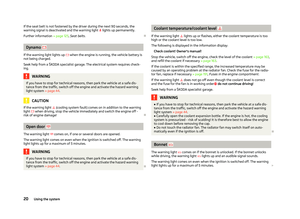 22
22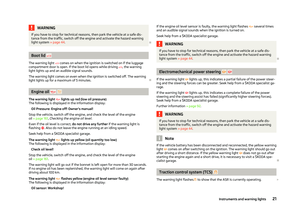 23
23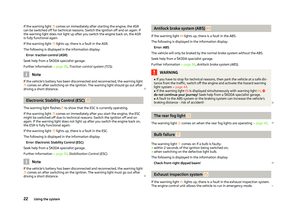 24
24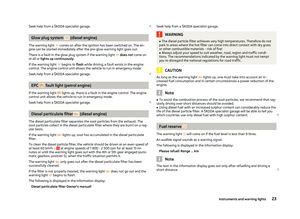 25
25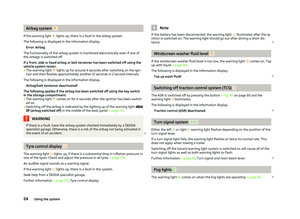 26
26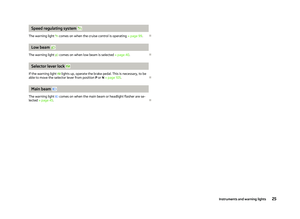 27
27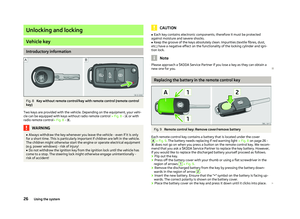 28
28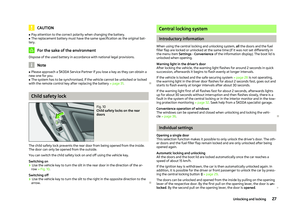 29
29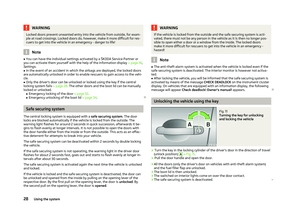 30
30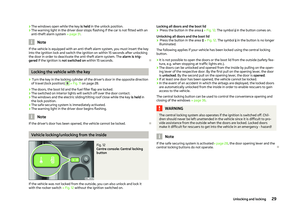 31
31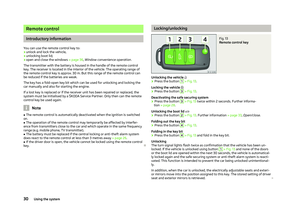 32
32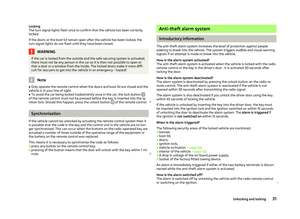 33
33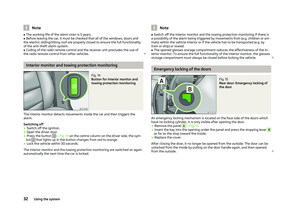 34
34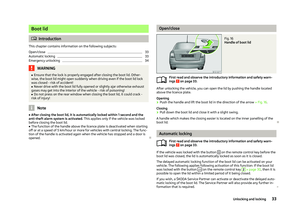 35
35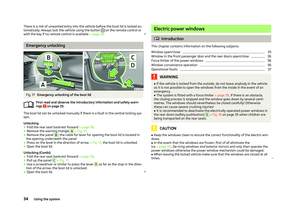 36
36 37
37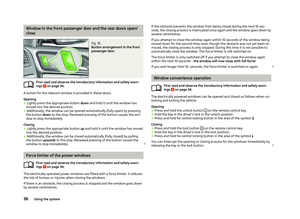 38
38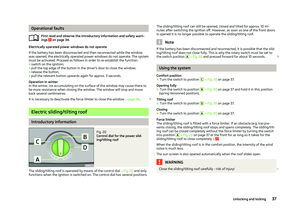 39
39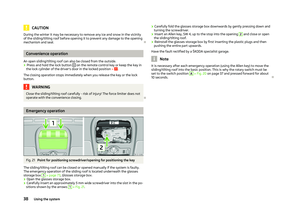 40
40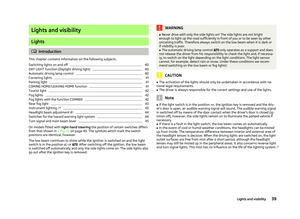 41
41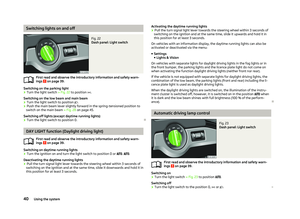 42
42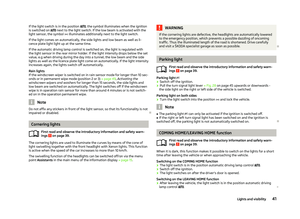 43
43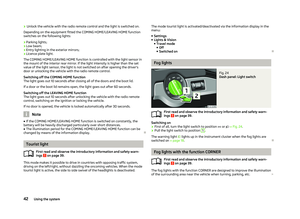 44
44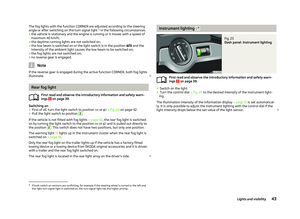 45
45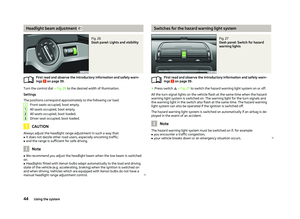 46
46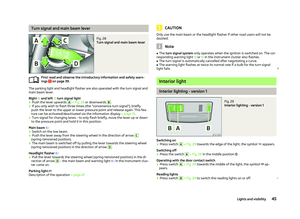 47
47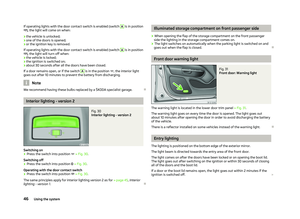 48
48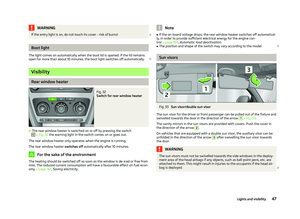 49
49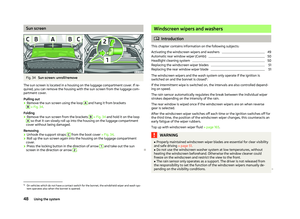 50
50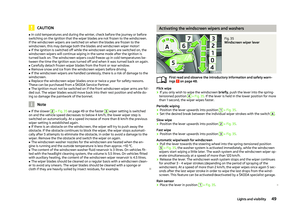 51
51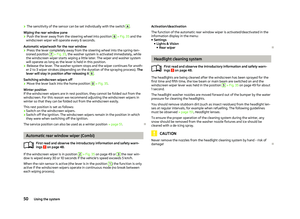 52
52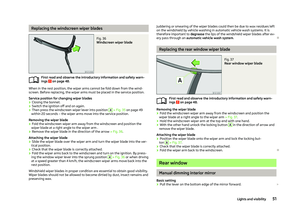 53
53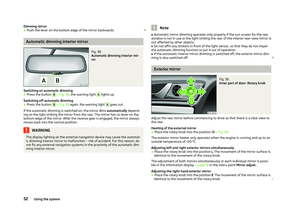 54
54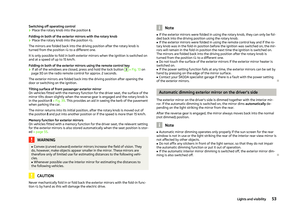 55
55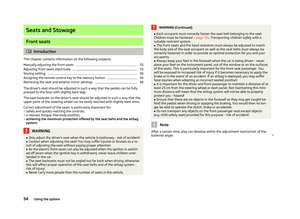 56
56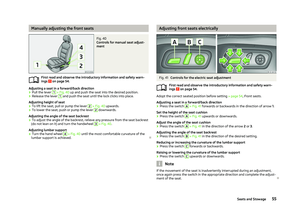 57
57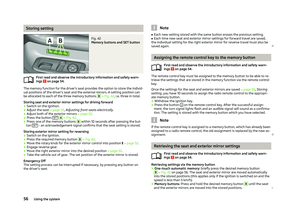 58
58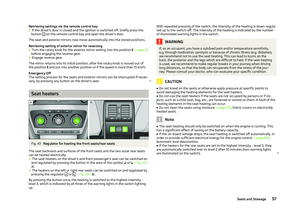 59
59 60
60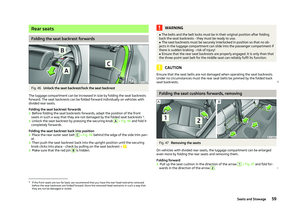 61
61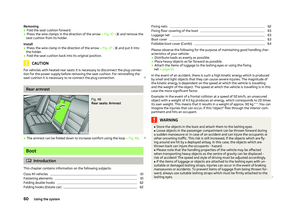 62
62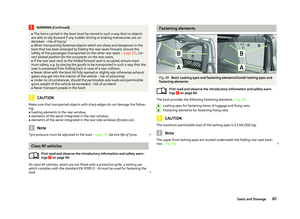 63
63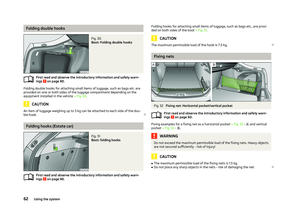 64
64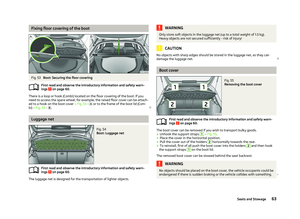 65
65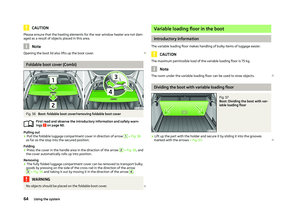 66
66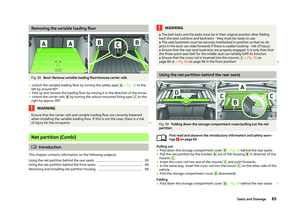 67
67 68
68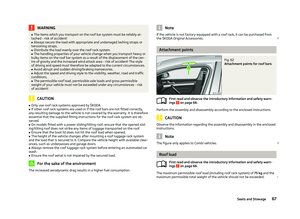 69
69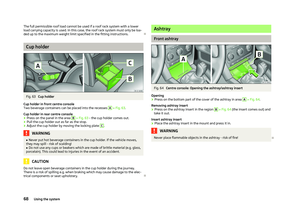 70
70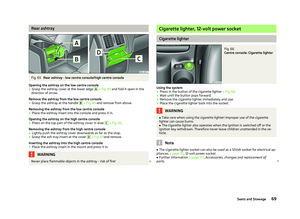 71
71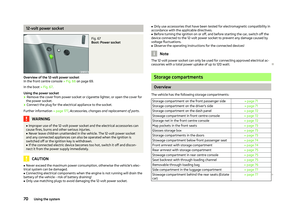 72
72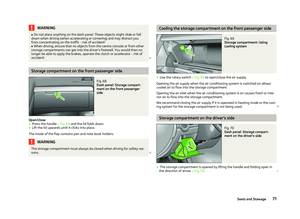 73
73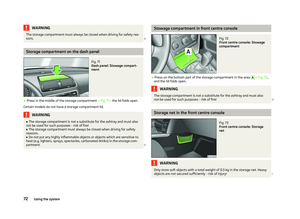 74
74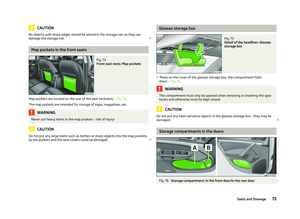 75
75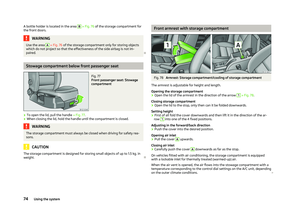 76
76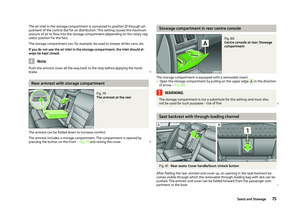 77
77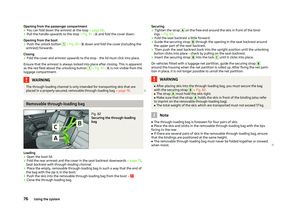 78
78 79
79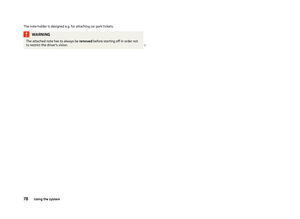 80
80 81
81 82
82 83
83 84
84 85
85 86
86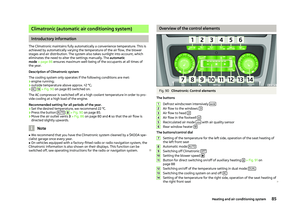 87
87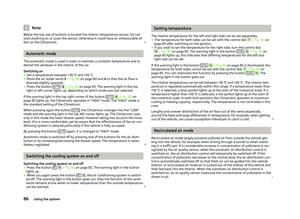 88
88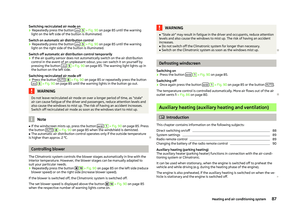 89
89 90
90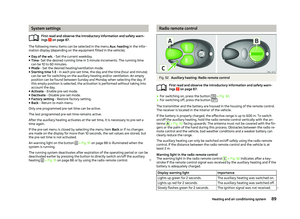 91
91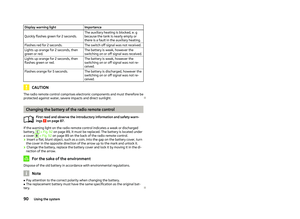 92
92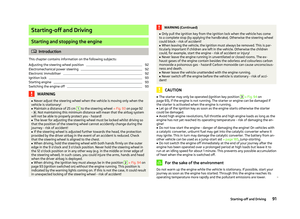 93
93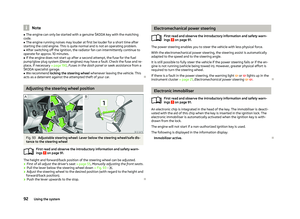 94
94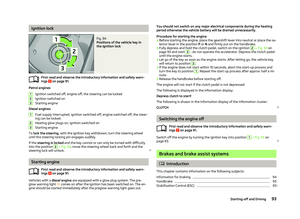 95
95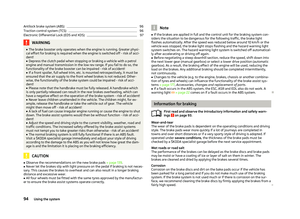 96
96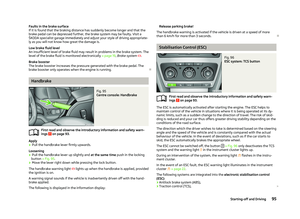 97
97 98
98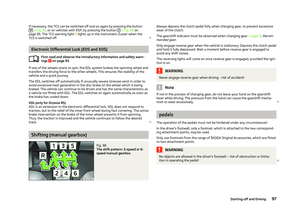 99
99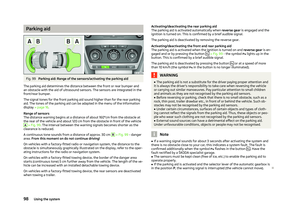 100
100 101
101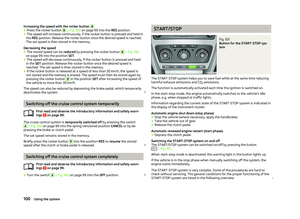 102
102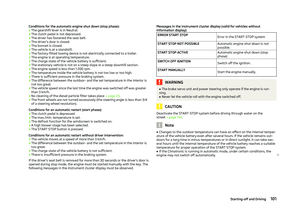 103
103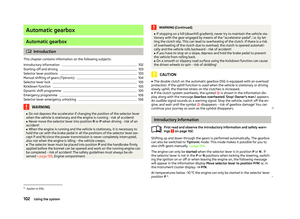 104
104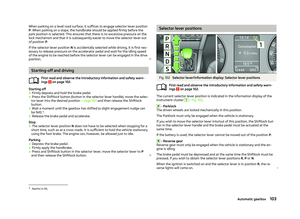 105
105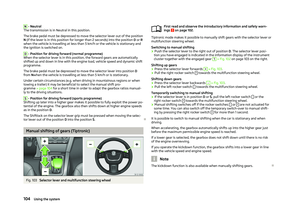 106
106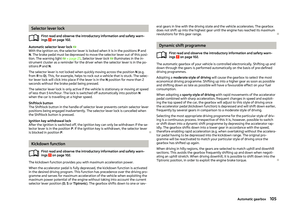 107
107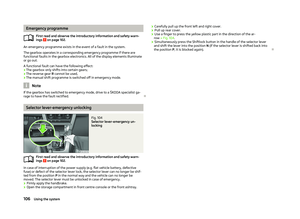 108
108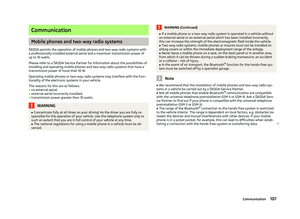 109
109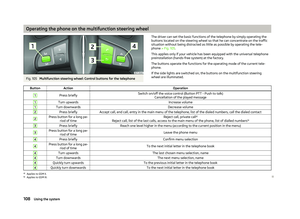 110
110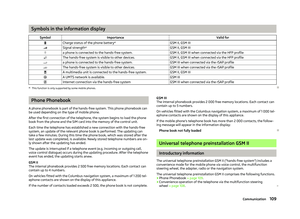 111
111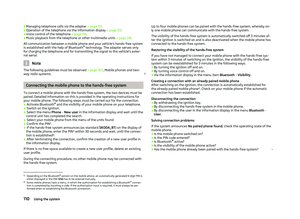 112
112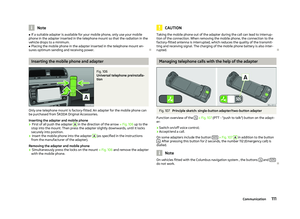 113
113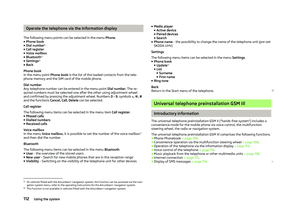 114
114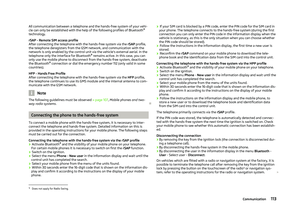 115
115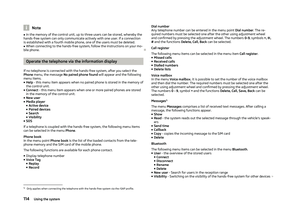 116
116 117
117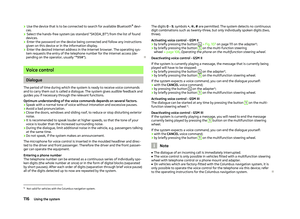 118
118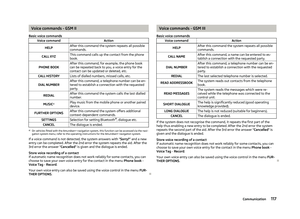 119
119 120
120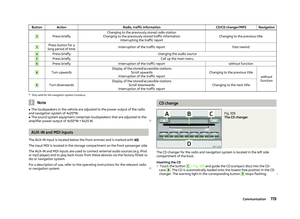 121
121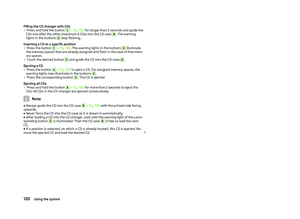 122
122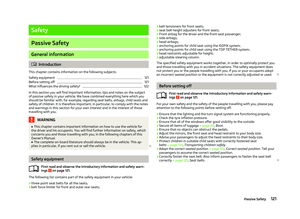 123
123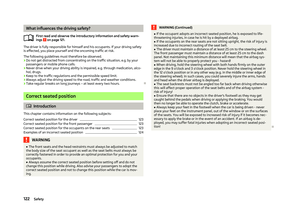 124
124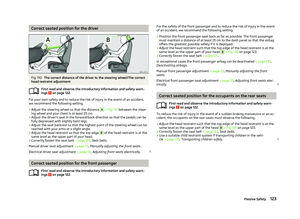 125
125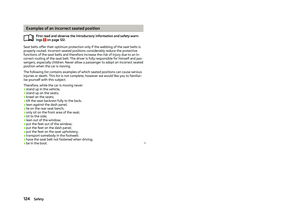 126
126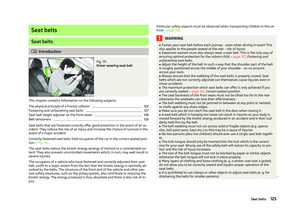 127
127 128
128 129
129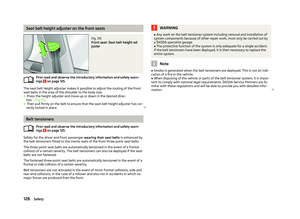 130
130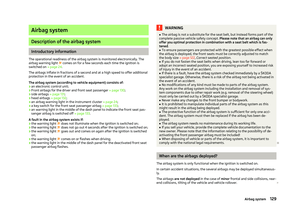 131
131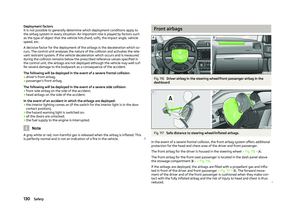 132
132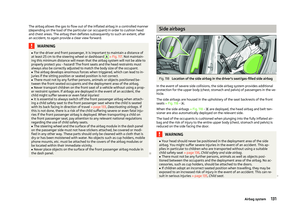 133
133 134
134 135
135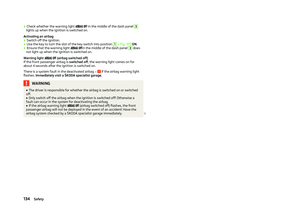 136
136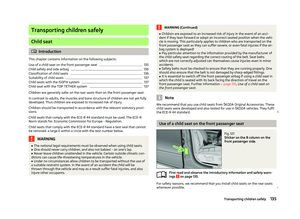 137
137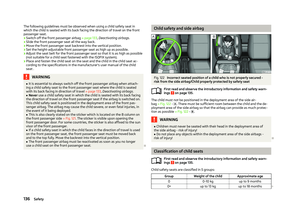 138
138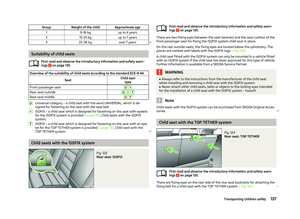 139
139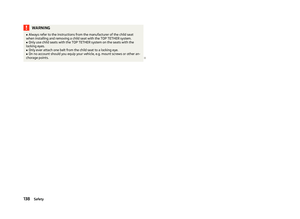 140
140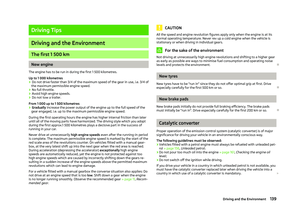 141
141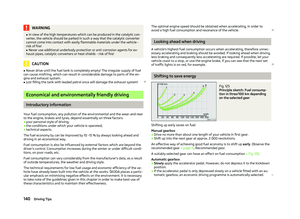 142
142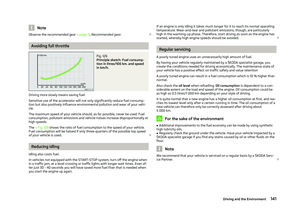 143
143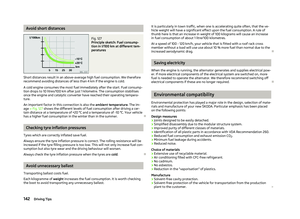 144
144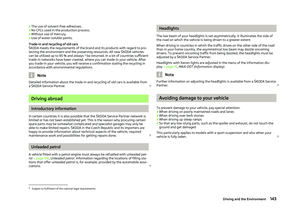 145
145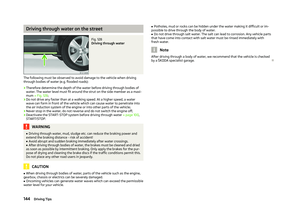 146
146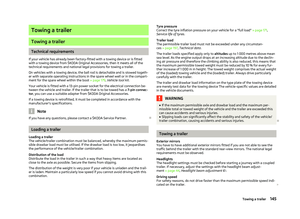 147
147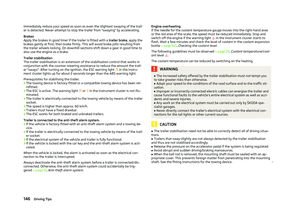 148
148 149
149 150
150 151
151 152
152 153
153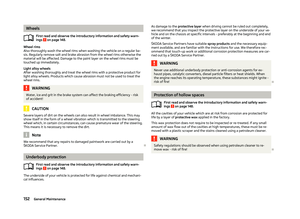 154
154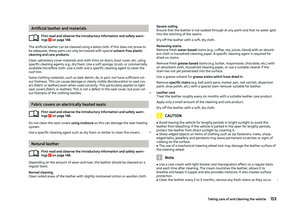 155
155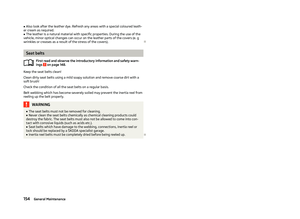 156
156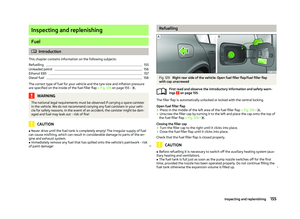 157
157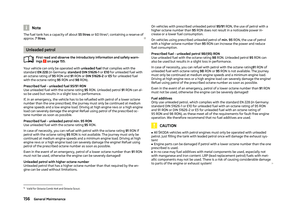 158
158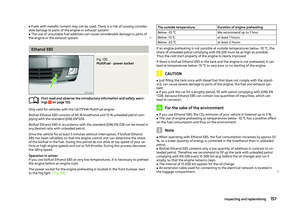 159
159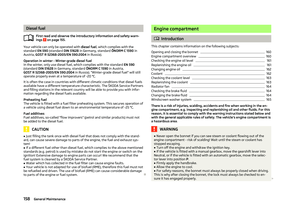 160
160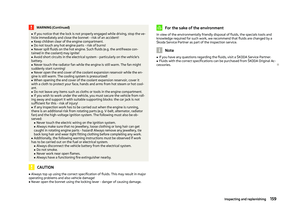 161
161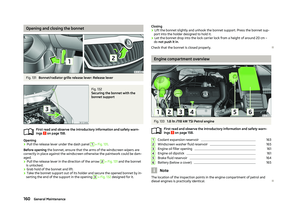 162
162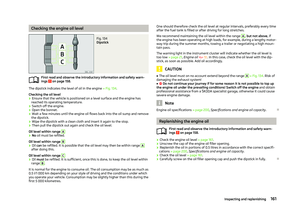 163
163 164
164 165
165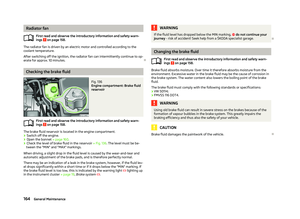 166
166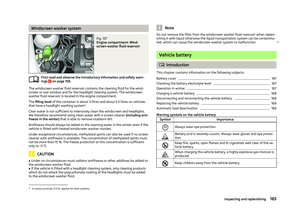 167
167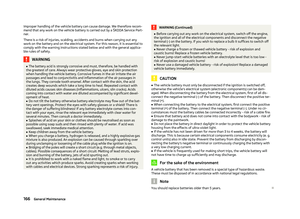 168
168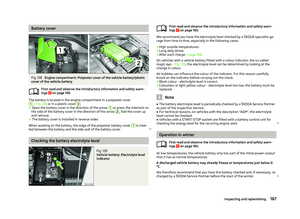 169
169 170
170 171
171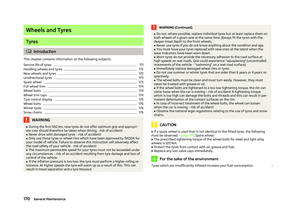 172
172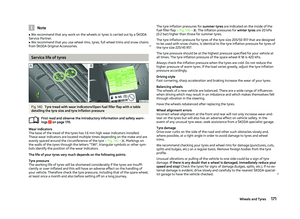 173
173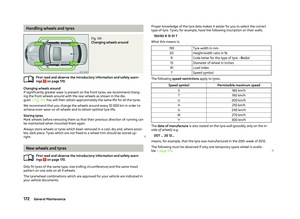 174
174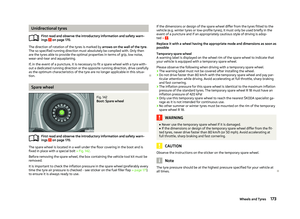 175
175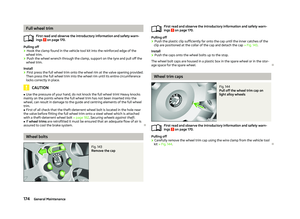 176
176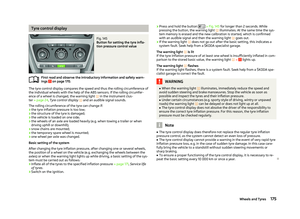 177
177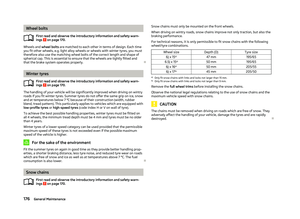 178
178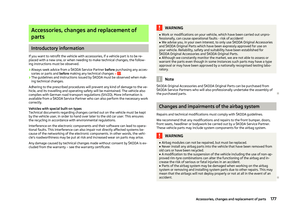 179
179 180
180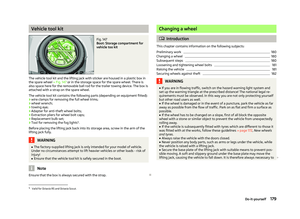 181
181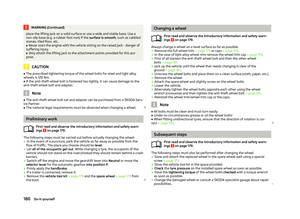 182
182 183
183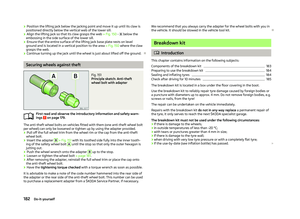 184
184 185
185 186
186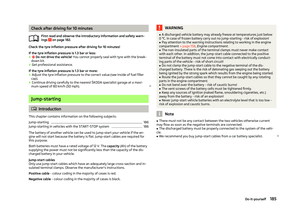 187
187 188
188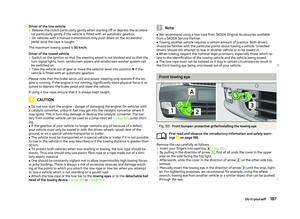 189
189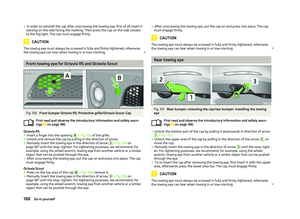 190
190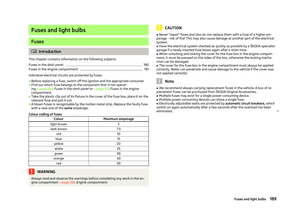 191
191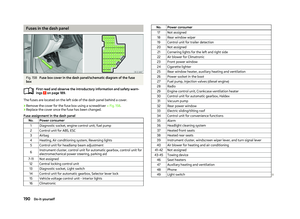 192
192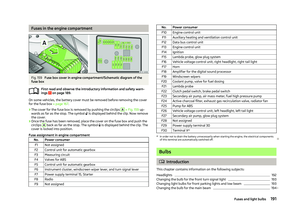 193
193 194
194 195
195 196
196 197
197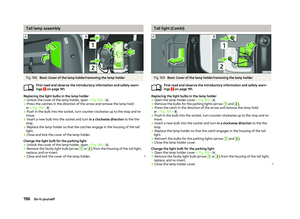 198
198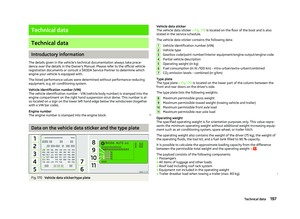 199
199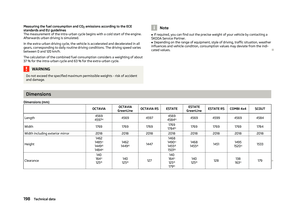 200
200 201
201 202
202 203
203 204
204 205
205 206
206 207
207 208
208 209
209 210
210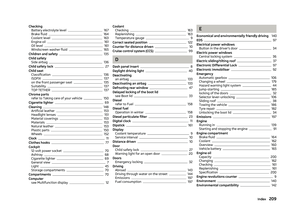 211
211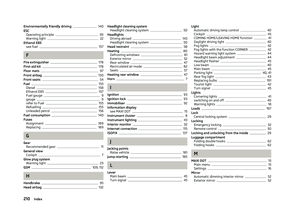 212
212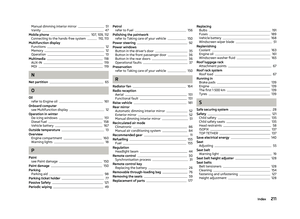 213
213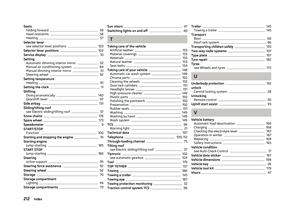 214
214 215
215 216
216 217
217