2006 INFINITI M35 torque
[x] Cancel search: torquePage 3405 of 5621
FFD-28
FRONT FINAL DRIVE ASSEMBLY
Revision: 2006 January2006 M35/M45
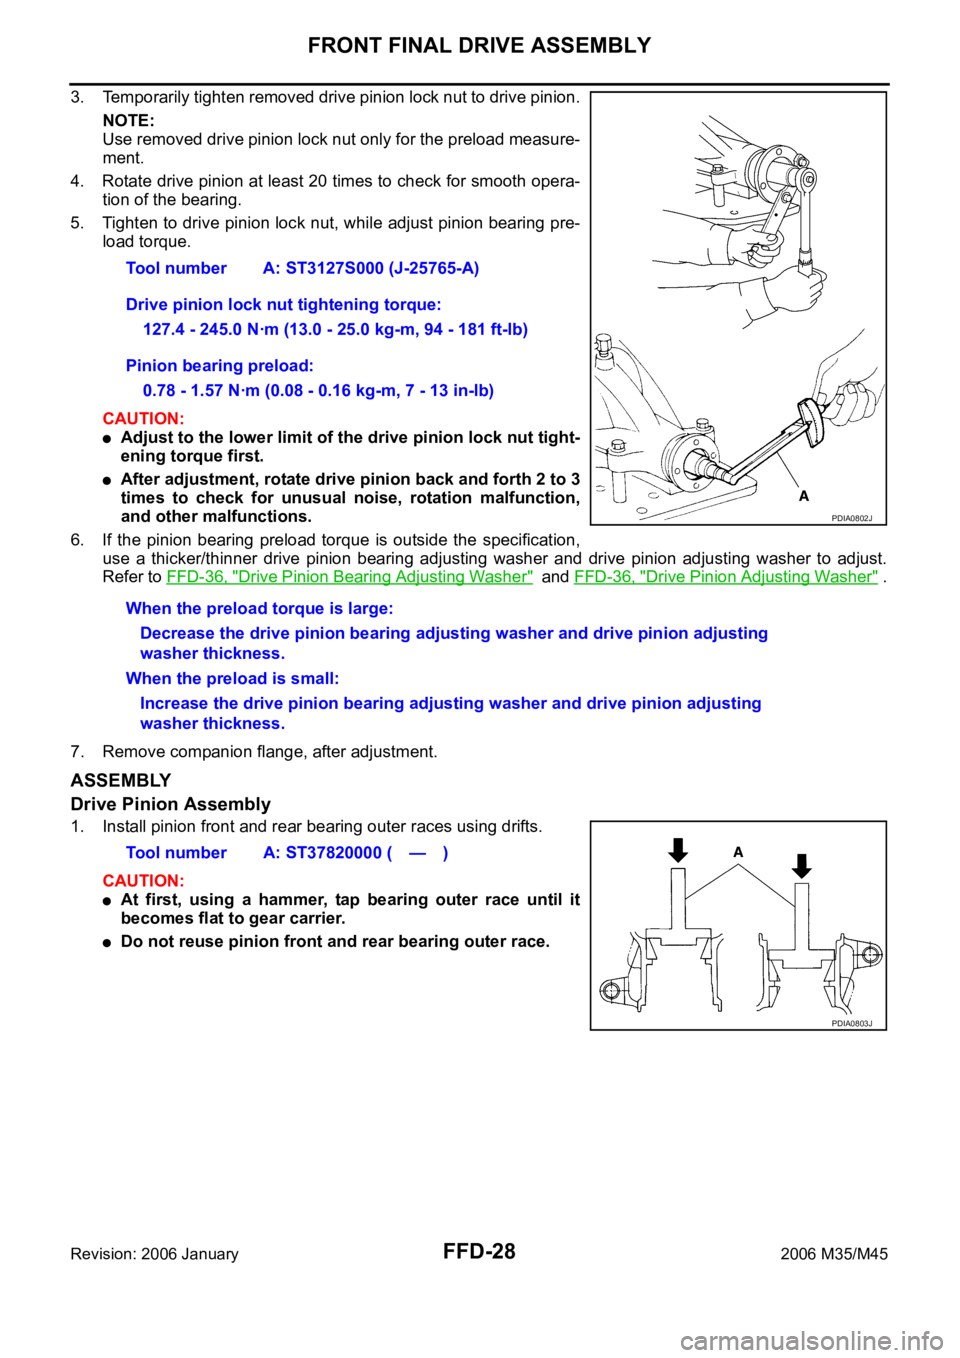
3. Temporarily tighten removed drive pinion lock nut to drive pinion.
NOTE:
Use removed drive pinion lock nut only for the preload measure-
ment.
4. Rotate drive pinion at least 20 times to check for smooth opera-
tion of the bearing.
5. Tighten to drive pinion lock nut, while adjust pinion bearing pre-
load torque.
CAUTION:
Adjust to the lower limit of the drive pinion lock nut tight-
ening torque first.
After adjustment, rotate drive pinion back and forth 2 to 3
times to check for unusual noise, rotation malfunction,
and other malfunctions.
6. If the pinion bearing preload torque is outside the specification,
use a thicker/thinner drive pinion bearing adjusting washer and drive pinion adjusting washer to adjust.
Refer to FFD-36, "
Drive Pinion Bearing Adjusting Washer" and FFD-36, "Drive Pinion Adjusting Washer" .
7. Remove companion flange, after adjustment.
ASSEMBLY
Drive Pinion Assembly
1. Install pinion front and rear bearing outer races using drifts.
CAUTION:
At first, using a hammer, tap bearing outer race until it
becomes flat to gear carrier.
Do not reuse pinion front and rear bearing outer race.Tool number A: ST3127S000 (J-25765-A)
Drive pinion lock nut tightening torque:
127.4 - 245.0 Nꞏm (13.0 - 25.0 kg-m, 94 - 181 ft-lb)
Pinion bearing preload:
0.78 - 1.57 Nꞏm (0.08 - 0.16 kg-m, 7 - 13 in-lb)
When the preload torque is large:
Decrease the drive pinion bearing adjusting washer and drive pinion adjusting
washer thickness.
When the preload is small:
Increase the drive pinion bearing adjusting washer and drive pinion adjusting
washer thickness.
PDIA0802J
Tool number A: ST37820000 ( — )
PDIA0803J
Page 3407 of 5621
FFD-30
FRONT FINAL DRIVE ASSEMBLY
Revision: 2006 January2006 M35/M45
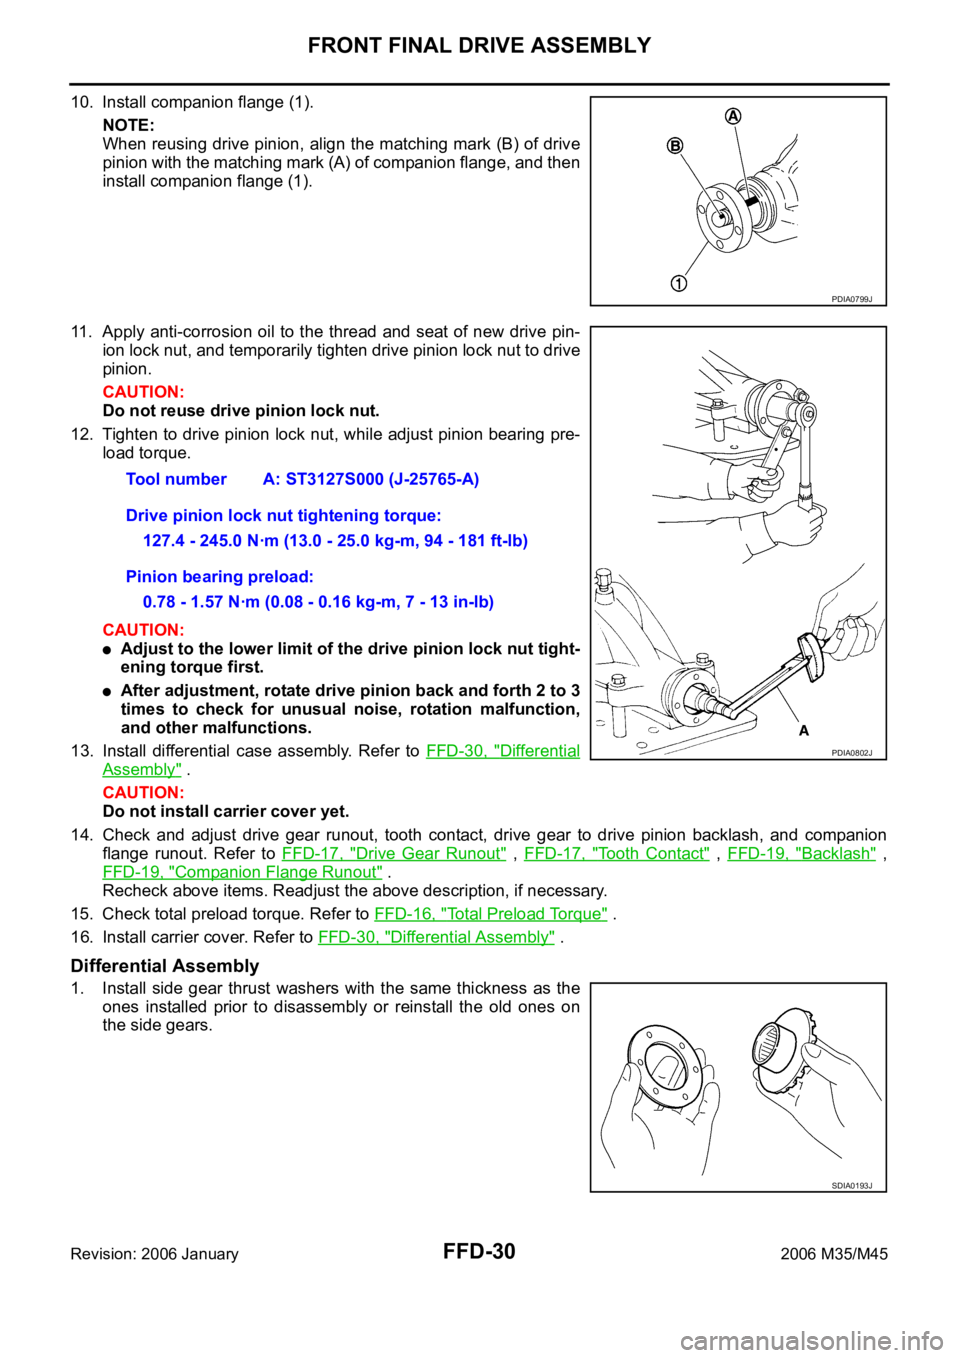
10. Install companion flange (1).
NOTE:
When reusing drive pinion, align the matching mark (B) of drive
pinion with the matching mark (A) of companion flange, and then
install companion flange (1).
11. Apply anti-corrosion oil to the thread and seat of new drive pin-
ion lock nut, and temporarily tighten drive pinion lock nut to drive
pinion.
CAUTION:
Do not reuse drive pinion lock nut.
12. Tighten to drive pinion lock nut, while adjust pinion bearing pre-
load torque.
CAUTION:
Adjust to the lower limit of the drive pinion lock nut tight-
ening torque first.
After adjustment, rotate drive pinion back and forth 2 to 3
times to check for unusual noise, rotation malfunction,
and other malfunctions.
13. Install differential case assembly. Refer to FFD-30, "
Differential
Assembly" .
CAUTION:
Do not install carrier cover yet.
14. Check and adjust drive gear runout, tooth contact, drive gear to drive pinion backlash, and companion
flange runout. Refer to FFD-17, "
Drive Gear Runout" , FFD-17, "Tooth Contact" , FFD-19, "Backlash" ,
FFD-19, "
Companion Flange Runout" .
Recheck above items. Readjust the above description, if necessary.
15. Check total preload torque. Refer to FFD-16, "
Total Preload Torque" .
16. Install carrier cover. Refer to FFD-30, "
Differential Assembly" .
Differential Assembly
1. Install side gear thrust washers with the same thickness as the
ones installed prior to disassembly or reinstall the old ones on
the side gears.
PDIA0799J
Tool number A: ST3127S000 (J-25765-A)
Drive pinion lock nut tightening torque:
127.4 - 245.0 Nꞏm (13.0 - 25.0 kg-m, 94 - 181 ft-lb)
Pinion bearing preload:
0.78 - 1.57 Nꞏm (0.08 - 0.16 kg-m, 7 - 13 in-lb)
PDIA0802J
SDIA0193J
Page 3409 of 5621
FFD-32
FRONT FINAL DRIVE ASSEMBLY
Revision: 2006 January2006 M35/M45
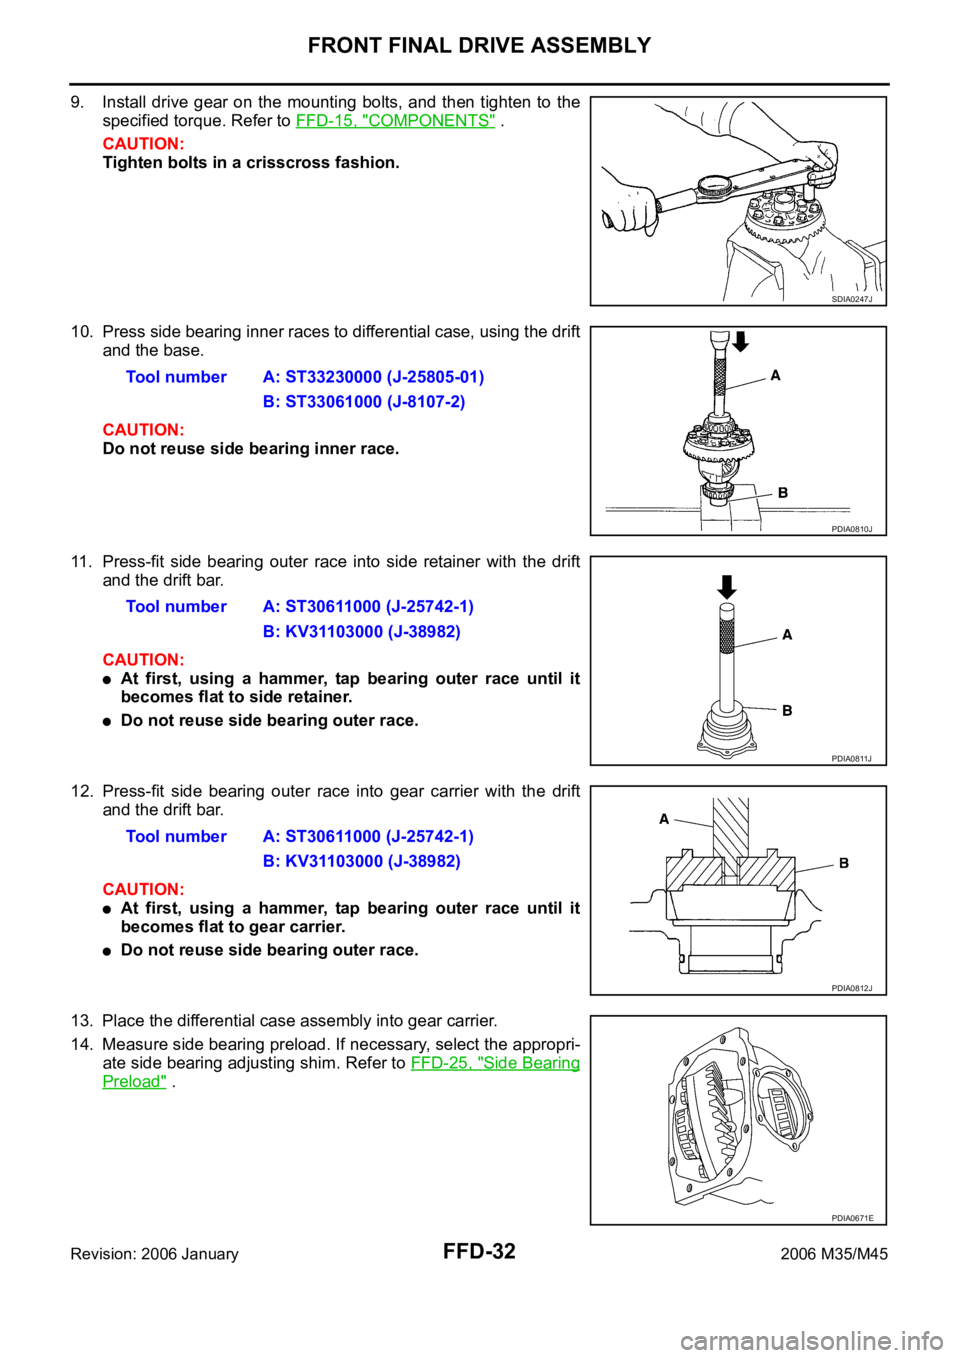
9. Install drive gear on the mounting bolts, and then tighten to the
specified torque. Refer to FFD-15, "
COMPONENTS" .
CAUTION:
Tighten bolts in a crisscross fashion.
10. Press side bearing inner races to differential case, using the drift
and the base.
CAUTION:
Do not reuse side bearing inner race.
11. Press-fit side bearing outer race into side retainer with the drift
and the drift bar.
CAUTION:
At first, using a hammer, tap bearing outer race until it
becomes flat to side retainer.
Do not reuse side bearing outer race.
12. Press-fit side bearing outer race into gear carrier with the drift
and the drift bar.
CAUTION:
At first, using a hammer, tap bearing outer race until it
becomes flat to gear carrier.
Do not reuse side bearing outer race.
13. Place the differential case assembly into gear carrier.
14. Measure side bearing preload. If necessary, select the appropri-
ate side bearing adjusting shim. Refer to FFD-25, "
Side Bearing
Preload" .
SDIA0247J
Tool number A: ST33230000 (J-25805-01)
B: ST33061000 (J-8107-2)
PDIA0810J
Tool number A: ST30611000 (J-25742-1)
B: KV31103000 (J-38982)
PDIA0811J
Tool number A: ST30611000 (J-25742-1)
B: KV31103000 (J-38982)
PDIA0812J
PDIA0671E
Page 3410 of 5621
FRONT FINAL DRIVE ASSEMBLY
FFD-33
C
E
F
G
H
I
J
K
L
MA
B
FFD
Revision: 2006 January2006 M35/M45
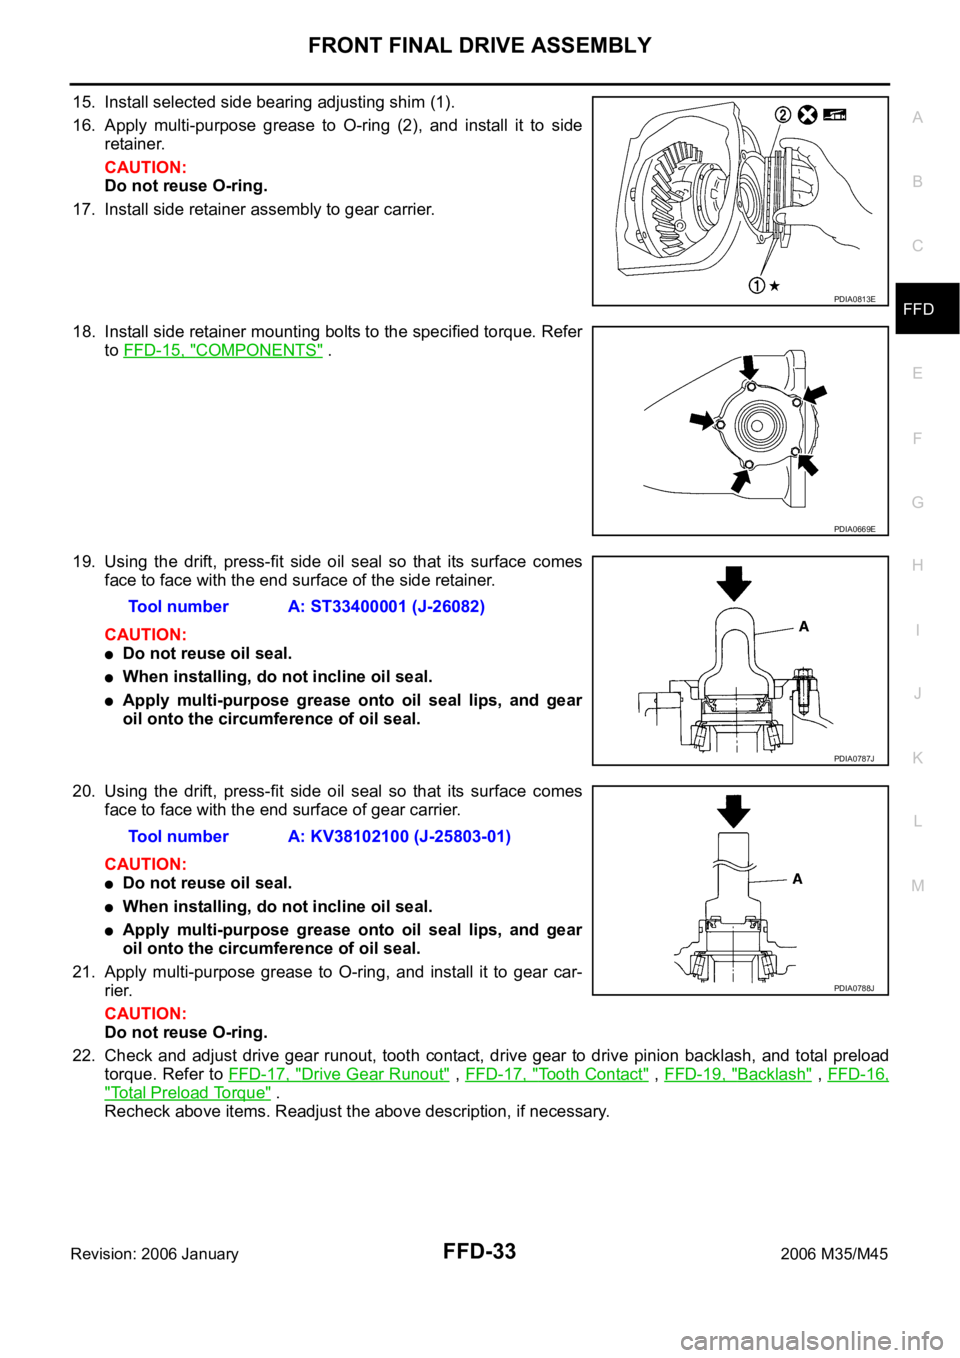
15. Install selected side bearing adjusting shim (1).
16. Apply multi-purpose grease to O-ring (2), and install it to side
retainer.
CAUTION:
Do not reuse O-ring.
17. Install side retainer assembly to gear carrier.
18. Install side retainer mounting bolts to the specified torque. Refer
to FFD-15, "
COMPONENTS" .
19. Using the drift, press-fit side oil seal so that its surface comes
face to face with the end surface of the side retainer.
CAUTION:
Do not reuse oil seal.
When installing, do not incline oil seal.
Apply multi-purpose grease onto oil seal lips, and gear
oil onto the circumference of oil seal.
20. Using the drift, press-fit side oil seal so that its surface comes
face to face with the end surface of gear carrier.
CAUTION:
Do not reuse oil seal.
When installing, do not incline oil seal.
Apply multi-purpose grease onto oil seal lips, and gear
oil onto the circumference of oil seal.
21. Apply multi-purpose grease to O-ring, and install it to gear car-
rier.
CAUTION:
Do not reuse O-ring.
22. Check and adjust drive gear runout, tooth contact, drive gear to drive pinion backlash, and total preload
torque. Refer to FFD-17, "
Drive Gear Runout" , FFD-17, "Tooth Contact" , FFD-19, "Backlash" , FFD-16,
"Total Preload Torque" .
Recheck above items. Readjust the above description, if necessary.
PDIA0813E
PDIA0669E
Tool number A: ST33400001 (J-26082)
PDIA0787J
Tool number A: KV38102100 (J-25803-01)
PDIA0788J
Page 3411 of 5621
FFD-34
FRONT FINAL DRIVE ASSEMBLY
Revision: 2006 January2006 M35/M45
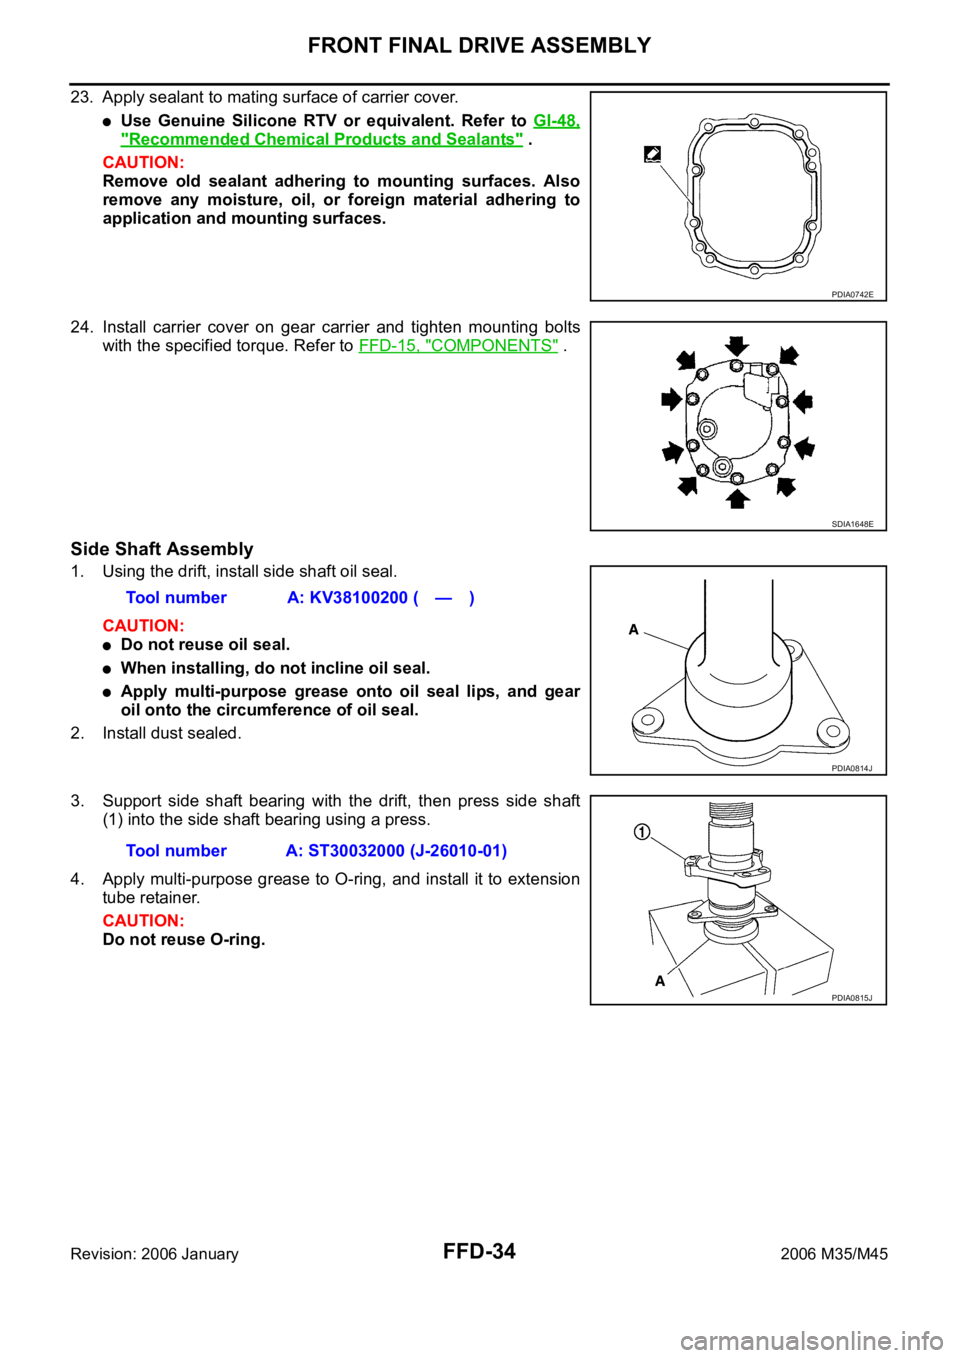
23. Apply sealant to mating surface of carrier cover.
Use Genuine Silicone RTV or equivalent. Refer to GI-48,
"Recommended Chemical Products and Sealants" .
CAUTION:
Remove old sealant adhering to mounting surfaces. Also
remove any moisture, oil, or foreign material adhering to
application and mounting surfaces.
24. Install carrier cover on gear carrier and tighten mounting bolts
with the specified torque. Refer to FFD-15, "
COMPONENTS" .
Side Shaft Assembly
1. Using the drift, install side shaft oil seal.
CAUTION:
Do not reuse oil seal.
When installing, do not incline oil seal.
Apply multi-purpose grease onto oil seal lips, and gear
oil onto the circumference of oil seal.
2. Install dust sealed.
3. Support side shaft bearing with the drift, then press side shaft
(1) into the side shaft bearing using a press.
4. Apply multi-purpose grease to O-ring, and install it to extension
tube retainer.
CAUTION:
Do not reuse O-ring.
PDIA0742E
SDIA1648E
Tool number A: KV38100200 ( — )
PDIA0814J
Tool number A: ST30032000 (J-26010-01)
PDIA0815J
Page 3412 of 5621
SERVICE DATA AND SPECIFICATIONS (SDS)
FFD-35
C
E
F
G
H
I
J
K
L
MA
B
FFD
Revision: 2006 January2006 M35/M45
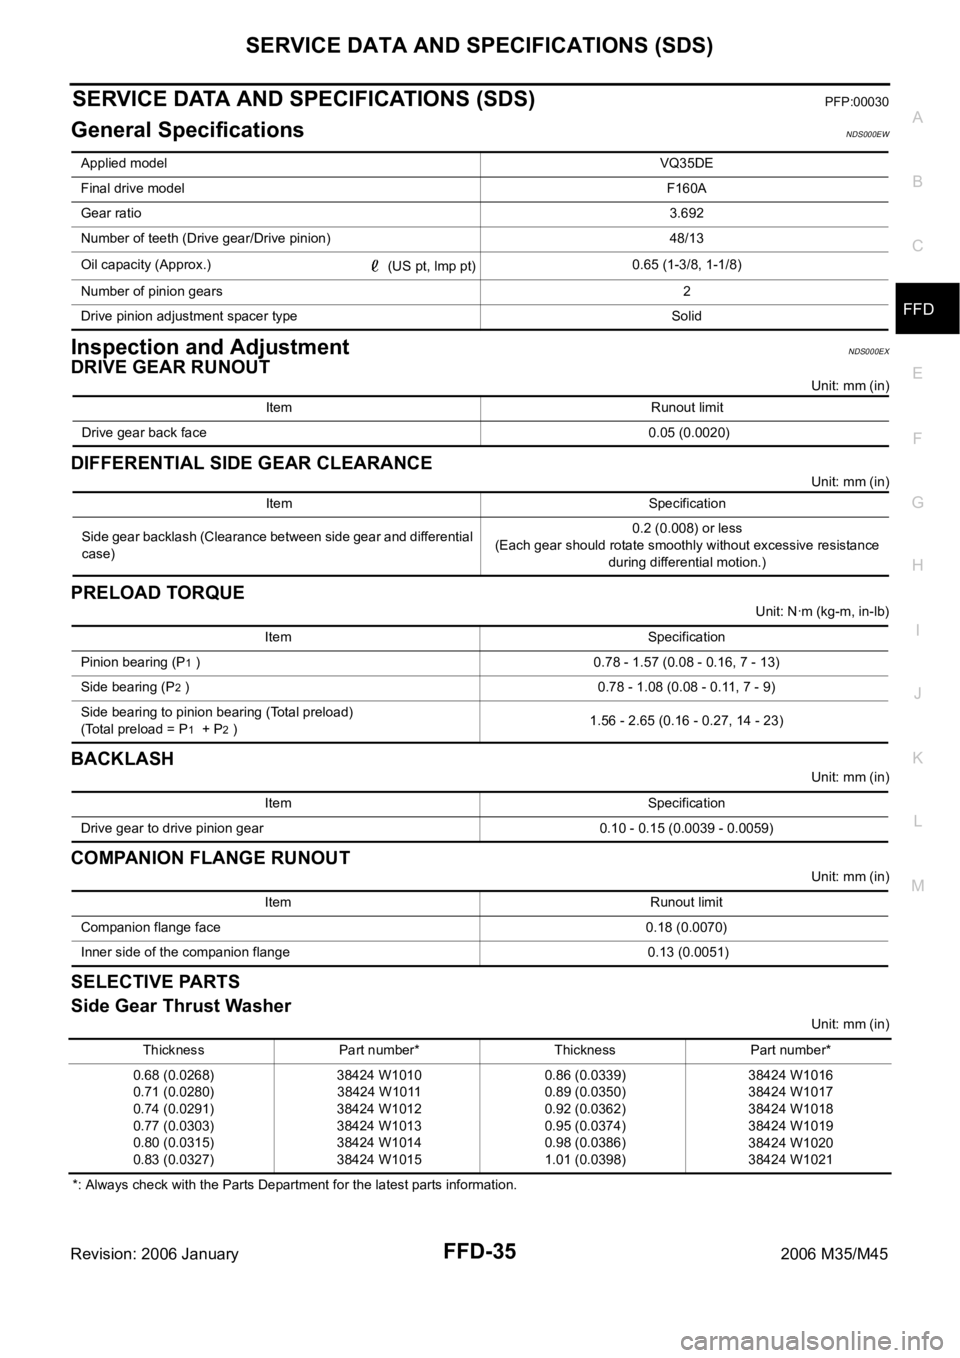
SERVICE DATA AND SPECIFICATIONS (SDS)PFP:00030
General SpecificationsNDS000EW
Inspection and AdjustmentNDS000EX
DRIVE GEAR RUNOUT
Unit: mm (in)
DIFFERENTIAL SIDE GEAR CLEARANCE
Unit: mm (in)
PRELOAD TORQUE
Unit: Nꞏm (kg-m, in-lb)
BACKLASH
Unit: mm (in)
COMPANION FLANGE RUNOUT
Unit: mm (in)
SELECTIVE PARTS
Side Gear Thrust Washer
Unit: mm (in)
*: Always check with the Parts Department for the latest parts information. Applied modelVQ35DE
Final drive modelF160A
Gear ratio3.692
Number of teeth (Drive gear/Drive pinion) 48/13
Oil capacity (Approx.)
(US pt, lmp pt)0.65 (1-3/8, 1-1/8)
Number of pinion gears2
Drive pinion adjustment spacer type Solid
Item Runout limit
Drive gear back face 0.05 (0.0020)
Item Specification
Side gear backlash (Clearance between side gear and differential
case)0.2 (0.008) or less
(Each gear should rotate smoothly without excessive resistance
during differential motion.)
Item Specification
Pinion bearing (P
1 ) 0.78 - 1.57 (0.08 - 0.16, 7 - 13)
Side bearing (P
2 ) 0.78 - 1.08 (0.08 - 0.11, 7 - 9)
Side bearing to pinion bearing (Total preload)
(Total preload = P
1 + P2 )1.56 - 2.65 (0.16 - 0.27, 14 - 23)
Item Specification
Drive gear to drive pinion gear 0.10 - 0.15 (0.0039 - 0.0059)
Item Runout limit
Companion flange face 0.18 (0.0070)
Inner side of the companion flange 0.13 (0.0051)
Thickness Part number* Thickness Part number*
0.68 (0.0268)
0.71 (0.0280)
0.74 (0.0291)
0.77 (0.0303)
0.80 (0.0315)
0.83 (0.0327)38424 W1010
38424 W1011
38424 W1012
38424 W1013
38424 W1014
38424 W10150.86 (0.0339)
0.89 (0.0350)
0.92 (0.0362)
0.95 (0.0374)
0.98 (0.0386)
1.01 (0.0398)38424 W1016
38424 W1017
38424 W1018
38424 W1019
38424 W1020
38424 W1021
Page 3431 of 5621
![INFINITI M35 2006 Factory Service Manual FSU-4
[2WD]
PREPARATION
Revision: 2006 January2006 M35/M45
PREPARATIONPFP:00002
Special Service Tools [SST]NES000I7
The actual shapes of Kent-Moore tools may differ from those of special service tools INFINITI M35 2006 Factory Service Manual FSU-4
[2WD]
PREPARATION
Revision: 2006 January2006 M35/M45
PREPARATIONPFP:00002
Special Service Tools [SST]NES000I7
The actual shapes of Kent-Moore tools may differ from those of special service tools](/manual-img/42/57023/w960_57023-3430.png)
FSU-4
[2WD]
PREPARATION
Revision: 2006 January2006 M35/M45
PREPARATIONPFP:00002
Special Service Tools [SST]NES000I7
The actual shapes of Kent-Moore tools may differ from those of special service tools illustrated here.
Commercial Service ToolsNES000I8
Tool number
(Kent-Moore No.)
Tool nameDescription
KV991040S0
(—)
CCK gauge attachment
1. Plate
2. Guide bolt
3. Nut
4. Spring
5. Center plate
6. KV99104020 Adapter A
a: 72 mm (2.83 in) dia.
7. KV99104030 Adapter B
b: 65 mm (2.56 in) dia.
8. KV99104040 Adapter C
c: 57 mm (2.24 in) dia.
9. KV99104050 Adapter D
d: 53.4 mm (2.102 in) dia.Measuring wheel alignment
ST35652000
(—)
Strut attachmentDisassembling and assembling shock
absorber
ST3127S000
(See J-25765-A)
Preload Gauge
1. GG91030000
(J-25765-A)
Torque wrench
2. HT62940000
(—)
Socket adapter
3. HT62900000
(—)
Socket adapterMeasuring rotating torque of ball joint
S-NT498
ZZA0807D
NT124
Tool nameDescription
Power tool
Removing wheel nuts
Removing torque member fixing bolts
Removing undercover
Removing front suspension compo-
nents parts
Removing hub lock nut
Spring compressor Removing and installing coil springPBIC0190E
S-NT717
Page 3437 of 5621
![INFINITI M35 2006 Factory Service Manual FSU-10
[2WD]
FRONT SUSPENSION ASSEMBLY
Revision: 2006 January2006 M35/M45
For VK45DE engine models, gradually lower a jack to remove front suspension assembly with engine
assembly from v INFINITI M35 2006 Factory Service Manual FSU-10
[2WD]
FRONT SUSPENSION ASSEMBLY
Revision: 2006 January2006 M35/M45
For VK45DE engine models, gradually lower a jack to remove front suspension assembly with engine
assembly from v](/manual-img/42/57023/w960_57023-3436.png)
FSU-10
[2WD]
FRONT SUSPENSION ASSEMBLY
Revision: 2006 January2006 M35/M45
For VK45DE engine models, gradually lower a jack to remove front suspension assembly with engine
assembly from vehicle.
INSTALLATION
Installation is the reverse order of removal. For tightening torque, refer to FSU-8, "Components" .
Perform final tightening of each of parts (rubber bushing), under unladen conditions, which were removed
when removing front suspension assembly. Check wheel alignment. Refer to FSU-6, "
Wheel Alignment
Inspection" .
Adjust neutral position of steering angle sensor after checking wheel alignment. Refer to BRC-6, "Adjust-
ment of Steering Angle Sensor Neutral Position" .
Check wheel sensor harness for proper connection. Refer to BRC-57, "WHEEL SENSOR" .