Page 3830 of 5267

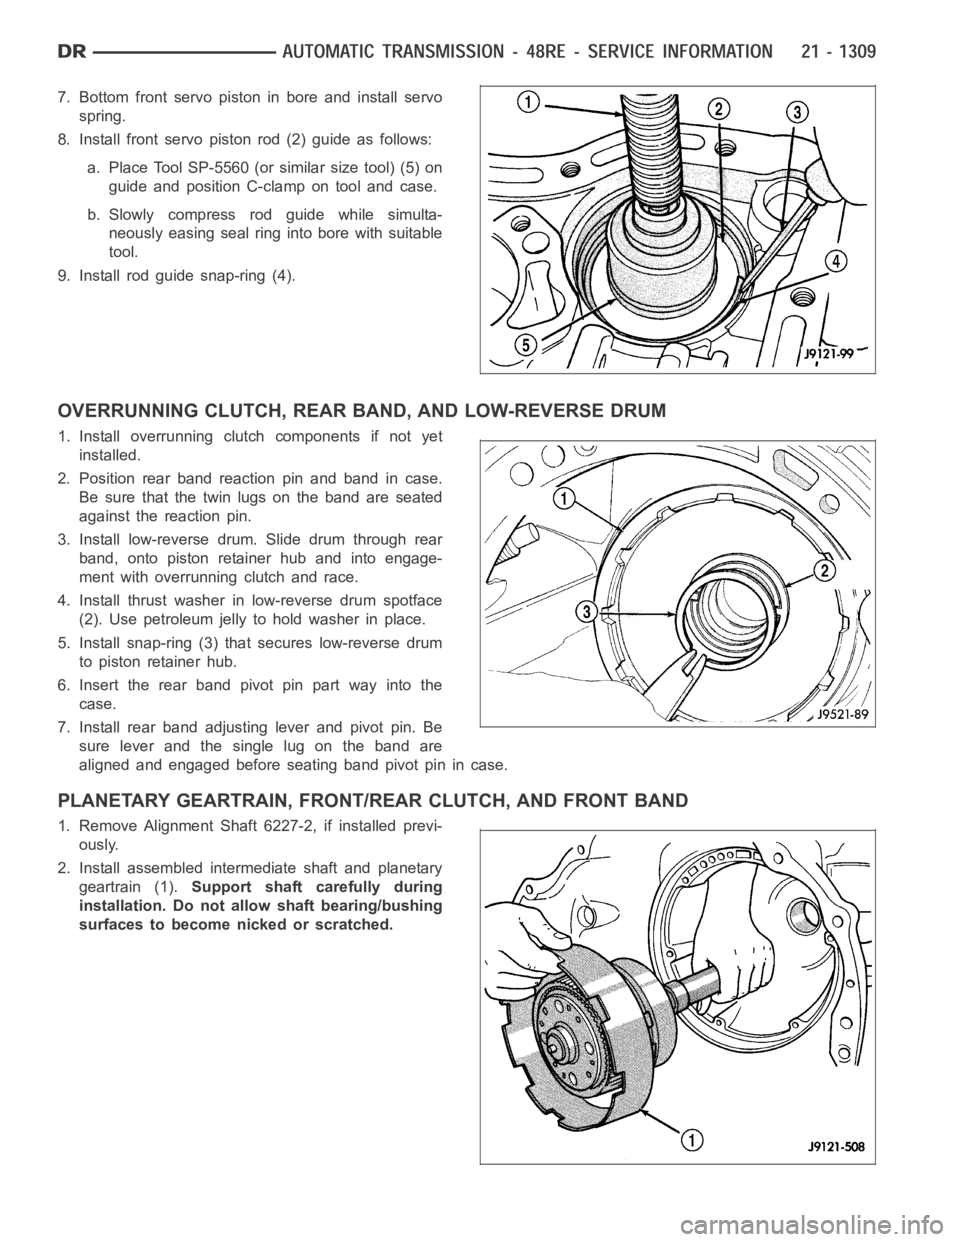
7. Bottom front servo piston in bore and install servo
spring.
8. Install front servo piston rod (2) guide as follows:
a. Place Tool SP-5560 (or similar size tool) (5) on
guide and position C-clamp on tool and case.
b. Slowly compress rod guide while simulta-
neously easing seal ring into bore with suitable
tool.
9. Install rod guide snap-ring (4).
OVERRUNNING CLUTCH, REAR BAND, AND LOW-REVERSE DRUM
1. Install overrunning clutch components if not yet
installed.
2. Position rear band reaction pin and band in case.
Be sure that the twin lugs on the band are seated
against the reaction pin.
3. Install low-reverse drum. Slide drum through rear
band, onto piston retainer hub and into engage-
ment with overrunning clutch and race.
4. Install thrust washer in low-reverse drum spotface
(2). Use petroleum jelly to hold washer in place.
5. Install snap-ring (3) that secures low-reverse drum
to piston retainer hub.
6. Insert the rear band pivot pin part way into the
case.
7. Install rear band adjusting lever and pivot pin. Be
sure lever and the single lug on the band are
aligned and engaged before seating band pivot pin in case.
PLANETARY GEARTRAIN, FRONT/REAR CLUTCH, AND FRONT BAND
1. Remove Alignment Shaft 6227-2, if installed previ-
ously.
2. Install assembled intermediate shaft and planetary
geartrain (1).Support shaft carefully during
installation. Do not allow shaft bearing/bushing
surfaces to become nicked or scratched.
Page 3832 of 5267
5. Assemble front (1) and rear (2) clutches. Align lugs
on front clutch discs. Mount front clutch on rear
clutch. Turn front clutch retainer back and forth until
front clutch discs are fully seated on rear clutch
splined hub.
6. Install intermediate shaft thrust washer (3) in hub of
rear clutch retainer (2). Use petroleum jelly to hold
washer in place. Position washer so grooves are
facing outward.Washer only fits one way in
clutch retainer hub.
Page 3833 of 5267
7. Place transmission case in upright position, or
place blocks under front end of transmission repair
stand to tilt case rearward. This makes it easier to
install front/rear clutch assembly (1).
8. Align discs in rear clutch. Then install and engage
assembly (1) in front planetary and driving shell.
Turn clutch retainers back and forth until both
clutches are seated.
9. Position front band lever (1) in case and over servo
rod guide. Then install front band lever pin in case
and slide it through lever.
10. Coat threads of front band pin access plug with
sealer and install it in case. Tighten plug to 17
Nꞏm (13 ft. lbs.) torque.
11. Slide front band over front clutch retainer and
install front band strut (2) and anchor (3).
12. Tighten front band adjusting screw until band is
tight on clutch retainer. This will hold clutches in
place while oil pump is being installed.Ve r i f y t h a t
front/rear clutch assembly is still properly
seated before tightening band.
Page 3842 of 5267

25. Connect wires to the transmission range sensor
and transmission solenoid connector. Be sure the
transmission harnesses are properly routed.
CAUTION: It is essential that correct length bolts
be used to attach the converter to the driveplate.
Bolts that are too long will damage the clutch sur-
face inside the converter.
26. Install torque converter-to-driveplate bolts.
27. Install converter housing access cover.
28. Install starter motor and cooler line bracket. (Refer
to 8 - ELECTRICAL/STARTING/STARTER
MOTOR - INSTALLATION)
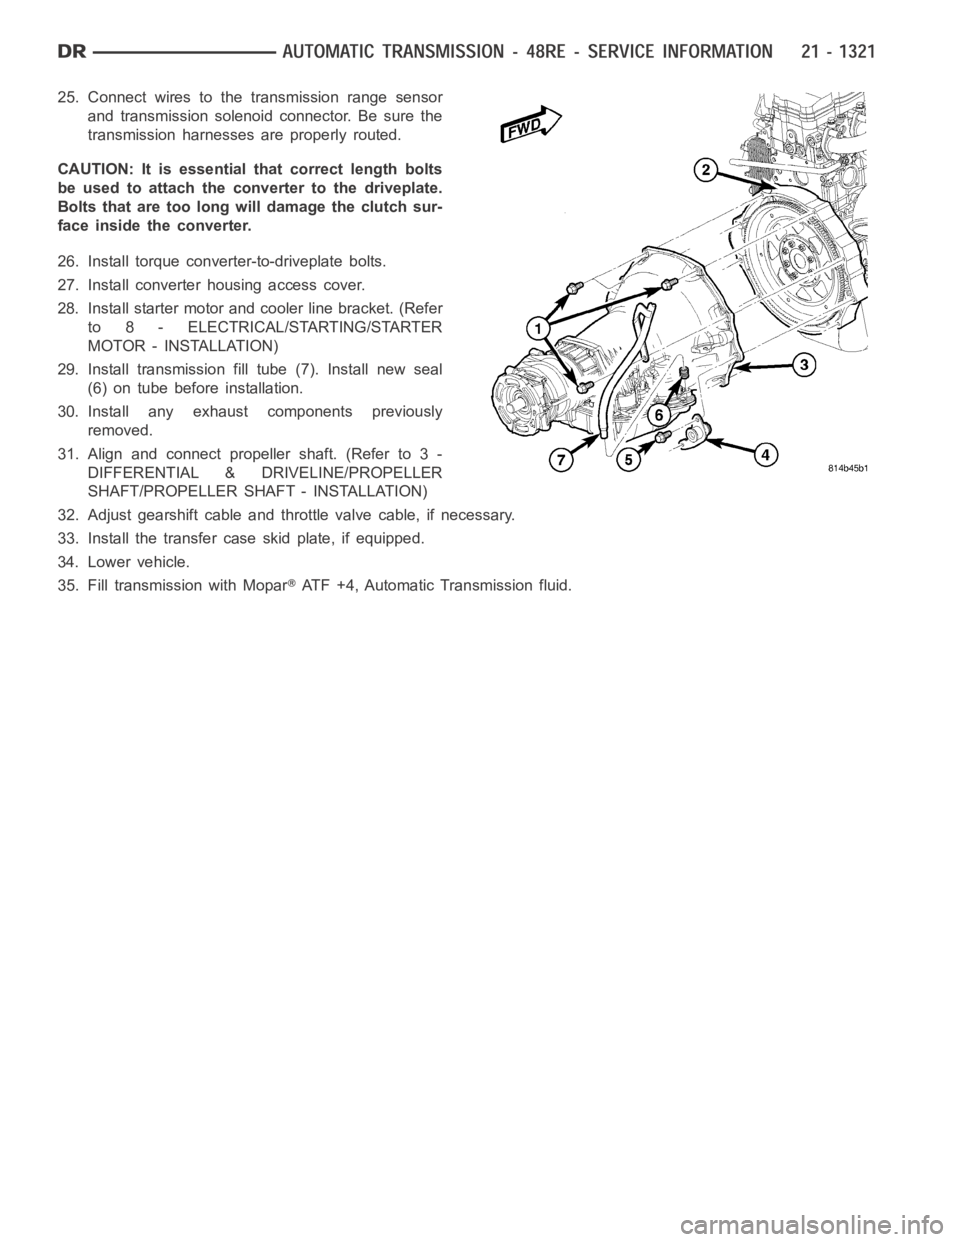
29. Install transmission fill tube (7). Install new seal
(6) on tube before installation.
30. Install any exhaust components previously
removed.
31. Align and connect propeller shaft. (Refer to 3 -
DIFFERENTIAL & DRIVELINE/PROPELLER
SHAFT/PROPELLER SHAFT - INSTALLATION)
32. Adjust gearshift cable and throttle valve cable, if necessary.
33. Install the transfer case skid plate, if equipped.
34. Lower vehicle.
35. Fill transmission with Mopar
ATF +4, Automatic Transmission fluid.
Page 3848 of 5267
HYDRAULIC FLOW IN DRIVE SECOND GEAR (CONVERTER CLUTCH NOT APPLIED)
Page 3849 of 5267
HYDRAULIC FLOW IN DRIVE SECOND GEAR (CONVERTER CLUTCH APPLIED)
Page 3850 of 5267
HYDRAULIC FLOW IN DRIVE THIRD GEAR (CONVERTER CLUTCH NOT APPLIED)
Page 3851 of 5267
HYDRAULIC FLOW IN DRIVE THIRD GEAR (CONVERTER CLUTCH APPLIED)