Page 57 of 133
Reference
At a glance
Controls
Driving tips
Mobility
55
Airbag system malfunction
>Warning lamp does not come on with the
ignition key in position 1 or higher.
>The warning lamp lights up continuously.
Have the airbag system checked immedi-
ately if a malfunction occurs; otherwise,
there is a danger of the system failing to
respond in the expected manner to an impact
occurring within its normal response range.<
Page 58 of 133

Lamps
56
Lamps
Parking lamps/low beams
Parking lamps
The front, rear and side vehicle lighting
is switched on. You can use the parking
lamps for parking. For the additional
option of roadside parking lamps on one side of
the vehicle only, refer to page57.
The parking lamps will discharge the bat-
tery. For this reason, avoid using them for
extended periods; otherwise, it may no longer
be possible to start the engine.<
Low beams
When you switch off the ignition with
the headlamps on, the headlamps go
out and only the parking lamps remain
on.
Defective lamps
The indicator lamp lights up:
At least one bulb of the exterior lighting
on the vehicle is defective.
Replacing bulbs, refer to page99.
Pathway lighting
When you activate the headlamp flasher after
parking the vehicle and switching off the lamps,
the low beams will come on for a brief period.
You may also have this function deacti-
vated if you wish.<
Lights on warning
If you turn the ignition key to position 0, an
acoustic signal sounds when you open the
driver's door for a few seconds to remind you
that the lights have not yet been switched off.
Daytime running lamps*
If so desired, the light switch can remain in the
low beam or automatic headlamp control posi-
tion.
The exterior lamps are automatically switched
off after the vehicle is parked.
You can switch on the parking lamps when
needed using the standard procedure
described under Parking lamps.
You can have the daytime running lamps
activated on your vehicle.<
Automatic headlamp control*
When you set the switch to this posi-
tion, the system activates and switches
on and off the low beams in response
to changes in ambient light conditions, for
instance, in tunnels, at dawn and dusk, and in
rain and snow.
When you enter a tunnel with bright ceiling
lighting, this can delay the switching on of your
low beams.
A blue sky with the sun low on the horizon can
also cause the headlamps to come on.
The low beams remain switched on
regardless of the ambient light when you
switch on the front fog lamps
*.
When the daytime running lamps are activated
as described in the section above, the low-
beam headlamps are always switched on when
the switch is in this position and the ignition is
on.<
If so desired, the light switch can remain in the
automatic headlamp control position. The exte-
rior lamps are automatically switched off after
the vehicle is parked.
Page 59 of 133

Reference
At a glance
Controls
Driving tips
Mobility
57
Automatic headlamp control cannot
serve as a substitute for the driver's judg-
ment in determining when the vehicle lamps
should be switched on. For example, the sys-
tem cannot detect fog or hazy weather. To
avoid safety risks, you should always switch on
the lamps manually under these conditions.<
You can have the sensitivity of the head-
lamp control adjusted.<
Adaptive Head Light*
The concept
Adaptive Head Light is a variable headlamp
control system that enables better illumination
of the road surface. Depending on the steering
angle and other assumptions, the light from the
headlamp follows the course of the road.
Activating Adaptive Head Light
In ignition position 2, turn the light
switch into the automatic headlamp
control position, refer to page56.
The LED next to the symbol lights up.
In order not to blind oncoming traffic, the Adap-
tive Head Light is not active when driving in
reverse and only points toward the passenger
side when the vehicle is stationary.
Malfunction
The LED next to the symbol for automatic head-
lamp control flashes. Adaptive Head Light is
malfunctioning or has failed. Have the system
checked as soon as possible.
High beams/
roadside parking lamps
1High beams
2Headlamp flasher
3Roadside parking lamps
Roadside parking lamps, left or right*
You also have the option of lighting up just one
side of your vehicle when parking. When doing
so, be sure to comply with national regulations.
After switching off the engine, press the lever
past the resistance point in the corresponding
direction 3.
The roadside parking lamps drain the bat-
tery. For this reason, avoid using them for
extended periods; otherwise, it may no longer
be possible to start the engine.<
Front fog lamps*
Briefly press the button once again to switch
on/off.
The parking lamps or low beams must
be switched on for the fog lamps to
operate. The green indicator lamp lights
up when the fog lamps are on.
Page 60 of 133

Lamps
58 If the automatic headlamp control is acti-
vated, the low beams will come on auto-
matically when you switch on the fog lamps.<
Instrument lighting
Turn the knurled wheel to adjust the illumina-
tion intensity.
Interior lamps
The interior lamps operate automatically.
If you wish, the interior lamps are
switched on after mechanical unlocking
of the vehicle. You may have this function acti-
vated/deactivated if you wish.<
If the interior lamps remain switched on
after locking the vehicle, one of the doors
or the liftgate may not be completely closed.<
Switching interior lamps on and off
Briefly press button 1.
If you want the interior lamps to remain off all
the time, press and hold the button for approx.
3seconds.
Press the button briefly to revert to normal
operation.
You can have your interior lamps set to
dim smoothly to the desired level when
you switch them on or off.<
Front reading lamps*
Switch on and off with buttons 2.
Rear reading lamps*
Switch on and off with the button.
To avoid discharging the battery, all of the
vehicle's interior lamps are automatically
extinguished approx. 15 minutes after the igni-
tion is switched off.<
Page 61 of 133
Reference
At a glance
Controls
Driving tips
Mobility
59
Air conditioner
Air conditioner
1Airflow directed toward the windshield and
side windows
2Airflow for the upper body61
3Airflow to footwell61
4Air volume605Recirculated-air mode60
6Temperature60
7Air distribution60
8Rear window defroster60
9Cooling function60
Page 62 of 133

Air conditioner
60
Air volume
You can vary the air volume in
steps 1 through 4. The heating or
cooling output is more effective
with a higher air volume.
Switching system on/off
Turn air volume rotary switch to 0. The blower
and air conditioning system are completely
switched off, the air flow is shut off.
To switch on the air conditioning system, set an
arbitrary air volume.
Temperature
To increase the temperature, turn
to the right, toward red.
For a lower temperature, turn the
rotary switch counterclockwise
toward blue.
Air distribution
You can direct air to flow onto the
windows , toward the upper
body and into the footwell .
Intermediate settings are possible.
Rear window defroster
The rear window heating switches
off automatically after a certain
amount of time.
Switching cooling function on/off
When the air conditioning is on, the
air is cooled, dehumidified, and
then reheated depending on the
temperature setting.
Depending on the weather, the windshield may
fog over briefly when the engine is started.
Recirculated-air mode
You can respond to unpleasant
odors outside the vehicle by tem-
porarily suspending the supply of
outside air. The system then recirculates the air
currently within the vehicle.
If condensation starts to form on the
inside window surfaces during operation
in the recirculated-air mode, you should switch
it off and increase the air supply as needed.
The recirculated-air mode should not be used
over a sustained period of time; otherwise, the
air quality inside the vehicle will steadily deteri-
orate.<
Defrosting windows and removing
condensation
1.Air volume 1 at level 4.
2.Temperature 2 toward right, red.
3.Air distribution 3 in position .
4.Deactivate recirculated-air mode 5.
5.Switch on the rear window heating 4 to
defrost the rear window.
Page 63 of 133
Reference
At a glance
Controls
Driving tips
Mobility
61
Ventilation
1Knurled wheels for opening and closing the
air vents through an infinitely variable range
2Levers for changing airflow direction
3Knurled wheel for more or less cool air from
the air vents for the upper body region
Ventilation for cooling
Adjust the vents to direct the flow of cool air in
your direction, for instance, if the interior has
become too warm.
Draft-free ventilation
Set the vent outlets so that the air flows past
you and is not directed straight at you.
Microfilter
The microfilter removes dust and pollen from
the incoming outside air. It is replaced when
maintenance is performed by your BMW Sports
Activity Vehicle Center. A substantial reduction
in air supply indicates that the filter should be
replaced before normal maintenance.
Page 64 of 133
Air conditioner
62
Automatic climate control*
1Airflow directed toward the windshield and
side windows
2Airflow for the upper body64
3Airflow to footwell64
4Manually varying air distribution63
5Adjusting temperature63
6Temperature display63,
Air volume63
7Manually varying air volume638Defrosting windows and removing
condensation63
9Rear window defroster64
10Switching cooling function on/off63
11Outside air/AUC Automatic recirculated-air
control/recirculated-air mode63
12AUTO program63
 1
1 2
2 3
3 4
4 5
5 6
6 7
7 8
8 9
9 10
10 11
11 12
12 13
13 14
14 15
15 16
16 17
17 18
18 19
19 20
20 21
21 22
22 23
23 24
24 25
25 26
26 27
27 28
28 29
29 30
30 31
31 32
32 33
33 34
34 35
35 36
36 37
37 38
38 39
39 40
40 41
41 42
42 43
43 44
44 45
45 46
46 47
47 48
48 49
49 50
50 51
51 52
52 53
53 54
54 55
55 56
56 57
57 58
58 59
59 60
60 61
61 62
62 63
63 64
64 65
65 66
66 67
67 68
68 69
69 70
70 71
71 72
72 73
73 74
74 75
75 76
76 77
77 78
78 79
79 80
80 81
81 82
82 83
83 84
84 85
85 86
86 87
87 88
88 89
89 90
90 91
91 92
92 93
93 94
94 95
95 96
96 97
97 98
98 99
99 100
100 101
101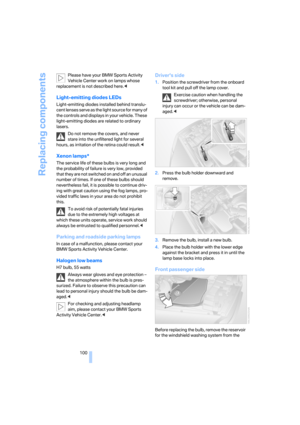 102
102 103
103 104
104 105
105 106
106 107
107 108
108 109
109 110
110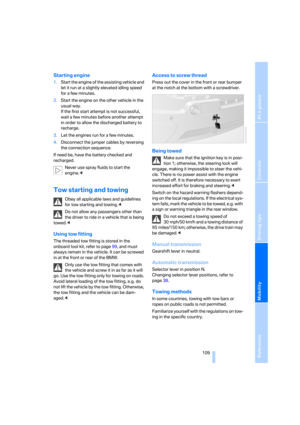 111
111 112
112 113
113 114
114 115
115 116
116 117
117 118
118 119
119 120
120 121
121 122
122 123
123 124
124 125
125 126
126 127
127 128
128 129
129 130
130 131
131 132
132


