Page 2045 of 5135
A76724
A76714
A78461
1ZZ±FE
A78497
3ZZ±FE
±
ENGINE MECHANICAL PARTIAL ENGINE ASSY (1ZZ±FE/3ZZ±FE)
14±29
AVENSIS REPAIR MANUAL (RM1018E)
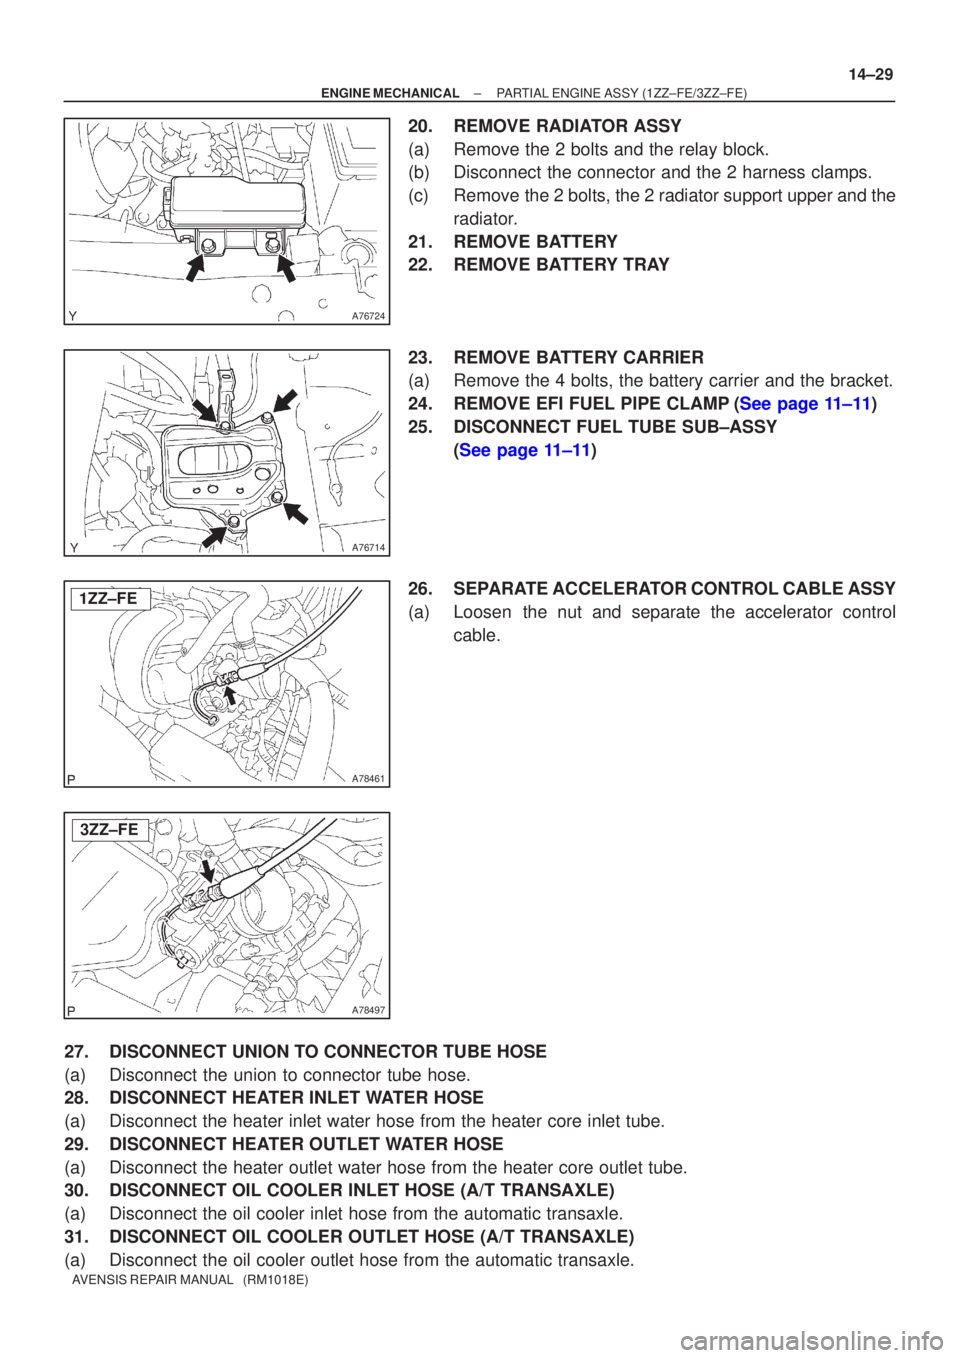
20. REMOVE RADIATOR ASSY
(a) Remove the 2 bolts and the relay block.
(b) Disconnect the connector and the 2 harness clamps.
(c) Remove the 2 bolts, the 2 radiator support upper and the
radiator.
21. REMOVE BATTERY
22. REMOVE BATTERY TRAY
23. REMOVE BATTERY CARRIER
(a) Remove the 4 bolts, the battery carrier and the bracket.
24.REMOVE EFI FUEL PIPE CLAMP(See page 11±11)
25. DISCONNECT FUEL TUBE SUB±ASSY (See page 11±11)
26. SEPARATE ACCELERATOR CONTROL CABLE ASSY
(a) Loosen the nut and separate the accelerator control cable.
27. DISCONNECT UNION TO CONNECTOR TUBE HOSE
(a) Disconnect the union to connector tube hose.
28. DISCONNECT HEATER INLET WATER HOSE
(a) Disconnect the heater inlet water hose from the heater core inlet tube.
29. DISCONNECT HEATER OUTLET WATER HOSE
(a) Disconnect the heater outlet water hose from the heater core outlet tube\
.
30. DISCONNECT OIL COOLER INLET HOSE (A/T TRANSAXLE)
(a) Disconnect the oil cooler inlet hose from the automatic transaxle.
31. DISCONNECT OIL COOLER OUTLET HOSE (A/T TRANSAXLE)
(a) Disconnect the oil cooler outlet hose from the automatic transaxle.
Page 2049 of 5135
A76718
A76719
A62838SST
A62838SST
±
ENGINE MECHANICAL PARTIAL ENGINE ASSY (1ZZ±FE/3ZZ±FE)
14±33
AVENSIS REPAIR MANUAL (RM1018E)
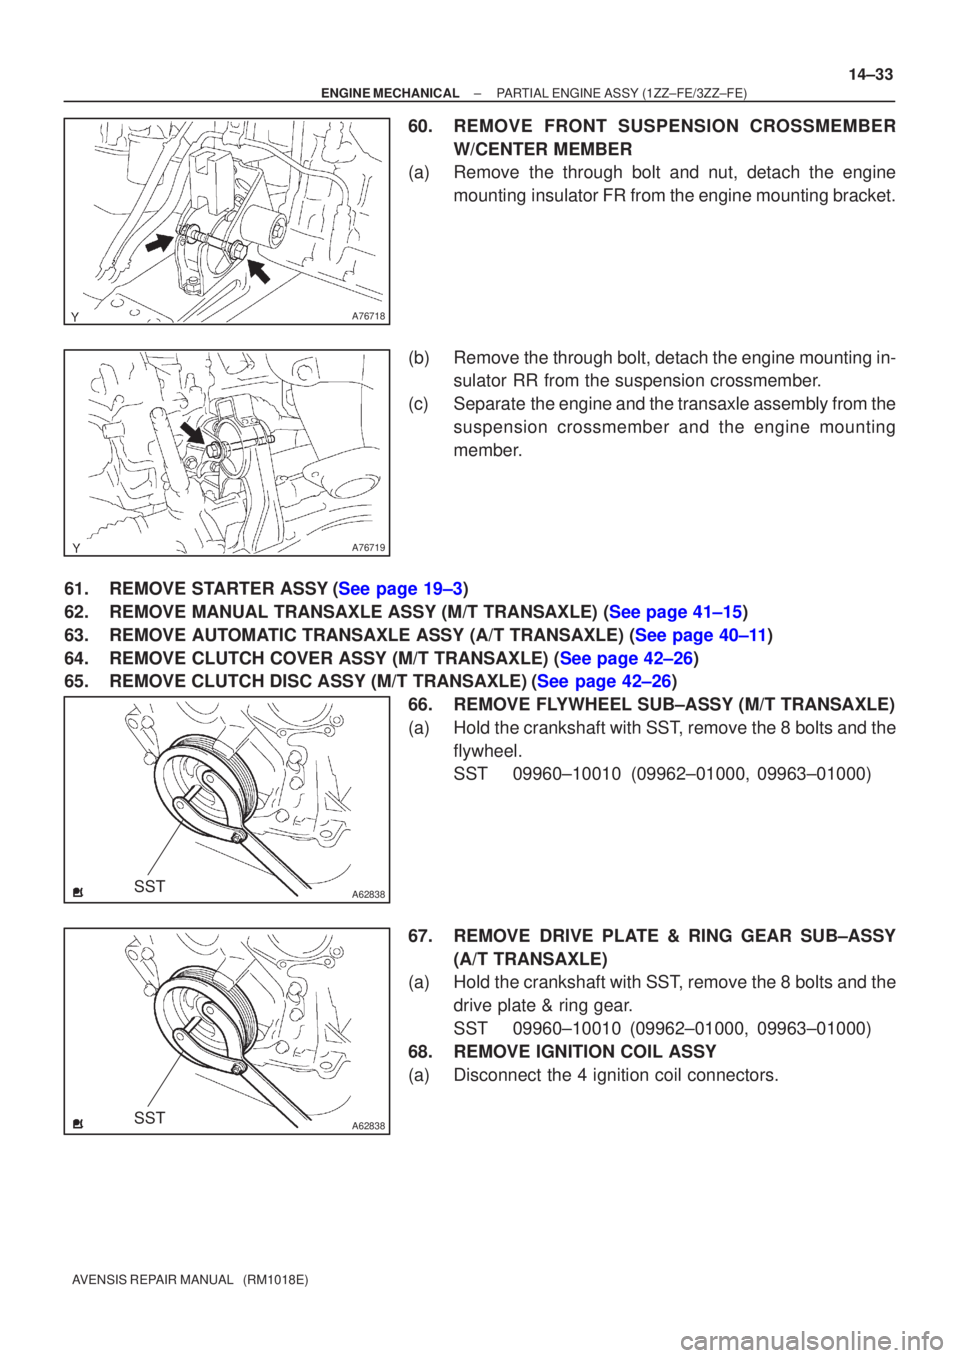
60. REMOVE FRONT SUSPENSION CROSSMEMBER
W/CENTER MEMBER
(a) Remove the through bolt and nut, detach the engine
mounting insulator FR from the engine mounting bracket.
(b) Remove the through bolt, detach the engine mounting in- sulator RR from the suspension crossmember.
(c) Separate the engine and the transaxle assembly from the suspension crossmember and the engine mounting
member.
61.REMOVE STARTER ASSY(See page 19±3)
62.REMOVE MANUAL TRANSAXLE ASSY (M/T TRANSAXLE) (See page 41±15)
63.REMOVE AUTOMATIC TRANSAXLE ASSY (A/T TRANSAXLE) (See page 40±11)
64.REMOVE CLUTCH COVER ASSY (M/T TRANSAXLE) (See page 42±26)
65.REMOVE CLUTCH DISC ASSY (M/T TRANSAXLE)(See page 42±26) 66. REMOVE FLYWHEEL SUB±ASSY (M/T TRANSAXLE)
(a) Hold the crankshaft with SST, remove the 8 bolts and theflywheel.
SST 09960±10010 (09962±01000, 09963±01000)
67. REMOVE DRIVE PLATE & RING GEAR SUB±ASSY (A/T TRANSAXLE)
(a) Hold the crankshaft with SST, remove the 8 bolts and the
drive plate & ring gear.
SST 09960±10010 (09962±01000, 09963±01000)
68. REMOVE IGNITION COIL ASSY
(a) Disconnect the 4 ignition coil connectors.
Page 2050 of 5135
A76713
A64023
A79363
A64026
14±34
±
ENGINE MECHANICAL PARTIAL ENGINE ASSY (1ZZ±FE/3ZZ±FE)
AVENSIS REPAIR MANUAL (RM1018E)
(b) Remove the 2 nuts which are used to secure the engine wire.
(c) Remove the 4 bolts and the 4 ignition coils.
69. REMOVE FUEL DELIVERY PIPE SUB±ASSY (See page 11±11)
70. REMOVE INTAKE MANIFOLD
(a) Disconnect the 2 water hoses from the throttle body.
(b) Disconnect the ventilation hose and the ventilation hose No. 2 from the cylinder head cover.
(c) Disconnect the vacuum hose from the water by±pass
pipe No. 1.
(d) Remove the 4 bolts, 2 nuts and 2 wire brackets,then re- move the intake manifold and the throttle body assembly.
(e) Remove the gasket from the intake manifold and the
throttle body assembly.
71. REMOVE OIL LEVEL GAGE SUB±ASSY
(a) Remove the oil level gage from the oil level gage guide.
72. REMOVE OIL LEVEL GAGE GUIDE
(a) Disconnect the crank shaft position sensor cramp.
(b) Remove the bolt and the oil level gage guide.
Page 2051 of 5135
A64027
A64028
B00084
A76692
A64029
±
ENGINE MECHANICAL PARTIAL ENGINE ASSY (1ZZ±FE/3ZZ±FE)
14±35
AVENSIS REPAIR MANUAL (RM1018E)
73. REMOVE WATER BY±PASS PIPE NO.1
(a) Disconnect the knock sensor cramp.
(b) Remove the 2 bolts and 2 nuts, then detach the water by±
pass pipe and the gasket.
74. REMOVE WATER INLET
(a) Remove the 2 nuts and the water inlet.
75. REMOVE THERMOSTAT
76. REMOVE ENGINE OIL PRESSURE SWITCH ASSY (See page 17±1)
77. REMOVE CAMSHAFT POSITION SENSOR
(a) Remove the bolt and the camshaft position sensor.
78. REMOVE CRANKSHAFT POSITION SENSOR
(a) Remove the 2 bolts and the crankshaft position sensor.
79. REMOVE KNOCK SENSOR
(a) Remove the nut and the knock sensor.
Page 2055 of 5135
A64060
A64059
A79324
A76692
B00084
±
ENGINE MECHANICAL PARTIAL ENGINE ASSY (1ZZ±FE/3ZZ±FE)
14±39
AVENSIS REPAIR MANUAL (RM1018E)
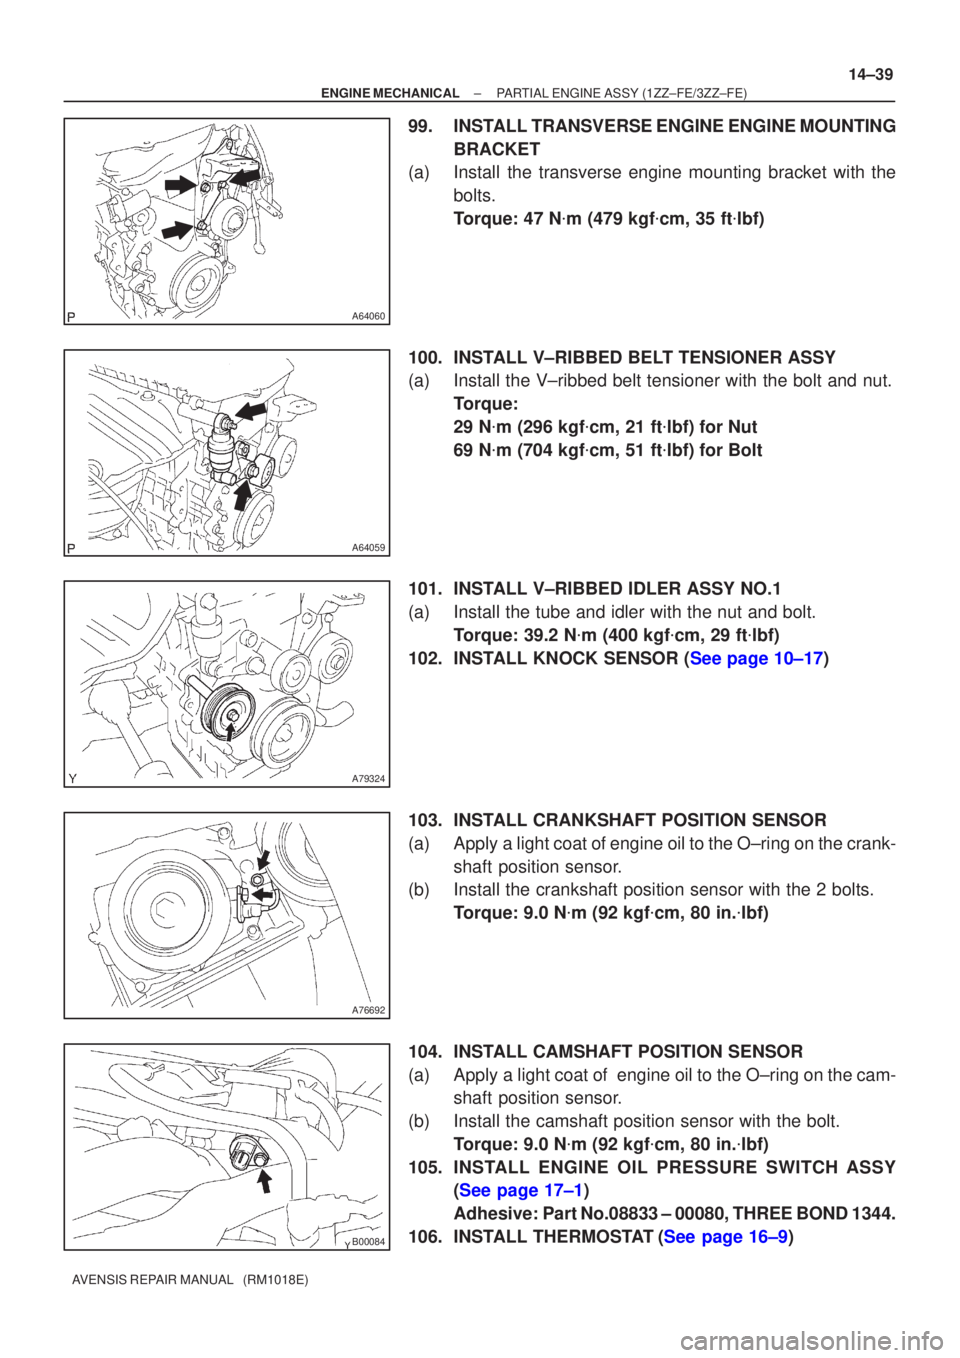
99. INSTALL TRANSVERSE ENGINE ENGINE MOUNTING
BRACKET
(a) Install the transverse engine mounting bracket with the
bolts.
Torque: 47 N �m (479 kgf �cm, 35 ft �lbf)
100. INSTALL V±RIBBED BELT TENSIONER ASSY
(a) Install the V±ribbed belt tensioner with the bolt and nut. Torque:
29 N�m (296 kgf �cm, 21 ft �lbf) for Nut
69 N �m (704 kgf �cm, 51 ft �lbf) for Bolt
101. INSTALL V±RIBBED IDLER ASSY NO.1
(a) Install the tube and idler with the nut and bolt. Torque: 39.2 N �m (400 kgf �cm, 29 ft �lbf)
102.INSTALL KNOCK SENSOR (See page 10±17)
103. INSTALL CRANKSHAFT POSITION SENSOR
(a) Apply a light coat of engine oil to the O±ring on the crank- shaft position sensor.
(b) Install the crankshaft position sensor with the 2 bolts.
Torque: 9.0 N �m (92 kgf �cm, 80 in. �lbf)
104. INSTALL CAMSHAFT POSITION SENSOR
(a) Apply a light coat of engine oil to the O±ring on the cam- shaft position sensor.
(b) Install the camshaft position sensor with the bolt. Torque: 9.0 N �m (92 kgf �cm, 80 in. �lbf)
105. INSTALL ENGINE OIL PR ESSURE SWITCH ASSY
(See page 17±1)
Adhesive: Part No.08833 ± 00080, THREE BOND 1344.
106.INSTALL THERMOSTAT(See page 16±9)
Page 2056 of 5135
A64028
A64027
A64026
A79363
A64023
14±40
±
ENGINE MECHANICAL PARTIAL ENGINE ASSY (1ZZ±FE/3ZZ±FE)
AVENSIS REPAIR MANUAL (RM1018E)
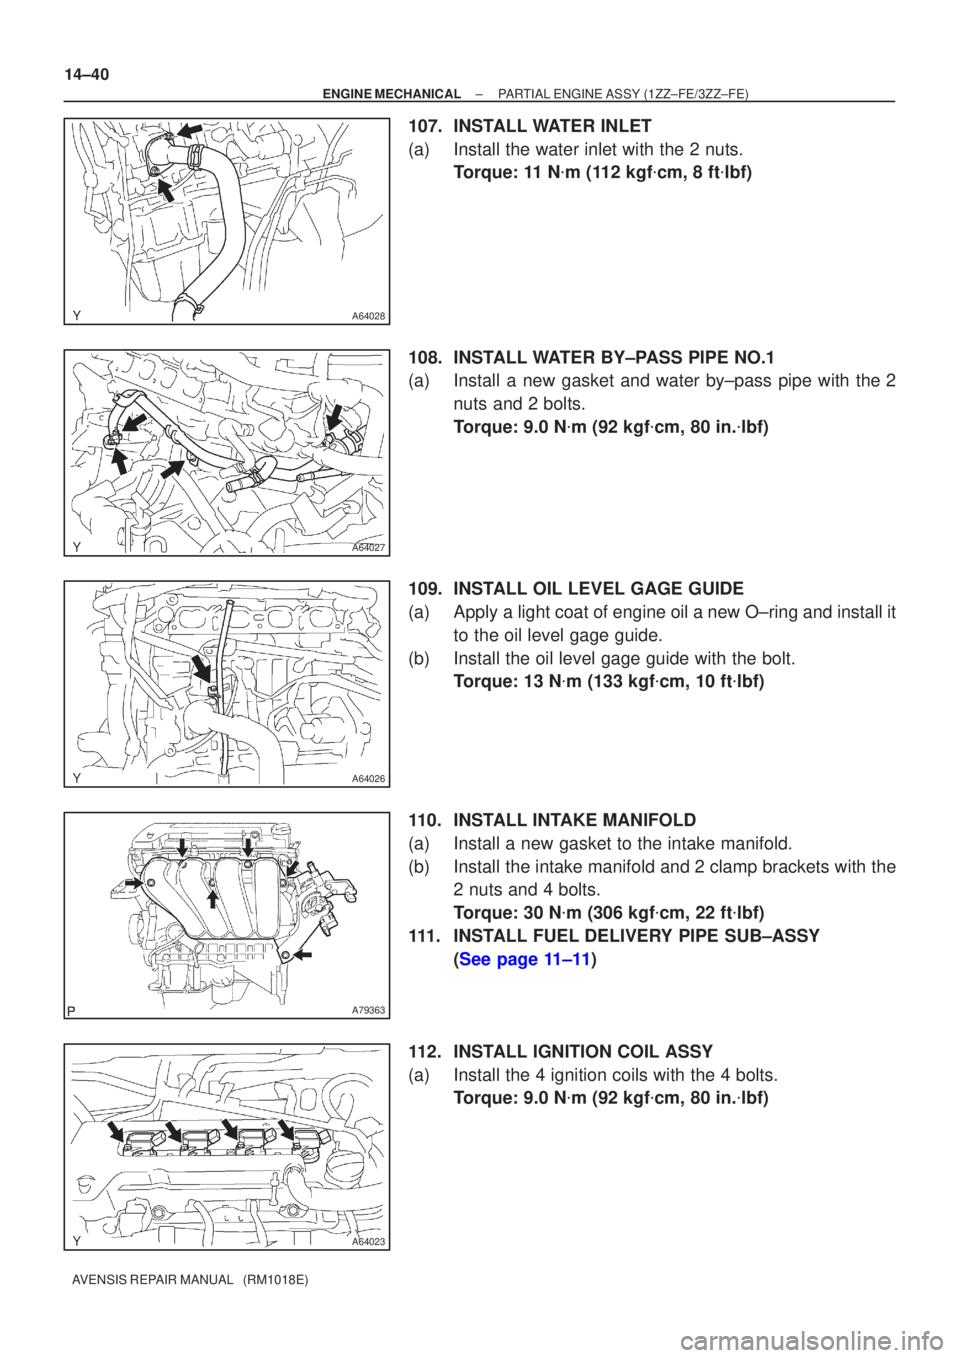
107. INSTALL WATER INLET
(a) Install the water inlet with the 2 nuts. Torque: 11 N �m (112 kgf �cm, 8 ft �lbf)
108. INSTALL WATER BY±PASS PIPE NO.1
(a) Install a new gasket and water by±pass pipe with the 2 nuts and 2 bolts.
Torque: 9.0 N �m (92 kgf �cm, 80 in. �lbf)
109. INSTALL OIL LEVEL GAGE GUIDE
(a) Apply a light coat of engine oil a new O±ring and install it to the oil level gage guide.
(b) Install the oil level gage guide with the bolt. Torque: 13 N �m (133 kgf �cm, 10 ft �lbf)
110. INSTALL INTAKE MANIFOLD
(a) Install a new gasket to the intake manifold.
(b) Install the intake manifold and 2 clamp brackets with the 2 nuts and 4 bolts.
Torque: 30 N �m (306 kgf �cm, 22 ft �lbf)
111. INSTALL FUEL DELIVERY PIPE SUB±ASSY (See page 11±11)
112. INSTALL IGNITION COIL ASSY
(a) Install the 4 ignition coils with the 4 bolts. Torque: 9.0 N �m (92 kgf �cm, 80 in. �lbf)
Page 2060 of 5135
A76714
A78459
14±44
±
ENGINE MECHANICAL PARTIAL ENGINE ASSY (1ZZ±FE/3ZZ±FE)
AVENSIS REPAIR MANUAL (RM1018E)
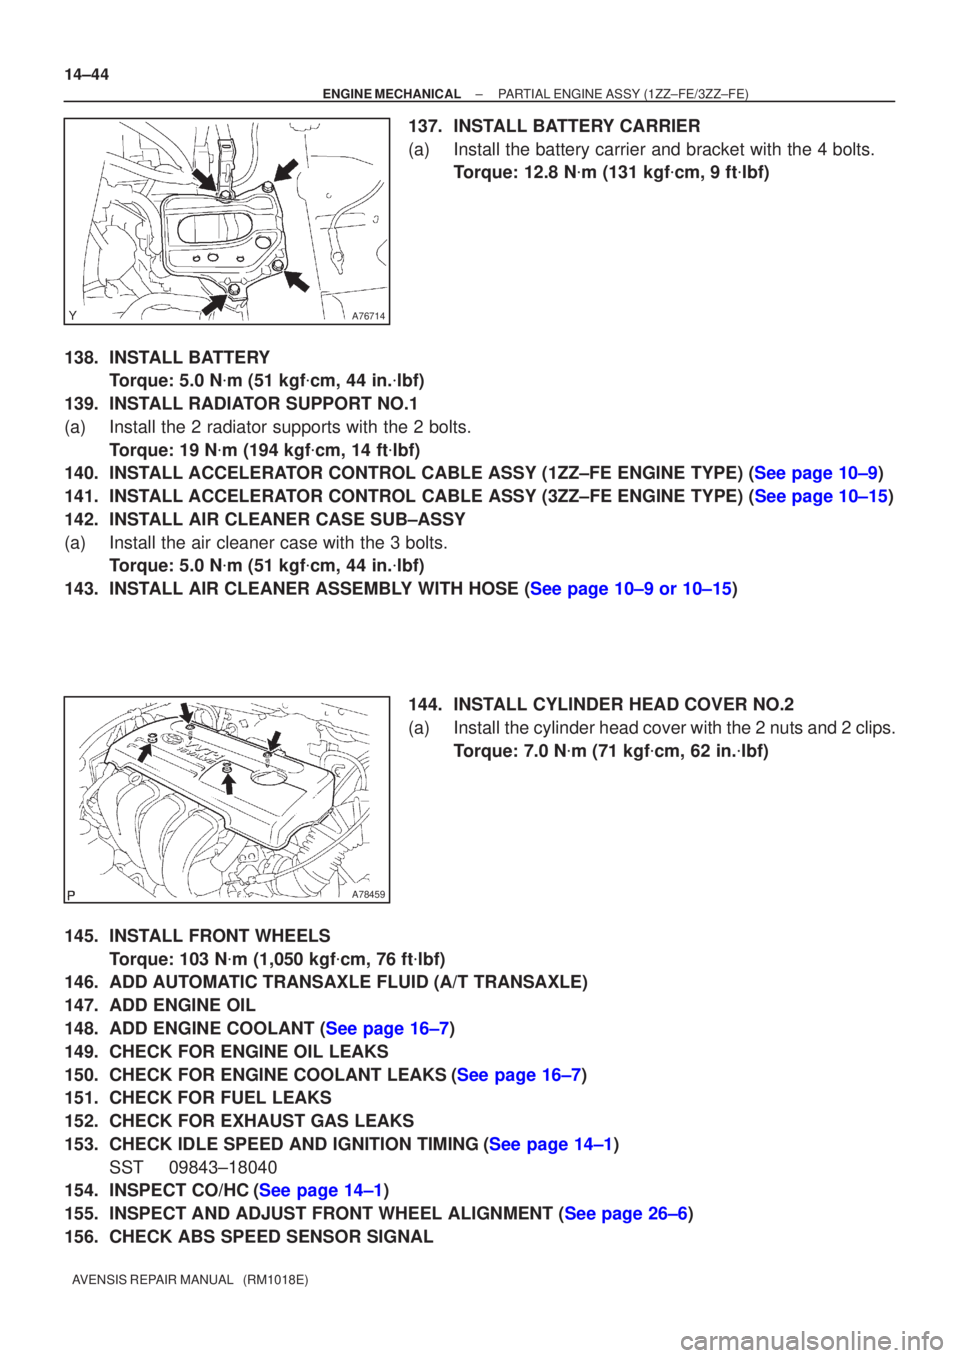
137. INSTALL BATTERY CARRIER
(a) Install the battery carrier and bracket with the 4 bolts. Torque: 12.8 N �m (131 kgf �cm, 9 ft �lbf)
138. INSTALL BATTERY Torque: 5.0 N �m (51 kgf �cm, 44 in. �lbf)
139. INSTALL RADIATOR SUPPORT NO.1
(a) Install the 2 radiator supports with the 2 bolts. Torque: 19 N �m (194 kgf �cm, 14 ft �lbf)
140.INSTALL ACCELERATOR CONTROL CABLE ASSY (1ZZ±FE ENGINE TYPE) (See page 10±9)
141.INSTALL ACCELERATOR CONTROL CABLE ASSY (3ZZ±FE ENGINE TYPE) (See page 10±15)
142. INSTALL AIR CLEANER CASE SUB±ASSY
(a) Install the air cleaner case with the 3 bolts. Torque: 5.0 N �m (51 kgf �cm, 44 in. �lbf)
143.INSTALL AIR CLEANER ASSEMBLY WITH HOSE (See page 10±9 or 10±15)
144. INSTALL CYLINDER HEAD COVER NO.2
(a) Install the cylinder head cover with the 2 nuts and 2 clips.Torque: 7.0 N �m (71 kgf �cm, 62 in. �lbf)
145. INSTALL FRONT WHEELS Torque: 103 N �m (1,050 kgf �cm, 76 ft �lbf)
146. ADD AUTOMATIC TRANSAXLE FLUID (A/T TRANSAXLE)
147. ADD ENGINE OIL
148.ADD ENGINE COOLANT (See page 16±7)
149. CHECK FOR ENGINE OIL LEAKS
150.CHECK FOR ENGINE COOLANT LEAKS(See page 16±7)
151. CHECK FOR FUEL LEAKS
152. CHECK FOR EXHAUST GAS LEAKS
153.CHECK IDLE SPEED AND IGNITION TIMING(See page 14±1)
SST 09843±18040
154.INSPECT CO/HC(See page 14±1)
155.INSPECT AND ADJUST FRONT WHEEL ALIGNMENT (See page 26±6)
156. CHECK ABS SPEED SENSOR SIGNAL
Page 2061 of 5135
141CF±01
A76700
Cylinder Head
Cover No. 2 Radiator Support
Upper
Radiator Support Upper
Radiator
Hose Inlet
Radiator Hose Outlet
Radiator AssyClip
7.0 (71, 62 in.�lbf)
19 (194, 14)
Engine Under Cover LH Engine Under Cover RH
Clip
Clip
N´m (kgf´cm, ft´lbf)
: Specified torque
Clip
Engine Under Cover No.1
19 (194, 14)
Retainer
Clip
Clip
Engine Room Cover Side
Radiator Suport Opening Cover
5.0 (51, 44)
Relay Block
Oil Cooler Inlet Tube No.1 Oil Cooler
Outlet Tube No.1
x2
± ENGINE MECHANICALPARTIAL ENGINE ASSY (1ZZ±FE/3ZZ±FE)
14±19
AVENSIS REPAIR MANUAL (RM1018E)
PARTIAL ENGINE ASSY (1ZZ±FE/3ZZ±FE)
COMPONENTS