Page 435 of 969
A05418
P12595
A78732
Camshaft
Sub Gear
Camshaft Gear
Bolt Washer Wave Washer
A52353
- ENGINE MECHANICALPARTIAL ENGINE ASSY (3MZ-FE)
14-59
2151 Author�: Date�:
2005 LEXUS ES330 REPAIR MANUAL (RM1124U)
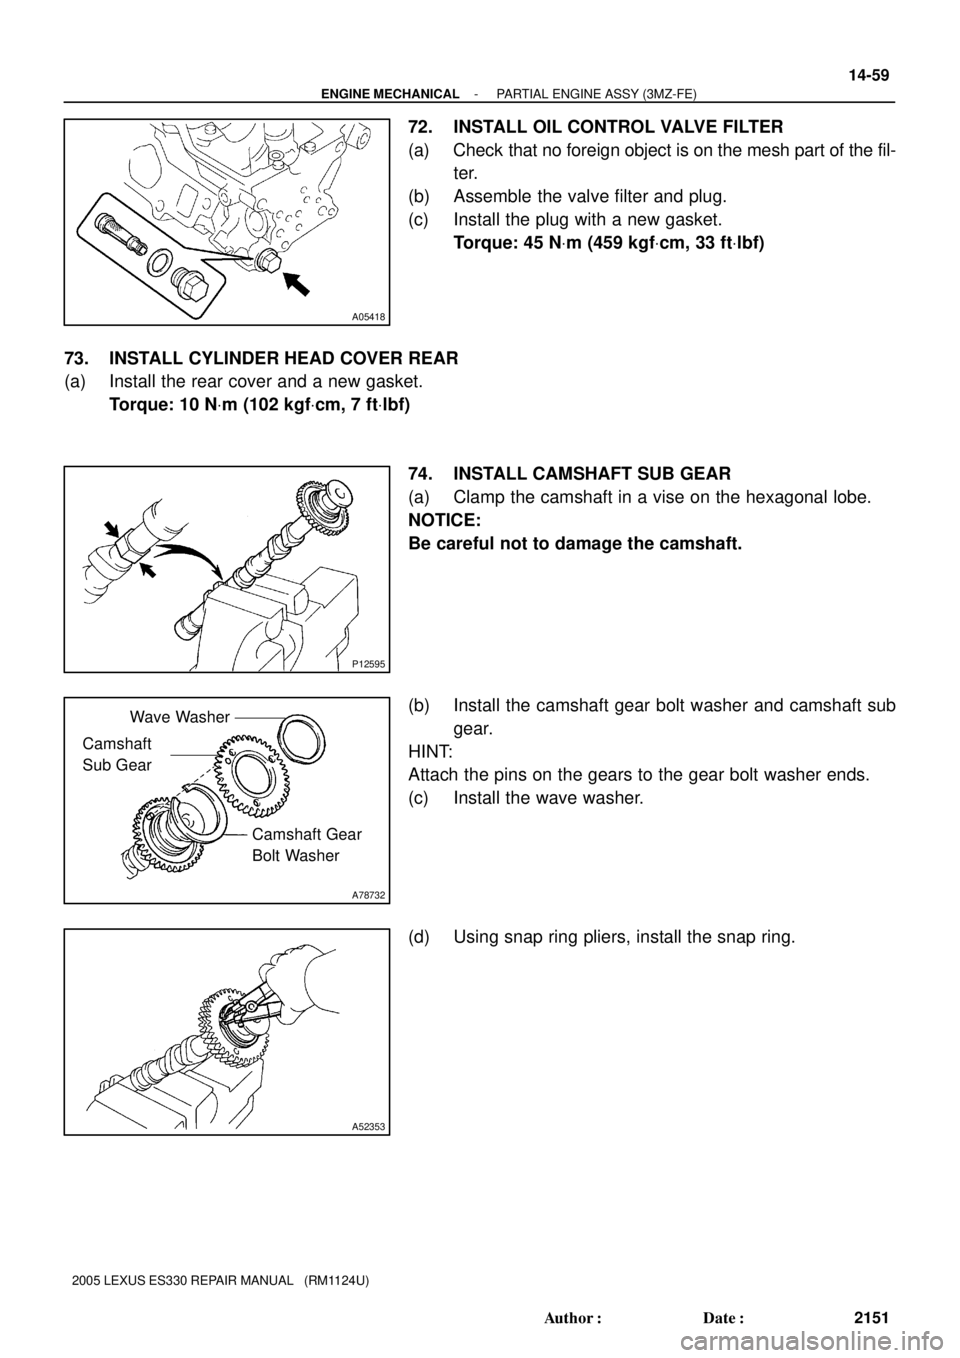
72. INSTALL OIL CONTROL VALVE FILTER
(a) Check that no foreign object is on the mesh part of the fil-
ter.
(b) Assemble the valve filter and plug.
(c) Install the plug with a new gasket.
Torque: 45 NVm (459 kgfVcm, 33 ftVlbf)
73. INSTALL CYLINDER HEAD COVER REAR
(a) Install the rear cover and a new gasket.
Torque: 10 NVm (102 kgfVcm, 7 ftVlbf)
74. INSTALL CAMSHAFT SUB GEAR
(a) Clamp the camshaft in a vise on the hexagonal lobe.
NOTICE:
Be careful not to damage the camshaft.
(b) Install the camshaft gear bolt washer and camshaft sub
gear.
HINT:
Attach the pins on the gears to the gear bolt washer ends.
(c) Install the wave washer.
(d) Using snap ring pliers, install the snap ring.
Page 441 of 969
A78535
A78747
SST
Additional
3/4 Turn
- ENGINE MECHANICALPARTIAL ENGINE ASSY (3MZ-FE)
14-65
2157 Author�: Date�:
2005 LEXUS ES330 REPAIR MANUAL (RM1124U)
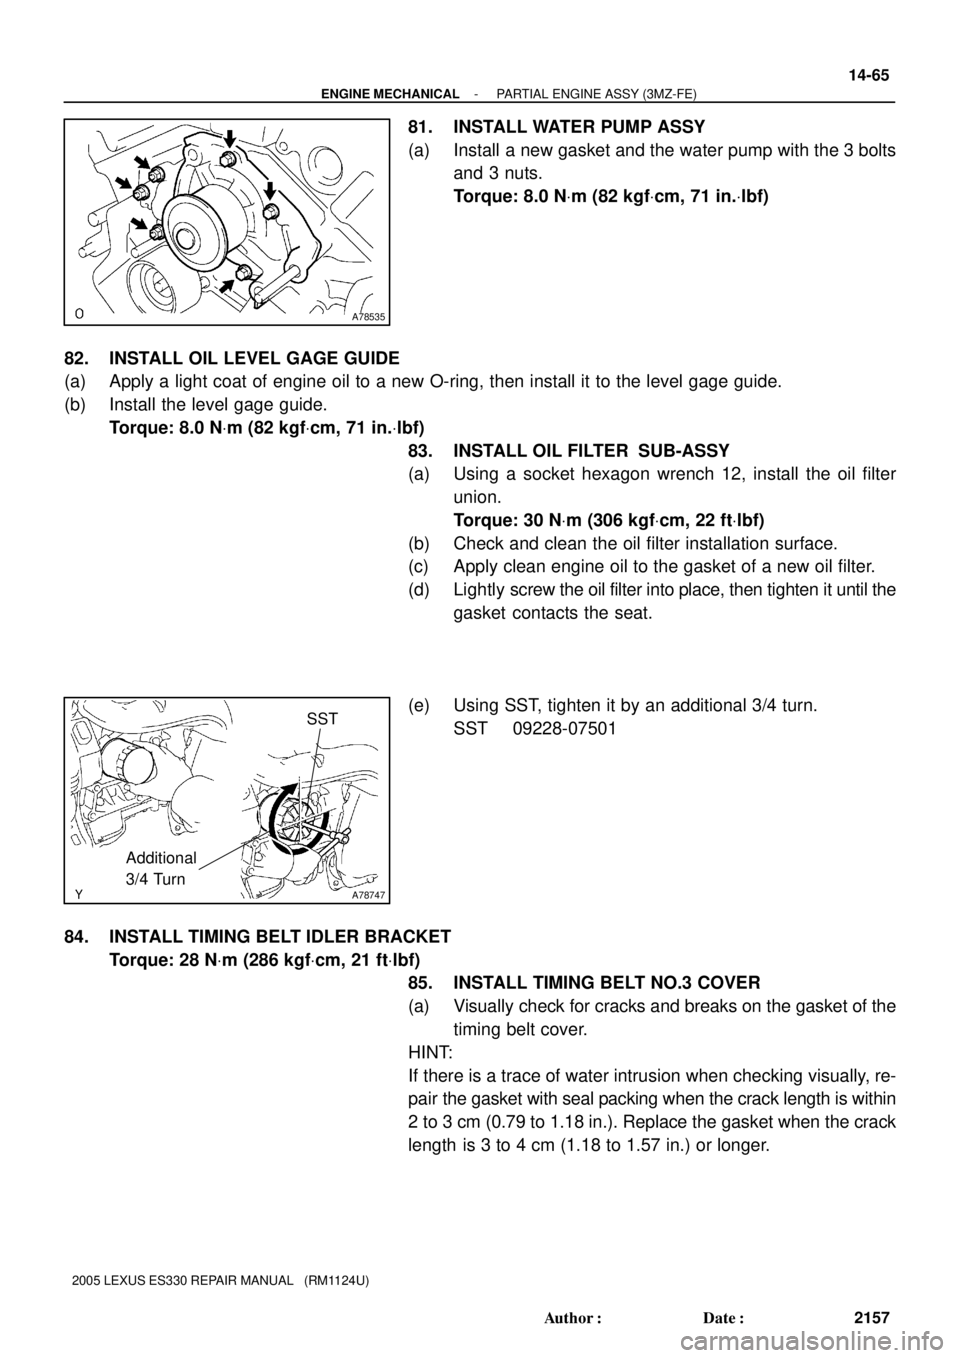
81. INSTALL WATER PUMP ASSY
(a) Install a new gasket and the water pump with the 3 bolts
and 3 nuts.
Torque: 8.0 NVm (82 kgfVcm, 71 in.Vlbf)
82. INSTALL OIL LEVEL GAGE GUIDE
(a) Apply a light coat of engine oil to a new O-ring, then install it to the level gage guide.
(b) Install the level gage guide.
Torque: 8.0 NVm (82 kgfVcm, 71 in.Vlbf)
83. INSTALL OIL FILTER SUB-ASSY
(a) Using a socket hexagon wrench 12, install the oil filter
union.
Torque: 30 NVm (306 kgfVcm, 22 ftVlbf)
(b) Check and clean the oil filter installation surface.
(c) Apply clean engine oil to the gasket of a new oil filter.
(d) Lightly screw the oil filter into place, then tighten it until the
gasket contacts the seat.
(e) Using SST, tighten it by an additional 3/4 turn.
SST 09228-07501
84. INSTALL TIMING BELT IDLER BRACKET
Torque: 28 NVm (286 kgfVcm, 21 ftVlbf)
85. INSTALL TIMING BELT NO.3 COVER
(a) Visually check for cracks and breaks on the gasket of the
timing belt cover.
HINT:
If there is a trace of water intrusion when checking visually, re-
pair the gasket with seal packing when the crack length is within
2 to 3 cm (0.79 to 1.18 in.). Replace the gasket when the crack
length is 3 to 4 cm (1.18 to 1.57 in.) or longer.
Page 603 of 969

A65038
New O-ring
A65040
O-ring
A86272
Cover
Tube Joint Clip
- FUELFUEL SUCTION W/ PUMP & GAUGE TUBE
ASSY (3MZ-FE)11-23
2051 Author�: Date�:
2005 LEXUS ES330 REPAIR MANUAL (RM1124U)
15. INSTALL FUEL PRESSURE REGULATOR ASSY
(a) Apply a light coat of spindle oil or gasoline to a new O-
ring, then install it to the fuel pressure regulator.
(b) Push in the fuel pressure regulator to the fuel tank fuel fil-
ter.
16. INSTALL FUEL PUMP FILTER
(a) Install the fuel pump filter with a new clip.
17. INSTALL FUEL PUMP
(a) Apply a light coat of gasoline or spindle oil to the O-ring
on the fuel pump.
(b) Push in the fuel pump to the fuel tank fuel filter.
18. INSTALL FUEL PUMP HARNESS
19. INSTALL FUEL SUCTION PLATE SUB-ASSY
20. INSTALL FUEL SENDER GAUGE ASSY
21. INSTALL FUEL PUMP CUSHION RUBBER
22. INSTALL FUEL SUCTION SUPPORT NO.2
23. INSTALL VAPOR PRESSURE SENSOR ASSY
(a) Install the vapor pressure sensor with the tube joint clip.
NOTICE:
�Check the connected part for scratch or foreign ob-
jects.
�Check that the vapor pressure sensor is inserted se-
curely.
�Check that the tube joint clip is on the collar of the va-
por pressure sensor.
�After installing the tube joint clip, check that the vapor
pressure sensor has not been pulled off.
(b) Install the cover.
Page 696 of 969
170F5-03
A78720
SST
P12582
Additional
3/4 TurnSST
17-20
- LUBRICATIONOIL FILTER SUB-ASSY (3MZ-FE)
2325 Author�: Date�:
2005 LEXUS ES330 REPAIR MANUAL (RM1124U)
OIL FILTER SUB-ASSY (3MZ-FE)
REPLACEMENT
CAUTION:
�Prolonged and repeated contact with engine oil will cause removal of natural oils from the skin,
leading to dryness, irritation and dermatitis. In addition, used engine oil contains potentially
harmful contaminants which may cause skin cancer.
�Precautions should be taken when replacing engine oil to minimize the risk of your skin making
contact with used engine oil. Wear protective clothing and gloves. Wash your skin thoroughly
with soap and water, or use water-less hand cleaner to remove any used engine oil. Do not use
gasoline, thinners, or solvents.
�For environmental protection used oil and used oil filter must be disposed of at designated dis-
posal sites.
1. REMOVE ENGINE UNDER COVER NO.1
2. DRAIN ENGINE OIL
(a) Remove the oil filler cap.
(b) Remove the oil drain plug, then drain the oil into a container.
(c) Clean and install the oil drain plug with a new gasket.
Torque: 45 NVm (459 kgfVcm,
33 ftVlbf)
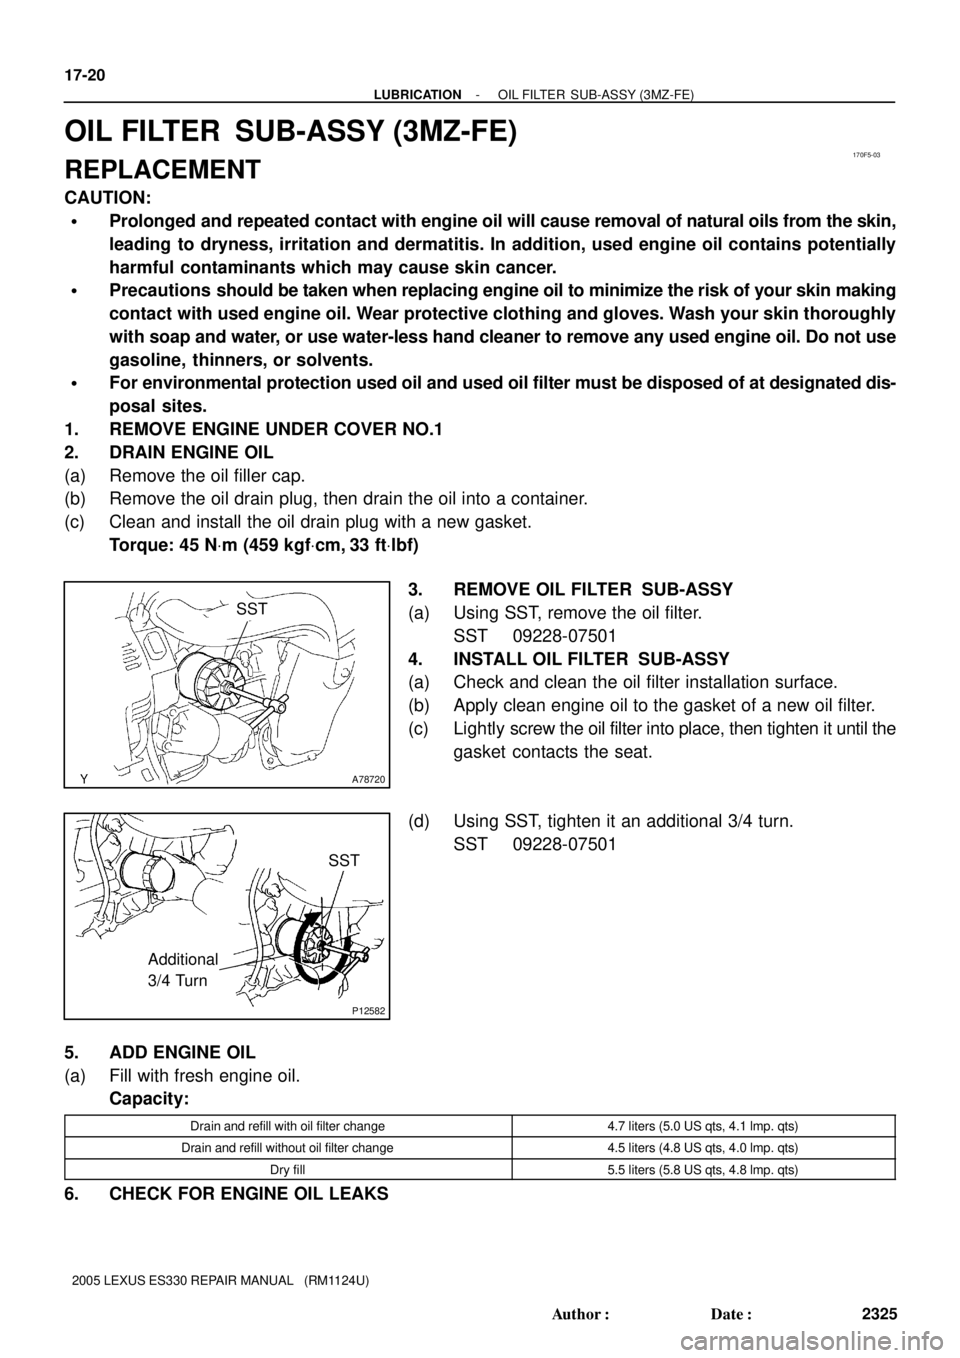
3. REMOVE OIL FILTER SUB-ASSY
(a) Using SST, remove the oil filter.
SST 09228-07501
4. INSTALL OIL FILTER SUB-ASSY
(a) Check and clean the oil filter installation surface.
(b) Apply clean engine oil to the gasket of a new oil filter.
(c) Lightly screw the oil filter into place, then tighten it until the
gasket contacts the seat.
(d) Using SST, tighten it an additional 3/4 turn.
SST 09228-07501
5. ADD ENGINE OIL
(a) Fill with fresh engine oil.
Capacity:
Drain and refill with oil filter change4.7 liters (5.0 US qts, 4.1 lmp. qts)
Drain and refill without oil filter change4.5 liters (4.8 US qts, 4.0 lmp. qts)
Dry fill5.5 liters (5.8 US qts, 4.8 lmp. qts)
6. CHECK FOR ENGINE OIL LEAKS