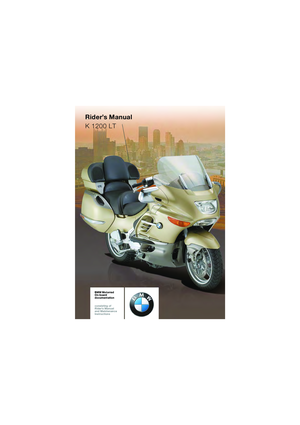
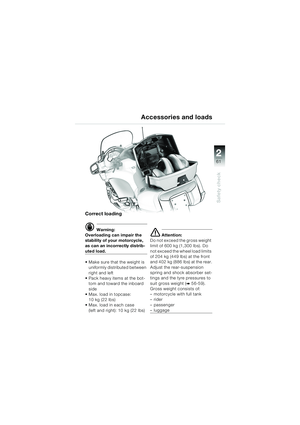
2005 BMW MOTORRAD K 1200 LT Rider's Manual (in English)
-
 1
1 -
 2
2 -
 3
3 -
 4
4 -
 5
5 -
 6
6 -
 7
7 -
 8
8 -
 9
9 -
 10
10 -
 11
11 -
 12
12 -
 13
13 -
 14
14 -
 15
15 -
 16
16 -
 17
17 -
 18
18 -
 19
19 -
 20
20 -
 21
21 -
 22
22 -
 23
23 -
 24
24 -
 25
25 -
 26
26 -
 27
27 -
 28
28 -
 29
29 -
 30
30 -
 31
31 -
 32
32 -
 33
33 -
 34
34 -
 35
35 -
 36
36 -
 37
37 -
 38
38 -
 39
39 -
 40
40 -
 41
41 -
 42
42 -
 43
43 -
 44
44 -
 45
45 -
 46
46 -
 47
47 -
 48
48 -
 49
49 -
 50
50 -
 51
51 -
 52
52 -
 53
53 -
 54
54 -
 55
55 -
 56
56 -
 57
57 -
 58
58 -
 59
59 -
 60
60 -
 61
61 -
 62
62 -
 63
63 -
 64
64 -
 65
65 -
 66
66 -
 67
67 -
 68
68 -
 69
69 -
 70
70 -
 71
71 -
 72
72 -
 73
73 -
 74
74 -
 75
75 -
 76
76 -
 77
77 -
 78
78 -
 79
79 -
 80
80 -
 81
81 -
 82
82 -
 83
83 -
 84
84 -
 85
85 -
 86
86 -
 87
87 -
 88
88 -
 89
89 -
 90
90 -
 91
91 -
 92
92 -
 93
93 -
 94
94 -
 95
95 -
 96
96 -
 97
97 -
 98
98 -
 99
99 -
 100
100 -
 101
101 -
 102
102 -
 103
103 -
 104
104 -
 105
105 -
 106
106 -
 107
107
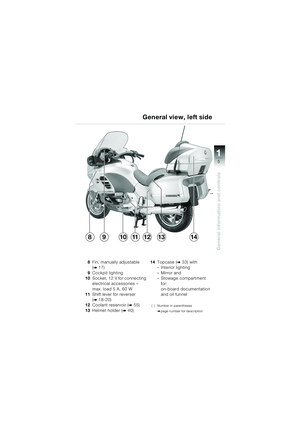
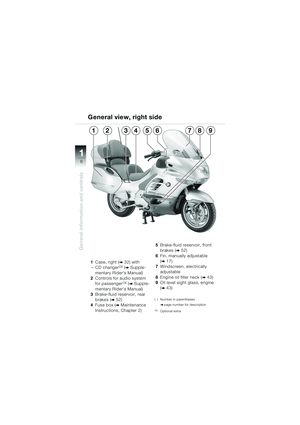
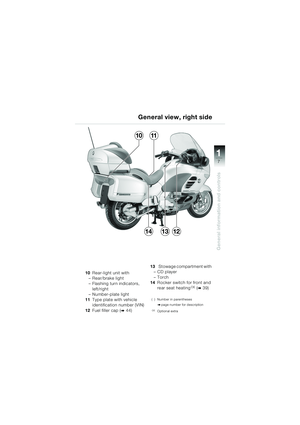
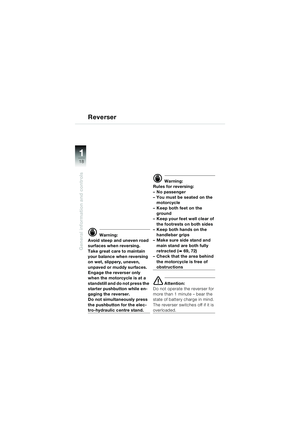
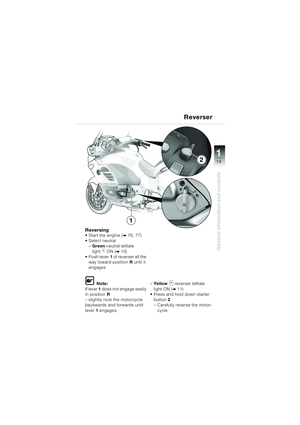
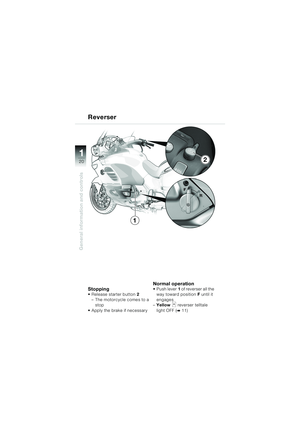
 23
General information and controls
1
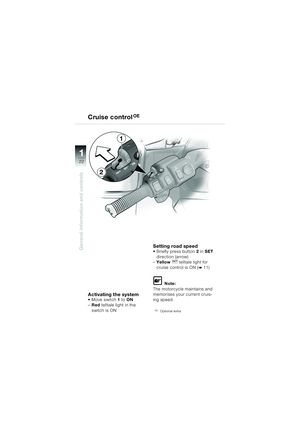
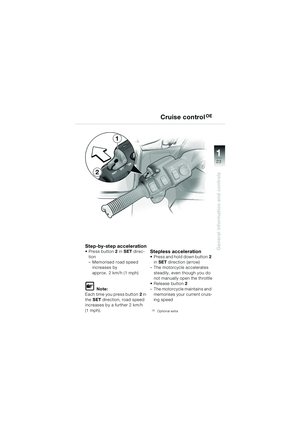
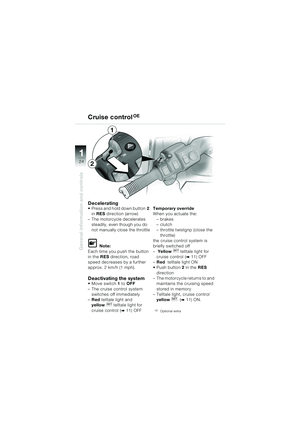
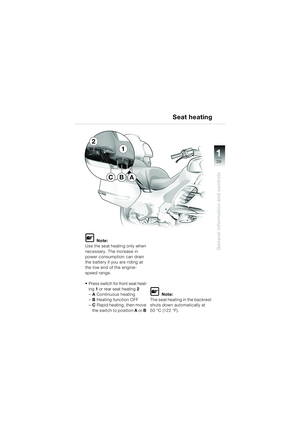
Cruise controlOE
Step-by-step acceleration Press button2 in SET direc-
tion
– Memorised road speed increases by
approx. 2 km/h (1 mph)
L Note:
Each time yo")
 24
General information and controls
1
Cruise controlOE
Decelerating Press and hold down button2
in RES direction (arrow)
– The motorcycle decelerates steadily, even though you do
not manually")
 25
General information and controls
1
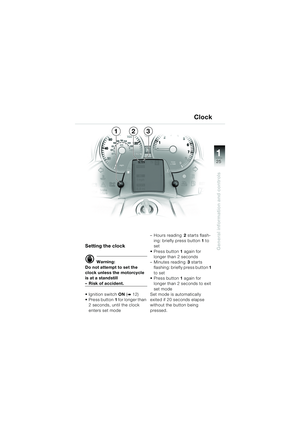
Setting the clock
d Warning:
Do not attempt to set the
clock unless the motorcycle
is at a standstill
– Risk of accident.
Ignition switch ON (
b12)
Press")
 26
General information and controls
1
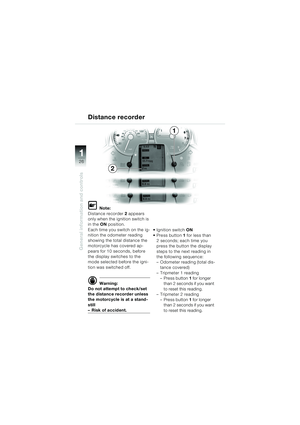
Distance recorder
L Note:
Distance recorder 2 appears
only when the ignition switch is
in the ON position.
Each time you switch on the ig-
nition the odometer")
 27
General information and controls
1
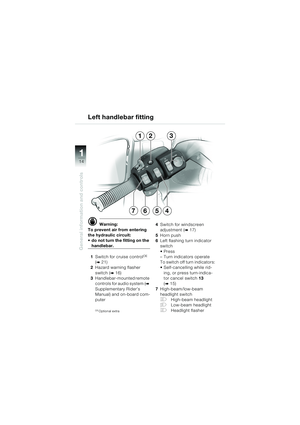
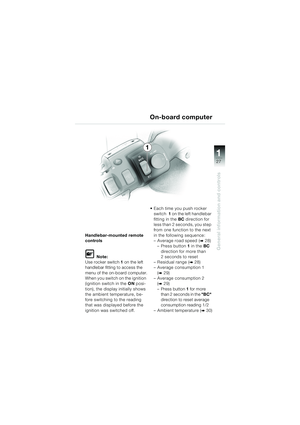
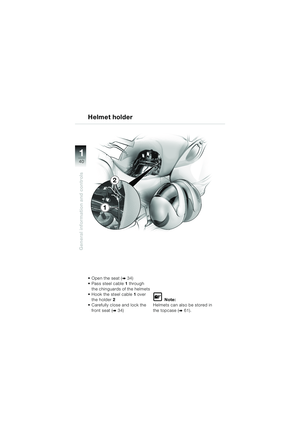
1
Handlebar-mounted remote
controls
L Note:
Use rocker switch 1 on the left
handlebar fitting to access the
menu of the on-board computer.
When you switch on")
 28
General information and controls
1
On-board computer
Average road speed
L Note:
The reading is in km/h or mph,
depending on national-market
version.
Stops with the engine switched
off are ignore")
 29
General information and controls
1
On-board computer
Average consumption
L Note:
Reading in litres/km, litres/mile,
or miles/gallon, depending on
national-market version.
Average consumption can")
 30
General information and controls
1
On-board computer
Ambient temperature
L Note:
Reading in °C or °F, depending
on national-market version.
Ice warning
If ambient temperature drops
below +3 °C")