Page 97 of 296

Knowing your vehicle86
3
1
2
3
4
5
6
7
8
9
Outside rearview mirror Be sure to adjust mirror angles
before driving.
✽ ✽
NOTICEDo not scrape ice off the mirror
face; this may damage the surface of
the glass. If ice should restrict move-
ment of the mirror, do not force the
mirror for adjustment. To remove
ice, use a deicer spray, or a sponge
or soft cloth with very warm water.
The electric remote control mirror
switch allows you to adjust the posi-
tion of the left and right outside
rearview mirrors. To adjust the posi-
tion of either mirror, move the lever
(➀) to R or L to select the right side
mirror or the left side mirror, then
press a corresponding point () on
the mirror adjustment control to posi-
tion the selected mirror up, down, left
or right.
After adjustment, put the lever into
neutral position to prevent the inad-
vertent adjustment.
MIRRORS
2GHA2205
CAUTION
The right outside rearview
mirror is convex. In somecountries, the left outsiderearview mirror is also con-vex. Objects seen in the mirrorare closer than they appear.
Use your interior rearview mir-
ror or direct observation todetermine the actual distanceof following vehicles whenchanging lanes.
➀
Opirus-ENG (CAN) 3.qxd 7/8/03 1:56 PM Page 86
Page 98 of 296

387
1
2
3
4
5
6
7
8
9
Knowing your vehicle
✽ ✽NOTICE• The mirrors stop moving when
they reach the maximum adjust-
ing angles, but the motor contin-
ues to operate while the switch is
depressed. Do not depress the
switch longer than necessary, the
motor may be damaged.
• Do not attempt to adjust the out- side rearview mirror by hands.
Doing so may damage the parts.
Automatic mirror adjustment in
reverse maneuvers (if equipped)When the transmission gear is shift-
ed into reverse (R), the outside
rearview mirror(s) will automatically
turn downward about 5 degrees to
improve driver visibility. It will stay in
that position until the transaxle shift
lever is shifted out of reverse (R). L : Both the left and right out-
side rearview mirrors will be
turned downward about 5
degrees.
R : Only the right outside rearview mirror will be
turned downward about 5
degrees.
Center : Automatic mirror adjustment function is disabled, no mir-
ror will be turned downward.
The outside rearview mirror(s) will
return to its previous position auto-
matically if outside rearview mirror
selection switch is changed to anoth-
er position, or transaxle shift lever is
shifted out of reverse (R).
2GHA2037Center
Opirus-ENG (CAN) 3.qxd 7/8/03 1:56 PM Page 87
Page 99 of 296

Knowing your vehicle88
3
1
2
3
4
5
6
7
8
9
(Examples)
If the shift lever is shifted into
reverse (R) when the outside
rearview mirror selection switch is in
L, both the right and left outside
rearview mirrors will automatically be
turned down 5 degrees
If the outside rearview mirror selec-
tion switch is set to R while shift lever
is in reverse (R), the left outside
rearview mirror will return to its previ-
ous position. The right outside
rearview mirror will not return to it ’s
previous position.
If the shift lever is shifted into any
other range OR the outside rearview
mirror selection switch is set to cen-
ter, the right outside rearview mirror
will automatically return to its original
position.
Folding the outside rearview
mirrorManual type
To fold outside rearview mirror, grasp
the housing of mirror and then fold it
toward the rear of the vehicle.
Outside rearview mirror heater (if equipped) The outside rearview mirror heater is
actuated in connection with the rear
window defroster. To heat the outside
rearview mirror glass, push the but-
ton for the rear window defroster.
The outside rearview mirror glass will
be heated for defrosting or defogging
and will give you improved rear
vision in inclement weather condi-
tions. Push the button again to turn
the heater off. The outside rearview
mirror heater automatically turns off
after 20 minutes.
E1V2B03032
Opirus-ENG (CAN) 3.qxd 7/8/03 1:56 PM Page 88
Page 100 of 296

389
1
2
3
4
5
6
7
8
9
Knowing your vehicle
Day/night rearview mirror Adjust the rearview mirror to center
on the view through the rear window.
Make this adjustment before you
start driving.
Manual type Make this adjustment before you
start driving and while the day/night
lever is in the day position.
Pull the day/night lever toward you to
reduce glare from the headlights of
vehicles behind you during night
driving.Remember that you lose somerearview clarity in the night position. Electric type (if equipped)
• Type A
The electric day/night rearview mir-
ror automatically controls the glare
from the headlights of the car behind
you in nighttime or low light driving
conditions. The sensor mounted in
the mirror senses the light level
around the vehicle, and through a
chemical reaction, automatically
controls the headlight glare (10% to
70 %) from vehicles behind you.
1GHA2203
Day
Night
Day/Night lever
1GHA2204
Sensor
CAUTION
Do not place objects in the rear
seat or cargo area which wouldinterfere with your vision outthe rear window.
Opirus-ENG (CAN) 3.qxd 7/8/03 1:56 PM Page 89
Page 101 of 296
Knowing your vehicle90
3
1
2
3
4
5
6
7
8
9
To operate the electric rearview mir-
ror
When the engine is running, the
glare is automatically controlled by
the sensor mounted in the rearview
mirror.
Whenever the shift lever is shifted
into reverse (R), the mirror will auto-
matically go to the brightest setting in
order to improve the drivers view
behind the vehicle.
• Type B
The electric day/night rearview mir-
ror automatically controls the glare
from the headlights of the car behind
you. Adjust the rearview mirror to the
desired position.
Press the “O”button to turn the auto-
matic- dimming function off. The mir-
ror indicator light will turn off.
Press the “I”button to turn the auto-
matic- dimming function on, the mir-
ror indicator light will illuminate.
2GHN3310
Opirus-ENG (CAN) 3.qxd 7/8/03 1:56 PM Page 90
Page 102 of 296
391
1
2
3
4
5
6
7
8
9
Knowing your vehicle
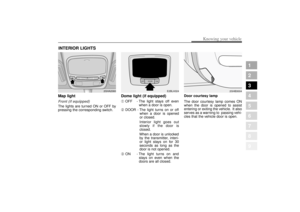
Map light Front (if equipped)The lights are turned ON or OFF by
pressing the corresponding switch.
Dome light (if equipped)
➀
OFF - The light stays off evenwhen a door is open.
➁
DOOR - The light turns on or off when a door is opened
or closed.
Interior light goes out
slowly if the door is
closed.
When a door is unlocked by the transmitter, interi-
or light stays on for 30
seconds as long as the
door is not opened.
➂
ON - The light turns on and stays on even when the
doors are all closed. Door courtesy lamp
The door courtesy lamp comes ON
when the door is opened to assist
entering or exiting the vehicle. It also
serves as a warning to passing vehi-
cles that the vehicle door is open.
INTERIOR LIGHTS
2GHA2060
OFF DOOR
ON
E2BLA324
2GHB3004
Opirus-ENG (CAN) 3.qxd 7/8/03 1:56 PM Page 91
Page 103 of 296

Knowing your vehicle92
3
1
2
3
4
5
6
7
8
9
✽ ✽
NOTICE• To avoid possible theft, do not
leave valuables in the storage com-
partment.
• Since stored items may move while driving, be sure to position them
in the storage compartment so
that they do not make noise or
cause a potential safety hazard
when the vehicle is moving.
• Always keep the storage compart- ment covers closed while driving.
Do not attempt to place many
items in the storage compartment
that the storage compartment
cover can not close securely.
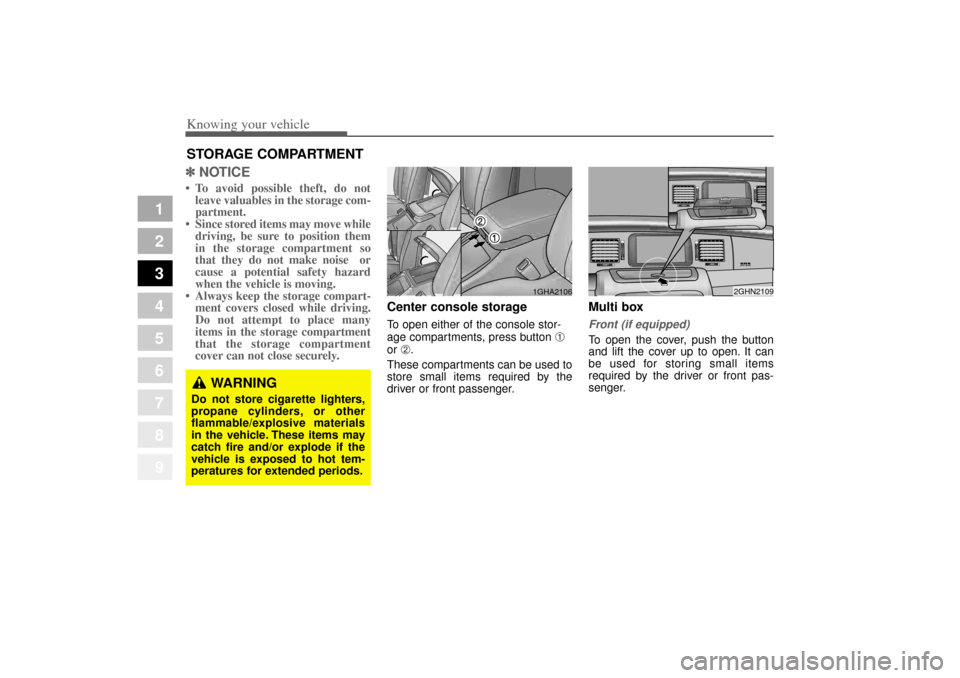
Center console storageTo open either of the console stor-
age compartments, press button
➀
or
➁.
These compartments can be used to
store small items required by the
driver or front passenger.
Multi boxFront (if equipped)To open the cover, push the button
and lift the cover up to open. It can
be used for storing small items
required by the driver or front pas-
senger.
STORAGE COMPARTMENT
WARNING
Do not store cigarette lighters,
propane cylinders, or other
flammable/explosive materials
in the vehicle. These items may
catch fire and/or explode if the
vehicle is exposed to hot tem-
peratures for extended periods.
1GHA2106
2GHN2109
Opirus-ENG (CAN) 3.qxd 7/8/03 1:56 PM Page 92
Page 104 of 296
393
1
2
3
4
5
6
7
8
9
Knowing your vehicle
Rear (if equipped)To open the storage compartment,
pull the armrest down and pull up on
the locking tab (
➀). It can be used for
storing small items.
Glove boxThe glove box can be locked (
➀) and
unlocked (
➁) with a master key.
It cannot be locked/unlocked with the
sub key.
To open the glove box, make sure it
is unlocked, then pull the handle (
➂)
and the glove box will automatically
open (
➃). Close the glove box after
use.
✽ ✽ NOTICESince key is not fully inserted into
the glove box key set, do not apply
excessive force. Doing so may dam-
age the parts.
1GHA2234A
1GHA2086
CAUTION
To reduce the risk of injury in
case of an accident or suddenstop, always keep the glove boxdoor closed while driving.
Opirus-ENG (CAN) 3.qxd 7/8/03 1:56 PM Page 93